labelme加载AI模型
labelme是使用python写的基于QT的跨平台图像标注工具,可用来标注分类、检测、分割、关键点等常见的视觉任务,支持VOC格式和COCO等的导出,代码简单易读,是非常利用上手的良心工具.

1、安装
1.1 基础环境安装
conda create -n labelme python=3.8.0
conda activate labelme
pip install opencv-python==4.2.0.34
之所以这么安装因为有的时候虚拟环境有问题,比如:
Provide environment information
qt.qpa.plugin: Could not load the Qt platform plugin "xcb" in "/home/pidl/.local/lib/python3.9/site-packages/cv2/qt/plugins" even though it was found.
This application failed to start because no Qt platform plugin could be initialized. Reinstalling the application may fix this problem.

Available platform plugins are: xcb, eglfs, linuxfb, minimal, minimalegl, offscreen, vnc, wayland-egl, wayland, wayland-xcomposite-egl, wayland-xcomposite-glx, webgl
为此重新安装
1.2 版本安装
此处可以为:
pip install labelme
但后续在配置AI模型时,会报错,故源码安装。
git clone https://github.com/wkentaro/labelme.git
cd labelme
pip install -e .
2、labelme基础操作
1、启动

注意切换到labelme环境下,并启动labelme命令,然后窗口会打开。
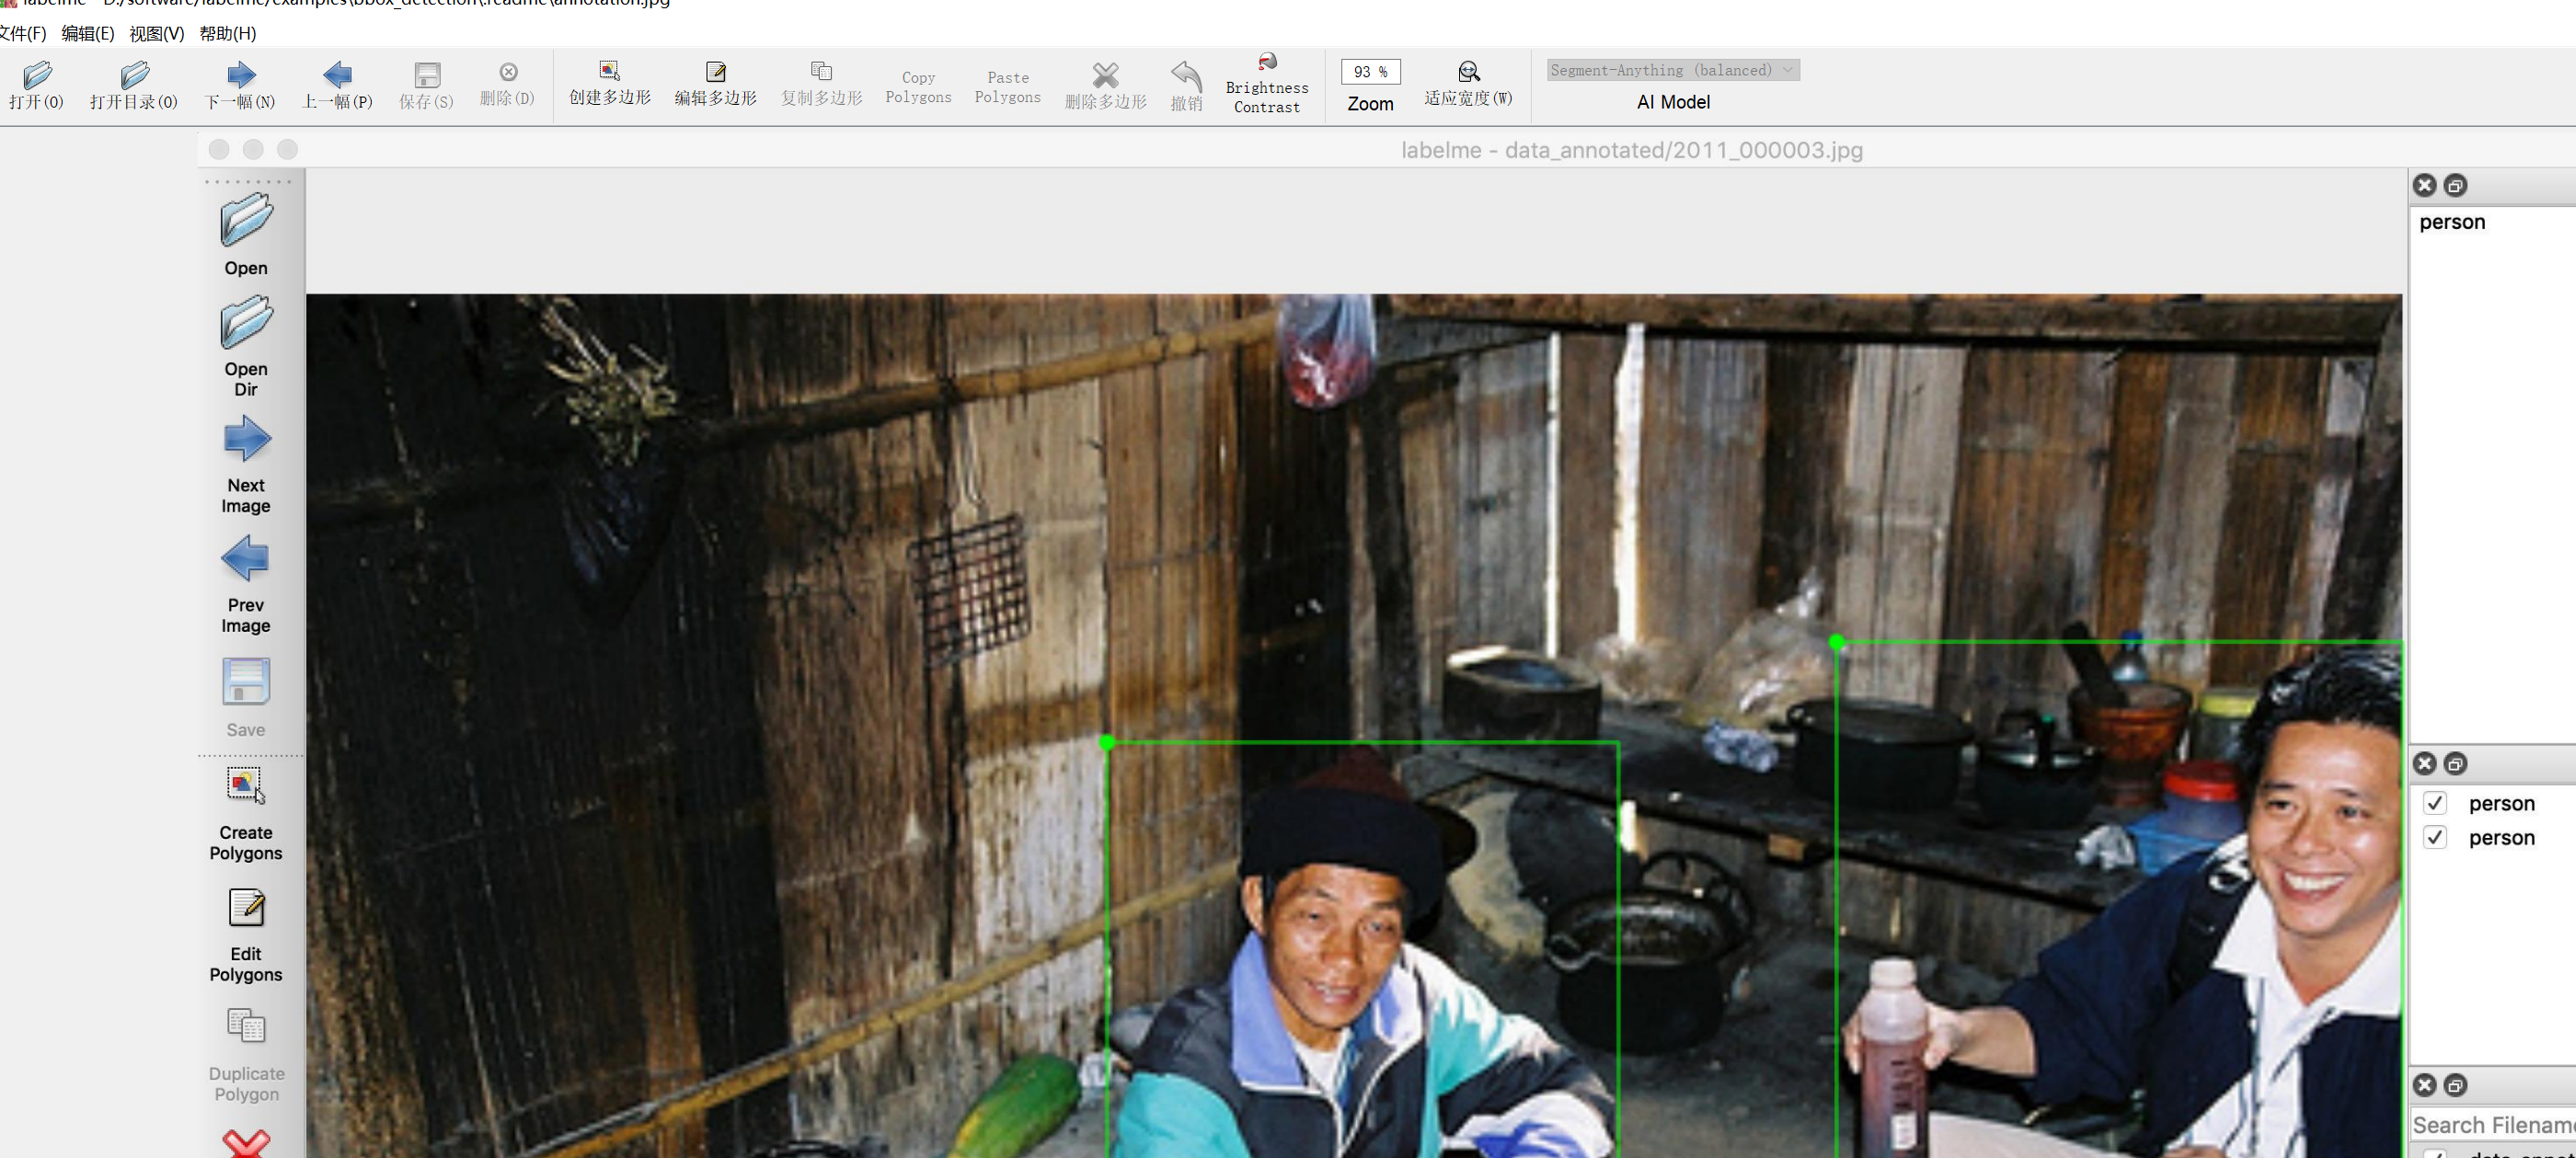
2、启动AI辅助标注
在点击“编辑”-》“create-ai-polygon后,软件会自动加载模型。
模型分为三种,speed、balanced、accuracy。如果本地无法连接外网,估计会报错,那如何操作呢。
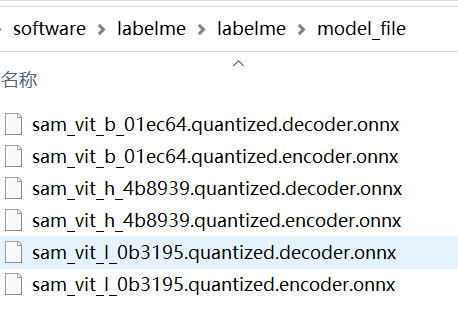
3、下载AI模型
打开文件:D:\software\labelme\labelme\ai\_init_.py,看到
MODELS = [
    Model(
        name="Segment-Anything (speed)",
        encoder_weight=Weight(
            url="https://github.com/wkentaro/labelme/releases/download/sam-20230416/sam_vit_b_01ec64.quantized.encoder.onnx",  # NOQA
            md5="80fd8d0ab6c6ae8cb7b3bd5f368a752c",
        ),
        decoder_weight=Weight(
            url="https://github.com/wkentaro/labelme/releases/download/sam-20230416/sam_vit_b_01ec64.quantized.decoder.onnx",  # NOQA
            md5="4253558be238c15fc265a7a876aaec82",
        ),
    ),
    Model(
        name="Segment-Anything (balanced)",
        encoder_weight=Weight(
            url="https://github.com/wkentaro/labelme/releases/download/sam-20230416/sam_vit_l_0b3195.quantized.encoder.onnx",  # NOQA
            md5="080004dc9992724d360a49399d1ee24b",
        ),
        decoder_weight=Weight(
            url="https://github.com/wkentaro/labelme/releases/download/sam-20230416/sam_vit_l_0b3195.quantized.decoder.onnx",  # NOQA
            md5="851b7faac91e8e23940ee1294231d5c7",
        ),
    ),
    Model(
        name="Segment-Anything (accuracy)",
        encoder_weight=Weight(
            url="https://github.com/wkentaro/labelme/releases/download/sam-20230416/sam_vit_h_4b8939.quantized.encoder.onnx",  # NOQA
            md5="958b5710d25b198d765fb6b94798f49e",
        ),
        decoder_weight=Weight(
            url="https://github.com/wkentaro/labelme/releases/download/sam-20230416/sam_vit_h_4b8939.quantized.decoder.onnx",  # NOQA
            md5="a997a408347aa081b17a3ffff9f42a80",
        ),
    ),
]
然后输入网址直接下载即可。
将下载后的模型保存在:D:\software\labelme\labelme\model_file目录下
4、修改文件
修改D:\software\labelme\labelme\ai\_init_.py文件如下:
修改D:\software\labelme\labelme\widgets\canvas.py
内容为:
    def initializeAiModel(self, name):
        if name not in [model.name for model in labelme.ai.MODELS]:
            raise ValueError("Unsupported ai model: %s" % name)
        model = [model for model in labelme.ai.MODELS if model.name == name][0]

        if self._ai_model is not None and self._ai_model.name == model.name:
            logger.debug("AI model is already initialized: %r" % model.name)
        else:
            logger.debug("Initializing AI model: %r" % model.name)
            self._ai_model = labelme.ai.SegmentAnythingModel(
                name=model.name,
                # encoder_path=gdown.cached_download(
                #     url=model.encoder_weight.url,
                #     md5=model.encoder_weight.md5,
                # ),
                # decoder_path=gdown.cached_download(
                #     url=model.decoder_weight.url,
                #     md5=model.decoder_weight.md5,
                # ),
                encoder_path=model.encoder_weight.url,
                decoder_path=model.decoder_weight.url,
            )

        self._ai_model.set_image(
            image=labelme.utils.img_qt_to_arr(self.pixmap.toImage())
        )
如此便可启动使用,在辅助分割中非常好用

 浙公网安备 33010602011771号