CentOS7 安装MySQL
这段时间在安装mysql时候遇到点问题,原先的yum安装安装不上,于是自己采用rpm安装mysql;
mysql需要的rpm包下载地址:http://repo.mysql.com/yum/
选择你自己想要安装的版本,打开之后会是这样的。

1. 首先清除centos7系统中默认的数据库mariadb,否则不能安装mysql。
rpm -qa |grep mariadb |xargs yum remove -y
2.下载mysql的相关rpm包

关于下载问题,你可以直接使用wget + 包的URL 下载到一个临时文件(我的是/tmp/download文件)

注意:每个安装包版本号是一样的,否则后面安装会出现问题;意味着每个文件都是以5.7.19-1.el7.x86_64.rpm结尾的
3.切换到下载包目录下(cd 你的下载目录),然后对每个包进行一次安装;
  rpm -ivh mysql-community-common-5.7.19-1.el7.x86_64.rpm
  rpm -ivh mysql-community-libs-5.7.19-1.el7.x86_64.rpm
  rpm -ivh mysql-community-libs-compat-5.7.19-1.el7.x86_64.rpm
  rpm -ivh mysql-community-client-5.7.19-1.el7.x86_64.rpm
  rpm -ivh mysql-community-server-5.7.19-1.el7.x86_64.rpm
在安装最后一个mysql-community-server的时候可能会出现下面的错误提示:
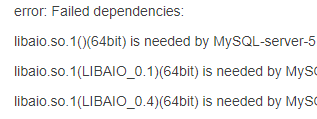
解决这个问题是因为系统缺少了libaio这个库,我们安装好就可以了。
下载地址:http://mirror.centos.org/centos/6/os/x86_64/Packages/libaio-0.3.107-10.el6.x86_64.rpm
这时候就可以安装mysql-community-server;
4.查看安装mysql时候生成的临时密码,这个临时密码放在了mysql日志文件中了。(对于Mysql 5.7.6以后的5.7系列版本,Mysql使用mysqld --initialize或mysqld --initialize-insecure命令来初始化数据库,后者可以不生成临时密码。)
[root@localhost ~]# cat /etc/my.cnf
log-error=/var/log/mysqld.log --找到日志路径
[root@localhost ~]# cat /var/log/mysqld.log | grep password --查到密码为PCbu?SNEx8zl
[root@localhost ~]# /usr/bin/mysql_secure_installation --安装完mysql后执行自带的安全设置
 Securing the MySQL server deployment.

  Enter password for user root:   --输入刚找到的临时密码

   The existing password for the user account root has expired. Please set a new password.

  New password:     --设置新的密码

  Re-enter new password:

  The 'validate_password' plugin is installed on the server.

  The subsequent steps will run with the existing configuration

  of the plugin.

  Using existing password for root.

  Estimated strength of the password: 100

  Change the password for root ? ((Press y|Y for Yes, any other key for No) : y

  New password:

  Re-enter new password:

  Estimated strength of the password: 100

  Do you wish to continue with the password provided?(Press y|Y for Yes, any other key for No) : y

  By default, a MySQL installation has an anonymous user,

  allowing anyone to log into MySQL without having to have

  a user account created for them. This is intended only for

  testing, and to make the installation go a bit smoother.

  You should remove them before moving into a production

  environment.

  Remove anonymous users? (Press y|Y for Yes, any other key for No) : y  --移除匿名用户

  Success.

  Normally, root should only be allowed to connect from

  'localhost'. This ensures that someone cannot guess at

  the root password from the network.

  Disallow root login remotely? (Press y|Y for Yes, any other key for No) : y  --不允许远程连接

  Success.

  By default, MySQL comes with a database named 'test' that

  anyone can access. This is also intended only for testing,

  and should be removed before moving into a production

  environment.

  Remove test database and access to it? (Press y|Y for Yes, any other key for No) : y  --移除测试数据库

   - Dropping test database...

  Success.

   - Removing privileges on test database...

  Success.

  Reloading the privilege tables will ensure that all changes

  made so far will take effect immediately.

  Reload privilege tables now? (Press y|Y for Yes, any other key for No) : y  --重读授权表使前面修改生效

  Success.

  All done!
[root@localhost ~]# mysql -u root -p
 Enter password:

  Welcome to the MySQL monitor.  Commands end with ; or \g.

  Your MySQL connection id is 11

  Server version: 5.7.17 MySQL Community Server (GPL)

  Copyright (c) 2000, 2016, Oracle and/or its affiliates. All rights reserved.

  Oracle is a registered trademark of Oracle Corporation and/or its

  affiliates. Other names may be trademarks of their respective

  owners.

  Type 'help;' or '\h' for help. Type '\c' to clear the current input statement.

      mysql>
5. 安装成功!

 浙公网安备 33010602011771号