13、SpringBoot整合ActiveMQ
参考
博客:https://zhuanlan.zhihu.com/p/21649950
视频:https://www.bilibili.com/video/BV164411G7aB?p=1
消息队列
假设我们现在需要做一个分布式电商系统,我们有用户服务、商品信息服务、订单服务、积分统计服务。服务之间相互调用,相互依赖。例如订单创建完成后,可能会做一下后续的操作:发送积分、短信通知等。创建订单可能很容易,也很快,但是发送积分、短信通知可更依赖网络环境,比较费时。双十一要来了,
订单服务的压力越来越大,这个时候就需要将订单服务和一些后续的服务拆分下来。订单服务只管处理订货,后续的任务就和他无关了,他无需等待缓慢的积分服务、短信服务。
消息队列就可以很好的充当这一媒介,或者说是一个缓冲。订单服务产生的订单信息发送到消息队列中即可,积分服务、短信服务可以不慌不忙地处理消息队列中待处理的订单,这就是一个解耦的过程。
通过耗费两次RPC的时间的代价(不考虑一致性的话),来缓解了上游服务(订单)的压力,达到了解耦、削峰的目的。
ActiveMQ有两种模式:队列模式、topic订阅模式。队列模式,如果多个人订阅,生产出来的消息只会被一个人消费。订阅模式,订阅的所有人都会收到生产者发出来的消息。
安装
官网:http://activemq.apache.org/components/classic/download/
下载linux版本,上传到服务器上,放在/usr/lcoal 或者/opt目录都可以。
解压 tar -zxvf 文件名
进入bin目录
./activemq start
需要提前装好jdk,配好环境变量,不然启动的时候会报错:
ERROR: Configuration variable JAVA_HOME or JAVACMD is not defined correctly.
       (JAVA_HOME='', JAVACMD='java')
启动完成后,可以查看61616端口的占用情况
 netstat -anp|grep 61616

 #或者

 lsof -i:61616
访问地址
http://ip:8161/admin/
初始密码
admin
admin
常用命令
启动
./activemq start
重启
./activemq restart
停止
./activemq stop
指定日志输出路径
./activemq start > /opt/activeMQ/activeMQ.log
远程访问
默认只能本机访问,如果是远程访问需要改配置文件。
host改成0.0.0.0表示允许所有ip访问。(如果在一个网段,也可以改成你自己电脑的ip)
    <bean id="jettyPort" class="org.apache.activemq.web.WebConsolePort" init-method="start">
             <!-- the default port number for the web console -->
        <property name="host" value="0.0.0.0"/>
        <property name="port" value="8161"/>
    </bean>
整合SpringBoot
队列
生产者
依赖
        <dependency>
            <groupId>org.springframework.boot</groupId>
            <artifactId>spring-boot-starter-activemq</artifactId>
        </dependency>
配置文件
spring:
  activemq:
    broker-url: tcp://ip:61616
    user: admin
    password: admin
  jms:
    pub-sub-domain: false #false=队列(默认值),true=订阅

queueName: dayrain-queue
配置类
config目录下
@Component
@EnableJms
public class ConfigBean {

    @Value("${queueName}")
    private String queueName;

    @Bean
    public Queue queue() {
        return new ActiveMQQueue(queueName);
    }

}
produce
@Component
public class QueueProduce {

    @Autowired
    private JmsMessagingTemplate jmsMessagingTemplate;

    @Autowired
    private Queue queue;

    SimpleDateFormat simpleDateFormat = new SimpleDateFormat("yyyy-MM-dd HH-mm-ss");

    @Scheduled(fixedDelay = 3000)
    public void produceMessage() {
        jmsMessagingTemplate.convertAndSend(queue, "发送了一条消息 at: " + simpleDateFormat.format(new Date()));
    }
}
启动类
@SpringBootApplication
@EnableScheduling
public class ActivemqBootApplication {

    public static void main(String[] args) {
        SpringApplication.run(ActivemqBootApplication.class, args);
    }

}
测试类
@SpringBootTest
@EnableScheduling
public class TestActiveMQ {

    @Resource
    private QueueProduce queueProduce;

    @Test
    public void send() {
        queueProduce.produceMessage();
    }
}
消费者
与生产者基本一致,部分配置要改下
spring:
  activemq:
    broker-url: tcp://175.24.15.179:61616
    user: admin
    password: admin
  jms:
    pub-sub-domain: false #false=队列(默认值),true=订阅

queueName: dayrain-queue
消息处理类
@Component
public class QueueConsumer {

    @JmsListener(destination = "${queueName}")
    public void receive(TextMessage textMessage) throws JMSException {
        System.out.println("消费者收到消息:" + textMessage.getText());
    }
}
topic订阅
生产者
依赖同上
配置文件
spring:
  activemq:
    broker-url: tcp://175.24.15.179:61616
    user: admin
    password: admin
  jms:
    pub-sub-domain: true #false=队列(默认值),true=订阅

topicName: dayrain-topic
配置类
@Component
@EnableJms
public class ConfigBean {

    @Value("${topicName}")
    private String topicName;

    @Bean
    public Topic topic() {
        return new ActiveMQTopic(topicName);
    }

}
produce
@Component
public class TopicProduce {

    @Autowired
    private JmsMessagingTemplate jmsMessagingTemplate;

    @Autowired
    private Topic topic;

    SimpleDateFormat simpleDateFormat = new SimpleDateFormat("yyyy-MM-dd HH-mm-ss");

    @Scheduled(fixedDelay = 3000)
    public void produceMessage() {
        jmsMessagingTemplate.convertAndSend(topic, "发送了一条topic消息 at: " + simpleDateFormat.format(new Date()));
    }
}
启动类
@SpringBootApplication
@EnableScheduling
public class ActivemqBootApplication {

    public static void main(String[] args) {
        SpringApplication.run(ActivemqBootApplication.class, args);
    }

}
测试类(运行的时候启动测试类)
@SpringBootTest
@EnableScheduling
public class TestActiveMQ {

    @Resource
    private TopicProduce topicProduce;

    @Test
    public void send() {
        topicProduce.produceMessage();
    }
}
消费者
配置文件
server:
  port: 8081
spring:
  activemq:
    broker-url: tcp://175.24.15.179:61616
    user: admin
    password: admin
  jms:
    pub-sub-domain: true #false=队列(默认值),true=订阅

topicName: dayrain-topic
消息处理类
@Component
public class TopicConsumer {

    @JmsListener(destination = "${topicName}")
    public void receive(TextMessage textMessage) throws JMSException {
        System.out.println("消费者收到消息:" + textMessage.getText());
    }
}
运行启动springboot即可。
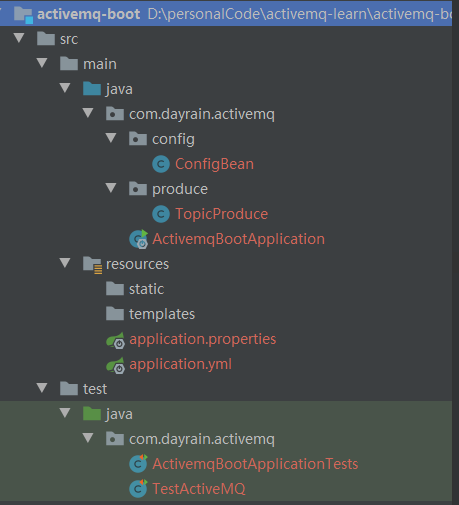
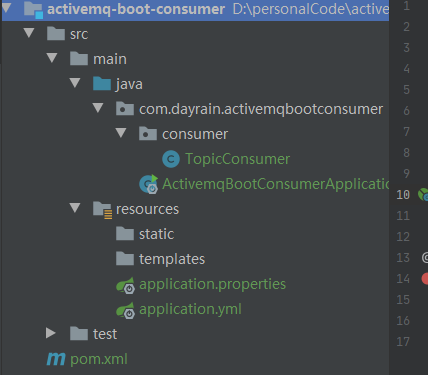
目录结构
生产者
消费者

 浙公网安备 33010602011771号