
使用agentscope访问注册在nacos的A2Aagent和MCP服务
参考资料
部署litellm代理平台
为了便于测试和控制在本地部署一个litellm代理bedrock平台,配置如下
- postgres数据库配之后可以开启litellm的UI管理界面,并通过虚拟key的方式管理用户
- UI界面可以进行模型注册,观察token消耗,注册MCP和A2A等
services:
  litellm:
    image: 000000000000.dkr.ecr.cn-north-1.amazonaws.com.cn/litellm:v1.80.11.rc.1
    container_name: litellm
    ports:
      - "4000:4000"
    environment:
      - DATABASE_URL=postgresql://litellm:ncxzGlA=@postgres:5432/litellm
      - LITELLM_MASTER_KEY=OFgmU5MB1zxrhZyq1gVDCyguU=
      - STORE_MODEL_IN_DB=True
      - LITELLM_DROP_PARAMS=True
    depends_on:
      - postgres
    restart: always

  postgres:
    image: 000000000000.dkr.ecr.cn-north-1.amazonaws.com.cn/postgres:13
    container_name: litellm-postgres
    ports:
      - "5432:5432"
    environment:
      - POSTGRES_DB=litellm
      - POSTGRES_USER=litellm
      - POSTGRES_PASSWORD=ncuV7j7v1RSxSI7XG1G5xzGlA=
      - PGDATA=/var/lib/postgresql/data/pgdata
    volumes:
      - postgres-data:/var/lib/postgresql/data
    restart: always

volumes:
  postgres-data:
    driver: local
部署完成图示

strands实现A2A服务
Agent-to-Agent 协议是一个开放标准,定义了 AI 代理如何发现、通信和协作。Strands Agents 支持 Agent-to-Agent (A2A) 协议。实现一个简单的A2A服务如下
from strands import Agent
from strands.multiagent.a2a import A2AServer
from strands.models.litellm import LiteLLMModel
from strands import tool

litemodel= LiteLLMModel(
    model_id="qwen3-vl",
    client_args={
        "api_key": "sk-uzpq0u0n5FN14HorW45hUw",
        "base_url": "http://localhost:4000",
        "use_litellm_proxy": True
    },
)

@tool(
    name="get_weather",
    description="Retrieves weather forecast for a specified location",
)
def weather_forecast(city: str, days: int = 3) -> str:
    """Get weather forecast for a city.

    Args:
        city: The name of the city
        days: Number of days for the forecast
    """
    return f"Weather forecast for {city} for the next {days} days..."


# Create a Strands agent
strands_agent = Agent(
    model=litemodel,
    name="Weather Agent",
    description="A weather agent that can retrieve weather forecasts.",
    tools=[weather_forecast],
    callback_handler=None,
)

# Create A2A server (streaming enabled by default)
a2a_server = A2AServer(agent=strands_agent)
a2a_server.serve(host="0.0.0.0", port=9000)
客户端首先会检查/.well-known/agent-card.json查看agent的skill
{
  "capabilities": {
    "streaming": true
  },
  "defaultInputModes": [
    "text"
  ],
  "defaultOutputModes": [
    "text"
  ],
  "description": "A weather agent that can retrieve weather forecasts.",
  "name": "Weather Agent",
  "preferredTransport": "JSONRPC",
  "protocolVersion": "0.3.0",
  "skills": [
    {
      "description": "Retrieves weather forecast for a specified location",
      "id": "get_weather",
      "name": "get_weather",
      "tags": []
    }
  ],
  "url": "http://127.0.0.1:9000/",
  "version": "0.0.1"
}
然后实际上通过如下方法访问代理。A2A 协议支持的 JSON-RPC 关键的方法有:
- message/send - 发送消息
- message/stream - 流式发送消息
- tasks/get - 获取任务
- tasks/cancel - 取消任务
- 其他
curl -X POST http://127.0.0.1:9000/ \
  -H "Content-Type: application/json" \
  -d '{
    "jsonrpc": "2.0",
    "method": "message/send",
    "params": {
      "message": {
        "kind": "message",
        "message_id": "msg-001",
        "role": "user",
        "parts": [
          {
            "kind": "text",
            "text": "What is the weather in Beijing?"
          }
        ]
      }
    },
    "id": 1
  }'
运行nacos并注册A2A服务
Nacos 是一款开源的动态服务发现、配置管理和服务管理平台,在 3.1.0 版本中引入了 Agent 注册中心功能,支持 A2A 智能体的分布式注册、发现和版本管理。
使用如下配置部署nacos
services:
  nacos:
    image: 000000000000.dkr.ecr.cn-north-1.amazonaws.com.cn/nacos-server:v3.1.1
    container_name: nacos-standalone
    environment:
      - MODE=standalone
      - PREFER_HOST_MODE=hostname
      - NACOS_AUTH_IDENTITY_KEY=serverIdentity
      - NACOS_AUTH_IDENTITY_VALUE=security
      - NACOS_AUTH_TOKEN=VGhpc0lzTXlDdXN0b21TZWNyZXRLZXkwMTIzNDU2Nzg= # 服务端使用此 Token 来验证客户端的身份
    ports:
      - "8080:8080" # Nacos 的控制台端口
      - "8848:8848" # Nacos 的主服务端口,用于服务注册、发现和配置管理的 API 调用
      - "9848:9848" # Nacos 客户端和服务端之间的 gRPC 通信(服务注册和发现的 RPC 通信)
    volumes:
      - nacos-data:/home/nacos/data
    restart: unless-stopped

volumes:
  nacos-data:
可见新版本的功能如下
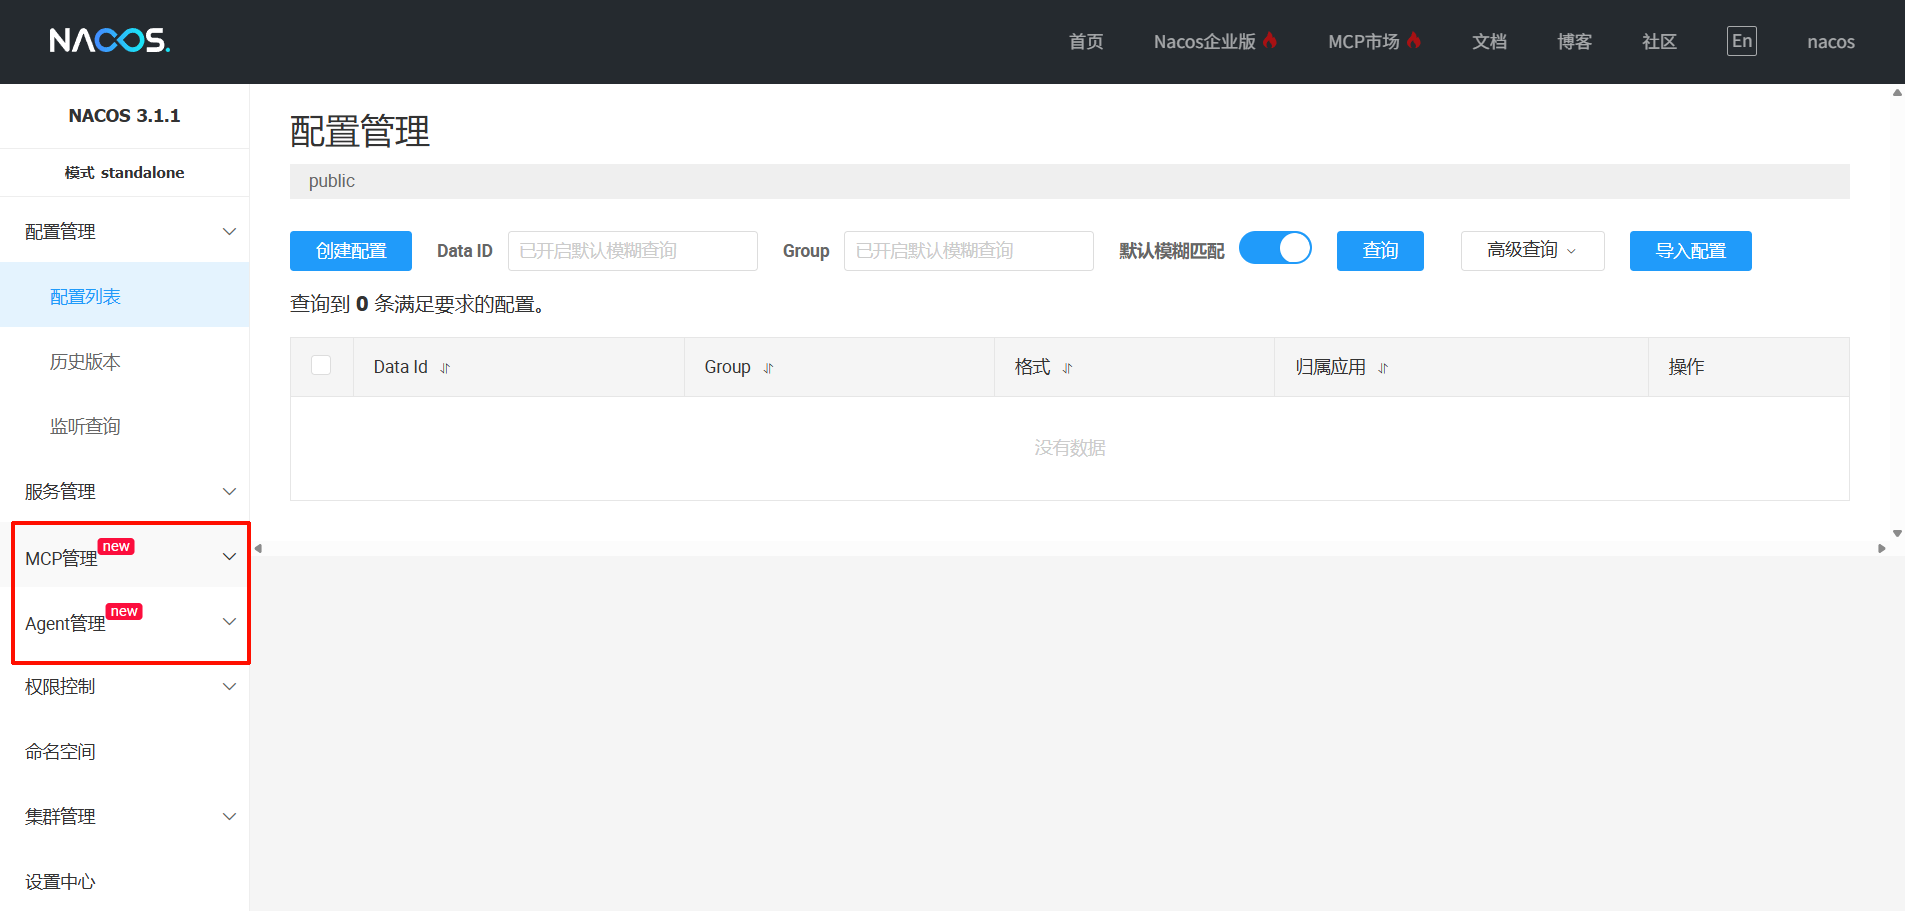
Nacos中的Agent (AgentCard) 匹配A2A协议中的AgentCard定义。在Nacos中,一个Agent(AgentCard)仅能处于一个命名空间下,通过不同的命名空间进行资源隔离。
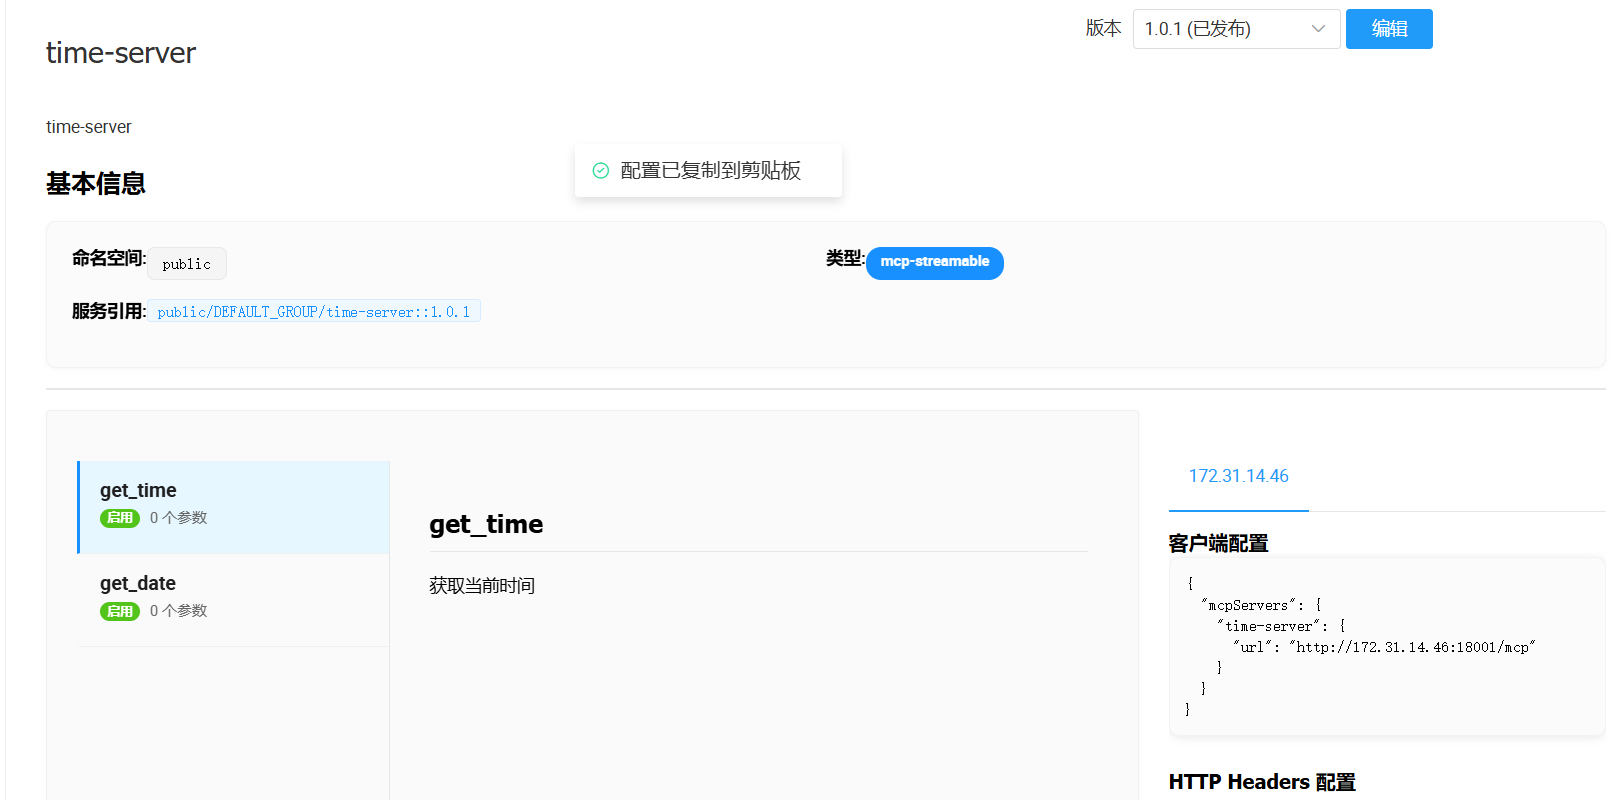
实现自动注册MCP服务
使用Nacos MCP Wrapper Python自动注册mcp示例如下
from mcp.server.fastmcp import FastMCP
from datetime import datetime
from nacos_mcp_wrapper.server.nacos_mcp import NacosMCP
from nacos_mcp_wrapper.server.nacos_settings import NacosSettings

nacos_settings = NacosSettings()
nacos_settings.SERVER_ADDR = "default.test.com:8848"
nacos_settings.NAMESPACE = "public"  # Nacos 命名空间ID
nacos_settings.USERNAME = "nacos"
nacos_settings.PASSWORD = "nacos"

mcp = NacosMCP("time-server", nacos_settings=nacos_settings, version="1.0.1", stateless_http=True, host="0.0.0.0", port=18001)


@mcp.tool()
def get_time():
    """获取当前时间"""
    current_time = datetime.now().strftime("%H:%M:%S")
    return {"time": current_time}


@mcp.tool()
def get_date():
    """获取当前日期"""
    current_date = datetime.now().strftime("%Y-%m-%d")
    return {"date": current_date}


if __name__ == "__main__":
    mcp.run(transport="streamable-http")
启动的时候报错显示找不到从而注册,正常现象最终能够注册成功
通过http请求获取agent详情如下
curl -X GET '127.0.0.1:8848/nacos/v3/admin/ai/a2a?namespaceId=public&agentName=weather-agent'

{"code":0,"message":"success","data":{"protocolVersion":"0.2.9","name":"weather-agent","description":"Retrieves weather forecast for a specified location","version":"1.0.0","iconUrl":null,"capabilities":{"streaming":false,"pushNotifications":false,"stateTransitionHistory":false,"extensions":null},"skills":[{"id":null,"name":"weather_forecast","description":"A weather agent that can retrieve weather forecasts.","tags":null,"examples":null,"inputModes":null,"outputModes":null}],"url":"http://default.test.com:9000/","preferredTransport":"JSONRPC","additionalInterfaces":null,"provider":null,"documentationUrl":null,"securitySchemes":null,"security":null,"defaultInputModes":["text"],"defaultOutputModes":["text"],"supportsAuthenticatedExtendedCard":null,"registrationType":"URL","latestVersion":true}}
agentscope使用在nacos注册的服务
使用
from a2a.types import AgentCard
from v2.nacos import ClientConfig

from agentscope.a2a import NacosAgentCardResolver
from agentscope.agent import A2AAgent, UserAgent
from agentscope.message import Msg, TextBlock
from agentscope.tool import ToolResponse

async def main() -> None:
    # 1. 从 Nacos 获取 Agent Card
    agent_card = await NacosAgentCardResolver(
        remote_agent_name="weather-agent",
        nacos_client_config=ClientConfig(
            server_addresses="http://localhost:8848",
        ),
    ).get_agent_card()
    print(f"获取到 Agent Card: {agent_card.name}")

    # 2. 创建 A2A 代理
    agent = A2AAgent(agent_card=agent_card)

    # 3. 访问 A2A 代理
    msg = Msg(
        name="user",
        content="what is the weather in beijing?",
        role="user",
    )
    res = await agent(msg)
    print(res.content)


if __name__ == "__main__":
    import asyncio
    asyncio.run(main())
调用结果

使用agentcsope router反代mcp服务
Nacos MCP Router 有两种工作模式:
- router模式:默认模式,通过MCP Server推荐、安装及代理其他MCP Server的功能,帮助用户更方便的使用MCP Server服务。
- prroxy模式:使用环境变量MODE=proxy指定,通过简单配置可以把sse、stdio协议MCP Server转换为streamableHTTP协议MCP Server。
此处使用router模式,Nacos MCP Router 作为一个标准MCP Server,提供MCP Server推荐、分发、安装及代理其他MCP Server的功能。
export NACOS_ADDR=127.0.0.1:8848
export NACOS_USERNAME=nacos
export NACOS_PASSWORD=nacos
export TRANSPORT_TYPE=streamable_http
uvx nacos-mcp-router@latest
将MCP Router注册为agent的tool
from mcp.client.streamable_http import streamable_http_client
from strands import Agent
from strands.tools.mcp import MCPClient
from strands.models.litellm import LiteLLMModel
import logging

logging.basicConfig(level=logging.INFO)
streamable_http_mcp_client = MCPClient(
    lambda: streamable_http_client("http://localhost:8000/mcp")
)

litemodel= LiteLLMModel(
    model_id="qwen3-vl",
    client_args={
        "api_key": "sk-uzpq0u0n5FN14HorW45hUw",
        "base_url": "http://localhost:4000",
        "use_litellm_proxy": True
    },
)

strands_agent = Agent(
    model=litemodel,
    name="Personal Assistant",
    description="A personal assistant for the user.",
    tools=[streamable_http_mcp_client],
    callback_handler=None,
)

resp = strands_agent("What can you do?")
print(resp)
可以查看mcp支持的功能

实际调用,这个提示词要比较有针对性,否则可能找不到nacos中的mcp服务
from mcp.client.streamable_http import streamable_http_client
from strands import Agent
from strands.tools.mcp import MCPClient
from strands.models.litellm import LiteLLMModel
import logging

logging.basicConfig(level=logging.INFO)
streamable_http_mcp_client = MCPClient(
    lambda: streamable_http_client("http://localhost:8000/mcp")
)

litemodel= LiteLLMModel(
    model_id="qwen3-vl",
    client_args={
        "api_key": "sk-uzpq0u0n5FN14HorW45hUw",
        "base_url": "http://localhost:4000",
        "use_litellm_proxy": True
    },
)

strands_agent = Agent(
    model=litemodel,
    name="Personal Assistant",
    description="A personal assistant for the user.",
    tools=[streamable_http_mcp_client],
    callback_handler=None,
)

resp = strands_agent("Please tell me the time using time-server.")
print(resp)

 浙公网安备 33010602011771号