Spring Boot入门第一天:Hello, Spring Boot!
1. 新建一个Maven Web项目。
2. 配置pom.xml文件。
|
1
2
3
4
5
6
7
8
9
10
11
12
13
14
15
16
17
18
19
20
21
22
23
24
|
<?xml version="1.0" encoding="UTF-8"?><project xmlns="http://maven.apache.org/POM/4.0.0" xmlns:xsi="http://www.w3.org/2001/XMLSchema-instance" xsi:schemaLocation="http://maven.apache.org/POM/4.0.0 http://maven.apache.org/xsd/maven-4.0.0.xsd"> <modelVersion>4.0.0</modelVersion> <groupId>com.yws710.springboot</groupId> <artifactId>demo1</artifactId> <version>1.0-SNAPSHOT</version> <packaging>war</packaging> <parent> <groupId>org.springframework.boot</groupId> <artifactId>spring-boot-starter-parent</artifactId> <version>1.5.4.RELEASE</version> </parent> <dependencies> <dependency> <groupId>org.springframework.boot</groupId> <artifactId>spring-boot-starter-web</artifactId> </dependency> </dependencies></project> |
3. 编写控制器类
|
1
2
3
4
5
6
7
8
9
10
11
12
13
14
15
16
17
18
|
package com.yws710.springboot.demo1.controller;import org.springframework.stereotype.Controller;import org.springframework.web.bind.annotation.RequestMapping;import org.springframework.web.bind.annotation.ResponseBody;/** * Created by Administrator on 2017/7/19. */@Controllerpublic class HelloController { @ResponseBody @RequestMapping("/hello") public String hello() { return "Hello, Spring Boot!"; }} |
4. 编写启动类
|
1
2
3
4
5
6
7
8
9
10
11
12
13
14
15
16
|
package com.yws710.springboot.demo1;import org.springframework.boot.SpringApplication;import org.springframework.boot.autoconfigure.SpringBootApplication;/** * Created by Administrator on 2017/7/19. */@SpringBootApplicationpublic class App { public static void main(String[] args) { SpringApplication.run(App.class, args); }} |
5. 启动项目。只需要运行上面代码的main方法,运行成功,控制台输出如下:
|
1
2
3
4
5
6
7
8
9
10
11
12
13
|
"D:\Program Files\Java\jdk1.7.0_67\bin\java" ... . ____ _ __ _ _ /\\ / ___'_ __ _ _(_)_ __ __ _ \ \ \ \( ( )\___ | '_ | '_| | '_ \/ _` | \ \ \ \ \\/ ___)| |_)| | | | | || (_| | ) ) ) ) ' |____| .__|_| |_|_| |_\__, | / / / / =========|_|==============|___/=/_/_/_/ :: Spring Boot :: (v1.5.4.RELEASE)省略部分信息2017-07-20 00:16:44.849 INFO 5388 --- [ main] s.b.c.e.t.TomcatEmbeddedServletContainer : Tomcat started on port(s): 8080 (http)2017-07-20 00:16:44.858 INFO 5388 --- [ main] com.yws710.springboot.demo1.App : Started App in 5.835 seconds (JVM running for 6.364) |
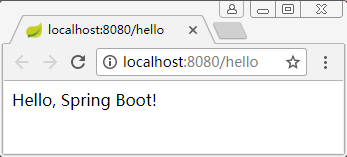
6. 在浏览器中输入 http://localhost:8080/hello,显示结果如下:
好了,一个最简单的Web项目完成了。没有写任何的配置文件,也没有任何的xml文件(这里完全可以把web.xml文件删掉)。

 浙公网安备 33010602011771号