

k8s相关随记
-1.理解linux中/etc/resolv.conf的search、ndot等参数,即如果要解析的域名的点数小于ndot(默认值是3,Pod设置为5),那么优先逐个拼接上search尝试解析,如果都失败才最后解析原域名。默认解析超时时间是5s,尝试两次。
redhat solutions:https://access.redhat.com/solutions/21420关于这个解析过错的一个伪代码描述:
if "number of dots in the hostname" > "options ndots in resolv.conf"
OR a trailing dot in the hostname (e.g. the hostname is an abolute name
like "www.redhat.com" or "www.redhat.com." (mind the trailing dot), but not "www"):
    queue(hostname)
    if resolved, return
if no trailing dot in the hostname (e.g. "www" or even "www.redhat.com" (no trailing dot)):
    for each search domain:
        queue(hostname.domain)
        if resolved, return

queue(name):
    for each attempt:
        for each DNS server:
            check DNS server for this "name":
                connect()
                sendto()
                poll(... timeout(ms))
                recvfrom() if there is reply
            if have reply (either successfully resolved or no such hostname), return
0.可以使用curl命令来统计域名解析的时间(排查容器云中偶发的DNS 5s解析延迟问题,就可以起一个pod运行脚本:不断循环curl随机域名,同时在pod所在节点上面抓包,当curl的时间超过5后停止)
curl -o /dev/null -s -w %{http_code}:%{time_namelookup}:%{time_connect}:%{time_pretransfer}:%{time_starttransfer}:%{time_total} http://test.demo.com
变量值含义可见man curl.
1.kubelet参数解析:https://blog.csdn.net/qq_34857250/article/details/84995381
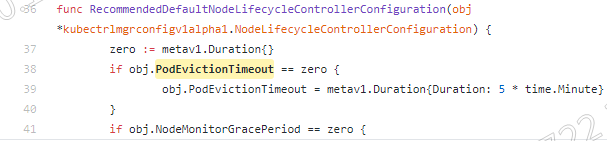
2.kubelet参数pod-eviction-timeout的默认值是多少
3.计算节点频繁发生OOM,linux中发生oom时,oom_killer如何决定首先杀掉哪个进程:https://www.vpsee.com/2013/10/how-to-configure-the-linux-oom-killer/
为了防止它杀死关键的应用程序,例如数据库实例,可以手动调整分数。这可以通过/proc/[pid]/oom_score_adj(对于2.6.29之前的内核,使用/proc/[pid]/oom_adj)实现。oom_score_adj接受的值范围是-1000到1000,(oom_adj接受的值范围是-17到15)
在k8s的qos(quality of service)中,三个qos级别正是对应三个oom_score-adj值,通过调整该值来控制evict驱逐策略和system oom_killer的优先级。
guaranteed级别的pod的oom-score-adj= -998,而计算节点kubelet服务的oom-score-adi= -999
k8s doc: https://kubernetes.io/docs/tasks/administer-cluster/out-of-resource/
If the node experiences a system OOM (out of memory) event prior to the kubelet being able to reclaim memory, the node depends on the oom_killer to respond.
The kubelet sets a oom_score_adj value for each container based on the quality of service for the Pod.
| Quality of Service | oom_score_adj |
|---|---|
Guaranteed |
-998 |
BestEffort |
1000 |
Burstable |
min(max(2, 1000 - (1000 * memoryRequestBytes) / machineMemoryCapacityBytes), 999),该值在2~999 |
在配置容器云计算节点驱逐策略时,可能存在以下问题:
Kubelet 无法及时观测到内存压力
Kubelet 目前从 cAdvisor 定时获取内存使用状况统计。如果内存使用在这个时间段内发生了快速增长,Kubelet 就无法观察到 MemoryPressure,可能会触发 OOMKiller。我们正在尝试将这一过程集成到 memcg 通知 API 中,来降低这一延迟,而不是让内核首先发现这一情况。如果用户不是希望获得终极使用率,而是作为一个过量使用的衡量方式,对付这一个问题的较为可靠的方式就是设置驱逐阈值为 75% 容量。这样就提高了避开 OOM 的能力,提高了驱逐的标准,有助于集群状态的平衡。
Kubelet 可能驱逐超出需要的更多 Pod
这也是因为状态搜集的时间差导致的。未来会加入功能,让根容器的统计频率和其他容器分别开来(https://github.com/google/cadvisor/issues/1247)
4.容器设计模式:Sidecar
什么是 Sidecar?在 Pod 里面,可以定义一些专门的容器,来执行主业务容器所需要的一些辅助工作,比如Init Container,它就是一个 Sidecar,它可以将文件拷贝到共享目录里面,以便被同pod中的业务容器用起来。
优势就是在于其实将辅助功能从我的业务容器解耦了,所以我就能够独立发布 Sidecar 容器,并且更重要的是这个能力是可以重用的,即同样的一个监控 Sidecar 或者日志 Sidecar,可以被全公司的人共用的。这就是设计模式的一个威力。
5. 我们发现k8s中的很多组件其实都是容器化部署的,比如etcd、api-server、controller等,那为什么每个node上面的kubelet服务不容器化部署呢?
kubelet 是 Kubernetes 项目用来操作 Docker 等容器运行时的核心组件。可是,除了跟容器运行时打交道外,kubelet 在配置容器网络、管理容器数据卷时,都需要直接操作宿主机。
而如果现在 kubelet 本身就运行在一个容器里,那么直接操作宿主机就会变得很麻烦。对于网络配置来说还好,kubelet 容器可以通过不开启 Network Namespace(即 Docker 的 host network 模式)的方式,直接共享宿主机的网络栈。可是,要让 kubelet 隔着容器的 Mount Namespace 和文件系统,操作宿主机的文件系统,就有点儿困难了。比如,如果用户想要使用 NFS 做容器的持久化数据卷,那么 kubelet 就需要在容器进行绑定挂载前,在宿主机的指定目录上,先挂载 NFS 的远程目录。可是,这时候问题来了。由于现在 kubelet 是运行在容器里的,这就意味着它要做的这个“mount -F nfs”命令,被隔离在了一个单独的 Mount Namespace 中。即,kubelet 做的挂载操作,不能被“传播”到宿主机上。对于这个问题,有人说,可以使用 setns() 系统调用,在宿主机的 Mount Namespace 中执行这些挂载操作;也有人说,应该让 Docker 支持一个–mnt=host 的参数。但是,到目前为止,在容器里运行 kubelet,依然没有很好的解决办法。
6. 比较好用的patch写法:将pod中定义的第一个容器的第一个环境变量的name修改为test
kc patch deployment jenkins --type='json' -p='[{"op": "replace", "path": "/spec/template/spec/containers/0/env/1/name", "value": "test"}]'
7. 在 Kubernetes v1.11 之前,由于调度器尚不完善,DaemonSet 是由 DaemonSet Controller 自行调度的,即它会直接设置 Pod 的 spec.nodename 字段,这样就可以跳过调度器了。但是,这样的做法很快就会被废除,所以在这里我也不推荐你再花时间学习这个流程了。
8. 当你指定了 requests.cpu=250m 之后,相当于将 Cgroups 的 cpu.shares 的值设置为 (250/1000)*1024。而当你没有设置 requests.cpu 的时候,cpu.shares 默认则是 1024。这样,Kubernetes 就通过 cpu.shares 完成了对 CPU 时间的按比例分配。而如果你指定了 limits.cpu=500m 之后,则相当于将 Cgroups 的 cpu.cfs_quota_us 的值设置为 (500/1000)*100ms,而 cpu.cfs_period_us 的值始终是 100ms。这样,Kubernetes 就为你设置了这个容器只能用到 CPU 的 50%。而对于内存来说,当你指定了 limits.memory=128Mi 之后,相当于将 Cgroups 的 memory.limit_in_bytes 设置为 128 * 1024 * 1024。而需要注意的是,在调度的时候,调度器只会使用 requests.memory=64Mi 来进行判断。
即:
1.k8s调度时仅会考虑cpu和memory的request。
2.memory的request也只用于k8s调度时使用,而cpu的request值不仅用于k8s的调度,还会影响cpu.shares的值,当节点cpu紧张发生资源竞争时,系统将根据cpu_shares的值按比例分配CPU时间片。
例如,podA的request.cpu=500m,podB的request.cpu=1,对应的cpu.shares的值分别为(500/1000)*1024=512和(1000/1000)*1024=1024,假设节点只有这两个容器消耗cpu,当节点发生cpu竞争时,分别能占用最大的cpu的比值是1:2,cpu资源不紧张时,仍然可以占用到各自limit.cpu配置的值(limit.cpu配置的是cpu.cfs_quota_us参数),这并不冲突。跟memory这种不可压缩资源不同,cpu这一可压缩资源当发生资源竞争时就需要考虑如何配置的问题。
可以通过设置 cpuset 把容器绑定到某个 CPU 的核上,而不是像 cpushare 那样共享 CPU 的计算能力。使用cpuset使得操作系统在 CPU 之间进行上下文切换的次数大大减少,容器里应用的性能会得到大幅提升。事实上,cpuset 方式,是生产环境里部署在线应用类型的 Pod 时,非常常用的一种方式。
配置方式:
首先,你的 Pod 必须是 Guaranteed 的 QoS 类型(memory和cpu的request、imit值相等);然后,你只需要将 Pod 的 CPU 资源的 requests 和 limits 设置为同一个相等的整数值即可(不能是500m之类的)。
这时候,该 Pod 就会被绑定在 2 个独占的 CPU 核上。
9. pod有一个字段Ready表示pod中的进程是否准备好,比如一个web应用表示是否已经准备好接收流量进来,是否ready由pod配置的readiness probe来决定,如果readiness探针探测通过,那么这个pod就会被标记为ready(如果这个pod只有一个容器,Ready字段就是1/1)。service作为集群内的一种load balance,其维护了一个endpoint列表,列表中的pod都是可以通过接受接受外界请求的,假设一个pod中就一个容器,那是否一个pod Ready了,就代表这个pod一定会在service的ep列表里面呢?
不是的,pod的Ready字段表示的是这个pod是否具备接受外界请求的能力,只是一个能力描述,而service的ep列表中的pod将真正的接受请求,一个pod要想被加入ep列表中,前提是这个pod是Running的且这个pod是Ready的,也就是其实是存在一个pod是Ready的但不是Running的情况,比如我删除一个pod,由于是会默认给予这个pod最大30s的优雅退出时间,在pod退出之前这个pod将一直处于Terminating状态且Ready状态(这是因为Readiness probe依然是检测通过的),但这个时候service的ep列表还是需要移除这个需要被删除的pod的。
10. 为什么k8s的VPA不支持热更新?
因为在 Kubernetes 中,pod resource requests 会影响 pod QoS 和容器的限制状态,比如驱逐策略、OOM Score和 cgroup 的限制参数等。如果不重建的话,单纯的修改 pod spec 只会影响调度策略。重建的话会导致 pod 重新调度,同时也在一定程度上降低了应用的可用性。官网列出一个更新策略auto,是可以in-place重建:
11. 通过kc get apiservice 和 kc api-versions 得到的结果有啥区别?
将两个命令的输出对比一下会发现后者比前者多出一个apiGroup是apiregistration,然后因为这个apiGroup在我的环境(1.11)是有v1和v1beta1两个版本的,所以后者会比前者多两条记录。
如下可以看到,APIService是apiregistration.k8s.io/v1的一个Resource,而v1.apps是由APIService定义出来的。也就是apiregistration.k8s.io是最开始存在的apiGroup,这个group下有一个APIService这个Resource,而其他的apiGroup都是由APIService这个Resource定义出来的。当然,apiextensions.k8s.io的customresourcedefinitions这个Resource也可以创建apiGroup和对应的Resource。
kc get apiservice v1.apps -o yaml
apiVersion: apiregistration.k8s.io/v1
kind: APIService
metadata:
  creationTimestamp: 2019-12-24T07:01:25Z
  labels:
    kube-aggregator.kubernetes.io/automanaged: onstart
  name: v1.apps
  resourceVersion: "4"
  selfLink: /apis/apiregistration.k8s.io/v1/apiservices/v1.apps
  uid: 3343c093-261b-11ea-a5ad-5254008ade6c
spec:
  group: apps
  groupPriorityMinimum: 17800
  service: null
  version: v1
  versionPriority: 15
status:
  conditions:
  - lastTransitionTime: 2019-12-24T07:01:25Z
    message: Local APIServices are always available
    reason: Local
    status: "True"
    type: Available
apiVersion: apiregistration.k8s.io/v1
kind: APIService
metadata:
  name: v1beta1.custom.metrics.k8s.io
spec:
  insecureSkipTLSVerify: true
  group: custom.metrics.k8s.io
  groupPriorityMinimum: 1000
  versionPriority: 5
  service:
    name: api
    namespace: custom-metrics
  version: v1beta1
 time_connect   The time, in seconds, it took from the start until the TCP connect to the remote host (or proxy) was completed.

              time_namelookup
                             The time, in seconds, it took from the start until the name resolving was completed.

              time_pretransfer
                             The time, in seconds, it took from the start until the file transfer was just about to begin. This  includes  all  pre-transfer  commands  and
                             negotiations that are specific to the particular protocol(s) involved.

              time_redirect  The  time,  in  seconds, it took for all redirection steps include name lookup, connect, pretransfer and transfer before the final transaction
                             was started. time_redirect shows the complete execution time for multiple redirections. (Added in 7.12.3)

              time_starttransfer
                             The time, in seconds, it took from the start until the first byte was just about to be transferred. This includes  time_pretransfer  and  also
                             the time the server needed to calculate the result.

              time_total     The total time, in seconds, that the full operation lasted. The time will be displayed with millisecond resolution.

 浙公网安备 33010602011771号