IMX6ULL开发板体验Harmony LiteOS-A内核
1 概述
鸿蒙系统开发有两个方向:
- 北向:APP
- 南向:内核
一直觉得很懵,鸿蒙到底是什么,是整个系统还是单个内核,直到看完教程还是很迷。尝试用安卓来对比:
| 鸿蒙 | 安卓 | |
|---|---|---|
| 内核 | Linux/LiteOS | Linux |
| 系统语言 | C、C++ | C、C++、JAVA |
| APP语言 | C、C++ | JAVA、Kotlin |
| IDE | HUAWEI DevEco Device Tool | Android Studio、Eclipse |
| 场景 | 手机/平板/车载系统/可穿戴设备/电视…… | 同左 |
技术架构:
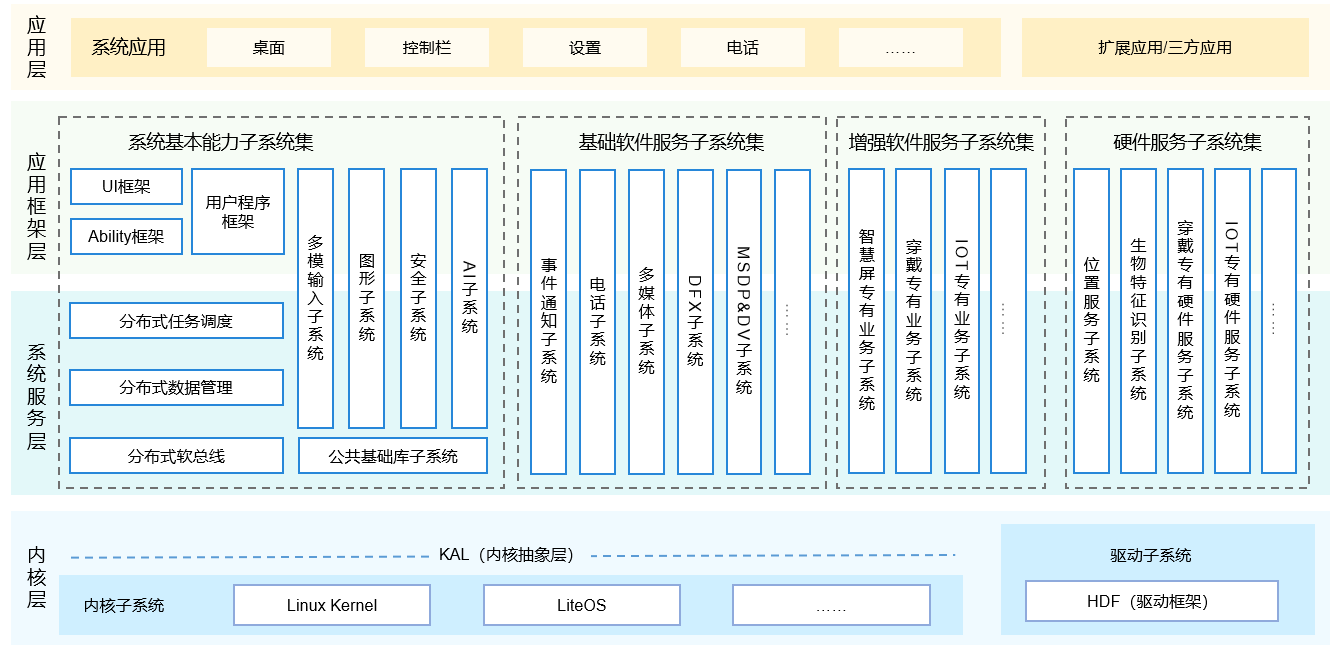
鸿蒙指的是这一整套东西,而这篇文章只用到了内核层的LiteOS,没有涉及分布式软总线和桌面APP等部分。
2 快速开始
环境:
- Win10
- Hyper虚拟机 Ubuntu 18.04
- 100ASK_IMX6ULL开发板
- OpenHarmony 1.0
- MobaXterm 20.3
- 100ask imx6ull flashing tool 4.0
资料:
- gitee: 鸿蒙内核Liteos-a开发手册.docx,鸿蒙开发板100ASK_IMX6ULL使用手册.pdf,APP、patch源码,烧写工具。
- 百度网盘:开发板资料,开发工具
- 视频:百问网,b站
把开发板设置为 USB 启动,接好 2 条 USB 线,装好驱动程序后,运行烧写工具100ask_imx6ull_flashing_tool。点下载到内存并启动。串口115200,MobaXterm看到有输出,启动成功。重置后要重新下载运行。
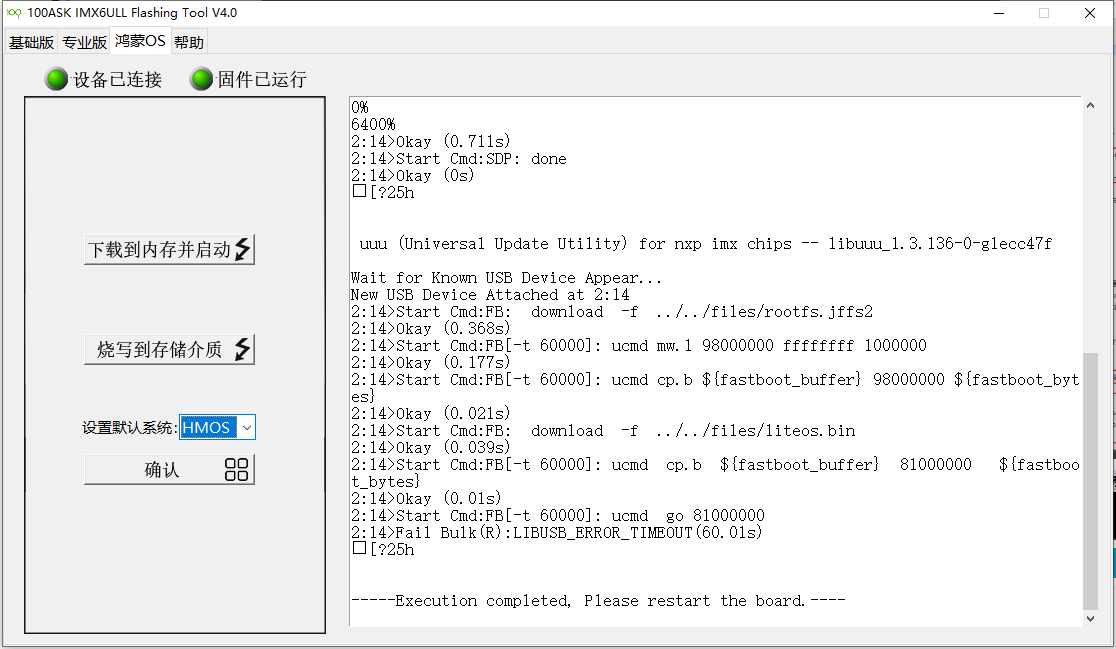
重启,点击烧写到存储介质,设置默认系统是HMOS,点确认。关机,设置EMMC启动,开机,成功。一次烧录多次运行。
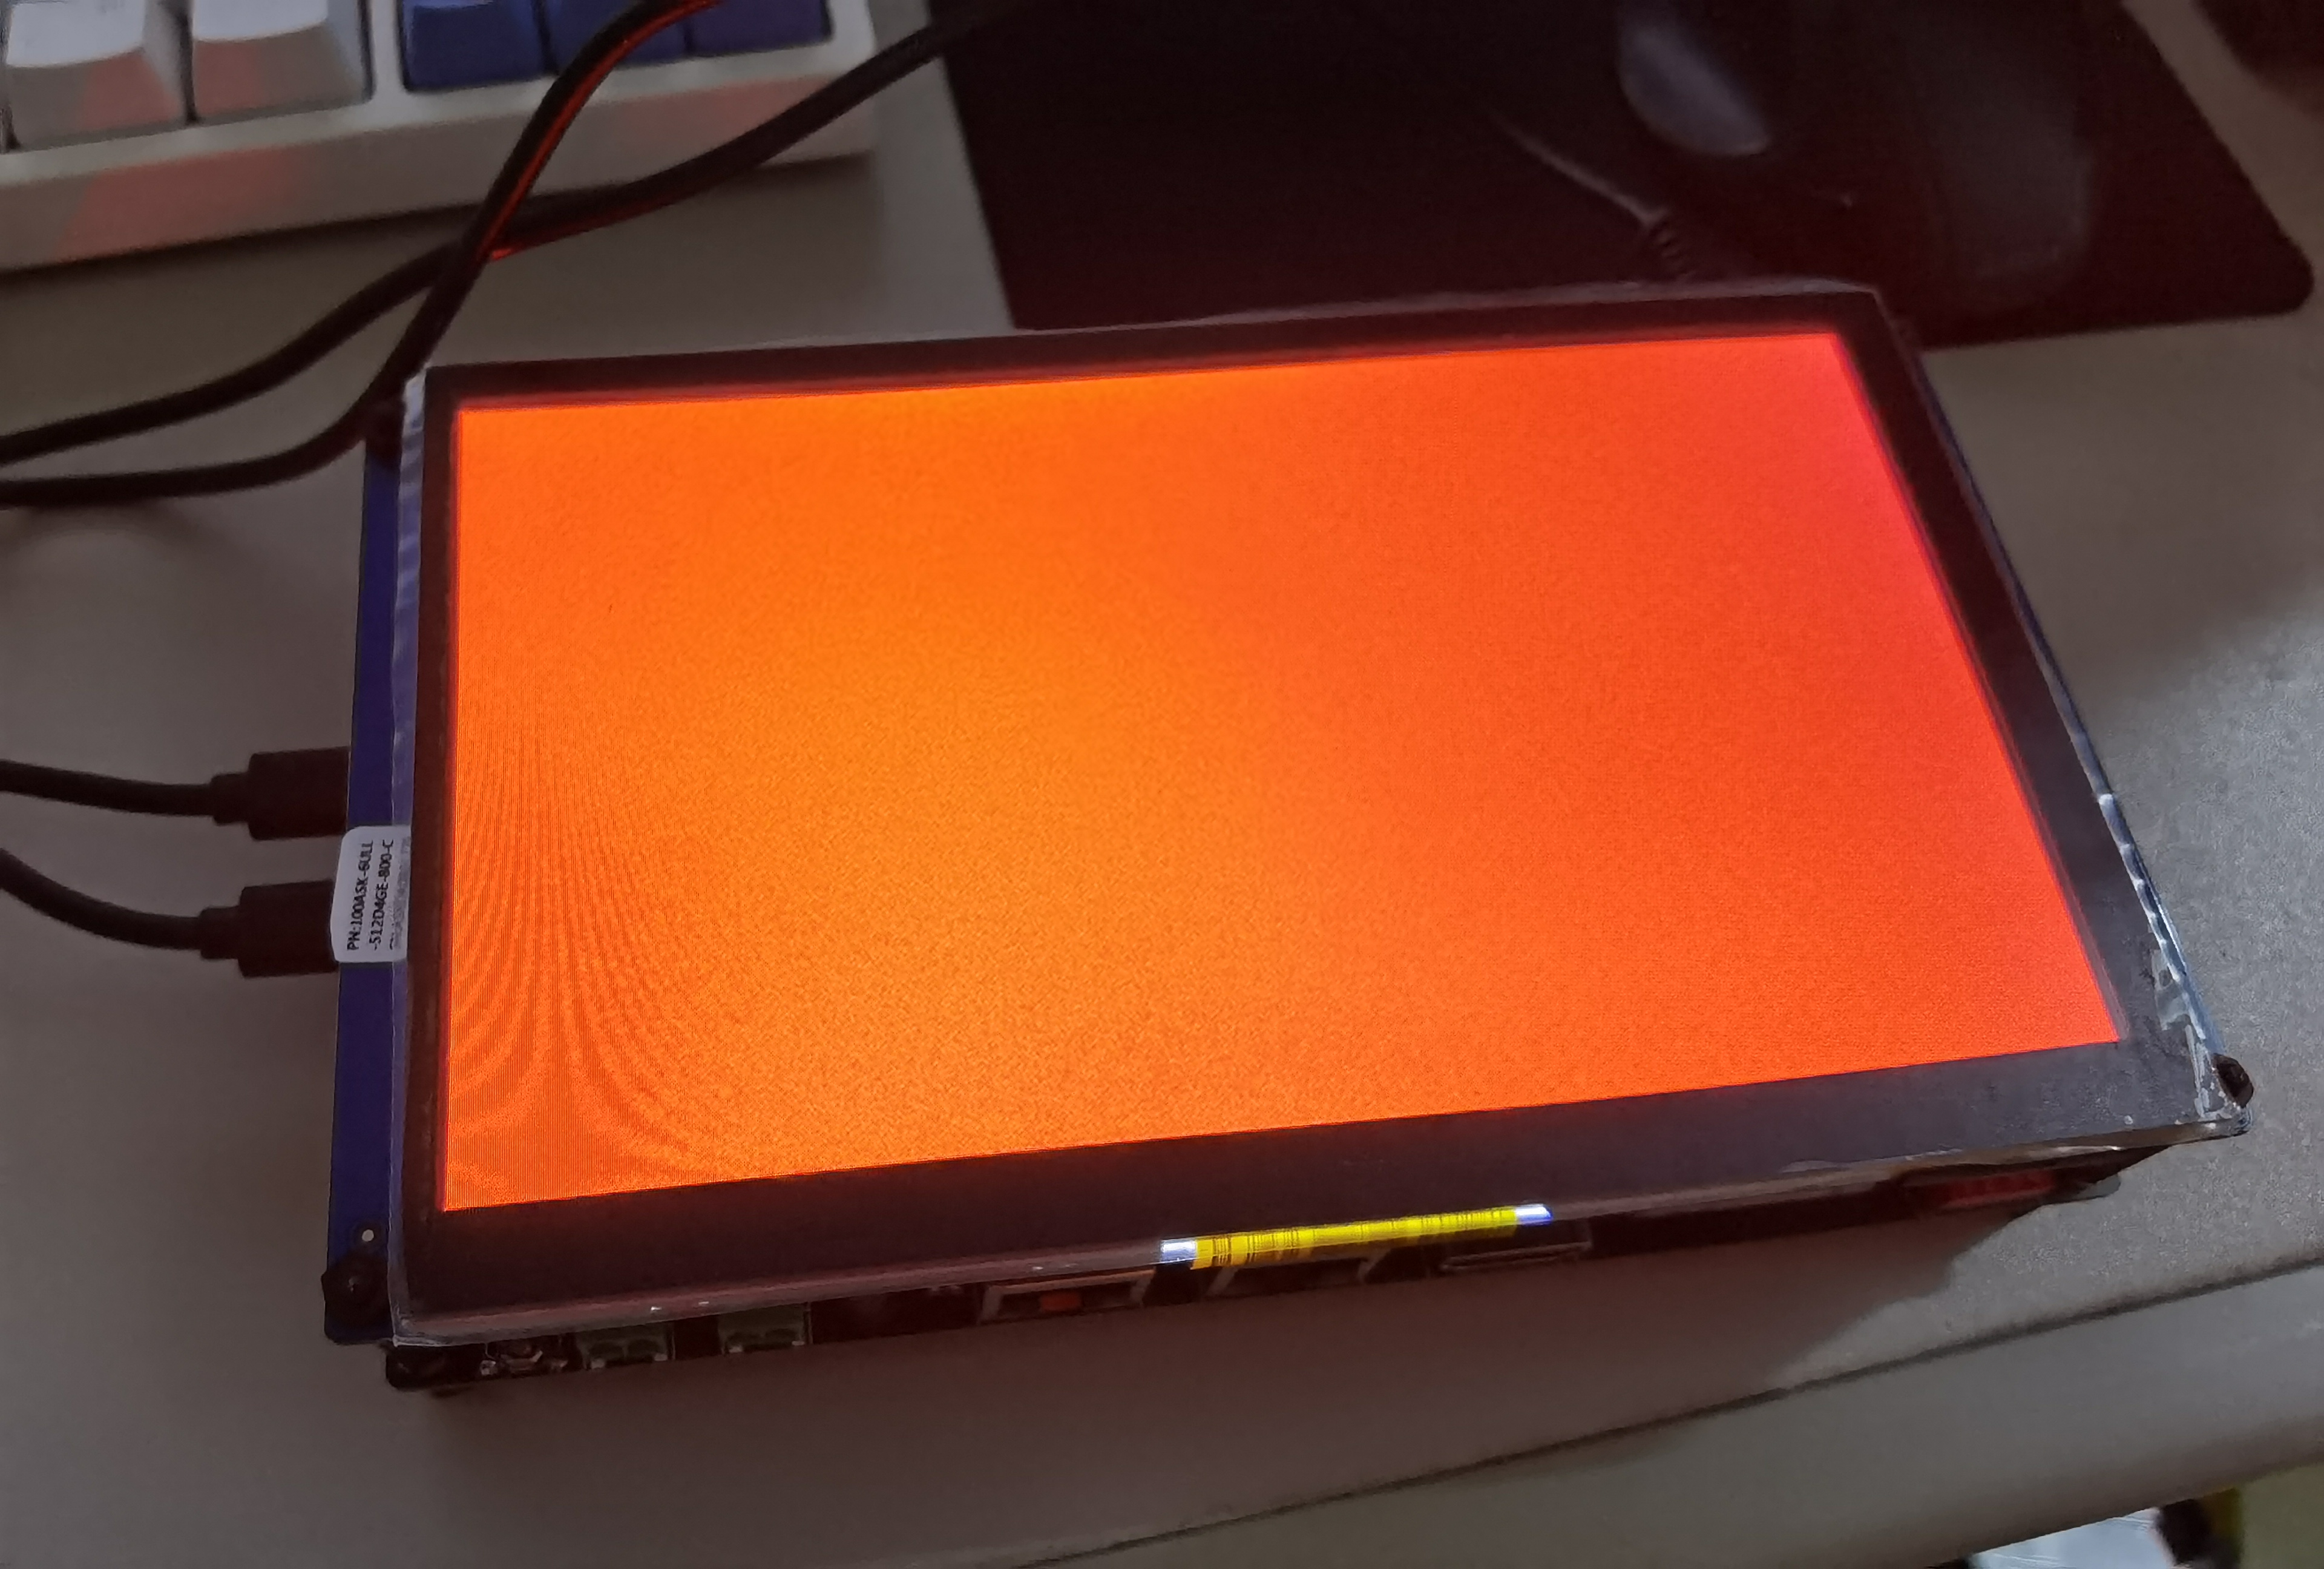
运行电子相册,韦老师自己写的
./bin/digitpic
错位了,应该在正中间。

3 编译LiteOS-a
3.1 配置环境
远程登录Ubuntu虚拟机,执行命令
wget --no-check-certificate -O Configuring_ubuntu.sh https://weidongshan.coding.net/p/DevelopmentEnvConf/d/DevelopmentEnvConf/git/raw/master/Configuring_ubuntu.sh && sudo chmod +x Configuring_ubuntu.sh && sudo ./Configuring_ubuntu.sh
选1
python版本必须在3.7以上
/bin/sh必须指向/bin/bash
配置Git
git config --global user.name "100ask"
git config --global user.email "weidongshan@qq.com"
git config --global credential.helper store
安装repo(repo是用来管理多个git仓库的)
curl https://gitee.com/oschina/repo/raw/fork_flow/repo-py3 > repo
sudo cp repo  /usr/local/bin/repo && sudo chmod a+x /usr/local/bin/repo
sudo pip3 install -i https://pypi.tuna.tsinghua.edu.cn/simple requests
这个提示不用管
The directory '/home/rong/.cache/pip/http' or its parent directory is not owned by the current user and the cache has been disabled. Please check the permissions and owner of that directory. If executing pip with sudo, you may want sudo's -H flag.
The directory '/home/rong/.cache/pip' or its parent directory is not owned by the current user and caching wheels has been disabled. check the permissions and owner of that directory. If executing pip with sudo, you may want sudo's -H flag.
3.2 下载源码
cd ~
mkdir  openharmony
cd  openharmony
repo init -u https://gitee.com/openharmony/manifest.git -b OpenHarmony-1.0
repo sync -c -j8
编译官方版本
cd ~/openharmony
python build.py ipcamera_hi3518ev300 -b debug
必须要编译成功一次,因为imx6ull的代码没改完,要借助官方版本来编译一些库,用于后面编译运行电子相册。
成功

3.3 下载补丁
cd  ~
git  clone  https://gitee.com/weidongshan/openharmony_for_imx6ull.git
使用补丁文件修改代码
cd  ~/openharmony
patch -p1 < ~/openharmony_for_imx6ull/patch/hmos_v1.0_imx6ull.patch
编译
cd  ~/openharmony/kernel/liteos_a
cp  tools/build/config/debug/imx6ull_clang.config .config   // 配置
make clean      // 先清除一下,否则会提示错误
make  -j  8     // 编译内核,可以得到out/imx6ull/liteos.bin
make  rootfs    // 编译根文件系统,可以得到rootfs.img
cp  out/imx6ull/rootfs.img out/imx6ull/rootfs.jffs2 // 改个名易辨认,烧写工具使用rootfs.jffs2
4 编译APP
cd  /home/rong/openharmony_for_imx6ull/apps/hello
clang -target arm-liteos   --sysroot=/home/rong/openharmony/prebuilts/lite/sysroot/  -o  hello   hello.c
或者修改Makefile后直接make
把执行文件放到kernel源码
cp hello /home/rong/openharmony/kernel/liteos_a/out/imx6ull/rootfs/bin
重新制作rootfs.jffs2
cd  /home/rong/openharmony/kernel/liteos_a/out/imx6ull/
mkfs.jffs2  -s 0x10000 -e 0x10000 -d rootfs -o rootfs.jffs2
把得到的liteos.bin和rootfs.jffs2放到烧写工具的files目录,就可以使用烧写工具启动了。
运行成功
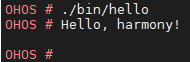
源码地址:https://gitee.com/obarong/myharmony
imx6ull分支
参考
【鸿蒙开发】韦东山手把手教你移植鸿蒙系统_基于IMX6ULL_哔哩哔哩 (゜-゜)つロ 干杯~-bilibili
https://www.bilibili.com/video/BV1ep4y1a7LH
openharmony_for_imx6ull: 支持IMX6ULL 系列开发板的鸿蒙系统补丁
https://gitee.com/weidongshan/openharmony_for_imx6ull
百问网Imx6ull开发板 - 百问网嵌入式Linux wiki
http://wiki.100ask.org/100ask_imx6ull
GitHub - LiteOS/LiteOS: code and manual
https://github.com/LiteOS/LiteOS

 浙公网安备 33010602011771号