
nginx入门系列之安装与卸载

目录
官方安装手册:https://nginx.org/en/docs/install.html
针对不同的操作系统平台,nginx支持不同的安装方式,如:通过包管理器安装,从源码编译安装。
通过包管理器安装
在Linux系统上安装nginx时,最方便的方式是通过包管理器进行安装,如:yum,apt。
针对不同的Linux系统,在执行nginx安装之前,需要进行一定的配置,详见:https://nginx.org/en/linux_packages.html 。
如下以在CentOS上通过yum方式安装nginx为例进行说明。
安装nginx
第一步:安装必要的基础工具“yum-utils”
$ sudo yum install yum-utils
第二步:在文件“/etc/yum.repos.d/nginx.repo”中配置nginx的yum源
$ sudo vim /etc/yum.repos.d/nginx.repo
[nginx-stable]
name=nginx stable repo
baseurl=http://nginx.org/packages/centos/$releasever/$basearch/
gpgcheck=1
enabled=1
gpgkey=https://nginx.org/keys/nginx_signing.key
module_hotfixes=true

[nginx-mainline]
name=nginx mainline repo
baseurl=http://nginx.org/packages/mainline/centos/$releasever/$basearch/
gpgcheck=1
enabled=0
gpgkey=https://nginx.org/keys/nginx_signing.key
module_hotfixes=true
第三步:通过yum安装nginx
$ sudo yum install nginx
特别说明: 默认情况下,通过“sudo yum install nginx”安装的是稳定版本的nginx,如果希望安装最新版本的nginx可以使用如下命令:
$ sudo yum-config-manager --enable nginx-mainline
安装完毕之后默认是不会启动nginx的:
$ ps uax |grep nginx
root     11455  0.0  0.0 112708   988 pts/0    S+   17:00   0:00 grep --color=auto nginx
通过这种方式安装nginx完毕之后,nginx可执行文件默认已经添加到/usr/sbin目录下,可以直接执行nginx命令启动nginx。
$ whereis nginx
nginx: /usr/sbin/nginx /usr/lib64/nginx /etc/nginx /usr/share/nginx /usr/share/man/man8/nginx.8.gz

# 启动nginx
$ nginx
$ ps uax |grep nginx
root     11457  0.0  0.0  46440   980 ?        Ss   17:01   0:00 nginx: master process nginx
nginx    11458  0.0  0.1  46852  1932 ?        S    17:01   0:00 nginx: worker process
root     11473  0.0  0.0 112708   988 pts/0    S+   17:01   0:00 grep --color=auto nginx
使用不带参数的命令行选项”-t“查看nginx进程当前使用的配置文件:
# 使用命令行选项-t查看nginx进程当前使用的配置文件
# 默认情况下nginx使用的配置文件是:/etc/nginx/nginx.conf
$ nginx -t
nginx: the configuration file /etc/nginx/nginx.conf syntax is ok
nginx: configuration file /etc/nginx/nginx.conf test is successful
通过命令行选项“-s”停止nginx:
# 停止nginx
$ nginx -s stop
$ ps uax |grep nginx
root     11502  0.0  0.0 112708   988 pts/0    S+   17:10   0:00 grep --color=auto nginx
卸载nginx
不同Linux发行版的包管理器卸载软件的方式各不相同,如下以在CentOS上通过yum卸载软件进行说明。
通过yum安装的nginx,卸载时非常方便,只需要通过yum命令即可完成nginx的卸载。
# 卸载之前查看下nginx的安装情况
$ which nginx
/usr/sbin/nginx

# 通过yum命令删除nginx
$ yum remove nginx
Loaded plugins: fastestmirror
Resolving Dependencies
--> Running transaction check
---> Package nginx.x86_64 1:1.16.1-1.el7.ngx will be erased
--> Finished Dependency Resolution

Dependencies Resolved

......

Removed:
  nginx.x86_64 1:1.16.1-1.el7.ngx

Complete!

# 卸载完成之后再次查看nginx的安装情况
# 显然,卸载nginx之后就找不到nginx的安装信息了
$ which nginx
/usr/bin/which: no nginx in (/usr/local/sbin:/usr/local/bin:/usr/sbin:/usr/bin:/root/bin)
值得注意的是,通过yum命令卸载nginx,仅仅是卸载了nginx软件本身,对于之前使用nginx配置文件将会被保留下来。
# 显然,卸载nginx之后之前使用的配置文件被保留了,并且换了一个文件名后缀表明这是通过yum卸载时保存的配置文件
$ ll /etc/nginx/
total 4
drwxr-xr-x. 2 root root   51 Nov 16 12:57 conf.d
-rw-r--r--. 1 root root 1025 Nov 14 23:40 nginx.conf.rpmsave
$ ll /etc/nginx/conf.d/
total 8
-rw-r--r--. 1 root root 1098 Nov  9 17:55 default.conf.rpmsave
可以手动删除之前使用的nginx配置文件:
$ rm -rf /etc/nginx
从源码编译安装
nginx是C语言开发的应用程序,支持从源码编译安装,这也是nginx常用的安装方式之一。
如下是在Linux环境(CentOS 7.6)下编译安装nginx的步骤:
准备安装环境
在进行nginx编译之前需要安装一些基础的工具环境,如:gcc,openssl等。
# 安装gcc
$ yum install -y gcc-c++

# 安装prce
# PCRE(Perl Compatible Regular Expressions)是一个Perl库,包括 perl 兼容的正则表达式库。nginx的http模块使用pcre来解析正则表达式,所以需要在linux上安装pcre库。
# 注:pcre-devel是使用pcre开发的一个二次开发库,nginx也需要此库。
$ yum install -y pcre pcre-devel

# 安装zlib
# zlib库提供了很多种压缩和解压缩的方式,nginx使用zlib对http包的内容进行gzip,所以需要在linux上安装zlib库。
$ yum install -y zlib zlib-devel

# 安装openssl
# OpenSSL 是一个强大的安全套接字层密码库,囊括主要的密码算法、常用的密钥和证书封装管理功能及SSL协议,并提供丰富的应用程序供测试或其它目的使用。
# nginx不仅支持http协议,还支持https(即在ssl协议上传输http),所以需要在linux安装openssl库。
$ yum install -y openssl openssl-devel
执行编译安装
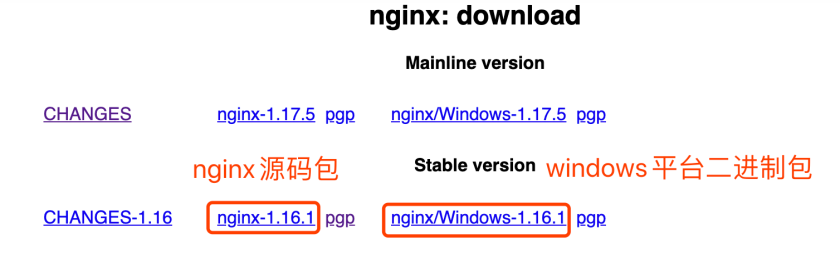
nginx源码文件下载:https://nginx.org/en/download.html
# 下载指定版本的nginx源码包
$ wget http://nginx.org/download/nginx-1.16.1.tar.gz

$ tar xzvf nginx-1.16.1.tar.gz
$ cd nginx-1.16.1
$ ./configure \
  --prefix=/usr/local/nginx \
  --pid-path=/var/run/nginx/nginx.pid \
  --lock-path=/var/lock/nginx.lock \
  --error-log-path=/var/log/nginx/error.log \
  --http-log-path=/var/log/nginx/access.log \
  --with-http_gzip_static_module \
  --http-client-body-temp-path=/var/temp/nginx/client \
  --http-proxy-temp-path=/var/temp/nginx/proxy \
  --http-fastcgi-temp-path=/var/temp/nginx/fastcgi \
  --http-uwsgi-temp-path=/var/temp/nginx/uwsgi \
  --http-scgi-temp-path=/var/temp/nginx/scgi
$ make
$ make install
执行上述编译安装之后,nginx将会被安装到目录“/usr/local/nginx”下。
$ cd /usr/local/nginx/
$ ./sbin/nginx -t
nginx: the configuration file /usr/local/nginx/conf/nginx.conf syntax is ok
nginx: configuration file /usr/local/nginx/conf/nginx.conf test is successful
$ ./sbin/nginx
$ ps uax |grep nginx
root      3975  0.0  0.0  20556   620 ?        Ss   21:33   0:00 nginx: master process ./sbin/nginx
nobody    3976  0.0  0.1  21008  1576 ?        S    21:33   0:00 nginx: worker process
root      3996  0.0  0.0 112708   988 pts/0    R+   21:36   0:00 grep --color=auto nginx
此时使用的配置文件默认为“/usr/local/nginx/conf/nginx.conf”,进入到“/usr/local/nginx”,执行“./sbin/nginx”即可启动nginx。
注意:
上边将临时文件目录指定为/var/temp/nginx,在启动nginx之前需要在/var下创建temp及nginx目录(mkdir -p /var/temp/nginx),否则将会报错:“nginx: [emerg] mkdir() "/var/temp/nginx/client" failed (2: No such file or directory)”。
编译安装的nginx卸载非常方便,直接将nginx的安装目录“/usr/local/nginx”删除即可,同时可以把nginx使用的日志目录和临时目录一并删除。
删除编译安装的nginx:
$ rm -rf /usr/local/nginx
$ rm -rf /var/log/nginx
$ rm -rf /var/temp/nginx
相比起直接通过操作系统的软件包管理器安装nginx,通过源码方式安装nginx有如下好处:
1.可以指定安装目录和相关文件路径,包管理器方式安装到默认位置
2.灵活地编译指定模块(如:--with-http_xslt_module),包管理器方式的安装默认带有的指定模块
从源码编译安装可以指定的参数和模块列表详见:Building nginx from Sources
制作nginx免安装包
有时候需要在内网环境使用nginx,如果内网无法访问外网,那么就无法通过包管理器工具安装nginx了。
而使用源码编译安装的方式同样需要先安装一些依赖工具包,这又将是一个非常繁琐的过程。
因此,如果有一个已经编译好的nginx二进制安装包,那该多么方便啊!遗憾的是,nginx官方并没有为Linux平台提供这样的二进制包,只提供了一个Windows平台二进制包。
实际上,可以通过源码编译方式制作一个免安装的nginx二进制包,这样就可以非常方便地使用nginx了。
如下是制作nginx免安装二进制包的详细步骤:
# 安装基础的依赖工具
$ yum -y install gcc-c++ make wget

# 下载nginx模块依赖的软件包和nginx源码包,并解压
$ wget https://www.openssl.org/source/openssl-1.0.2s.tar.gz
$ wget https://ftp.pcre.org/pub/pcre/pcre-8.43.tar.gz
$ wget https://zlib.net/zlib-1.2.11.tar.gz
$ wget http://nginx.org/download/nginx-1.16.1.tar.gz

# 开始编译nginx
$ cd nginx-1.16.1
$ ./configure \
   --with-openssl=../openssl-1.0.2s \
   --with-pcre=../pcre-8.43 \
   --with-zlib=../zlib-1.2.11 \
   --with-pcre-jit --user=root \
   --prefix=/root/nginx \
   --with-http_ssl_module \
   --with-http_v2_module

# 输出如下信息说明编译配置没问题
Configuration summary
  + using PCRE library: ../pcre-8.43
  + using OpenSSL library: ../openssl-1.0.2s
  + using zlib library: ../zlib-1.2.11

  nginx path prefix: "/root/nginx"
  nginx binary file: "/root/nginx/sbin/nginx"
  nginx modules path: "/root/nginx/modules"
  nginx configuration prefix: "/root/nginx/conf"
  nginx configuration file: "/root/nginx/conf/nginx.conf"
  nginx pid file: "/root/nginx/logs/nginx.pid"
  nginx error log file: "/root/nginx/logs/error.log"
  nginx http access log file: "/root/nginx/logs/access.log"
  nginx http client request body temporary files: "client_body_temp"
  nginx http proxy temporary files: "proxy_temp"
  nginx http fastcgi temporary files: "fastcgi_temp"
  nginx http uwsgi temporary files: "uwsgi_temp"
  nginx http scgi temporary files: "scgi_temp"

$ make
$ make install
如上所示,编译之后nginx将会被安装到“/root/nginx”路径下。
[root@localhost ~]# pwd
/root
[root@localhost ~]# ll nginx
total 4
drwxr-xr-x. 2 root root 4096 Nov 16 16:46 conf
drwxr-xr-x. 2 root root   40 Nov 16 16:46 html
drwxr-xr-x. 2 root root    6 Nov 16 16:46 logs
drwxr-xr-x. 2 root root   19 Nov 16 16:46 sbin
nginx的二进制文件在sbin目录下,配置文件在conf目录下。
将编译之后的整个nginx目录进行打包:tar czvf nginx.tar.gz nginx,打包之后的“nginx.tar.gz”就可以作为免安装的nginx二进制包进行使用。
将“nginx.tar.gz”拷贝到目标主机,解压之后就可以使用。
$ tar xzvf nginx.tar.gz
$ cd nginx
# 启动nginx,默认使用的配置文件为conf目录下的nginx.conf
$ ./sbin/nginx
关于nginx免安装包的制作,可以直接使用脚本工具,已经在Ubuntu和CentOS上验证过。
$ git clone https://github.com/nuccch/nginx-portable
$ cd nginx-portable
$ bash compile <nginx-version>
执行完毕之后将会在build目录下生成一个已经编译好的nginx文件:nginx-<version>.tar.gz,直接拷贝到目标主机解压即可使用。
【参考】
https://nginx.org/en/linux_packages.html nginx: Linux packages
https://blog.csdn.net/fdipzone/article/details/77199042 nginx快速查看配置文件的方法
https://nginx.org/en/docs/switches.html Nginx Command-line parameters
https://mp.weixin.qq.com/s/SctV1U_IXfHKpChT4gvaFg Nginx 的介绍及安装
https://juejin.im/post/5d31ec3b5188253a8f27ef5b Linux安装Nginx正确方式
作者:编程随笔
出处:http://www.cnblogs.com/nuccch/
声明:本文版权归作者和博客园共有,欢迎转载,但请在文章页面明显位置给出原文连接。

 浙公网安备 33010602011771号