Postman-Newman接口自动化
使用Newman接口自动化
1.Newman 是 Postman 推出的一个 nodejs 库,可以直接在命令行中运行 postman 导出的 json 文件的插件;
2.Newman 可以方便地运行测试集合,可以批量执行 API 测试用例并生成报告
一、环境准备
1安装node.js
进入页面,选择Linux二进制文件(x64)
https://nodejs.org/en/download/
将下载好的压缩包,上传到服务器上,解压
# 解压
tar -xvf node-v10.16.2-linux-x64.tar.xz
# 重命名为node;便于使用
mv  node-v10.16.2-linux-x64 node
# 配置环境变量
vi /etc/profile
# 在文件尾部添加,然后保存
export NODE_HOME=/usr/local/node  #刚才重命名node的路径
export PATH=$NODE_HOME/bin:$PATH
# 使配置的环境变量生效
source /etc/profile
# 检查node是否安装成功,出现版本信息则安装成功
node -v
2.安装newman
# 输入安装newman命令
npm install -g newman
# 检查newman是否安装成功
newman -v
# 查询newman安装位置,后面需要用到
whereis newman
3.安装html测试报告
# 清爽型html接口测试报告
npm install -g newman-reporter-html --registry https://registry.npm.taobao.org/
# 具体型html接口测试报告
npm install -g newman-reporter-htmlextra --registry https://registry.npm.taobao.org/
二、Newman命令
1.命令解释
newman run 运行newman的命令,有以下选项
- -e 加载环境变量的数据
- -g 加载全局变量的数据
- -n 用例执行次数,默认运行次数为1次
- --reporters html,junit,json 指定生成报告的类型
- --folder 运行collection中的指定folder
2.命令例子
# 举例,所有选项都用上;真实的情况往往不需要所有选项都用上,看具体需求!
# newman将执行case.json用例,
# 加载的环境是env.json,
# 全局变量为global.json,
# 执行用例次数2次,
# 生成html报告,
# 指定执行case.json中f1目录下的case;不指定则case.json下所有用例
newman run case.json -e env.json -g global.json -n 2 --reporters html --folder f1
# 当newman命令报错,newman命令执行需要输入全路径执行
# whereis newman,获取newman安装位置,usr/local/newman
usr/local/newman run case.json -e env.json -g global.json -n 2 --reporters html --folder f1
三、准备测试用例
1.常用断言
在Postman工具中,用Tests实现断言
Tests可以写在Collections集合、Collection-folder目录、Collection-folder-api具体接口
判断响应头内容类型
pm.test("Content-Type header为 application/json", () => {
  pm.expect(pm.response.headers.get('Content-Type')).to.eql('application/json');
});
判断响应时间
tests["响应时间小于200毫秒"] = responseTime < 200;
判断响应状态code=200
pm.test("Status code is 200", function () {
    //预期响应结果为200
    pm.response.to.have.status(200);
});
判断响应体是否有xx数据
预期响应结果
{
    "code": 200,
    "msg": "ok",
    "result": null
}
Tests
pm.test("请求的响应体中msg的值为ok", () => {
  //解析成JSON数据
  const responseJson = pm.response.json();
  //pm.expect为测试结果消息提供不同的格式,实现最有用的输出
  //将解析成JSON的数据下的msg 与 字符串"OK" 作判断
  pm.expect(responseJson.msg).to.eql("ok");
});
判断响应体是否有xx数据(2)
目的:拿到响应结果result-stbtype为"B760DN_3"与预期结果,作判断
预期响应结果
{
    "code": 200,
    "msg": "ok",
    "result": [
        {
            "stbType": "HG680-TD4WH",
            "tvmsType": "ajax",
            "enable": false,
            "provider": "烽火",
            "loopTime": 1000,
            "reconnectType": null,
            "timeout": 60
        },
        {
            "stbType": "B760DN_3",
            "tvmsType": "ajax",
            "enable": true,
            "provider": "中兴",
            "loopTime": 1000,
            "reconnectType": null,
            "timeout": 60
        }
}
Tests
pm.test("HG680-TD4WH的enable状态为200且状态为false", () => {
  //解析成json数据
  const responseJson = pm.response.json();
  //将json数据下result中索引为1的数据下的stbType取到,与"B760DN_3",作判断
  pm.expect(responseJson.result[1].stbType).to.eql("B760DN_3");
});
使用多个断言
//断言都通过,用例才算通过
pm.test("HG680-TD4WH的enable状态为200且状态为false", () => {
  const responseJson = pm.response.json();
  pm.expect(responseJson.result[0].stbType).to.eql("HG680-TD4WH");
  pm.expect(responseJson.result[0].enable).to.eql(false);
});
2.导入外部数据
导入外部数据(txt、csv、json)
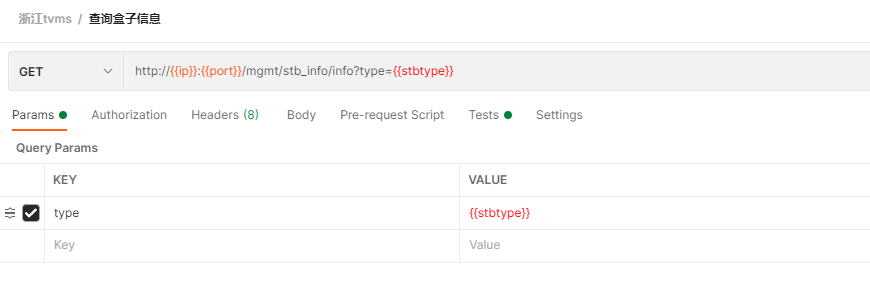
a.查询不同盒子信息,使盒子stbtype参数化
b.本地新建data.txt文档,添加不同类型盒子
stbtype
TY1608
B860A
IP906H_59T2
B760DN_3
fsdk_0123
c.添加Pre-request Script
//data对应创建的data.txt
//stbtyepe对应data.txt第一行stbtype
//若需要添加多个参数在data.txt文档中以,号分隔
//id,stbtype
//1,TY1608
var stbtype=data.stbtype
d.Postman内置Runner执行(也可用Newman)
- 选择postman工具右下角Runner

- 选择指定case
- 添加data.txt文件
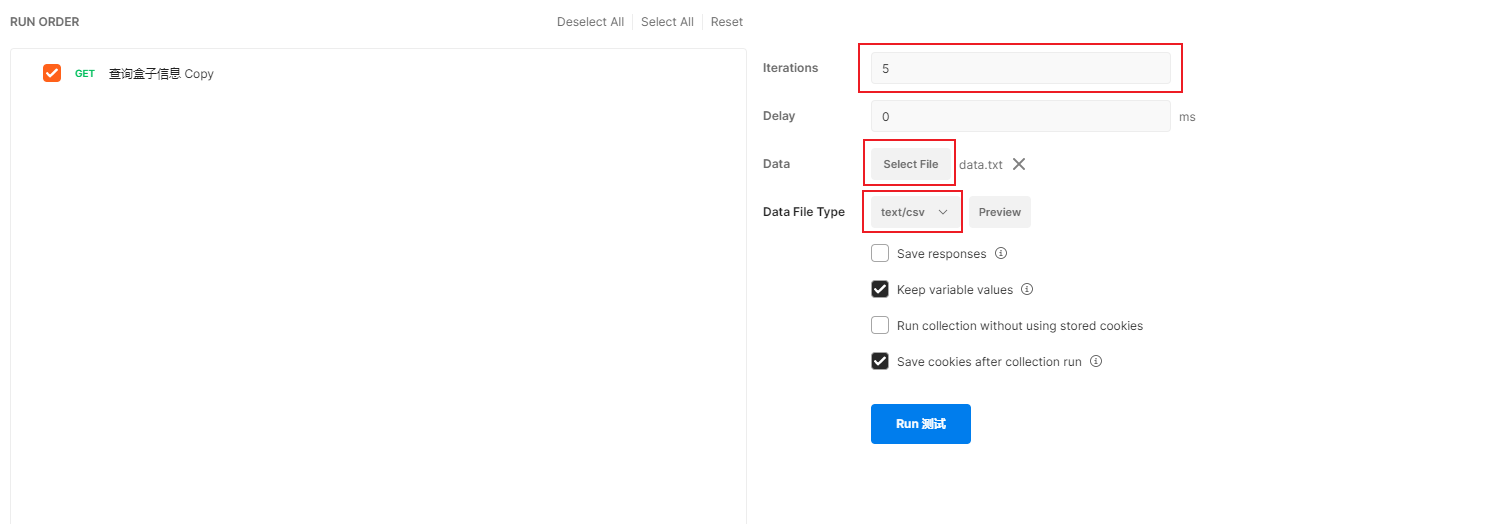
Date:添加本地data.txt文件
Date File Type:选择text/csv
Iteration:执行case次数;data.txt添加了5个参数值,所以这里执行5次
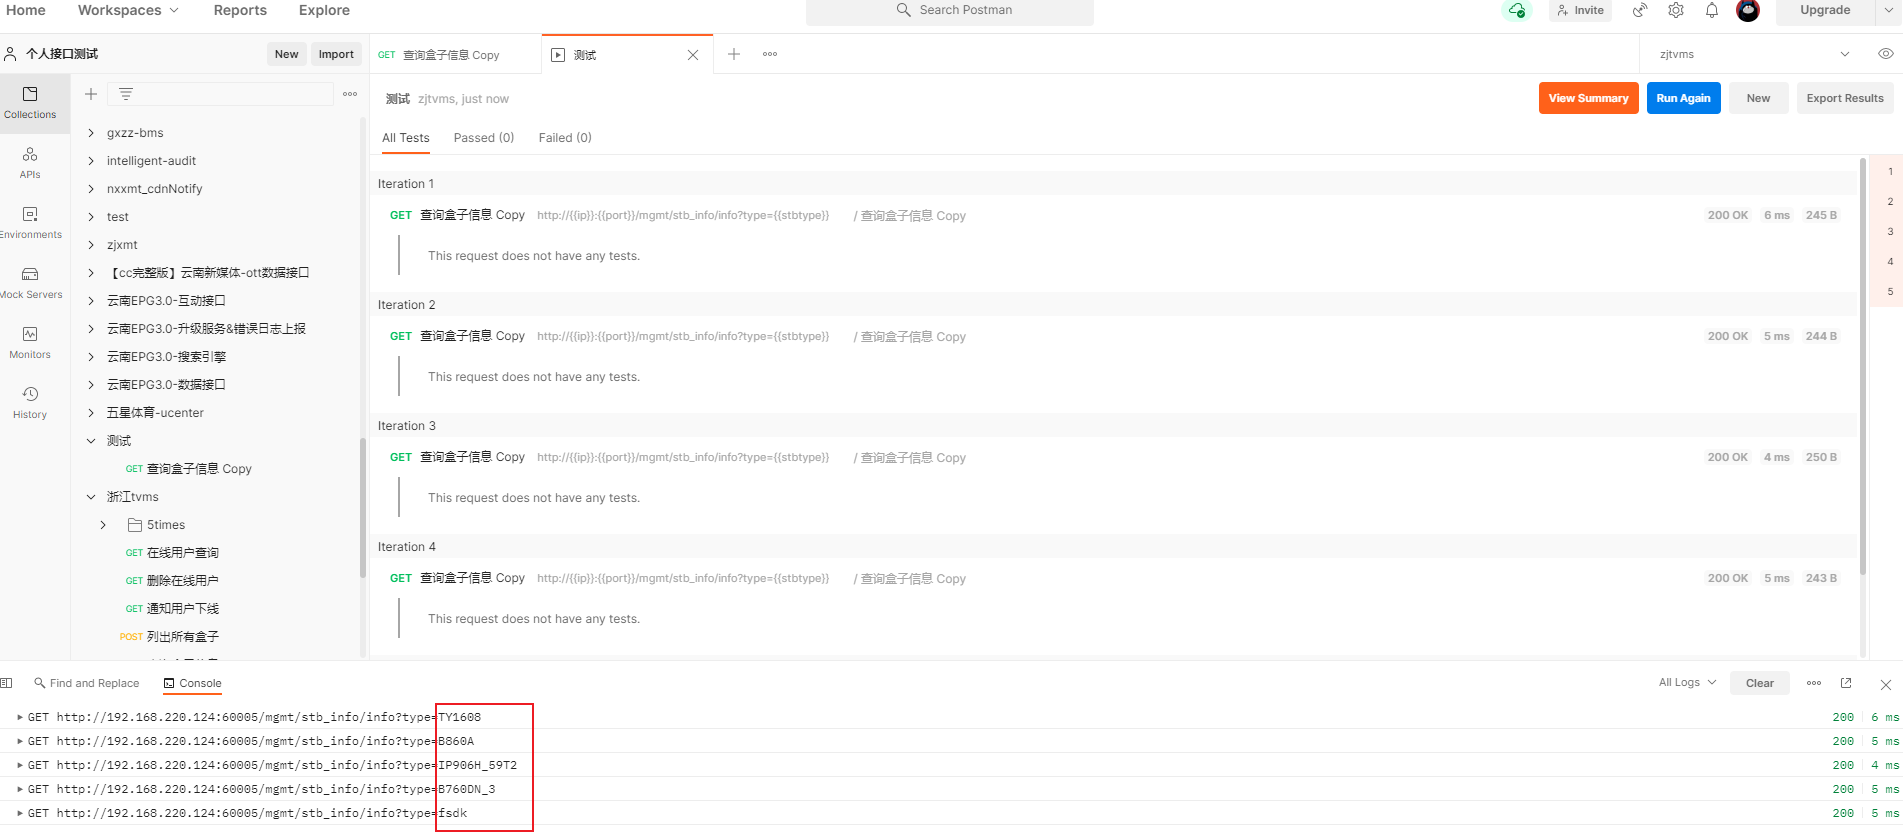
- 自动执行接口用例
四、使用Newman
1.测试数据准备
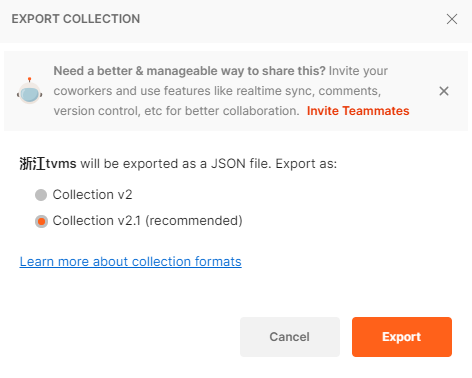
- 导出postman用例
选择指定用例集合,导出Collection v2.1
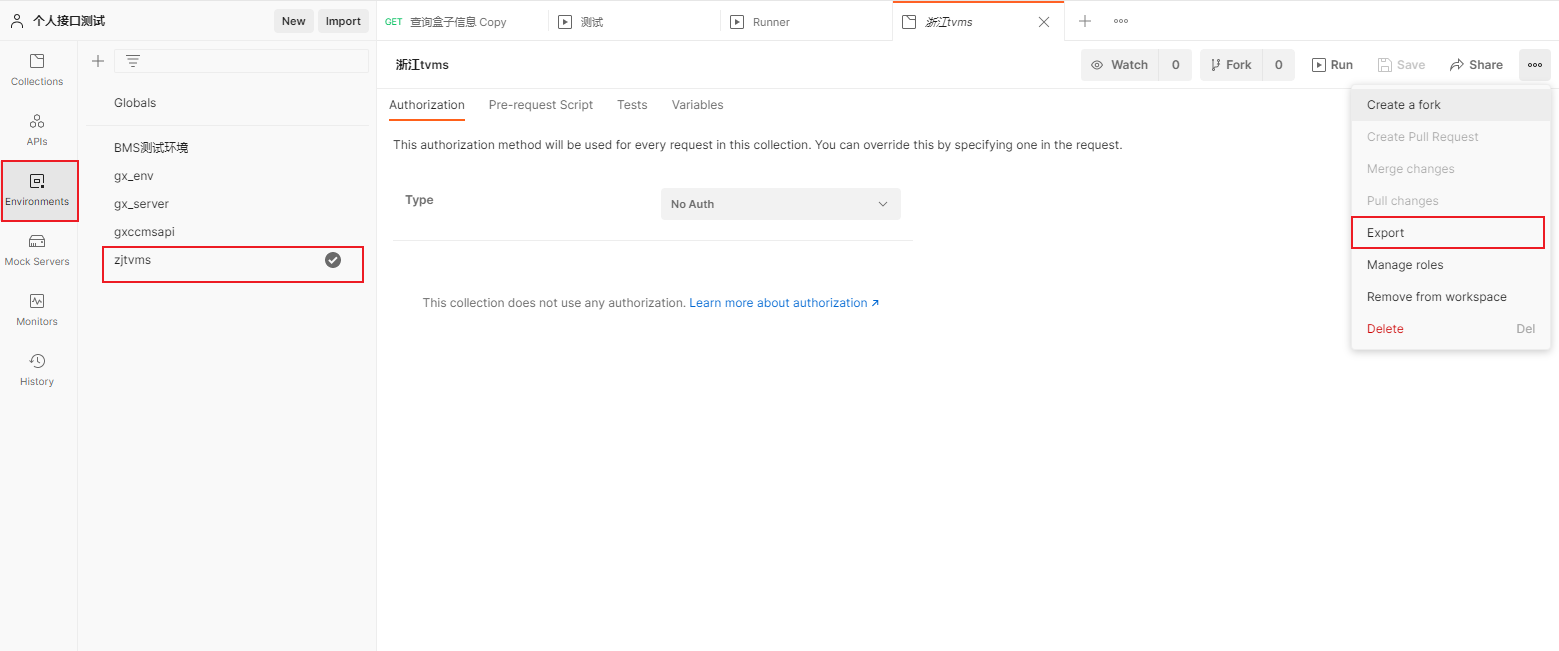
- 导出环境/全局变量
进入Environments-指定环境-export
- 准备测试数据(csv/text/json)
- 将准备的数据上传到服务器中
2.执行Newman命令
- 进入服务器,上传数据的目录下
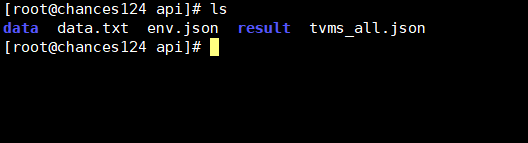
- 执行newman命令
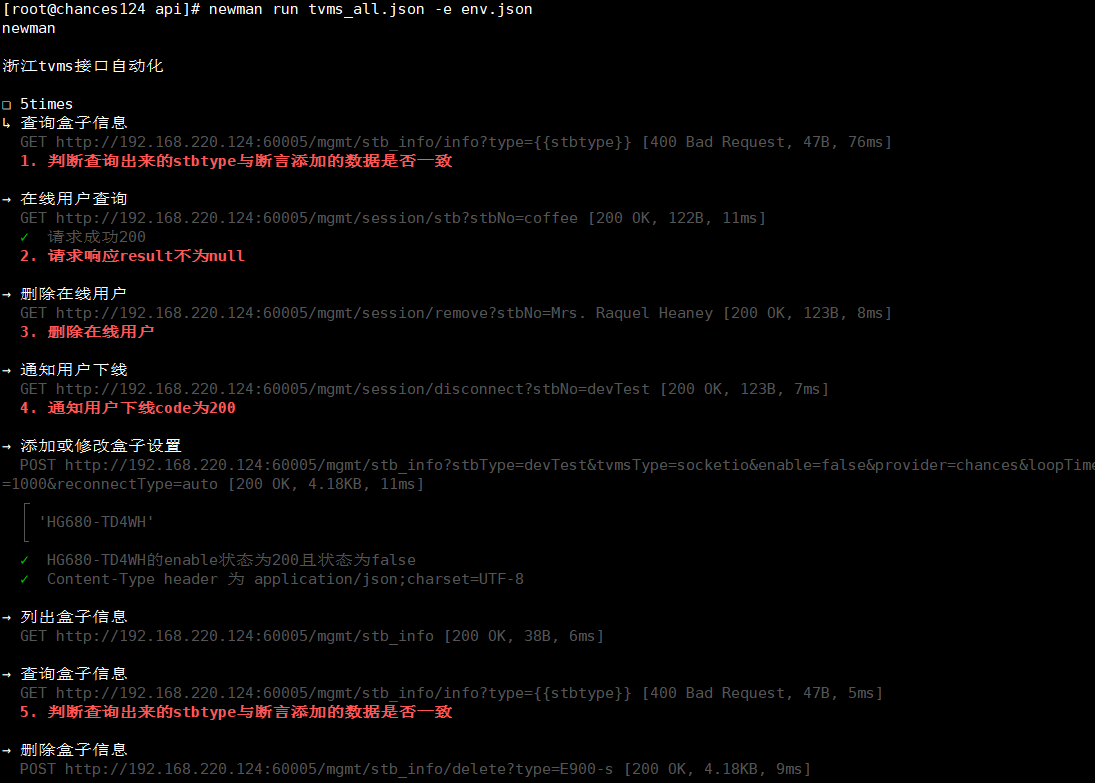
# 运行tvms_all.json用例,指定环境env.json
newman run tvms_all.json -e env.json
- 输出接口测试结果
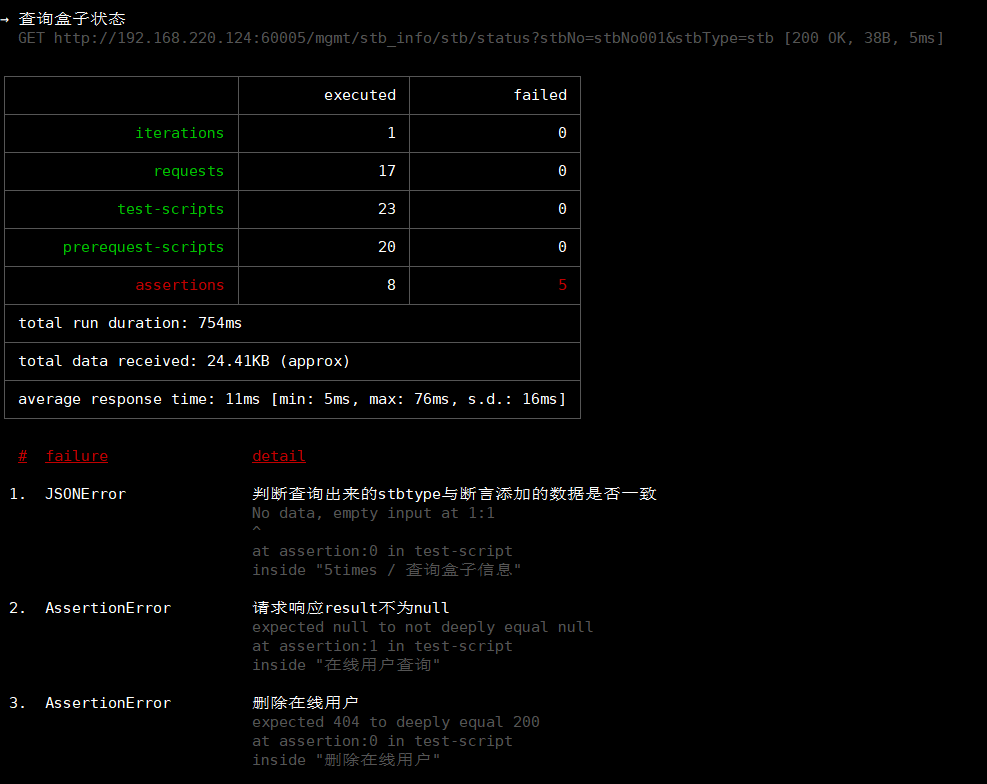
3.接口测试输出结果解释
iterations:测试用例执行次数
requests:执行请求次数
test-scripts:测试脚本
prerequest-scripts:预请求脚本
assertions:断言
executed:已执行
failed:已失败
total run duration:整个脚本执行时长
total data received:所有返回数据大小
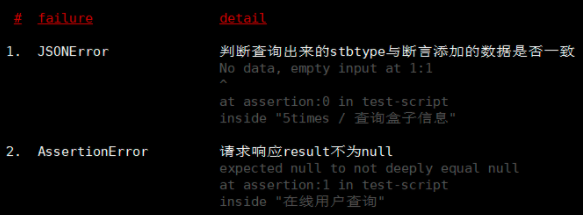
average response time:平均响应时间
具体断言失败的case原因
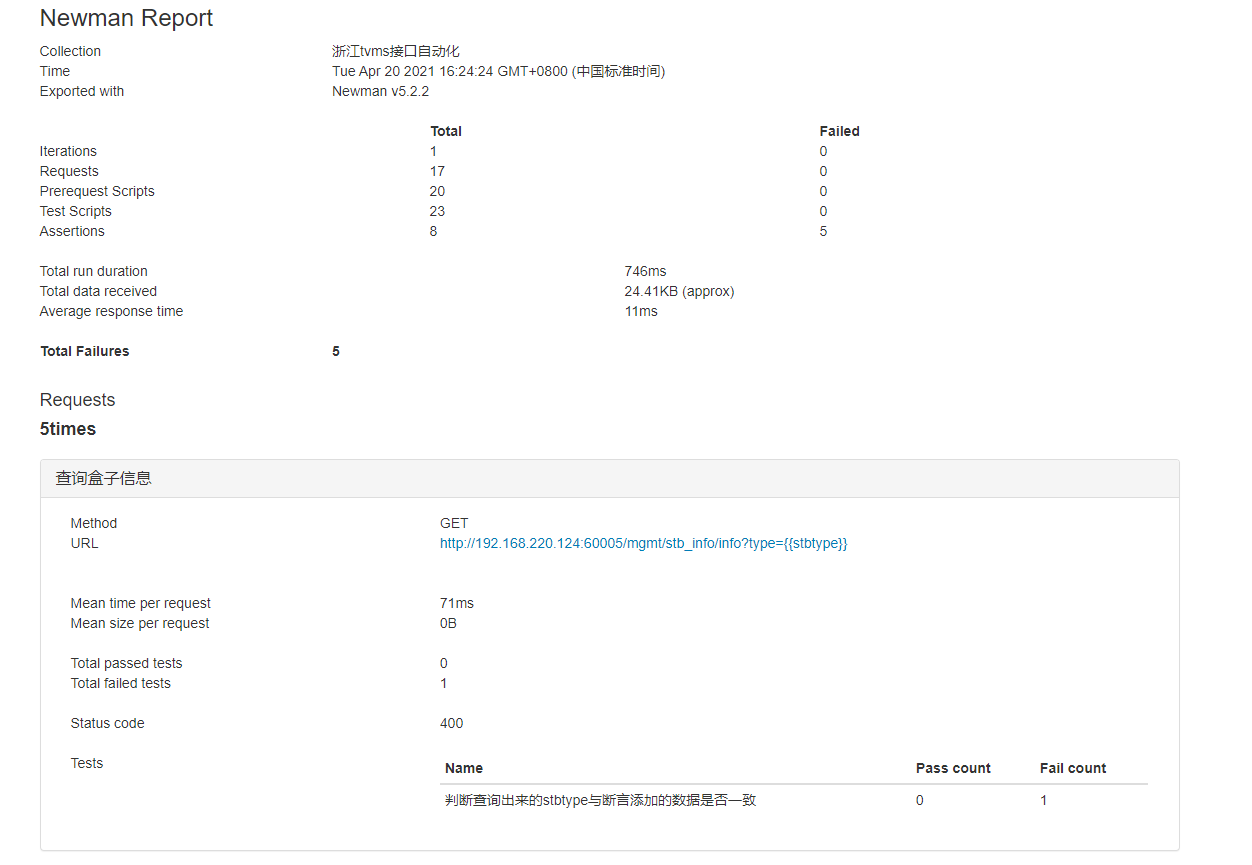
4.生成接口测试html报告
- 执行newman命令
# 指定执行的case为tvms_all.json,指定环境为env.json
# 指定生成报告类型为html,使用--reporter-html-export类型html报告
# ./Report.html 指定生成html报告的目录
newman run tvms_all.json -e env.json -r html --reporter-html-export ./Report.html
清爽型html报告
不支持在 Docs 外粘贴 block
- 另一种风格html报告
# 指定执行的case为tvms_all.json,指定环境为env.json
# 指定生成报告类型为html,使用--reporter-htmlextra-export类型html报告
# ./Report.html 指定生成html报告的目录
newman run tvms_all.json -e env.json -r htmlextra --reporter-htmlextra-export ./Report1.html
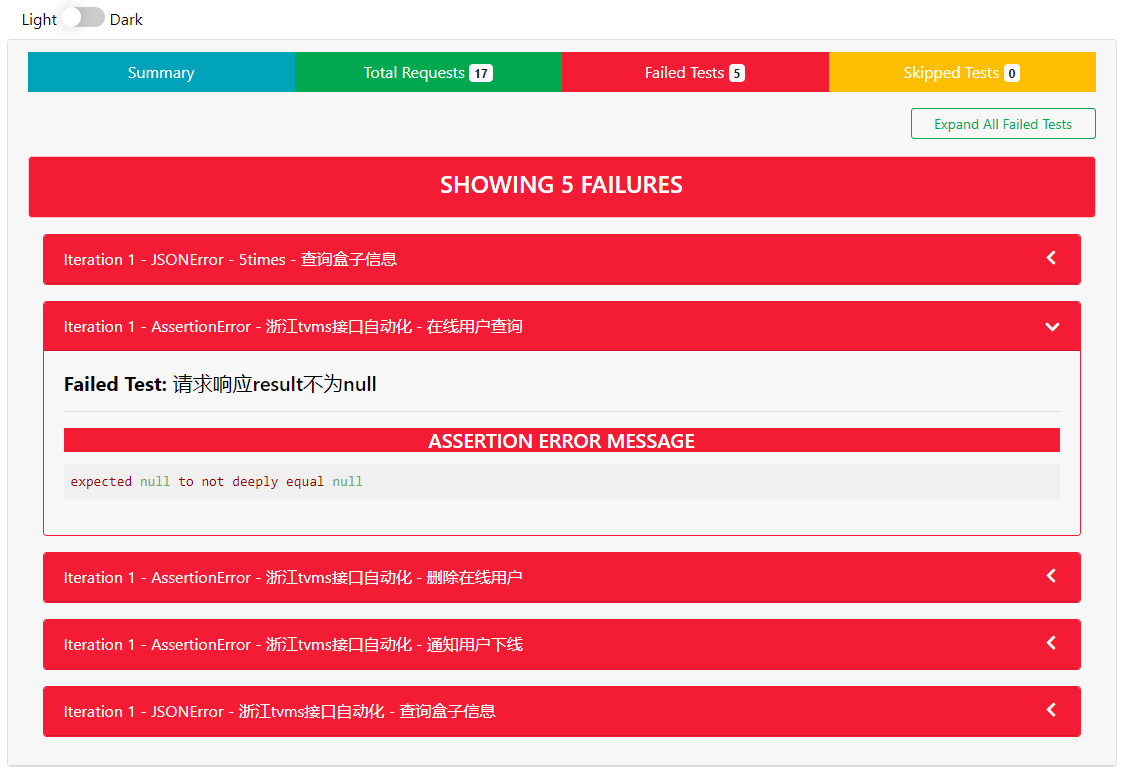
- 实时展示接口测试进度

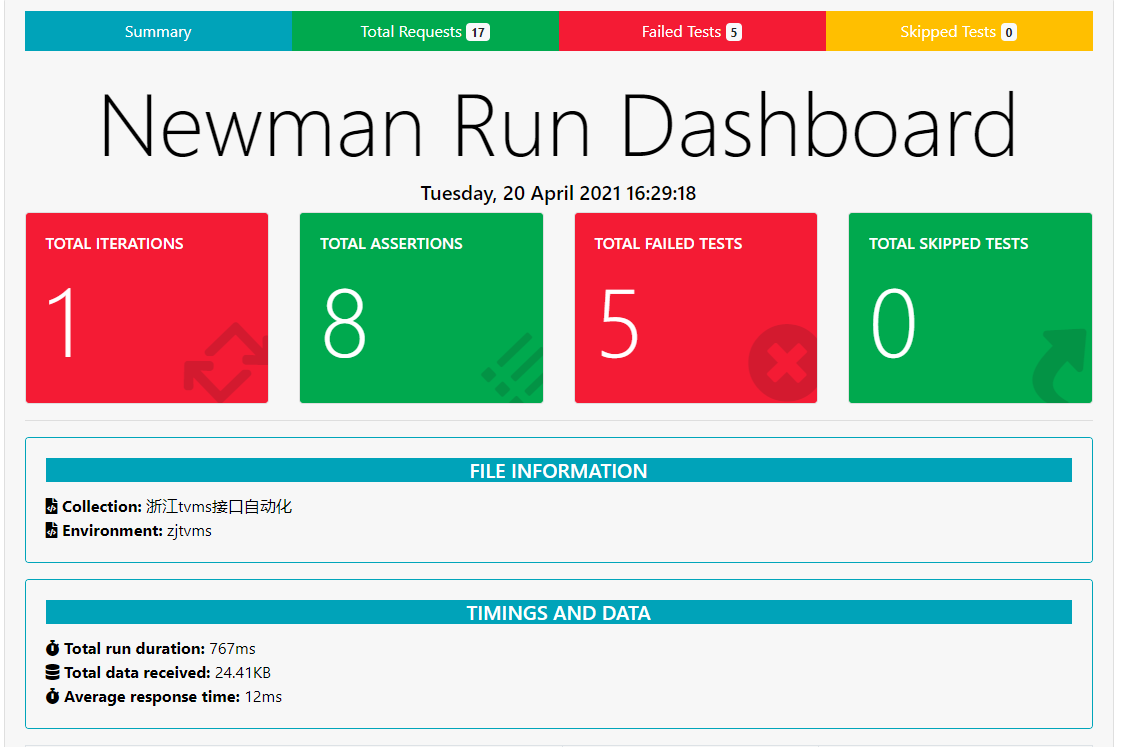
具体型html报告
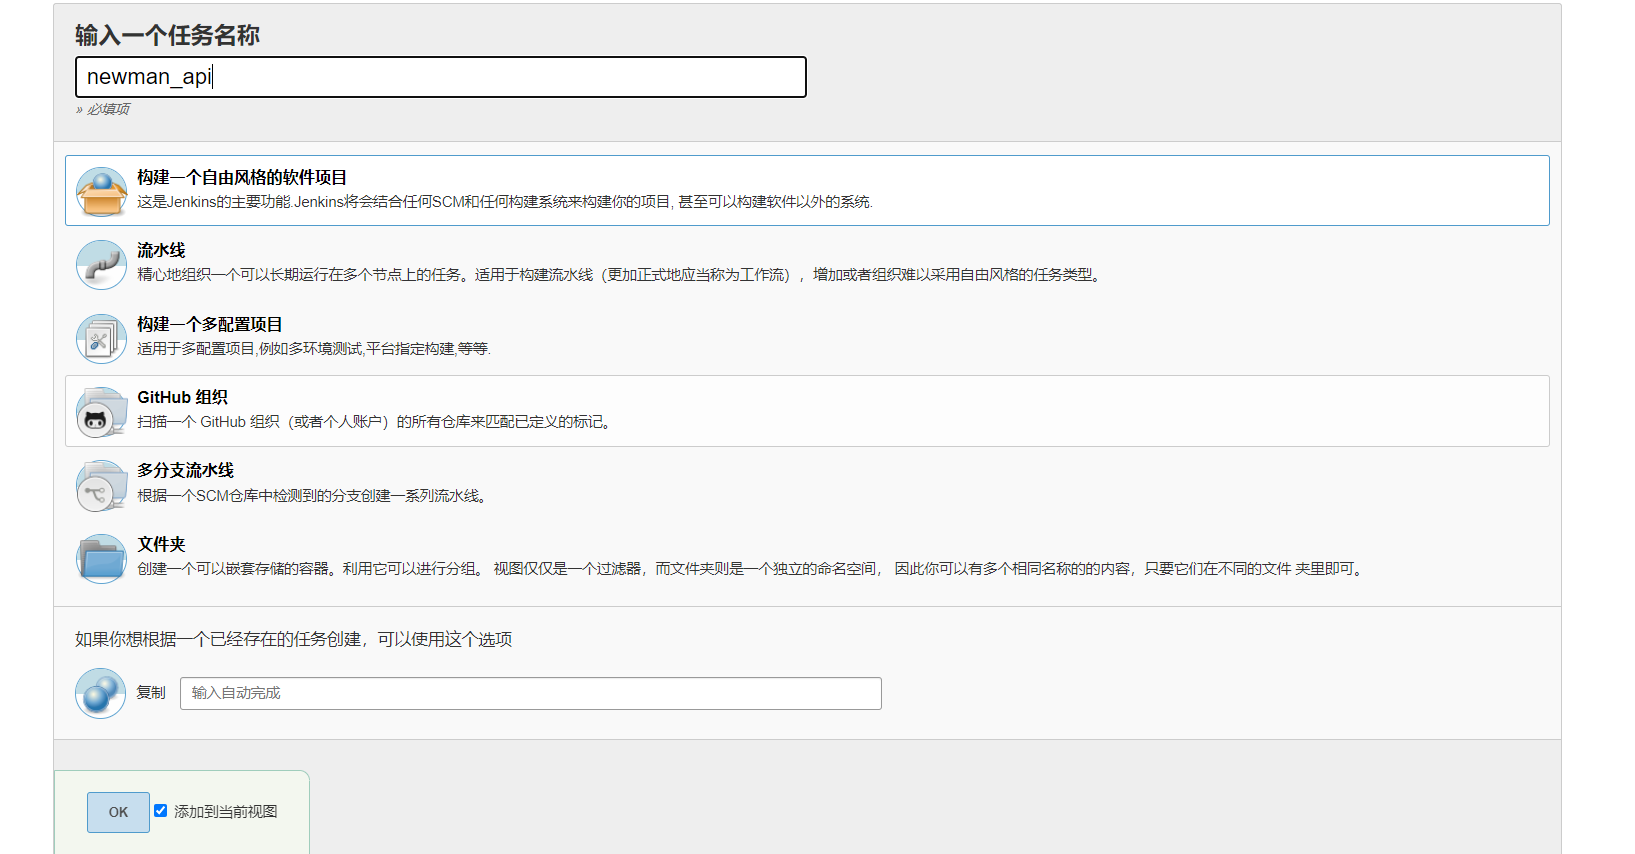
五、Jenkins+Newman自动化接口测试
1.Jenkins新建任务
2.配置Jenkins
进入newman_api项目,添加执行shell,保存
# 生成项目时间戳
dates=`date +"%Y%m%d%H%M"`
# 指定项目名称
projects="gx_tvms"
# 指定运行的case文件
collections="tvms_all.json"
# 指定运行的环境
env="env.json"
cd /data/test/dingkw/api
# 执行newman命令,清爽型html报告
#/data/test/dingkw/node/bin/newman run ${collections} -e ${env} -r html --reporter-html-export /data/test/dingkw/api/result/${projects}${dates}.html|| true
# 执行newman命令,具体型html报告
/data/test/dingkw/node/bin/newman run ${collections} -e ${env} -r htmlextra --reporter-htmlextra-export /data/test/dingkw/api/result/${projects}${dates}.html|| true
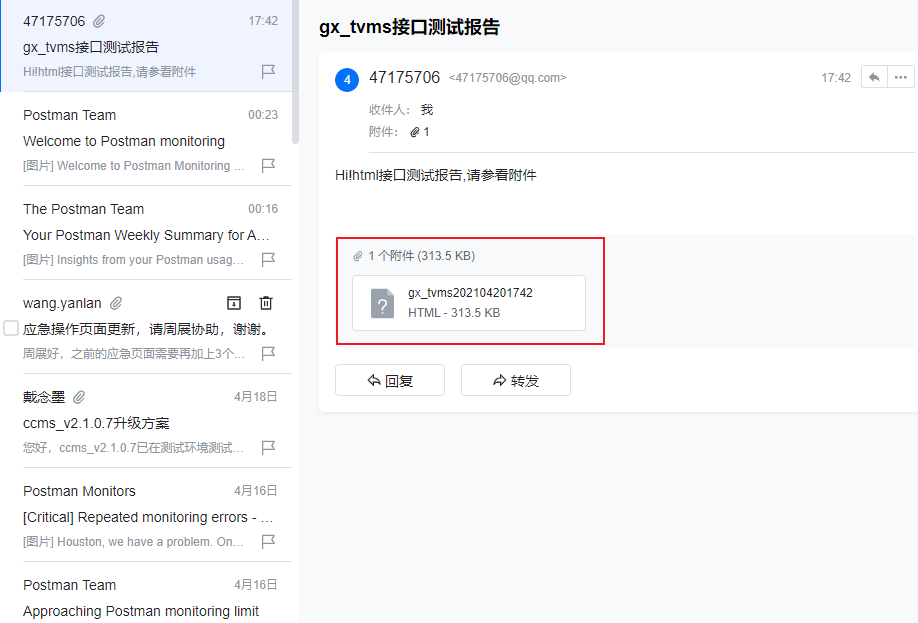
# 将生成的html报告发给指定邮箱
echo Hi,html接口测试报告,请参看附件 | mail -s "${projects}接口测试报告" -a /data/test/dingkw/api/result/${projects}${dates}.html dingkewei@chances.com.cn|| true
3.生成接口测试报告到邮箱
4.Jenkins个性化配置
定时构建
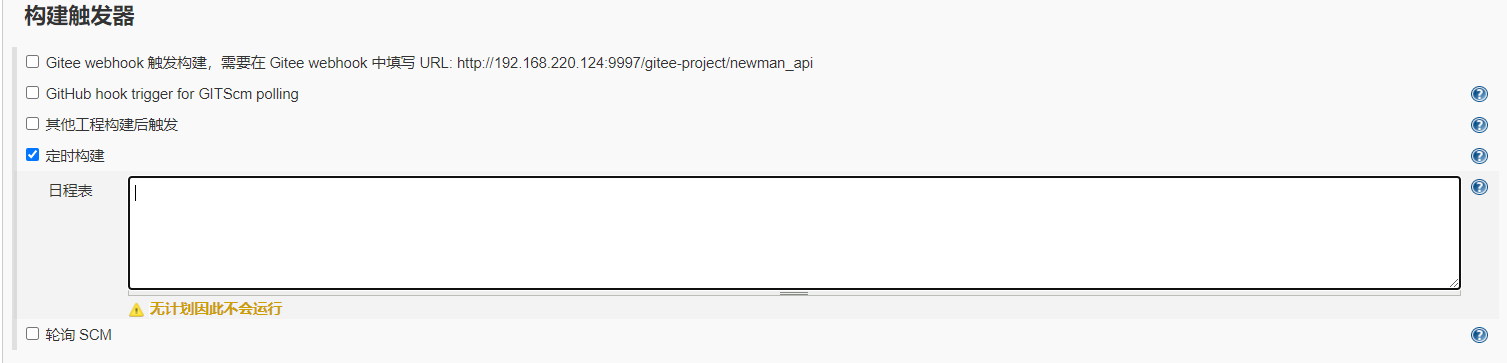
其他工程构建后触发


 浙公网安备 33010602011771号