

Django学习笔记2
In the last part, we’ve set up a really simple static website even without an html file. But hold on, let’s make it dynamic first that we can interact with the web. Now start our journey of setting up database.>3
1.Set up database
Before I start the Django project, I have no concept about database. I’m a totally green hand in this field. But there is nothing to worry. Go for it step by step, be patient. There are so many database but we are not going to configure them. It is definitely more convenient for us green hand to use a Django built-in database, SQLite to wet our appetite. Let’s see what is waiting for us.
When we run python manage.py runserver, we will have this warning:![]()

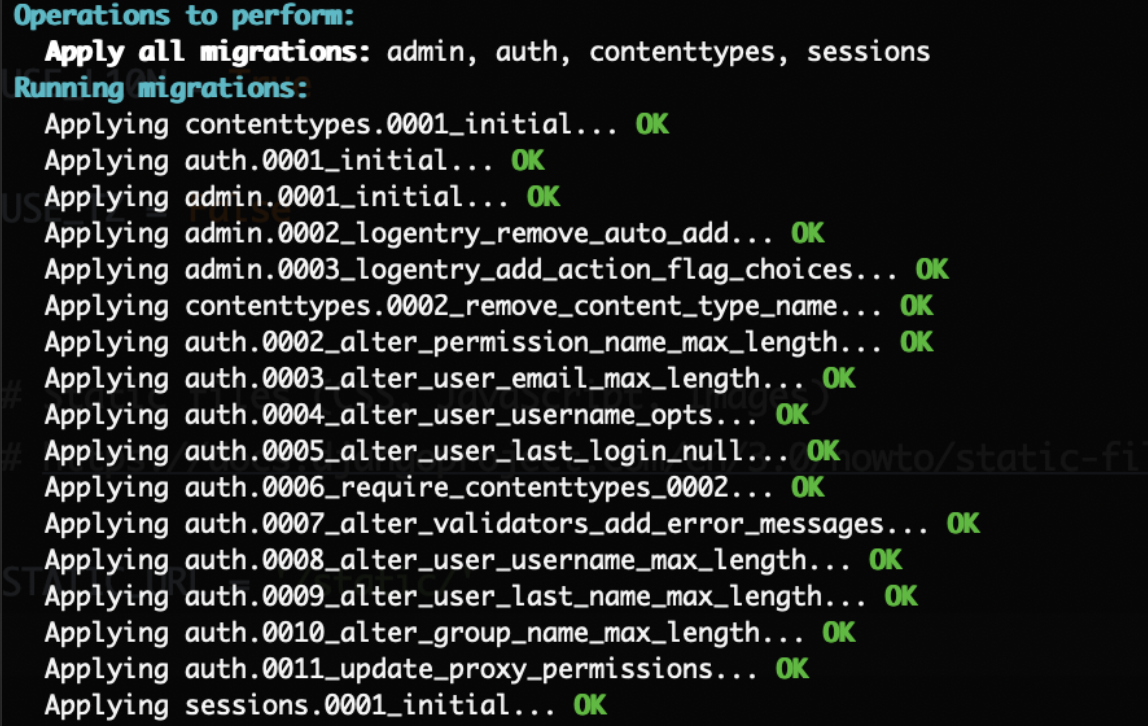
So confused, right? We have done nothing, but why this will pop out. What is the migration? Why we have to run python manage.py migrate to fix it. But anyway, we know this it related to the apps. Then what is the relation between them? Leave the question here and go ahead.
Following the command python manage.py migrate, we’ve fixed this warning. ![]()
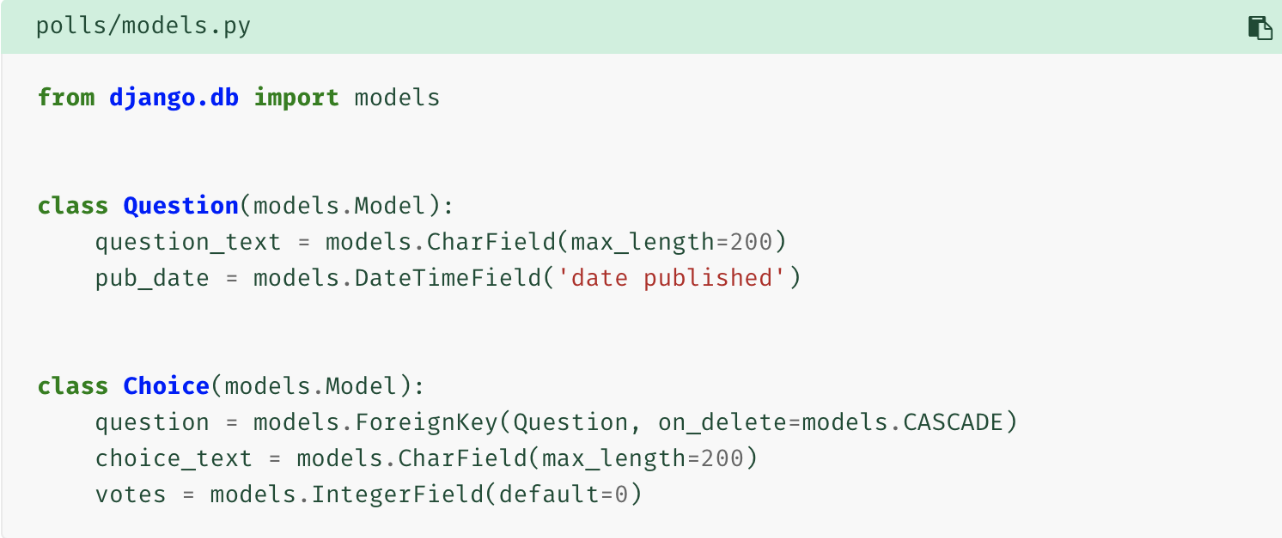
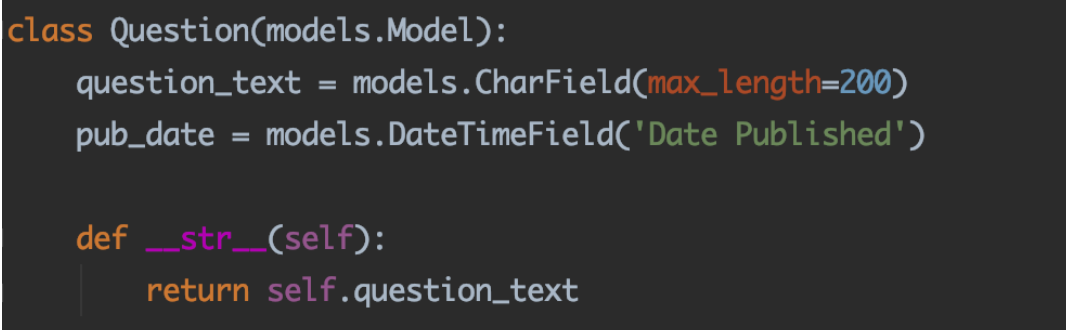
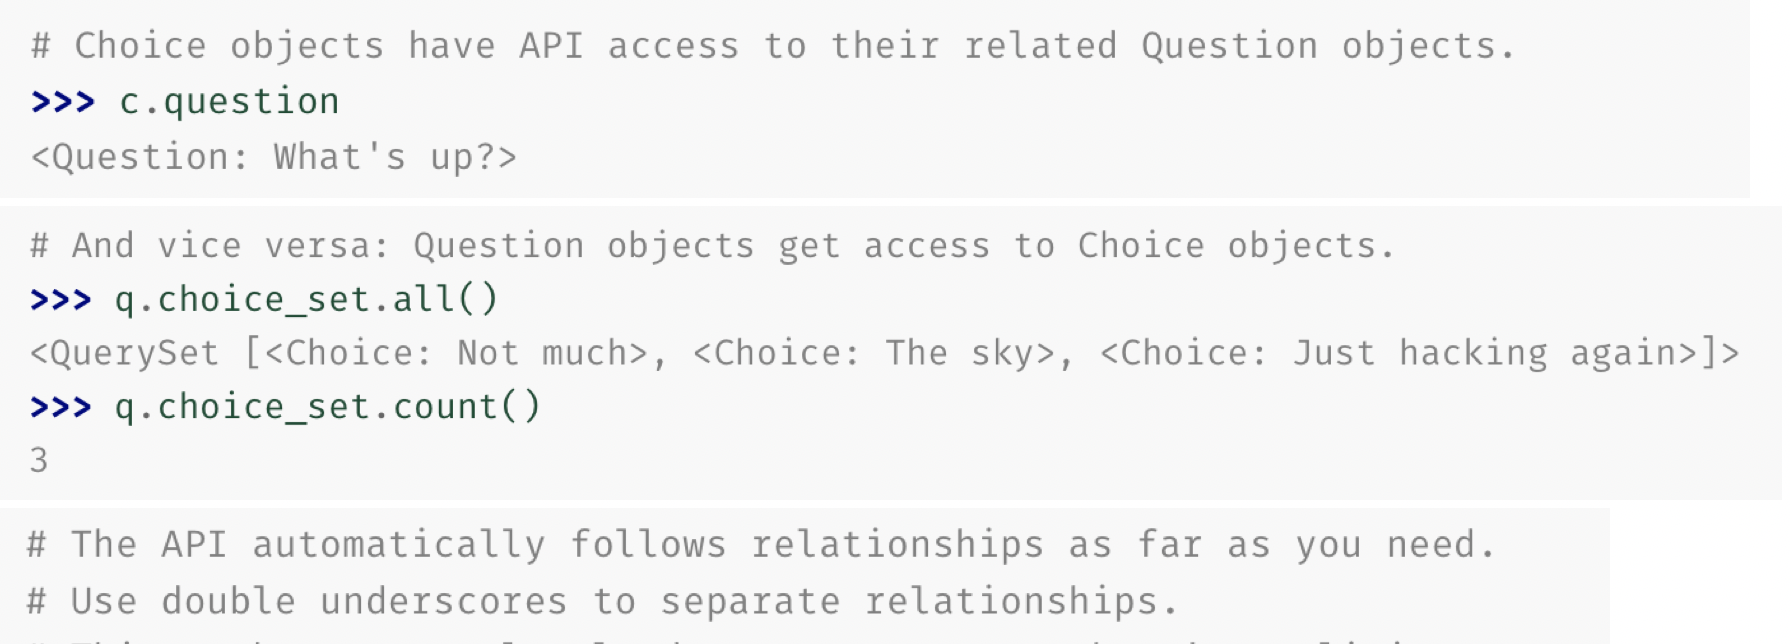
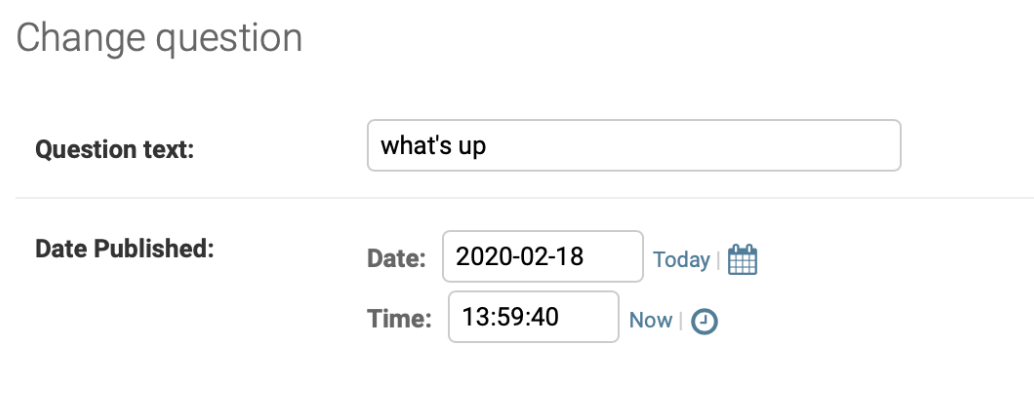
Back to our goal, a website! Give an instance of a polls website, we created an app named polls in the last part, and we’ve done much preparation for it. But we haven’t created any polls functions. Whoops. Okay, let’s collect our mind. A polls app needs questions and choices! Then where to write it? We have to choose a place where it will bind with the database so that we can store, edit and see the data. Luckily, Django has build-in ORM(object relational mapping) framework which can correspond the questions and choices, what we call models to the database. Look at the app directory, we will see a models.py file where will place the models of question and choice. Question_text is an instance of character field which we use for short text. Max_length must be pointed out. Pub_date is to store the publication time. So is the Choice class. Notice that choices is associated with the question. Using the Foreignkey to state this relationship.
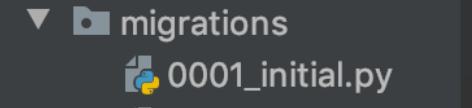
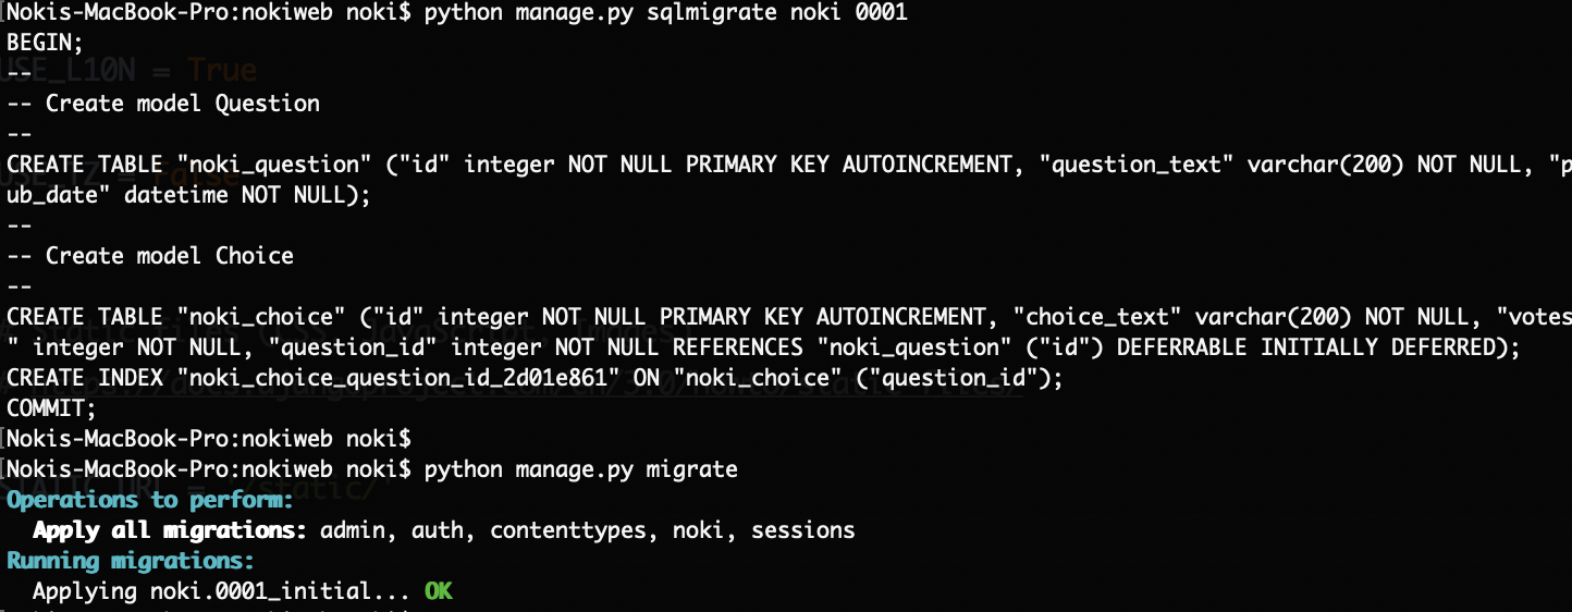
Run python manage.py makemigrations polls to store changes of models as a migration. Then a file is created:
Run python manage.py migrate to apply changes, namely migration to database.
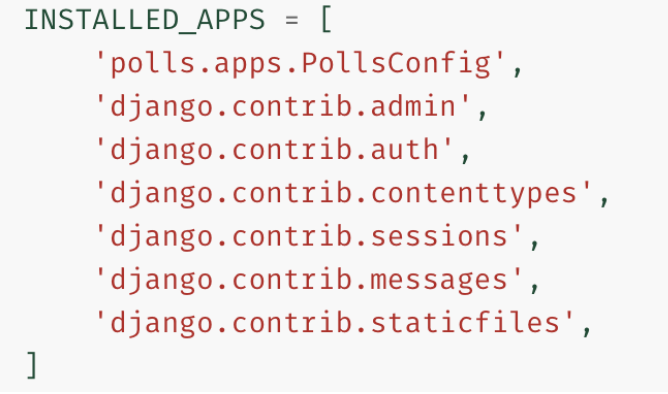
Oh no!!! Wait, we forget one thing!!! Recall the migrate we did on the top. Those apps, right? And those apps name appear in the settings.py INSTALLED_APPS. Similar, we need to do the same thing with polls. Cuz we only write models in the app directory, we have to state it in the project directory so that the database can retrieve them. Code polls.apps.PollsConfig to fix this.
What is the meaning of the characters after the polls? A blogger explained to me as follows:
Before we run this, we can try python manage.py sqlmigrate polls 0001.
I’m confused with the explanation:

But anyway we can infer that we migrate the migration 0001_initial.py in polls to database.
Why we have to make migrations first and then apply them? It’s for the sake of version control system. I don’t have much feeling about this now. But the database is set done anyway.
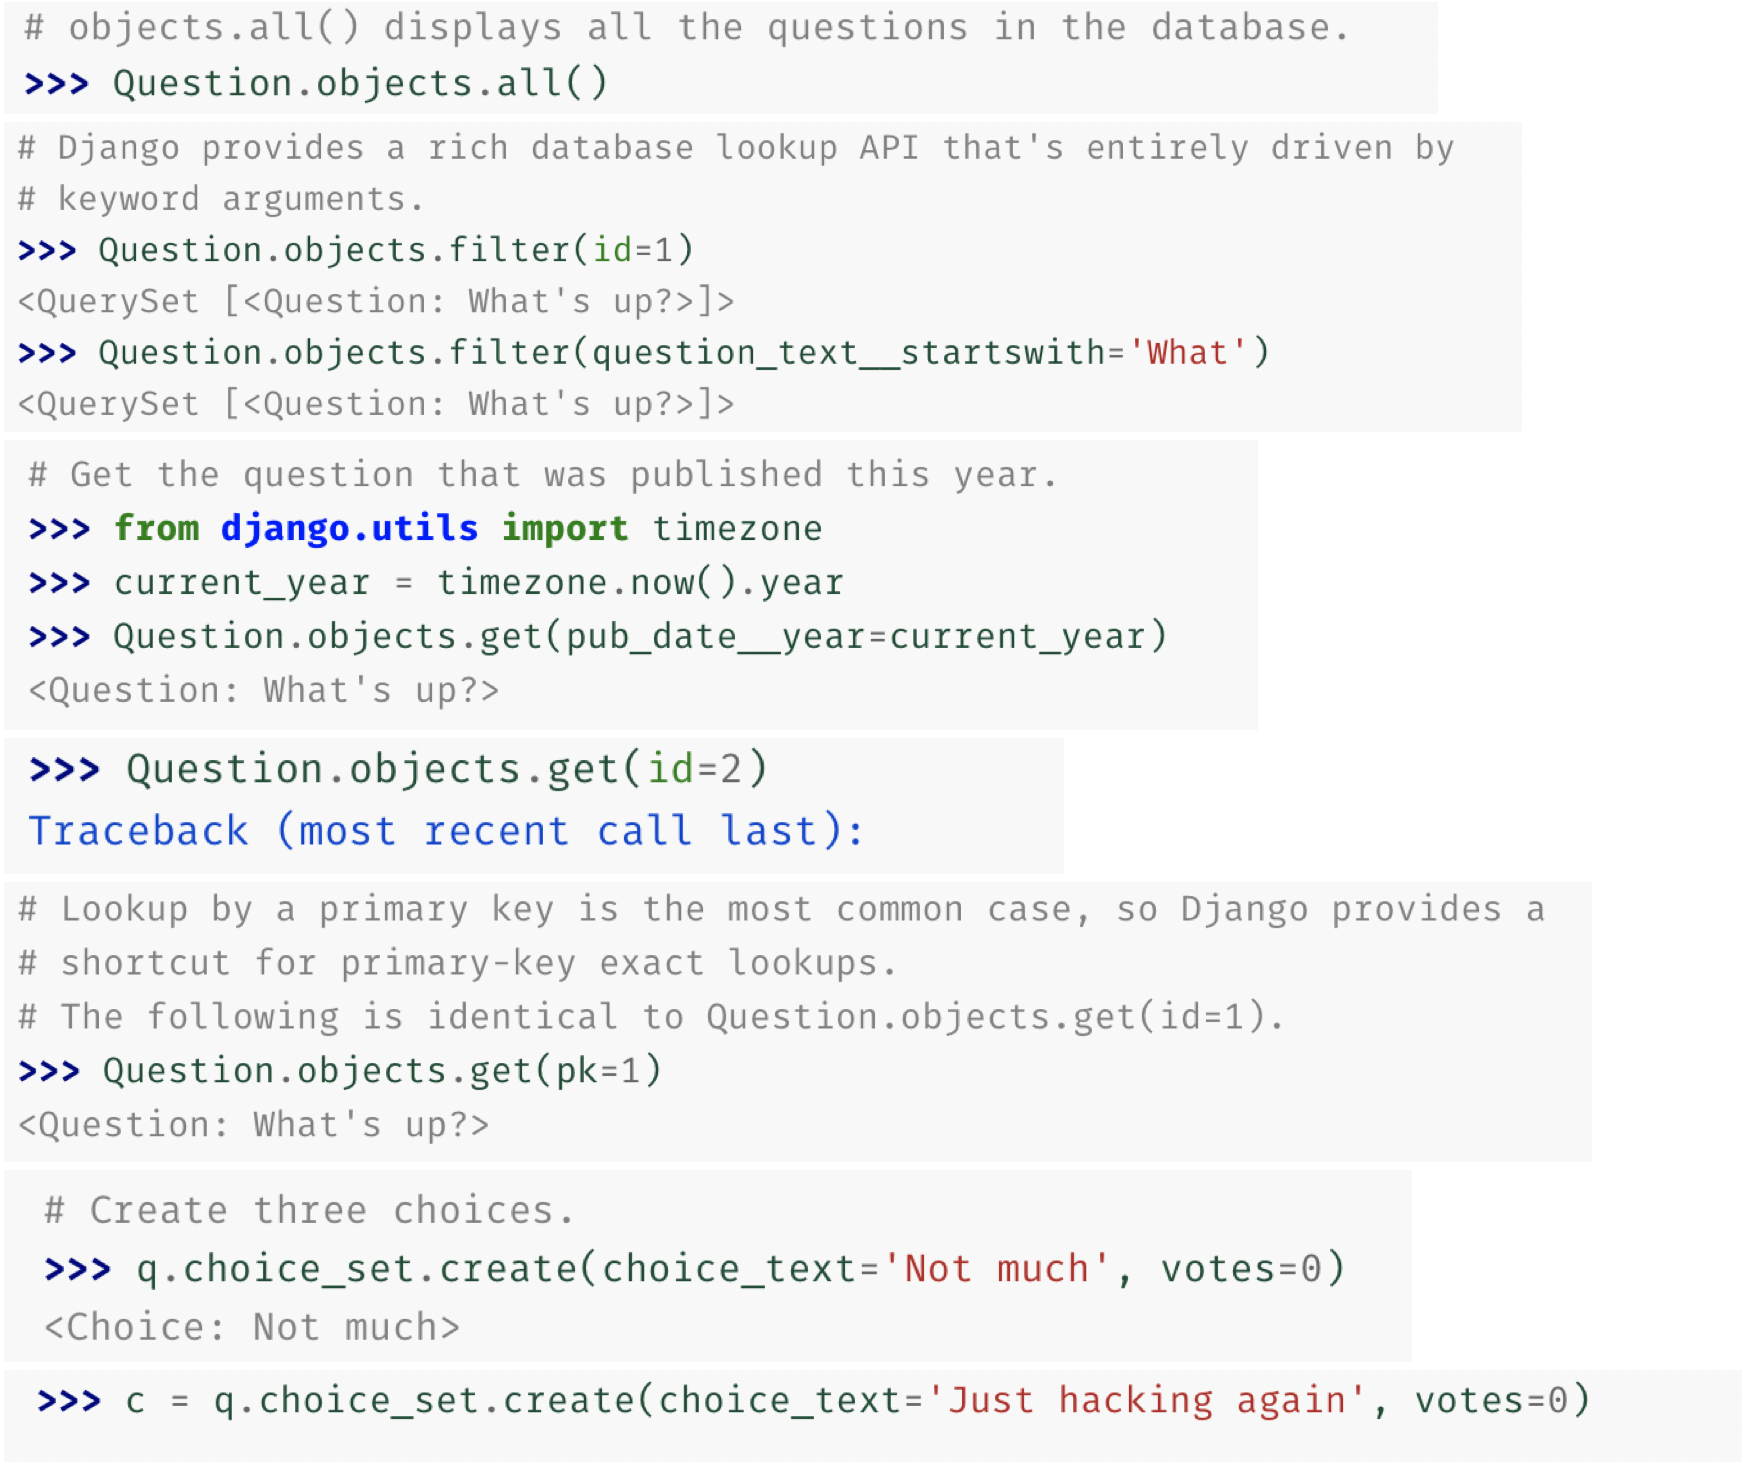
2.Try the model API
Let’s open the python shell, but we also have to use manage.py to backup the commands. Run python manage.py shell.
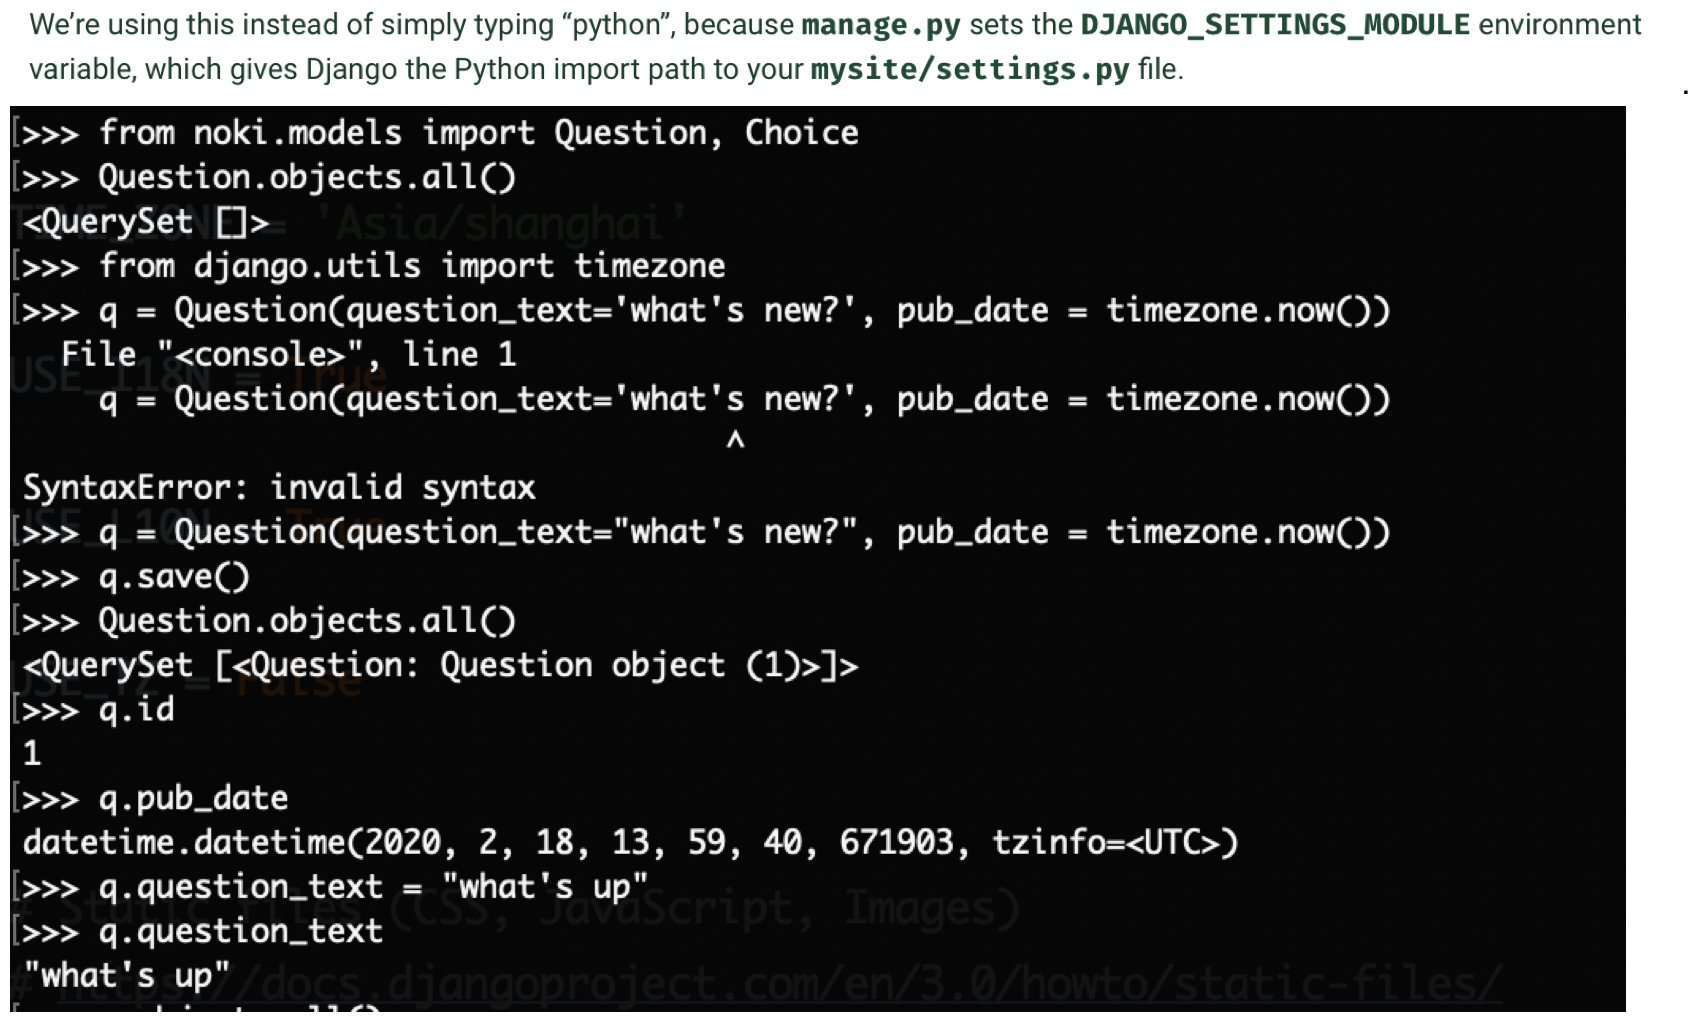
We encounter some troubles while running these.
(1)Question.objects.all() can’t show the question itself? Cuz when we access the Question class, it doesn’t return anything. We can use __str__() to fix it. So does the Choice.
(2)pub_time is wrong??? Which means timezone.now is wrong. Look at the settings.py TIME_ZONE we will see the time follows UTC time. It make sense now that the time is 8 hours after our real publish time. Meanwhile USE_TZ = True will influence it, too.


Run the Question.objects.all() again, it comes out the same situation. Why? Cuz the shell haven't detected the changes. Reopen the shell and code the import things, then run the command again. We can see the question now and the time is right.
Run and take a see~~~
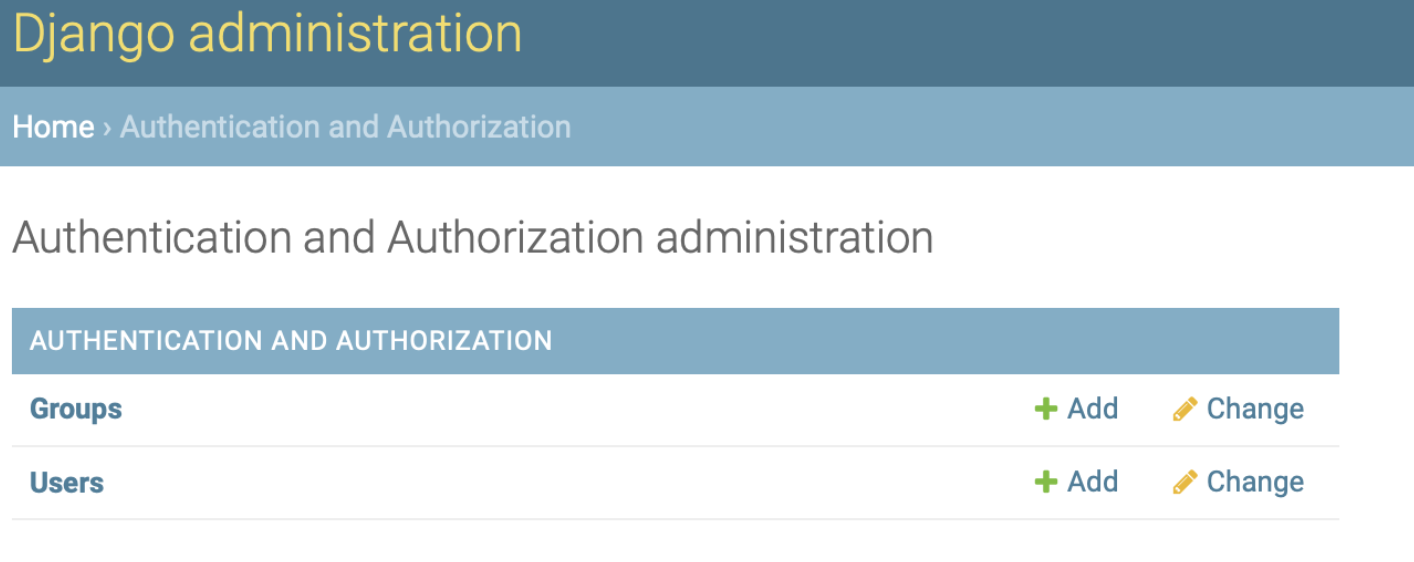
3.Create Django administration
Open the localhost:8000/admin/, we will see an interface:
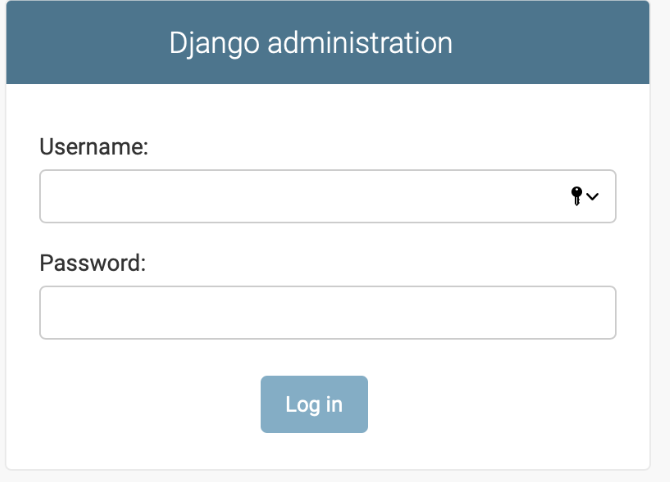
It’s the administration system. Why we need this?
So now we need to create an admin user. Run python manage.py createsuperuser. Then set up everything.
We need to run python manage.py runserver so that we can enter the page.
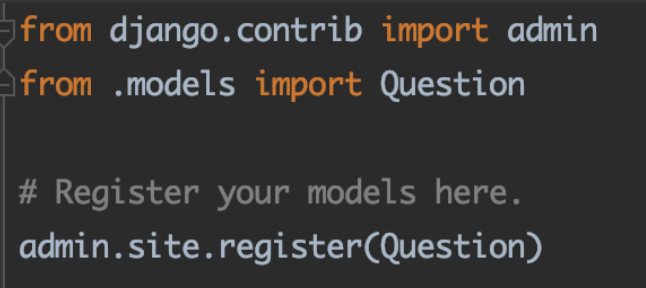
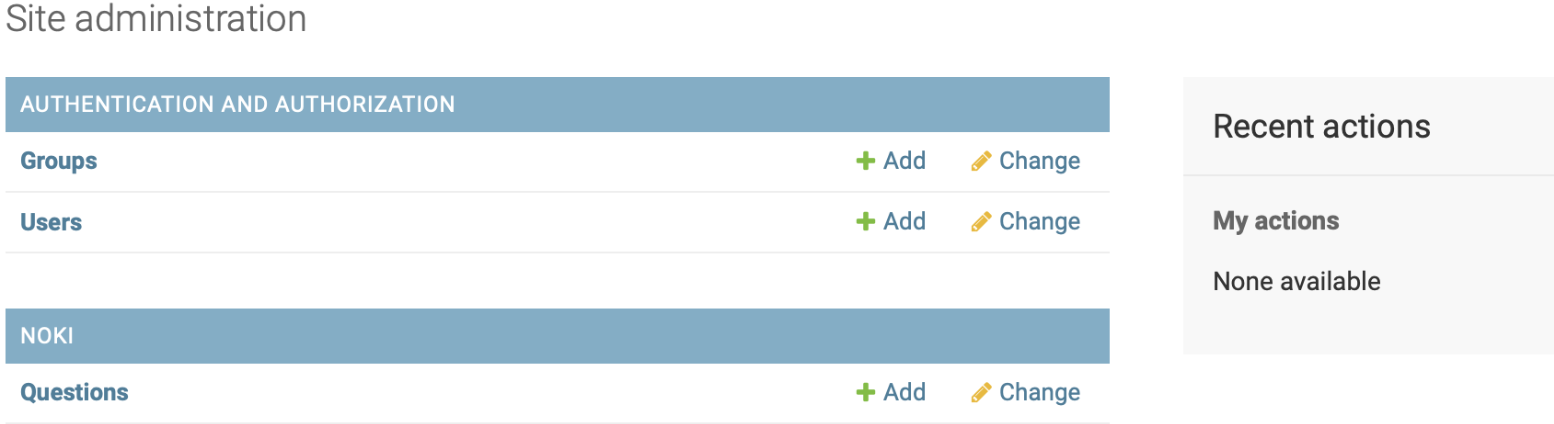
But where is the Question we create? Oh, the admin is from the project. We haven’t connect them. We should register the model. Open the app/admin.py file and add some messages telling the admin to add models on the admin site.

 浙公网安备 33010602011771号