QQ互联登陆(Java)
一、准备部分
1、账户注册
腾讯开放平台网址: https://connect.qq.com/index.html
首先需要到开放平台注册QQ互联开发者身份。注册之后创建一个网站应用,注意,需要备案成功的域名才可申请。

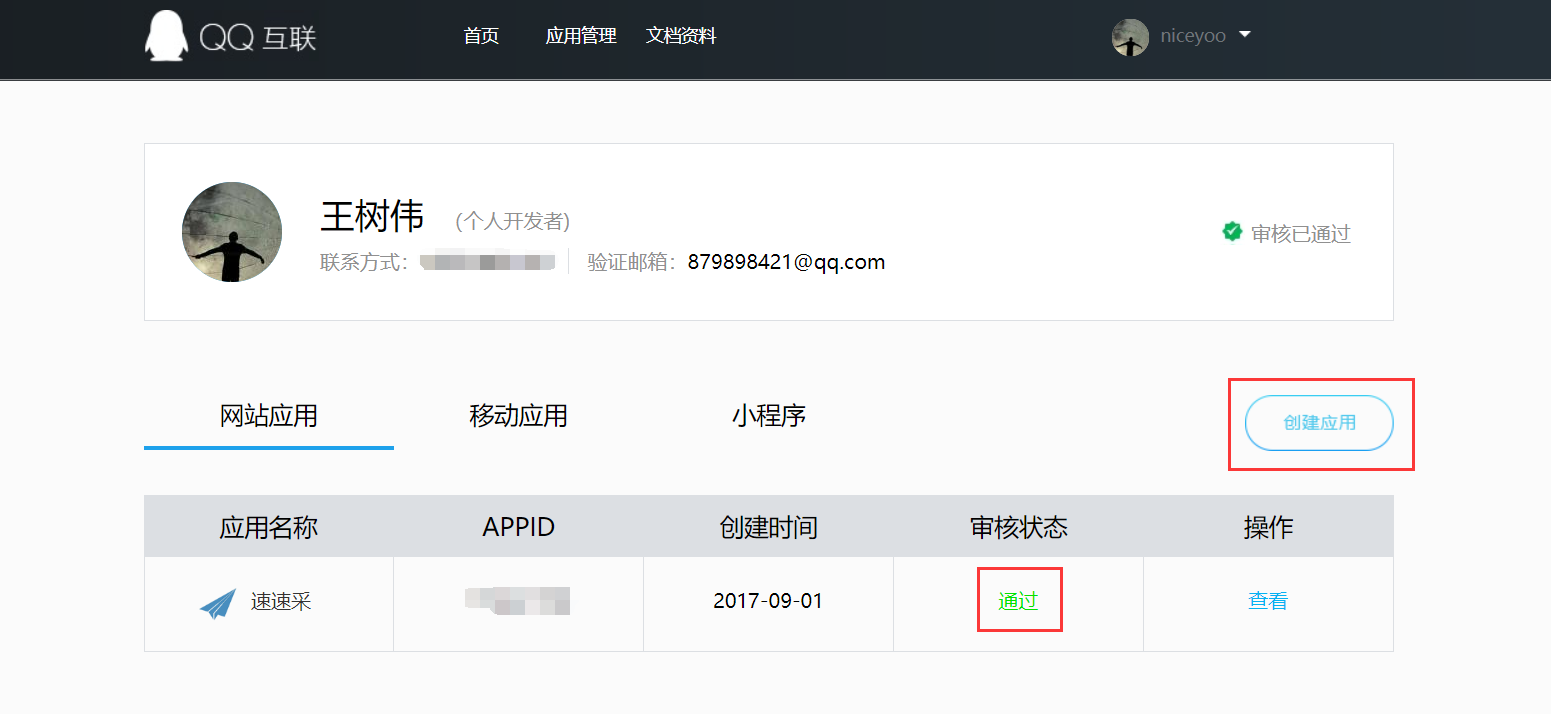
2、应用审核
审核通过后如下图所示,审核通过后可以得到 appid 和 appkey,用于开发中使用。
二、实现思路
相信大家都用过QQ登陆第三方网站,但是在开发之前我们需要先了解一下QQ互联的开发流程:
- 生成QQ授权链接
- 获取授权码,使用授权码获取用户的openid
- 使用openid可以查询到用户信息
openid作用:相当于QQ用户的 userid,身份唯一标识。
看完这三步是不是觉得很熟悉?没错,跟微信一个路子,毕竟都是 OAuth协议嘛。如果还不是特别清楚的小伙伴可以去看官方文档:腾讯开放平台文档 —http://wiki.connect.qq.com/
为了方便开发,我们再整理一下代码实现思路:
- 编写授权链接接口
- 编写授权回调接口,拿到用户openid
-- 获取到授权码;
-- 使用授权码获取accessToken;
-- 使用accessToken获取用户openid。 - 使用openid查询数据库user信息表中是否有关联
-- 如果使用openid能够查询用户信息,说明用户已经绑定成功,自动实现登陆;’
-- 如果使用openid没有查询到用户信息的话,说明用户没有绑定账信息,跳转到关联账号页面;
-- 关联成功账号之后,将openid修改为对应的账号信息。
三、代码部分
1、引入sdk
QQ互连提供了用户开发的SDK,下载链接:https://files.cnblogs.com/files/niceyoo/Sdk4J.zip
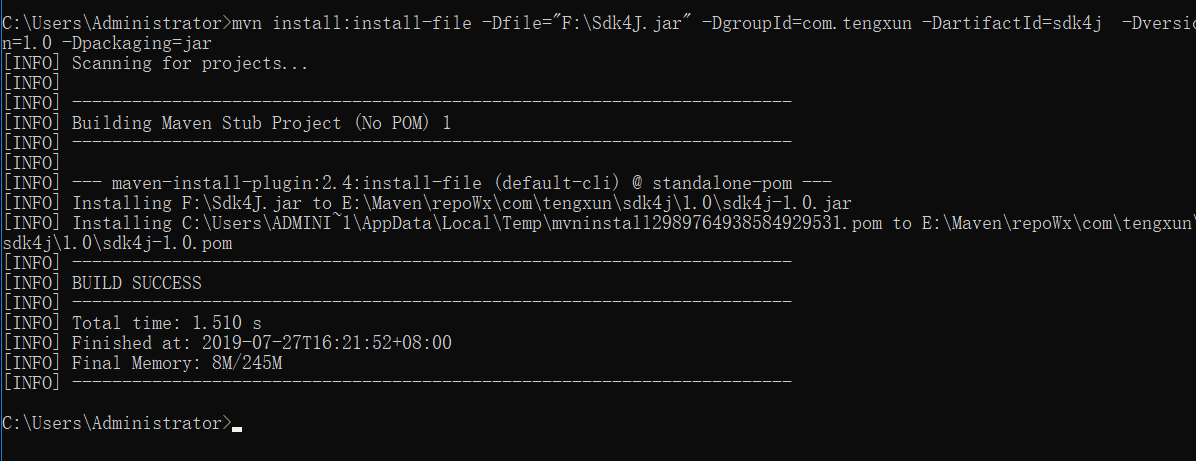
由于我们的项目大部分都是 maven 管理的,但提供的是个 jar 文件,所以我们可以打入本地 maven 中:
mvn install:install-file -Dfile=jar包的位置(参数一) -DgroupId=groupId(参数二)
-DartifactId=artifactId(参数三) -Dversion=version(参数四) -Dpackaging=jar


mvn install:install-file -Dfile="F:\Sdk4J.jar" -DgroupId=com.tengxun
-DartifactId=sdk4j  -Dversion=1.0 -Dpackaging=jar
项目中引入依赖:
<dependency>
    <groupId>com.tengxun</groupId>
    <artifactId>sdk4j</artifactId>
    <version>1.0</version>
</dependency>
项目中引入配置文件
app_ID = APP_ID
app_KEY = APP_KEY
redirect_URI = 回调地址
scope = get_user_info,add_topic,add_one_blog,add_album,upload_pic,list_album,add_share,check_page_fans,add_t,add_pic_t,del_t,get_repost_list,get_info,get_other_info,get_fanslist,get_idollist,add_idol,del_ido,get_tenpay_addr
baseURL = https://graph.qq.com/
getUserInfoURL = https://graph.qq.com/user/get_user_info
accessTokenURL = https://graph.qq.com/oauth2.0/token
authorizeURL = https://graph.qq.com/oauth2.0/authorize
getOpenIDURL = https://graph.qq.com/oauth2.0/me
addTopicURL = https://graph.qq.com/shuoshuo/add_topic
addBlogURL = https://graph.qq.com/blog/add_one_blog
addAlbumURL = https://graph.qq.com/photo/add_album
uploadPicURL = https://graph.qq.com/photo/upload_pic
listAlbumURL = https://graph.qq.com/photo/list_album
addShareURL = https://graph.qq.com/share/add_share
checkPageFansURL = https://graph.qq.com/user/check_page_fans
addTURL = https://graph.qq.com/t/add_t
addPicTURL = https://graph.qq.com/t/add_pic_t
delTURL = https://graph.qq.com/t/del_t
getWeiboUserInfoURL = https://graph.qq.com/user/get_info
getWeiboOtherUserInfoURL = https://graph.qq.com/user/get_other_info
getFansListURL = https://graph.qq.com/relation/get_fanslist
getIdolsListURL = https://graph.qq.com/relation/get_idollist
addIdolURL = https://graph.qq.com/relation/add_idol
delIdolURL = https://graph.qq.com/relation/del_idol
getTenpayAddrURL = https://graph.qq.com/cft_info/get_tenpay_addr
getRepostListURL = https://graph.qq.com/t/get_repost_list
version = 2.0.0.0
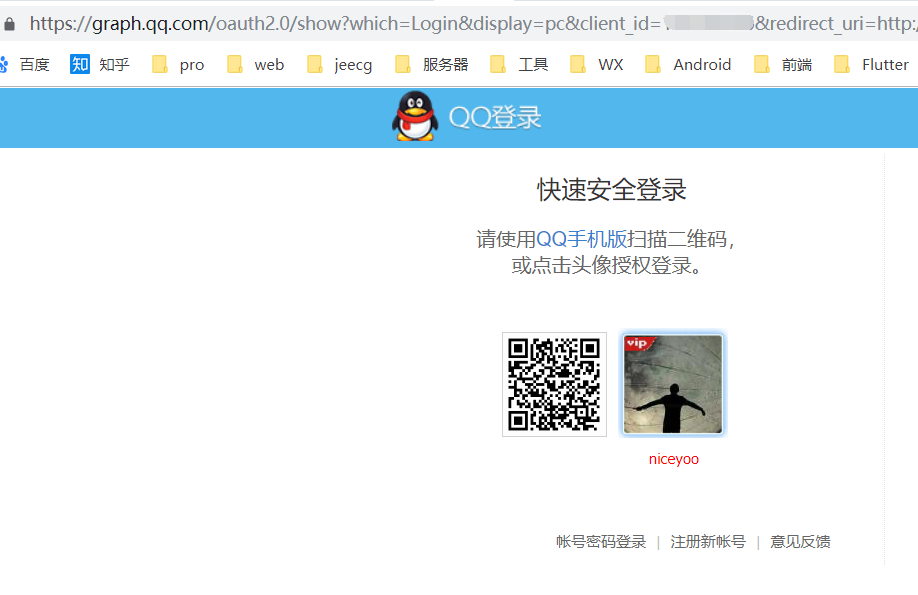
2、生成QQ联合登陆授权链接
https://graph.qq.com/oauth2.0/authorize?response_type=code&client_id=[YOUR_APPID]&redirect_uri=[YOUR_REDIRECT_URI]&state=[THE_STATE]
接口以及参数详细说明地址:https://wiki.connect.qq.com/%E4%BD%BF%E7%94%A8authorization_code%E8%8E%B7%E5%8F%96access_token#Step1.EF.BC.9A.E8.8E.B7.E5.8F.96AuthorizationCode
代码实现:
/**
 * 生成授权链接
 *
 * @param request
 * @return
 */
@RequestMapping("/qqAuth")
public String qqAuth(HttpServletRequest request) {
    try {
        String authorizeURL = new Oauth().getAuthorizeURL(request);
        log.info("authorizeURL:{}", authorizeURL);
        return "redirect:" + authorizeURL;
    } catch (Exception e) {
        return ERROR_500_FTL;
    }
}
3、QQ授权回调
在上边生成授权方法里进行了一次重定向,重定向地址即为本方法。
private static final String MB_QQ_QQLOGIN = "member/qqlogin";

/**
 * 重定向到首页
 */
private static final String REDIRECT_INDEX = "redirect:/";

@RequestMapping("/qqLoginBack")
public String qqLoginBack(HttpServletRequest request, HttpServletResponse response, HttpSession httpSession) {
    try {
        AccessToken accessTokenObj = (new Oauth()).getAccessTokenByRequest(request);
        if (accessTokenObj == null) {
            return ERROR_500_FTL;
        }
        String accessToken = accessTokenObj.getAccessToken();
        if (StringUtils.isEmpty(accessToken)) {
            return ERROR_500_FTL;
        }
        /* 获取用户openid */
        OpenID openIDObj = new OpenID(accessToken);

        String openId = openIDObj.getUserOpenID();
        if (StringUtils.isEmpty(openId)) {
            return ERROR_500_FTL;
        }
        BaseResponse<JSONObject> findByOpenId = qqAuthoriFeign.findByOpenId(openId);
        if (!isSuccess(findByOpenId)) {
            return ERROR_500_FTL;
        }
        Integer resultCode = findByOpenId.getCode();
        /* 如果使用openid没有查询到用户信息,则跳转到绑定用户信息页面 */
        if (resultCode.equals(Constants.HTTP_RES_CODE_NOTUSER_203)) {
            /* 使用openid获取用户信息 */
            UserInfo qzoneUserInfo = new UserInfo(accessToken, openId);
            UserInfoBean userInfoBean = qzoneUserInfo.getUserInfo();
            if (userInfoBean == null) {
                return ERROR_500_FTL;
            }
            String avatarURL100 = userInfoBean.getAvatar().getAvatarURL100();
            /* 返回用户头像页面展示 */
            request.setAttribute("avatarURL100", avatarURL100);
            httpSession.setAttribute(WebConstants.LOGIN_QQ_OPENID, openId);
            return MB_QQ_QQLOGIN;
        }
        /* 自动实现登陆 */
        JSONObject data = findByOpenId.getData();
        String token = data.getString("token");
        CookieUtils.setCookie(request, response, WebConstants.LOGIN_TOKEN_COOKIENAME, token);
        return REDIRECT_INDEX;
    } catch (Exception e) {
        return ERROR_500_FTL;
    }

}
4、测试环节
访问生成授权链接的方法地址:
http://shop.sscai.club/qqAuth
我创建了一个java相关的公众号,用来记录自己的学习之路,感兴趣的小伙伴可以关注一下微信公众号哈:程序员小源


 浙公网安备 33010602011771号