
笔记参照地址,如有学习,请跳转查看更加详细描述:华为二面:SpringBoot如何自定义Starter? - 码农Academy - 博客园 (cnblogs.com)
一、基础功能使用
1、pom.xml
<?xml version="1.0" encoding="UTF-8"?>
<project xmlns="http://maven.apache.org/POM/4.0.0"
         xmlns:xsi="http://www.w3.org/2001/XMLSchema-instance"
         xsi:schemaLocation="http://maven.apache.org/POM/4.0.0 http://maven.apache.org/xsd/maven-4.0.0.xsd">
    <modelVersion>4.0.0</modelVersion>
    <parent>
        <groupId>org.springframework.boot</groupId>
        <artifactId>spring-boot-starter-parent</artifactId>
        <version>2.7.2</version>
        <relativePath/> <!-- lookup parent from repository -->
    </parent>


    <groupId>com.namejr</groupId>
    <artifactId>FirstSBDemo</artifactId>
    <version>1.0-SNAPSHOT</version>
    <packaging>war</packaging>

    <properties>
        <maven.compiler.source>8</maven.compiler.source>
        <maven.compiler.target>8</maven.compiler.target>
        <project.build.sourceEncoding>UTF-8</project.build.sourceEncoding>
        <java.version>1.8</java.version>
    </properties>

    <dependencies>
        <dependency>
            <groupId>org.springframework.boot</groupId>
            <artifactId>spring-boot-starter</artifactId>
        </dependency>
        <dependency>
            <groupId>org.springframework.boot</groupId>
            <artifactId>spring-boot-starter-test</artifactId>
            <scope>test</scope>
        </dependency>
        <dependency>
            <groupId>org.springframework.boot</groupId>
            <artifactId>spring-boot-starter-web</artifactId>
        </dependency>
        <!-- 引入权限验证功能 -->
        <dependency>
            <groupId>org.springframework.boot</groupId>
            <artifactId>spring-boot-starter-validation</artifactId>
        </dependency>
        <dependency>
            <groupId>junit</groupId>
            <artifactId>junit</artifactId>
            <version>3.8.1</version>
            <scope>test</scope>
        </dependency>
        <dependency>
            <groupId>joda-time</groupId>
            <artifactId>joda-time</artifactId>
            <version>2.10.14</version>
        </dependency>
    </dependencies>
    <build>
        <resources>
            <resource>
                <directory>src/main/java</directory>
                <includes>
                    <include>**/*.properties</include>
                    <include>**/*.xml</include>
                </includes>
                <filtering>false</filtering>
            </resource>
            <resource>
                <directory>src/main/resources</directory>
                <includes>
                    <include>**/*.properties</include>
                    <include>**/*.yml</include>
                    <include>**/*.xml</include>
                    <include>**/*.json</include>
                    <include>**/*.txt</include>
                    <include>**/*.mp3</include>
                </includes>
                <filtering>false</filtering>
            </resource>
            <resource>
                <!-- 注册webapp目录为资源目录 -->
                <directory>src/main/webapp</directory>
                <targetPath>META-INF/resources</targetPath>
                <includes>
                    <include>**/**</include>
                </includes>
            </resource>
        </resources>
        <plugins>
            <plugin>
                <groupId>org.springframework.boot</groupId>
                <artifactId>spring-boot-maven-plugin</artifactId>
                <configuration>
                    <includeSystemScope>true</includeSystemScope>
                    <jvmArguments>-Dfile.encoding=UTF-8</jvmArguments>
                </configuration>
            </plugin>
            <plugin>
                <!-- 配置jar包打包工具 -->
                <groupId>org.apache.maven.plugins</groupId>
                <artifactId>maven-war-plugin</artifactId>
                <configuration>
                    <webResources>
                        <resource>
                            <directory>${project.basedir}/libs</directory>
                            <targetPath>WEB-INF/lib</targetPath>
                            <includes>
                                <include>**/*.jar</include>
                            </includes>
                        </resource>
                    </webResources>
                </configuration>
            </plugin>
        </plugins>
    </build>
</project>
2、创建自定义注解
package com.namejr.base;

import javax.validation.Constraint;
import javax.validation.Payload;
import java.lang.annotation.ElementType;
import java.lang.annotation.Retention;
import java.lang.annotation.RetentionPolicy;
import java.lang.annotation.Target;

/**
 * 创建自定义注解
 * */
@Constraint(validatedBy = {CustomCheckUtil.class})
@Target({ElementType.METHOD,ElementType.FIELD,ElementType.ANNOTATION_TYPE,ElementType.CONSTRUCTOR,ElementType.PARAMETER})
@Retention(RetentionPolicy.RUNTIME)
public @interface CCInterface {
    // 提示信息
    String message() default "参数不符合上传规定";
    // 指定分组,不同分组可以使用不同校验规则
    Class<?>[] groups() default {};
    // 用于指定元数据,可通过该属性传递一些额外的验证信息
    Class<? extends Payload>[] payload() default {};
}
3、创建验证功能实现
package com.namejr.base;

import javax.validation.ConstraintValidator;
import javax.validation.ConstraintValidatorContext;

/**
 * 创建自定义校验功能
 * */
public class CustomCheckUtil implements ConstraintValidator<CCInterface,Object> {
    @Override
    public void initialize(CCInterface constraintAnnotation) {
        ConstraintValidator.super.initialize(constraintAnnotation);
    }

    @Override
    public boolean isValid(Object o, ConstraintValidatorContext constraintValidatorContext) {
        // 验证功能处理
        if(o==null||"".equals(o)){
            // 如果为null或者空返回校验失败
            return false;
        }
        return true;
    }
}
4、使用自定义验证功能
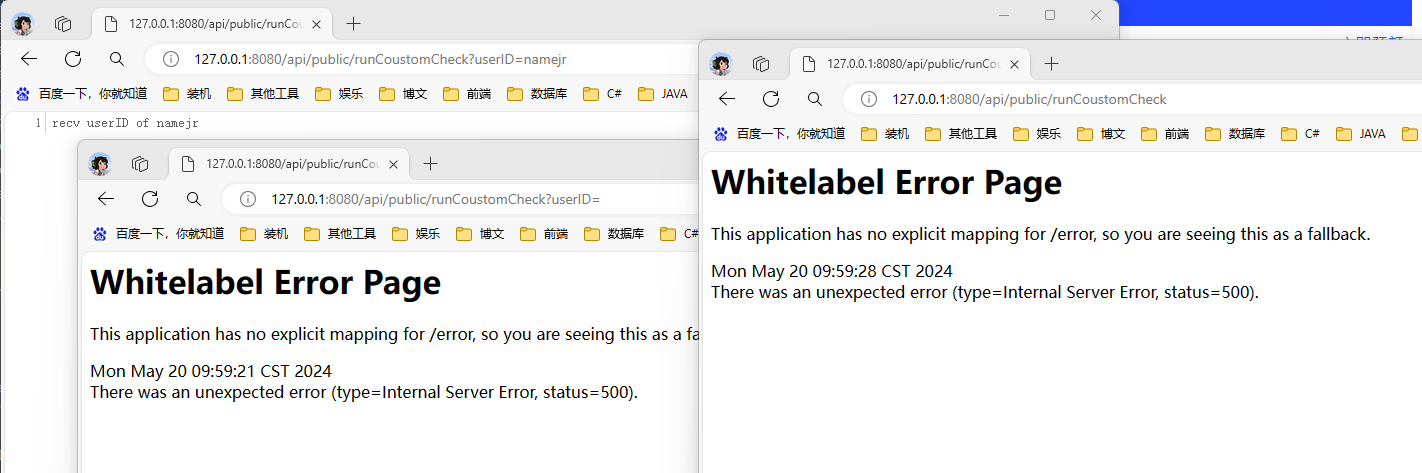
package com.namejr.controller;

import com.namejr.base.CCGroupFirst;
import com.namejr.base.CCInterface;
import com.namejr.bean.UserModel;
import com.namejr.serviceImpl.PublicServiceImpl;
import org.joda.time.DateTime;
import org.springframework.beans.factory.annotation.Autowired;
import org.springframework.validation.annotation.Validated;
import org.springframework.web.bind.annotation.RequestBody;
import org.springframework.web.bind.annotation.RequestMapping;
import org.springframework.web.bind.annotation.RequestMethod;
import org.springframework.web.bind.annotation.RestController;

@RestController
@RequestMapping(value = "/api/public")
@Validated
public class PublicController {
    @Autowired
    private PublicServiceImpl pServiceImpl;

    @RequestMapping(value = "/getServerTime", method = RequestMethod.GET,produces = "application/json;charset=UTF-8")
    public String getServerTime() {
        return DateTime.now().toString("yyyy-MM-dd HH:mm:ss");
    }

    @RequestMapping(value = "/runCoustomCheck", method = RequestMethod.GET,produces = "application/json;charset=UTF-8")
    public String runCoustomCheck(@CCInterface(message = "参数不能为空") String userID) {
        return "recv userID of "+userID;
    }
}
输出:
二、附加分组功能
1、创建两个分组
CCGroupFirst.java
package com.namejr.base;

import javax.validation.groups.Default;

public interface CCGroupFirst extends Default {
}

CCGroupTwo.java
package com.namejr.base;

import javax.validation.groups.Default;

public interface CCGroupTwo extends Default {
}
2、配置不同分组使用不同的注解
package com.namejr.bean;

import com.namejr.base.CCGroupFirst;
import com.namejr.base.CCGroupTwo;
import org.springframework.stereotype.Component;

import javax.validation.constraints.NotNull;
import javax.validation.constraints.Null;

/**
 * 用户米星
 * */
@Component
public class UserModel {
    // CCGroupFirst分组该字段不能为空,CCGroupTwo分组该字段必须为空
    @NotNull(message = "不能为空",groups = {CCGroupFirst.class})
    @Null(message = "必须为空",groups = {CCGroupTwo.class})
    public String userID;
}
3、在前端接口配置使用分组
package com.namejr.controller;

import com.namejr.base.CCGroupFirst;
import com.namejr.base.CCInterface;
import com.namejr.bean.UserModel;
import com.namejr.serviceImpl.PublicServiceImpl;
import org.joda.time.DateTime;
import org.springframework.beans.factory.annotation.Autowired;
import org.springframework.validation.annotation.Validated;
import org.springframework.web.bind.annotation.RequestBody;
import org.springframework.web.bind.annotation.RequestMapping;
import org.springframework.web.bind.annotation.RequestMethod;
import org.springframework.web.bind.annotation.RestController;

@RestController
@RequestMapping(value = "/api/public")
@Validated
public class PublicController {
    @Autowired
    private PublicServiceImpl pServiceImpl;

    @RequestMapping(value = "/getServerTime", method = RequestMethod.GET,produces = "application/json;charset=UTF-8")
    public String getServerTime() {
        return DateTime.now().toString("yyyy-MM-dd HH:mm:ss");
    }

    @RequestMapping(value = "/runCoustomCheck", method = RequestMethod.GET,produces = "application/json;charset=UTF-8")
    public String runCoustomCheck(@CCInterface(message = "参数不能为空") String userID) {
        return "recv userID of "+userID;
    }

    // @Validated(value = CCGroupFirst.class) 配置使用指定的CCGroupFirst分组
    @RequestMapping(value = "/runCCGroup", method = RequestMethod.POST,produces = "application/json;charset=UTF-8")
    public String runCCGroup1(@Validated(value = CCGroupFirst.class) @RequestBody UserModel model) {
        return "runCCGroup1 recv userID of "+model.userID;
    }
}
输出:

\\

 浙公网安备 33010602011771号