
SpringBoot系列之IDEA项目中设置热部署教程
1、新建SpringBoot项目
环境准备
- JDK 1.8
- SpringBoot2.2.1
- Maven 3.2+
- 开发工具
- smartGit
- IntelliJ IDEA2018
创建一个SpringBoot Initialize项目,详情可以参考我之前博客:SpringBoot系列之快速创建项目教程

检查spring-boot-devtools是否加上?
<dependency>
            <groupId>org.springframework.boot</groupId>
            <artifactId>spring-boot-devtools</artifactId>
            <scope>runtime</scope>
            <optional>true</optional>
        </dependency>
ps:修改如下配置,reload才生效,<fork>true</fork>,用于明确表示编译版本配置有效

补充:
如果有加上Thymeleaf模板引擎,需要关了Thymeleaf缓存,然后按Ctrl+F9重新编译,修改配置文件:
spring:
  thymeleaf:
    cache: false
2、IntelliJ IDEA配置
Settings->Build,Execut, Deployment -> Compiler,勾选中左侧的Build Project automatically

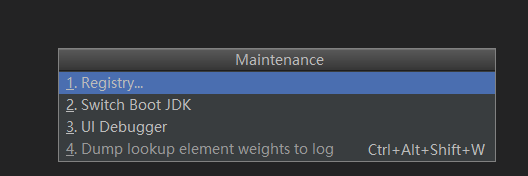
Ctrl+Alt+Shift+/,选择Registry
勾选complier.automake.allow.when.app.running

ok,next需要重启 IntelliJ IDEA,既可实现java文件自动构建,不过对于html还是要按Ctrl+F9编译
代码例子下载:code download

 浙公网安备 33010602011771号