spring native 初体验实现 小米控制美的空调
目前关于 spring native 分享的文章还比较少
写这篇文章的主要目前是分享一下自己写的一个 小米控制美的空调 的程序 集成 spring native 过程中碰到的一些问题和解决方法
先放地址 : https://github.com/toohandsome/xiaomi2meidi 欢迎star
对比一下速度:
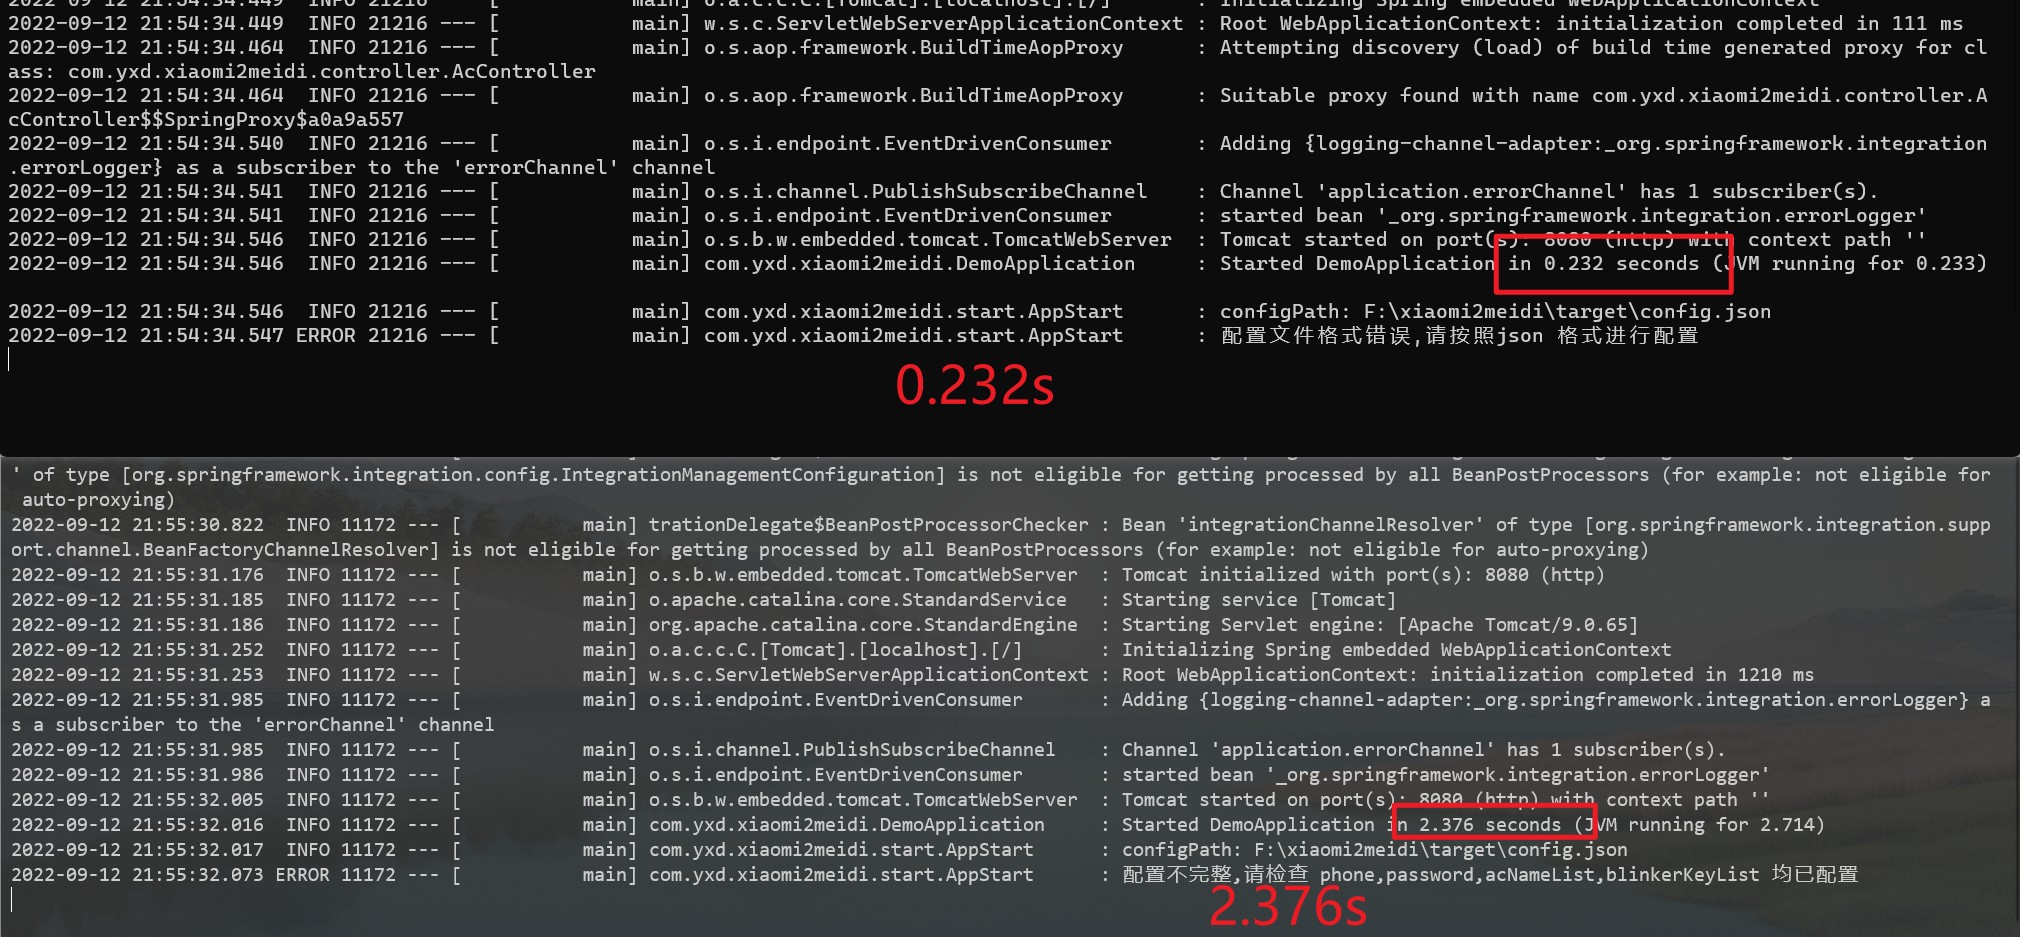
上面是编译成exe运行,下面是jar运行 快了10倍.
Spring Native 可以通过 GraalVM 将 Spring 应用程序编译成原生镜像,提供了一种新的方式来部署 Spring 应用。
ps: 这篇文章主要是将其打包成exe,没有打包成docker镜像
注意 目前 Spring Native 已经不支持jdk8 了,这里选用的jvm 是 graalvm-ce-java17-22.2.0, maven 选用 apache-maven-3.8.6
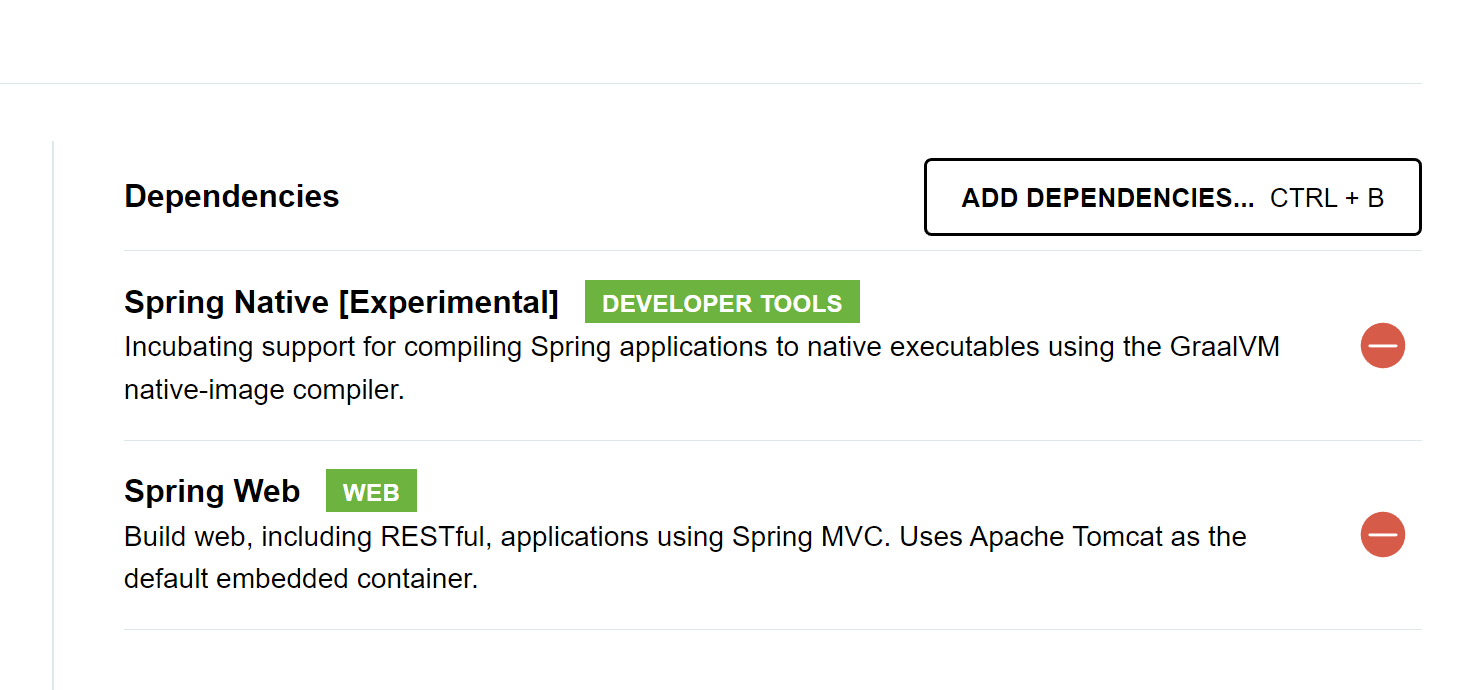
首先在 start.spring.io 中 选择 spring native 和 web
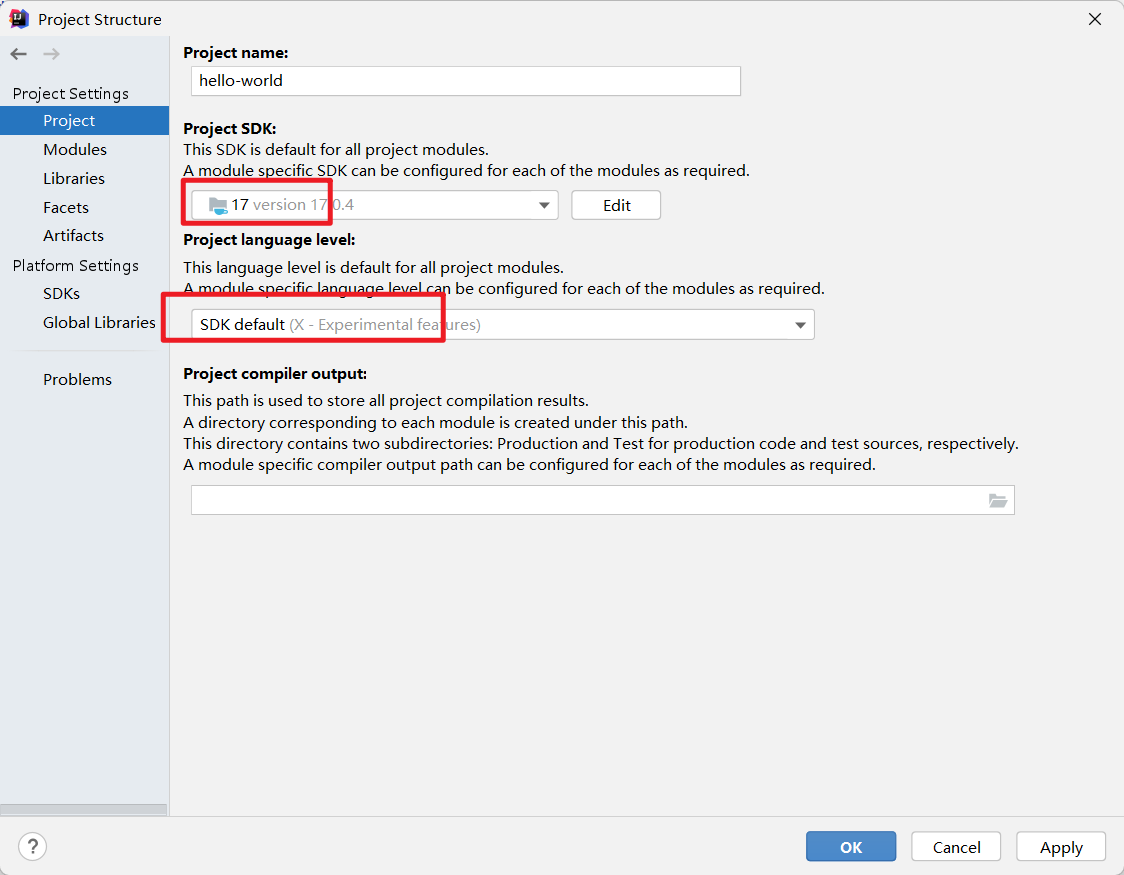
下载后导入idea,把项目的sdk 和 语法 均设置为 17
按照 Visual Studio ,我这里是vs2019 , 更高版本应该也可以,可以参考这篇文章 https://www.cnblogs.com/luguojun/p/16132521.html
环境配置好了以后,
在 resource 下 创建 META-INF/native-image/{groupId}/{artifactId}
然后在下面创建
native-image.properties
proxy-config.json
reflect-config.json
resource-config.json
serialization-config.json
如图所示

开始编译主要有几种错误
1. must not contain "."
must not contain ".". This can happen implicitly if the builder runs exclusively on the --module-path but specifies the com.oracle.svm.hosted.NativeImageGeneratorRunner main class without --module.
经过排除发现是 classpath 环境变量不能有 "." , 只要保留
%JAVA_HOME%\lib;
即可,如图

2.UnsupportedFeatureError
UnsupportedFeatureError: Proxy class defined by interfaces[xxxx] not found. Generating proxy classes at runtime is not supported. Proxy classes need to be defined at image build time by specifying the list of interfaces that they implement.
会一直报错 某某bean 不能被创建 , 需要在 proxy-config.json 中 增加 报错信息中的 xxx 接口.
但是这里有个问题就是 它这个错会有很多,你改了一个bean , 下一个bean 又会有不同的接口,所以我写了一个程序来自动分析
      Pattern p = Pattern.compile("Proxy class defined by interfaces \\[(.*?)\\]");
       for (int i = 0; i < 10000; i++) {
            Process process = Runtime.getRuntime().exec("F:\\springnative\\start.bat");
            BufferedReader bufferedReader = new BufferedReader(
                    new InputStreamReader(process.getInputStream(), "gbk"));
            String line;
            while ((line = bufferedReader.readLine()) != null) {
                System.out.println(line);
            }
            System.out.println("success");

            String s = RuntimeUtil.execForStr("\"F:\\springnative\\target\\xiaomi2meidi.exe\"");
            System.out.println("exe: " + s);
            Matcher matcher = p.matcher(s);
            if (matcher.find()) {
                var interfaces = matcher.group(1).replace("interface ", "").replace(" ", "");

                String[] split = interfaces.split(",");
                JSONArray jsonArray = new JSONArray();
                for (String s1 : split) {
                    System.out.println(s1);
                    jsonArray.add(s1);
                }
                String s1 = Files.readString(Paths.get("F:\\springnative\\src\\main\\resources\\META-INF\\native-image\\com.yxd.xiaomi2meidi\\proxy-config.json"));
                List<JSONArray> jsonArrays = JSON.parseArray(s1, JSONArray.class);
                jsonArrays.add(jsonArray);
                String pretty = JSON.toJSONString(jsonArrays, JSONWriter.Feature.PrettyFormat,
                        JSONWriter.Feature.WriteMapNullValue,
                        JSONWriter.Feature.WriteNullListAsEmpty);
                try {
                    Files.writeString(Paths.get("F:\\springnative\\src\\main\\resources\\META-INF\\native-image\\com.yxd.xiaomi2meidi\\proxy-config.json"), pretty);
                } catch (Exception e) {
                    e.printStackTrace();
                }

            } else {
                break;
            }

        }
写的比较粗糙
大概就是循环编译运行,把运行后得到的日志 用正则匹配出来,然后自动加到 proxy-config.json 中去,然后又重新编译,直到它不报错为止.
3. logback 没有日志或者报错找不到 ConsoleAppender 等日志相关的类
增加依赖
<dependency>
  <groupId>org.codehaus.janino</groupId>
  <artifactId>janino</artifactId>
  <version>3.1.8</version>
</dependency>
在 reflect-config.json 增加配置
{
    "name": "ch.qos.logback.core.ConsoleAppender",
    "allPublicConstructors": true,
    "allPublicMethods": true
  }
这里的类名是怎么来的呢,其实是 logback-spring.xml 里面的类, 还有
ch.qos.logback.core.rolling.RollingFileAppender
ch.qos.logback.classic.PatternLayout
ch.qos.logback.classic.encoder.PatternLayoutEncoder
ch.qos.logback.core.rolling.SizeAndTimeBasedRollingPolicy
等, 根据自己的xml配置
最后说一下 如何使用 小米控制美的空调
首先说一下思路.
想用小爱控制,那么最好的办法自然是接入小米的iot平台,然而小米并不对个人开发者开发.
退而求其次,我们可以找一个第三方厂商,由他们做中间人接入.
blinker (点灯科技) 是一家物联网技术提供商, 官网 点灯科技 (https://diandeng.tech/home) (虽然文档烂,但是功能不含糊,该有的都有. )
虽然我之前参考 使用ESP32和Blinker实现远程网络唤醒电脑(接入语音助手,以小爱同学为例) 这篇帖子用esp32成功控制了电脑远程开机
但是这次我不想依赖硬件设备,不然成本太高了( 一台空调设备就得买一个esp32),
然后我就想blinker的代码既然能在树莓派上面跑,自然我就能把核心逻辑抠出来用java重写一遍
好.正文开始
首先我们在blinker官网下载 他们的app,注册.
注册后 登录,显示如下界面
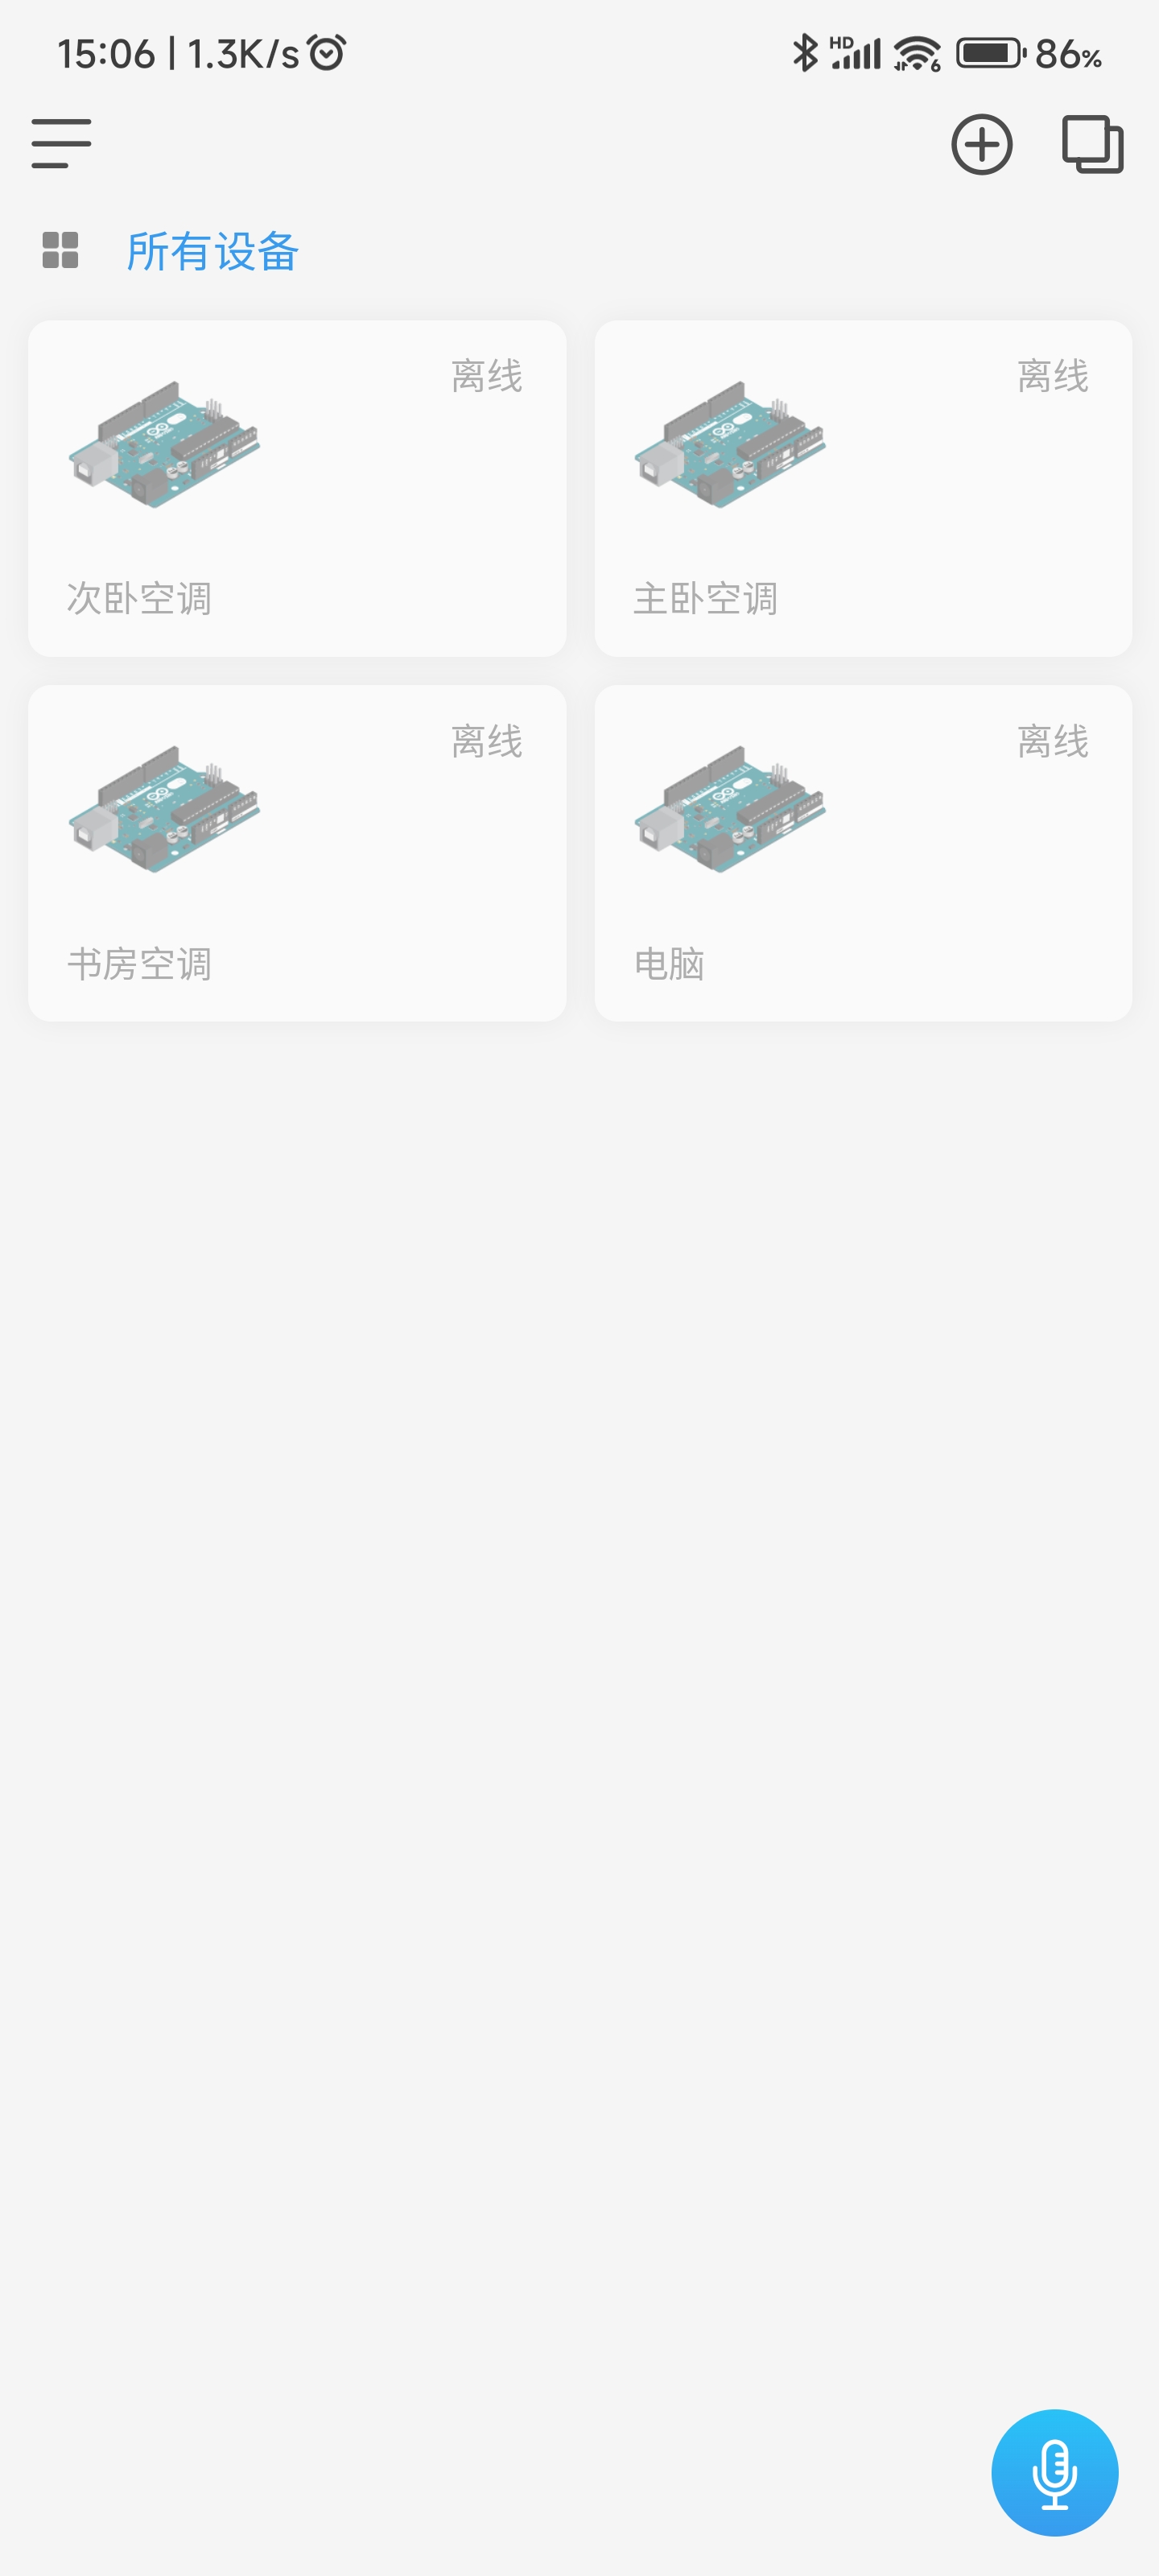
你们这里应该是空的,我加过所以有其他设备
然后我们点击右上角的 加号 进行添加一个新的设备
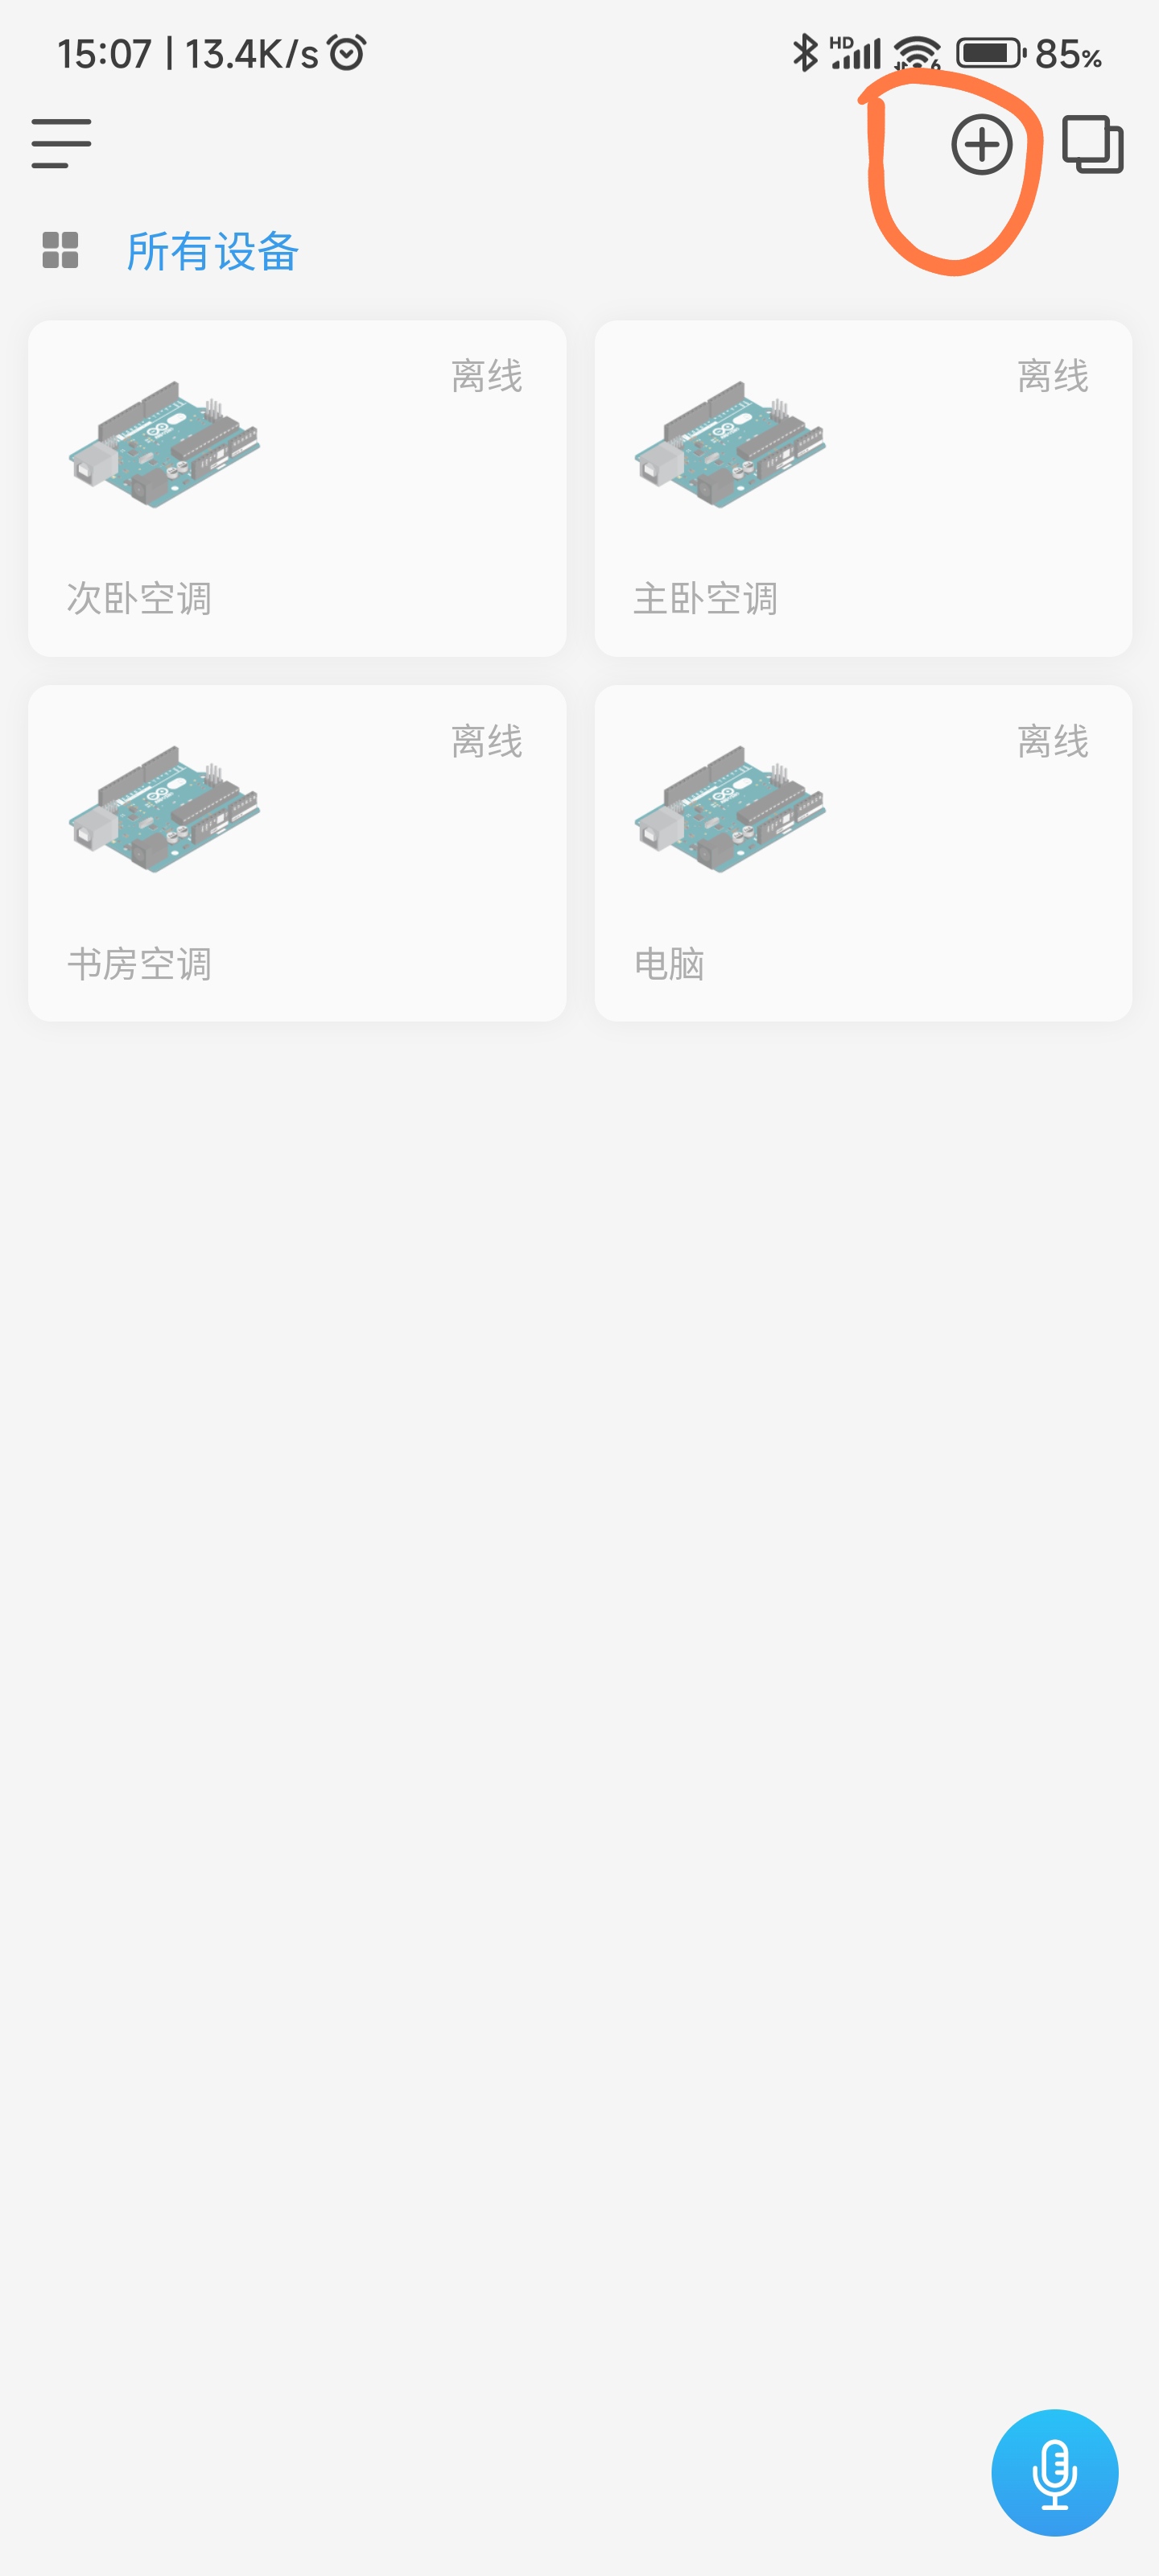
点击 独立设备
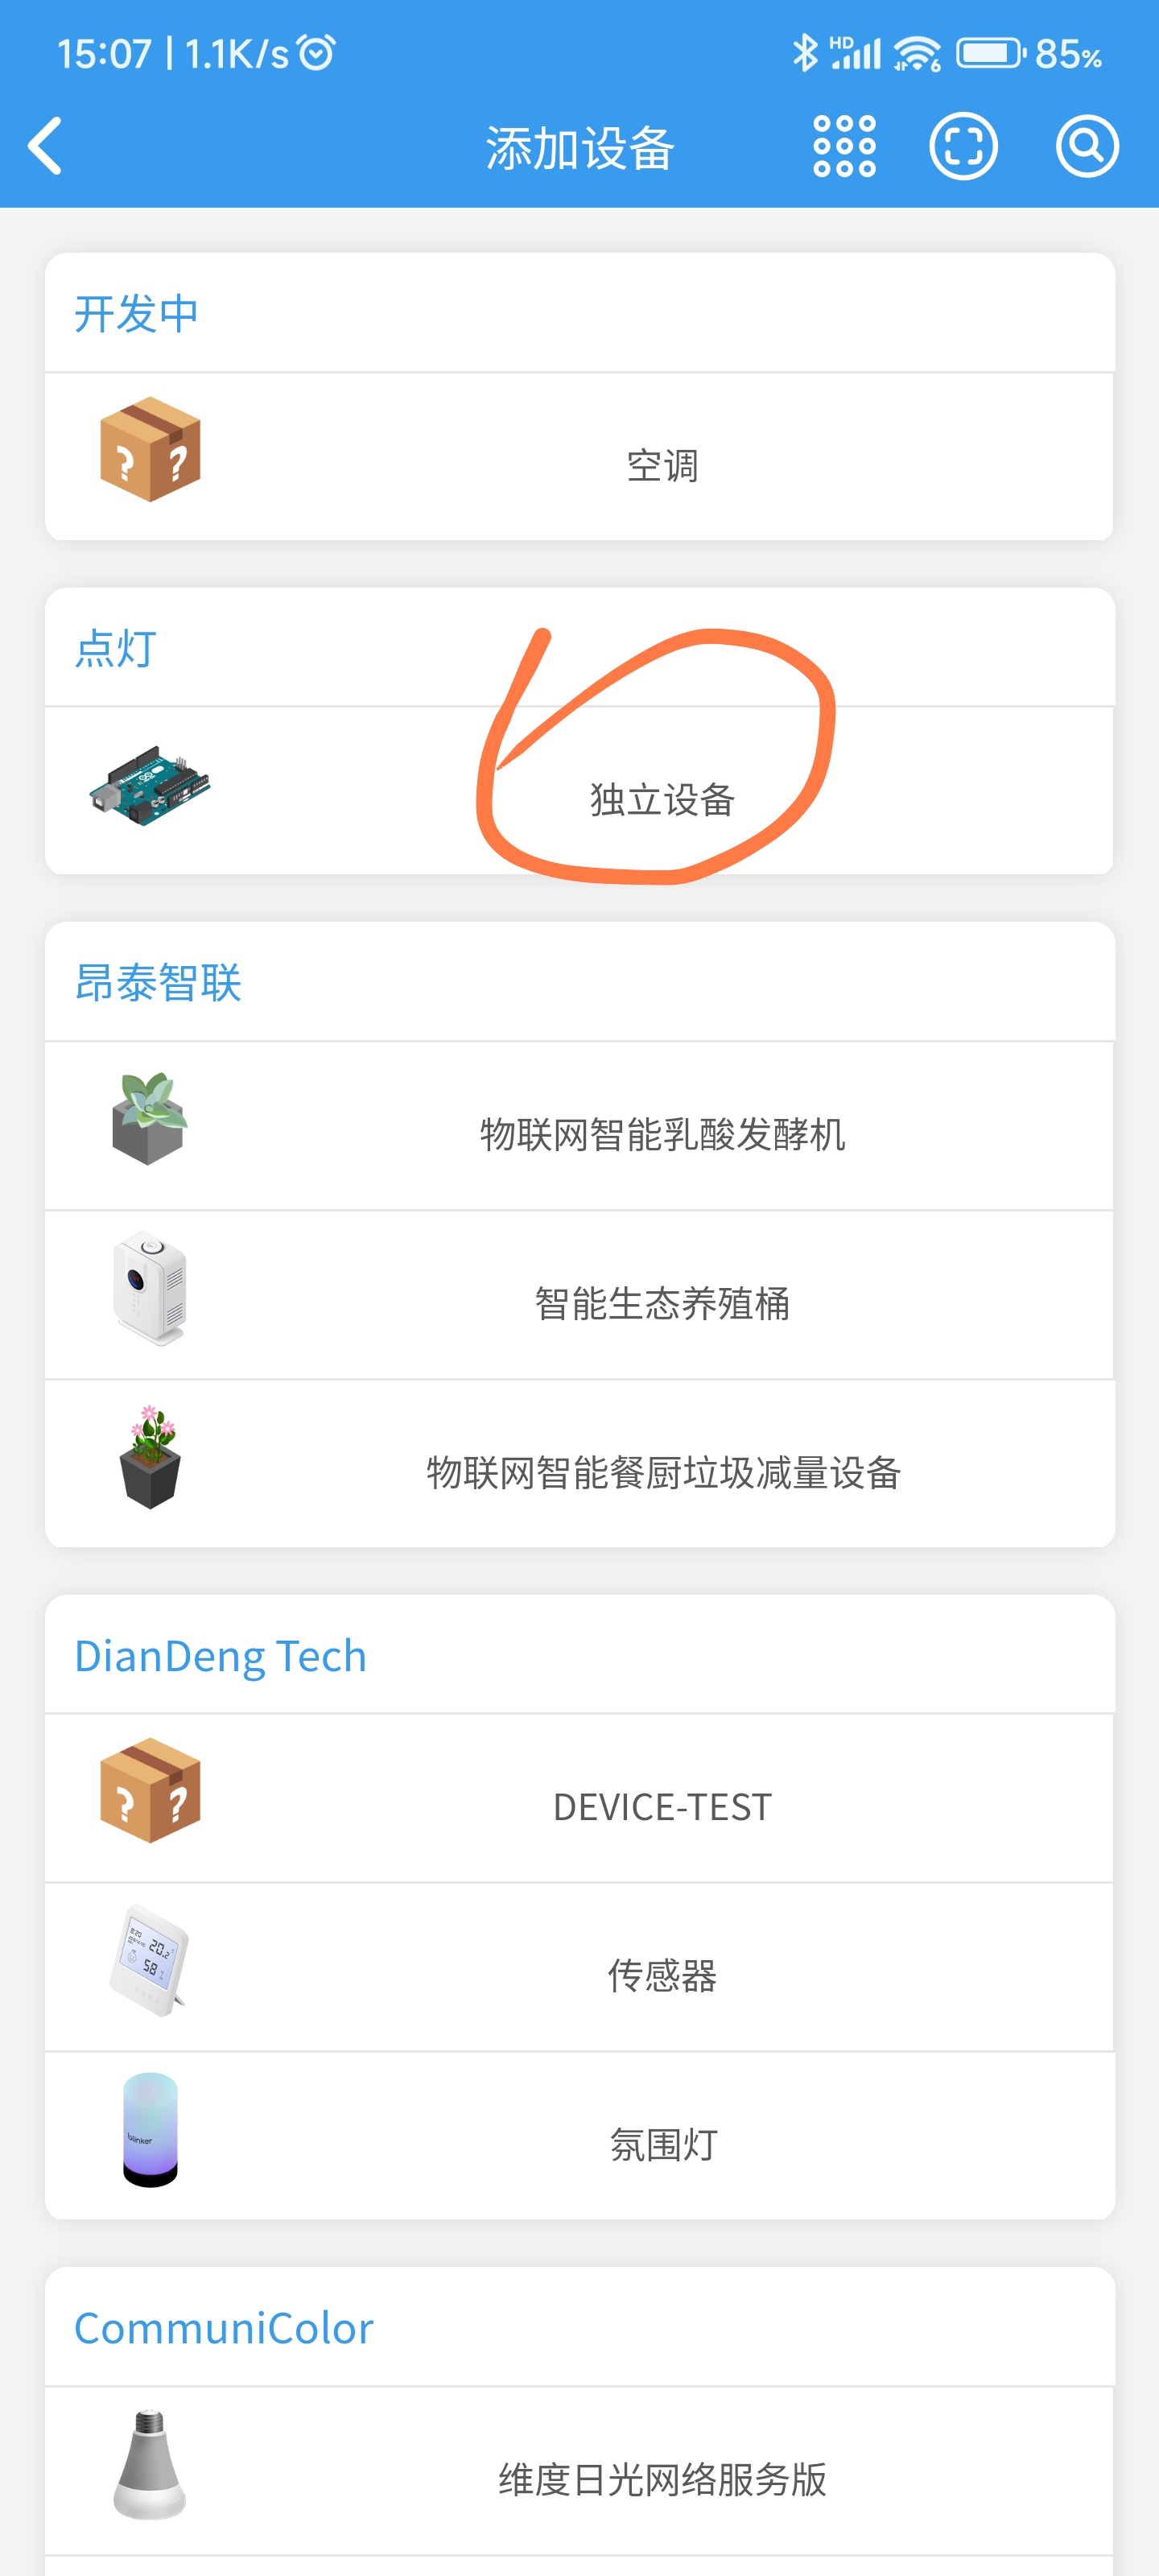
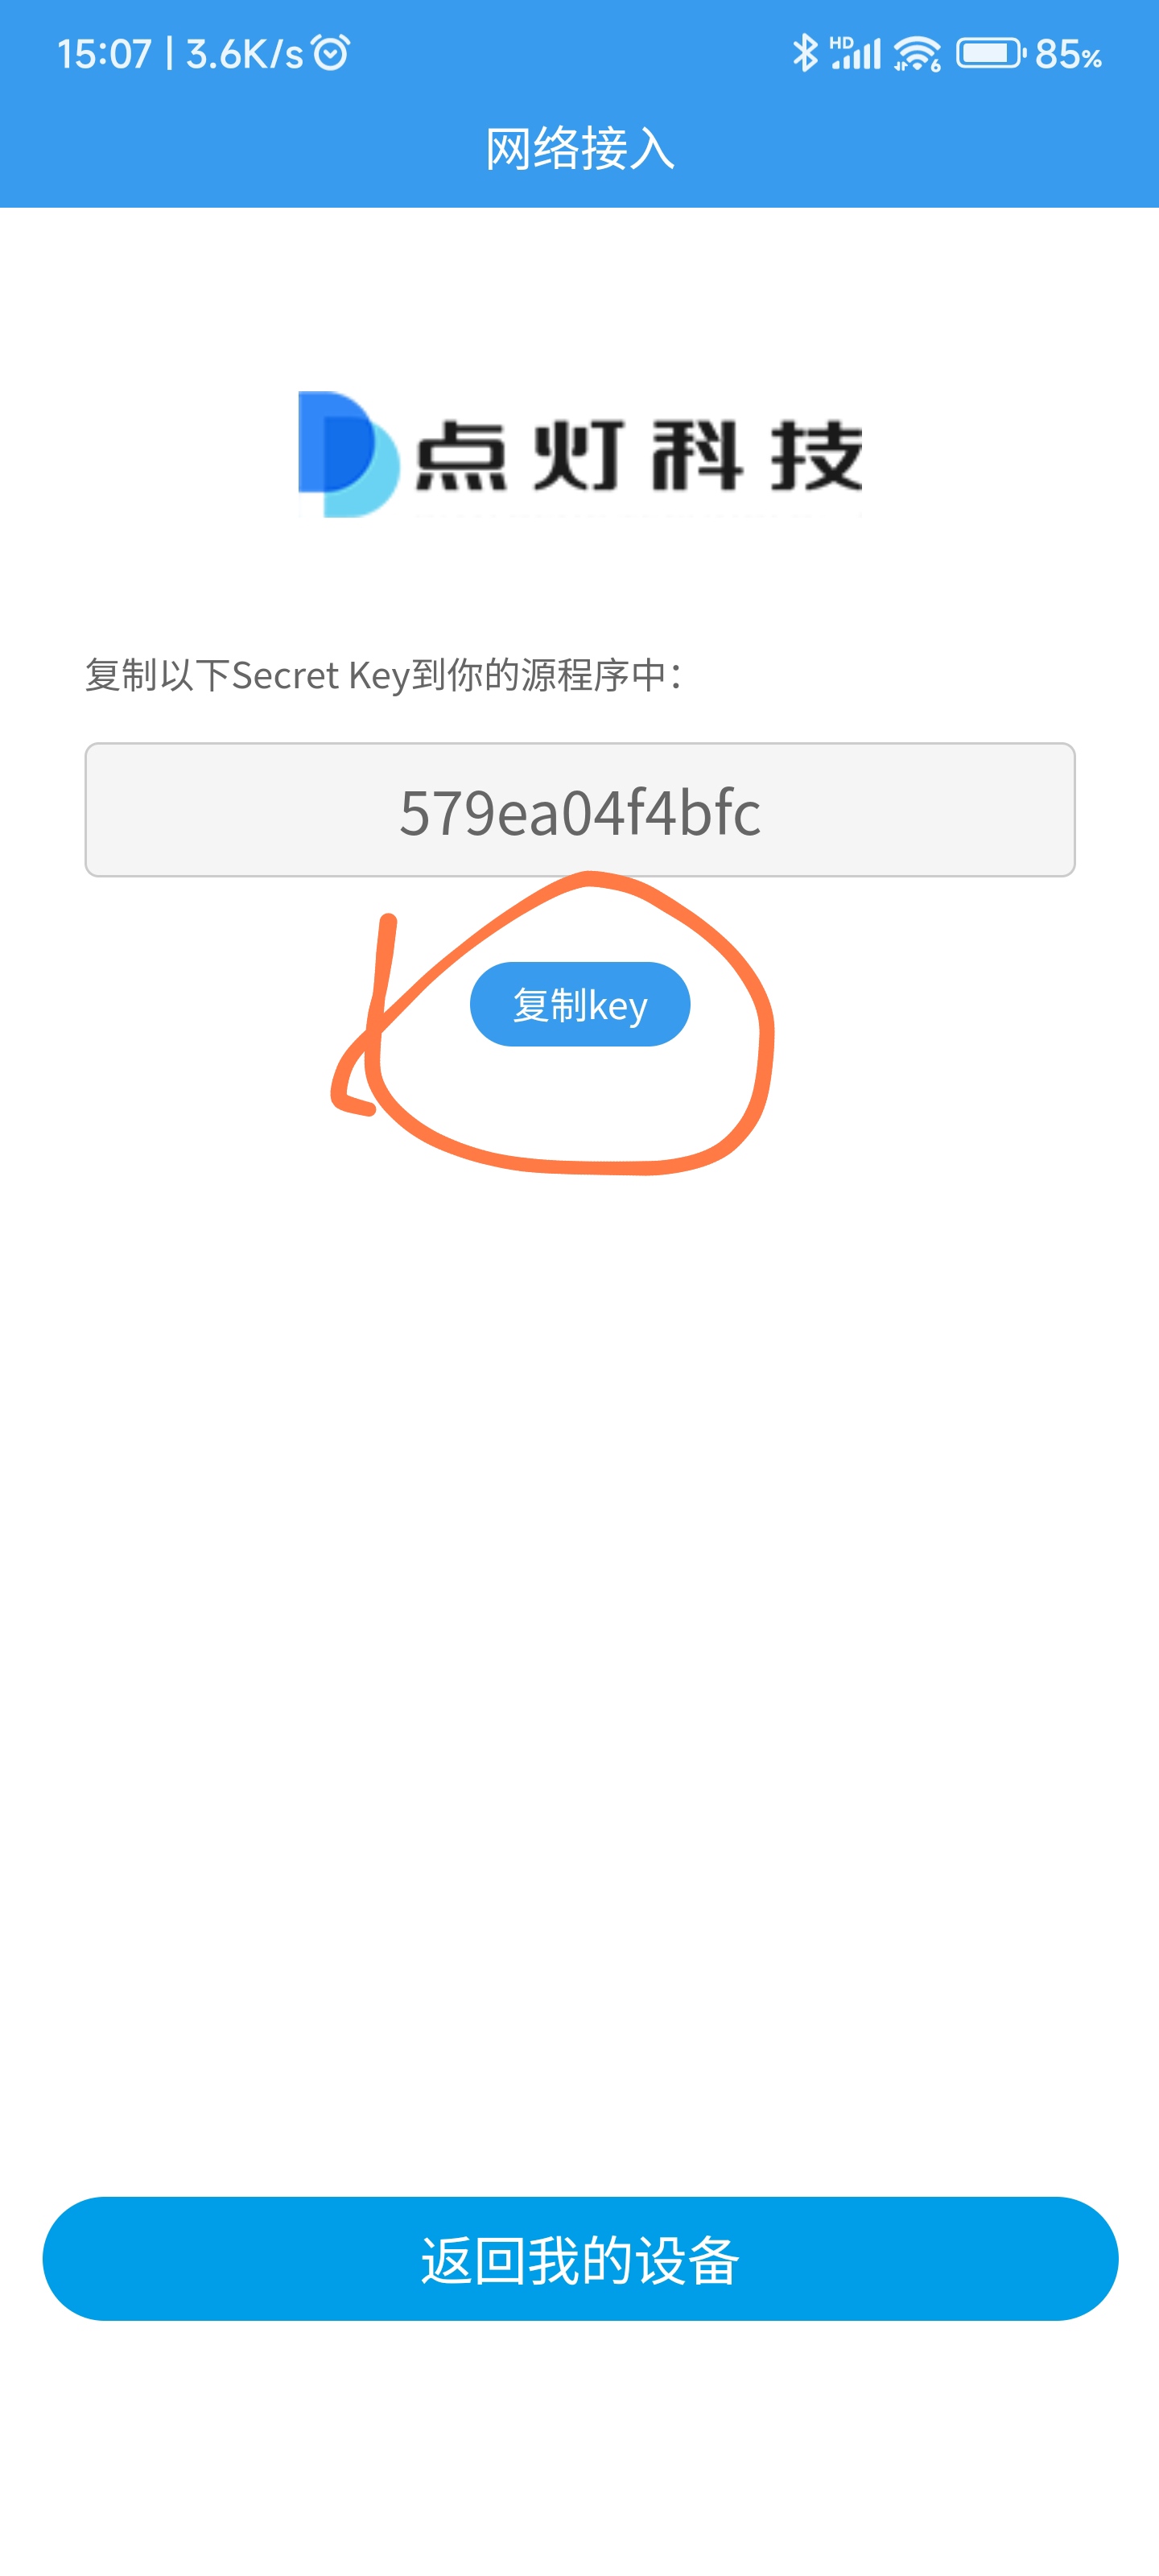
选择网络接入

得到 authKey, 保存好,后面要用
然后我们返回设备列表,点击刚新加的设备. 右上角 三个点

编辑设备名称

输入名称, 这个名称就是后面你喊小爱的名称,同时 要和 美的美居 app 里面空调的名称要相同
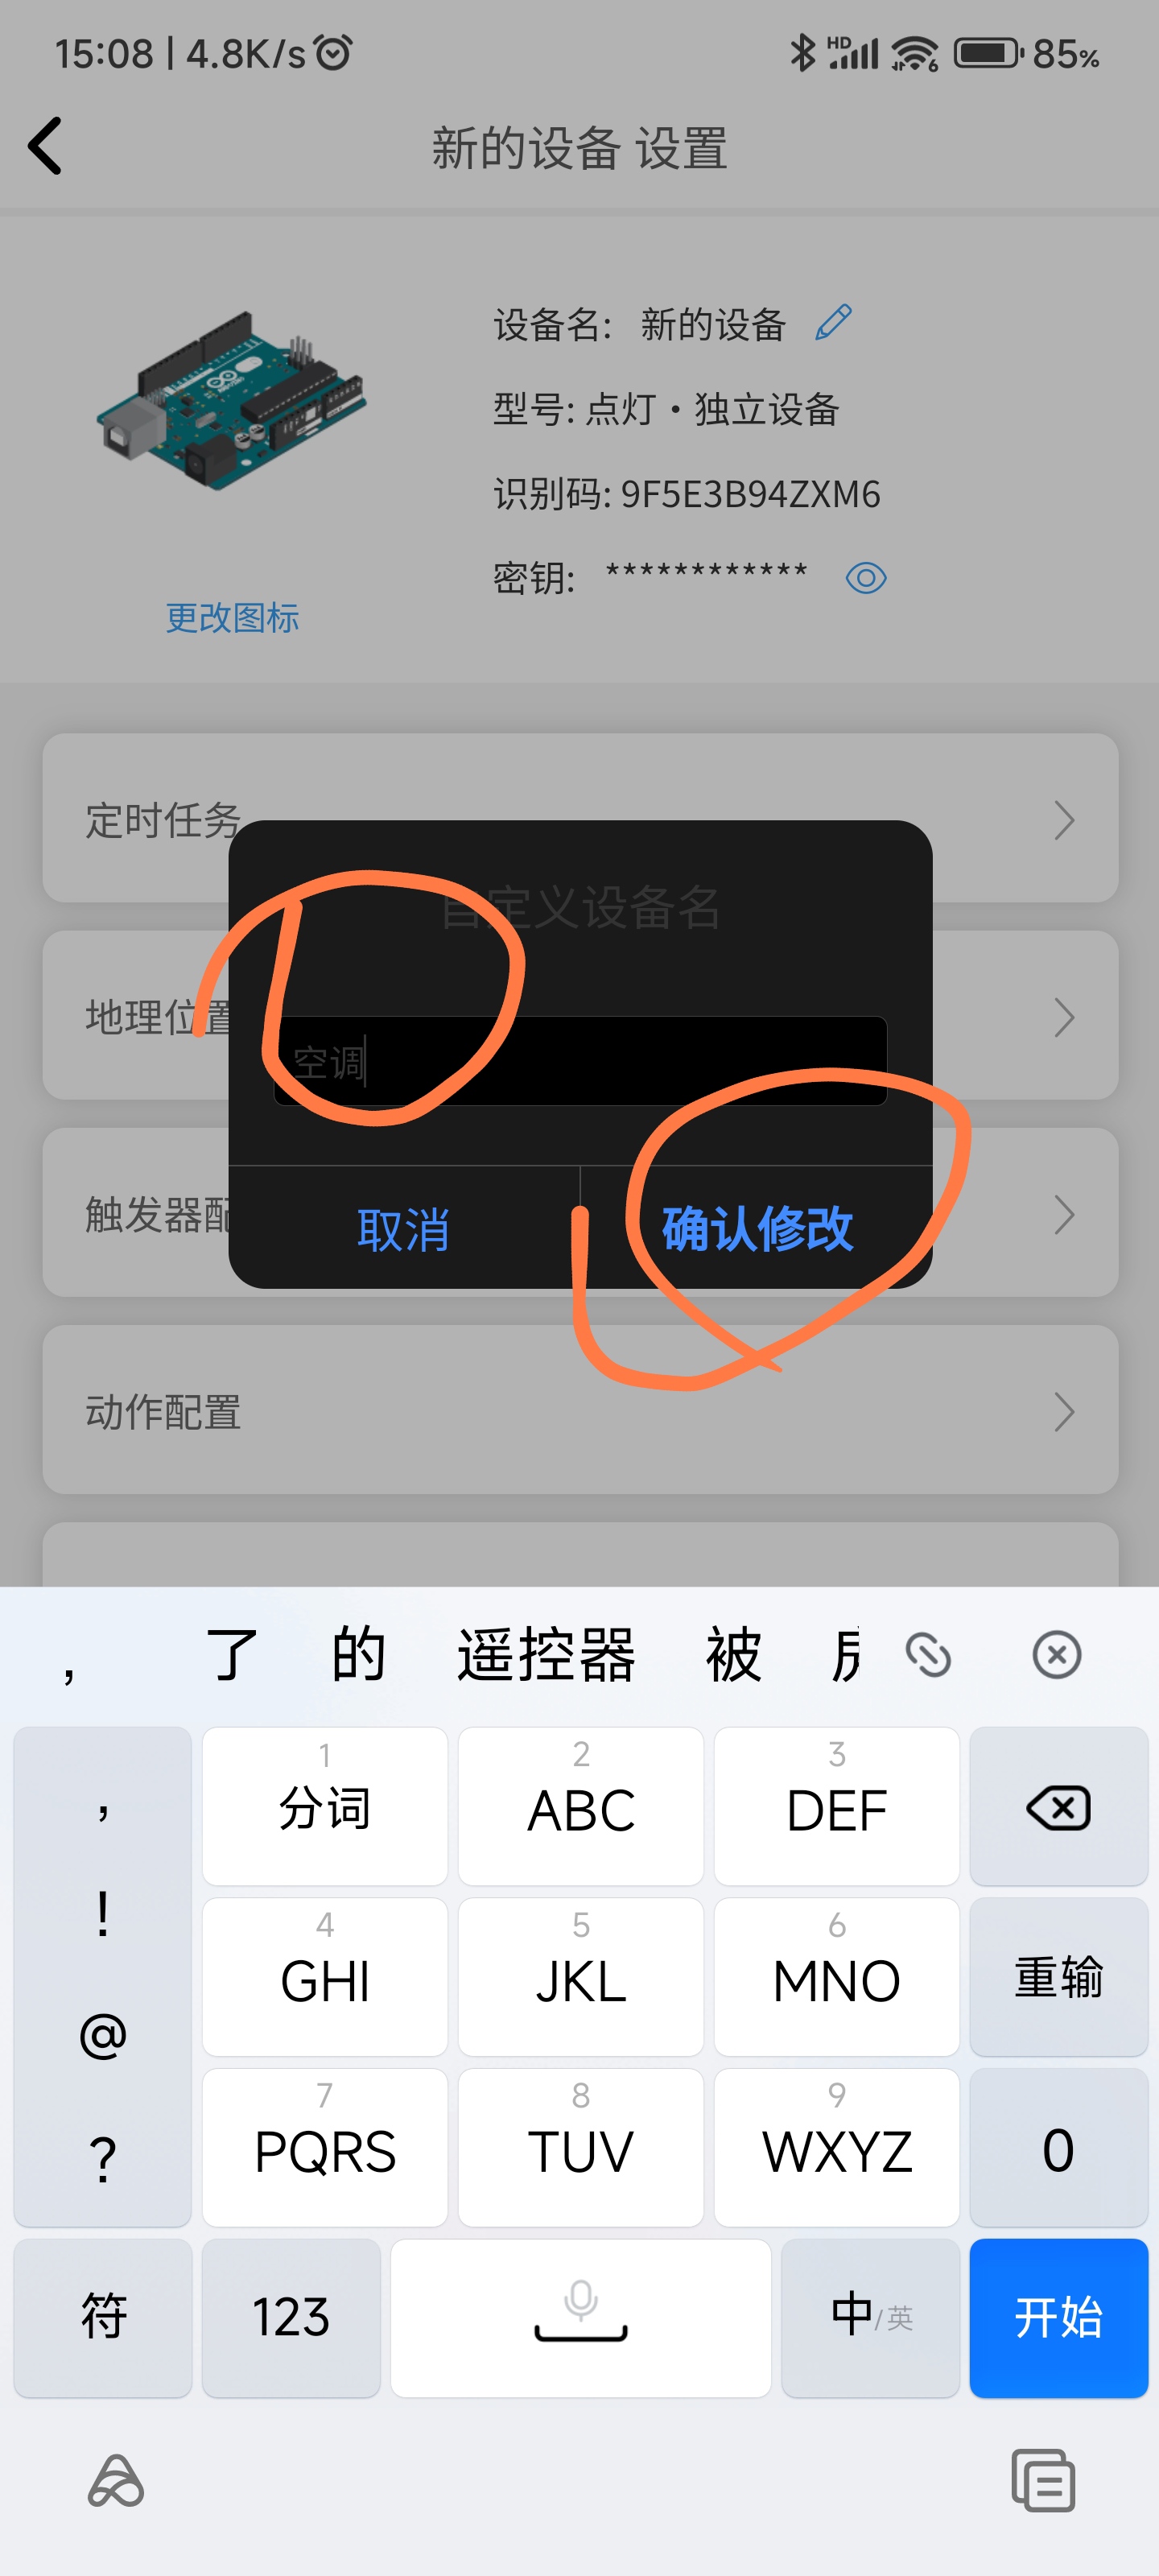
确认修改后,我们下载 github 上的 程序 ,运行后在 程序提示的配置文件中输入
phone: 美的app手机号, password: 美的app密码,acNameList: 空调名称(多个用逗号隔开), blinkerKeyList: 点灯的authkey(多个用逗号隔开,需要与空调名称一一对应)
{
        "phone":"13812345678",
        "password":"123456",
        "acNameList":"书房空调,主卧空调,次卧空调",
        "blinkerKeyList":"8*****2,2*****9,0******8",
        "uid":"",
        "accessToken":"",
        "tokenPwd":"",
        "homeId":"",
        "appVersion":"",
        "deviceId":"",
        "deviceName":"",
        "osVersion":"",
        "deviceList":[]
}
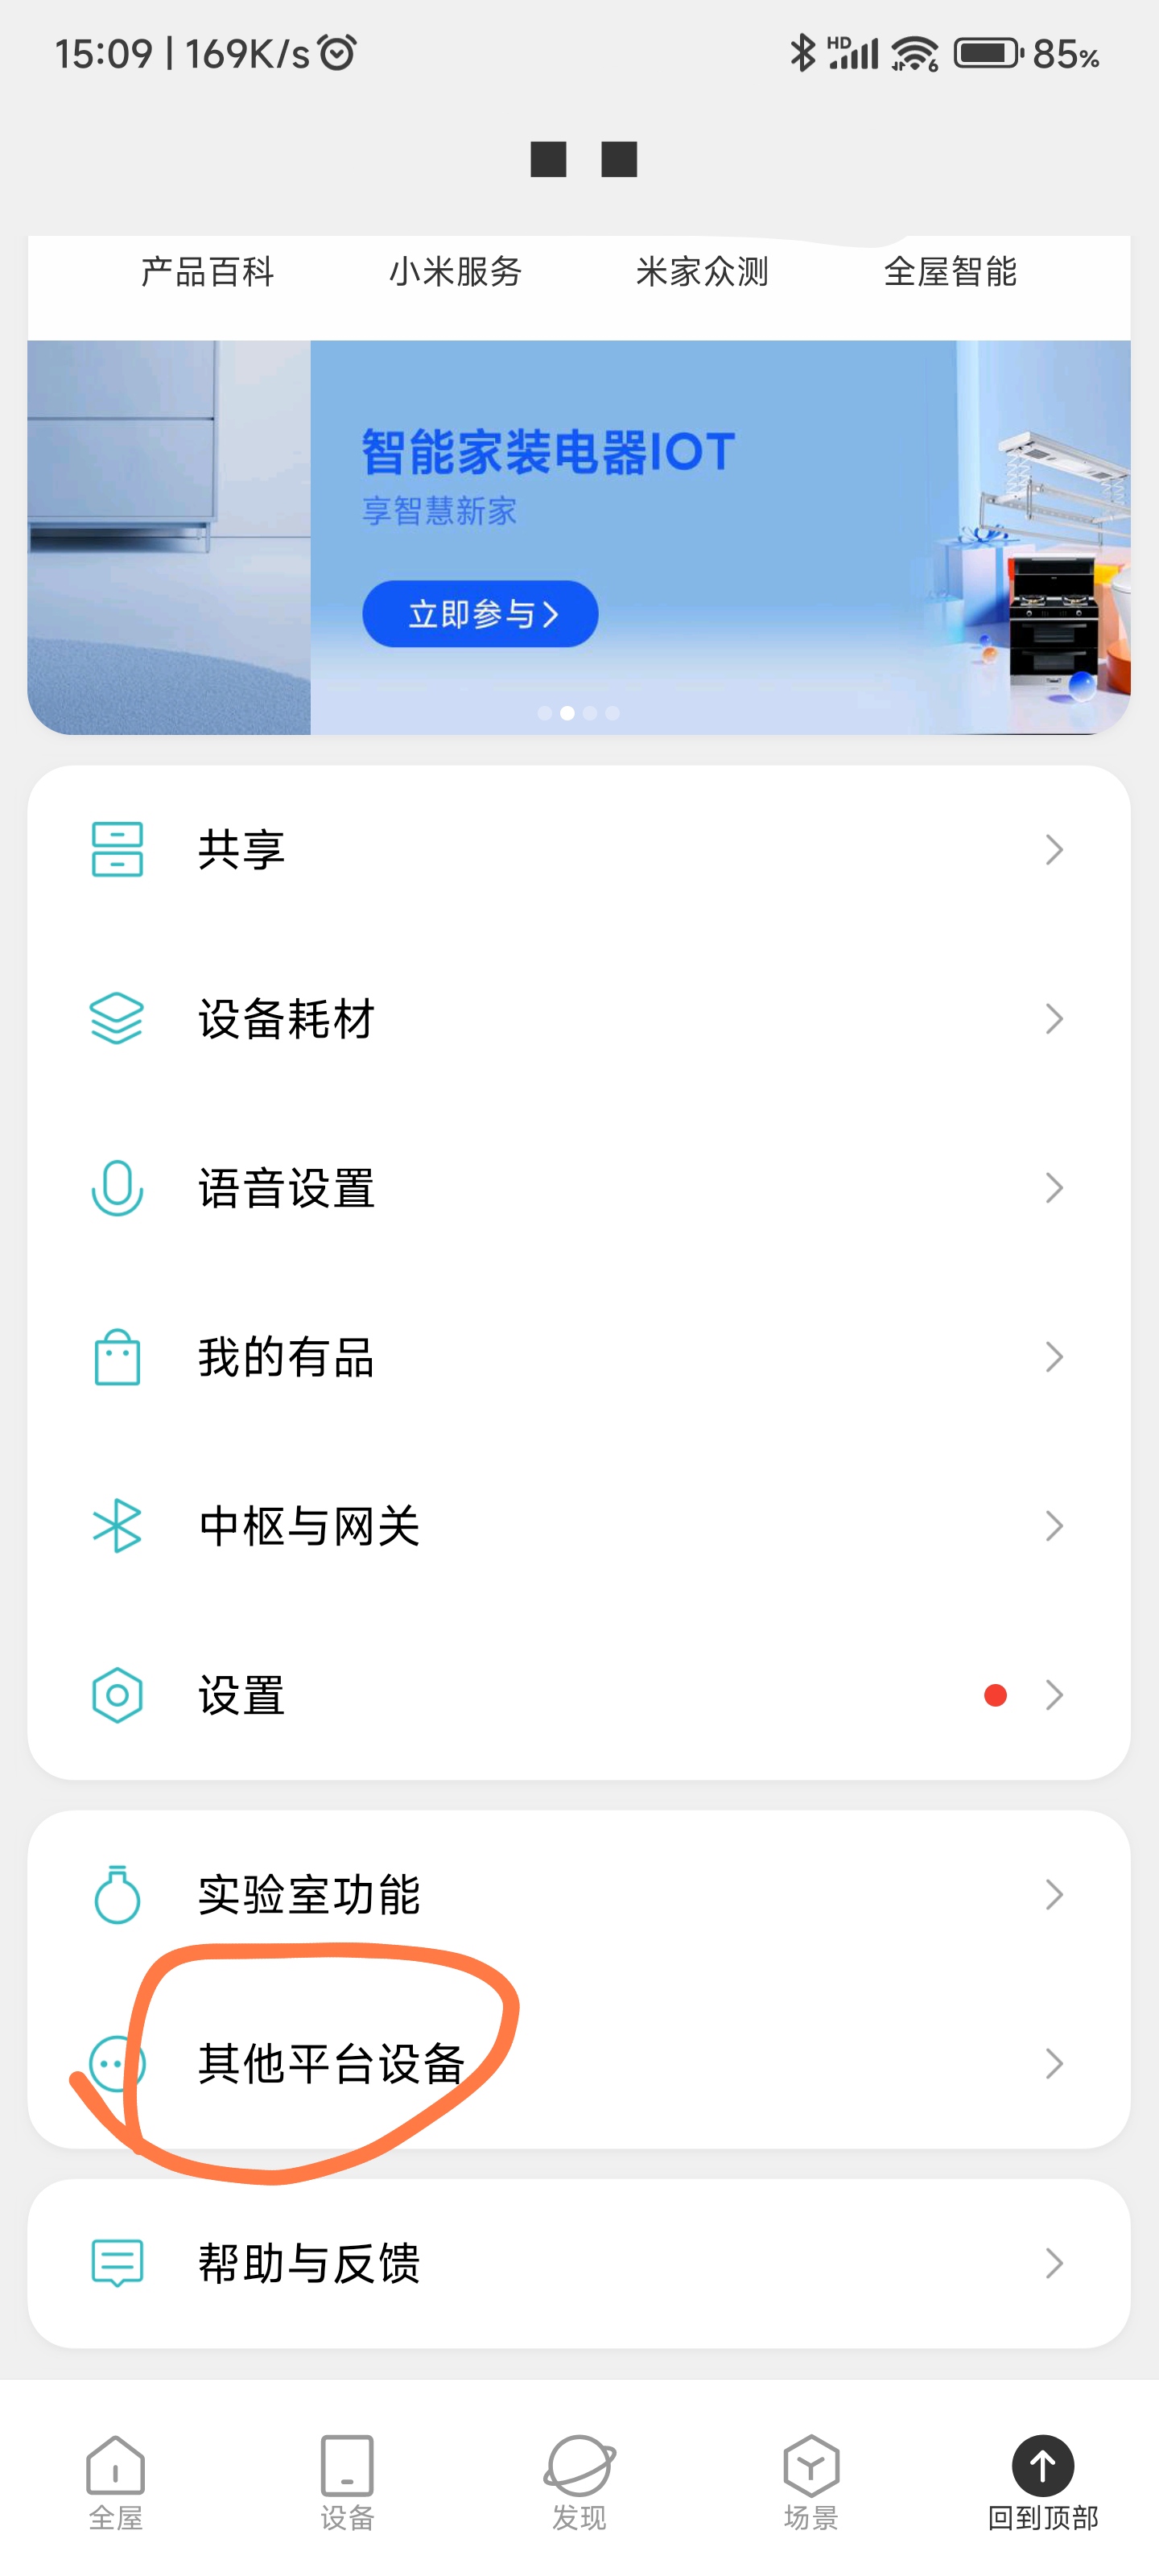
程序正常运行后.
我们 打开 米家 app , 点击 "我的" , 往下翻 选择 "其他平台设备"

先点添加, 找到 点灯科技. ,然后点击 同步设备.
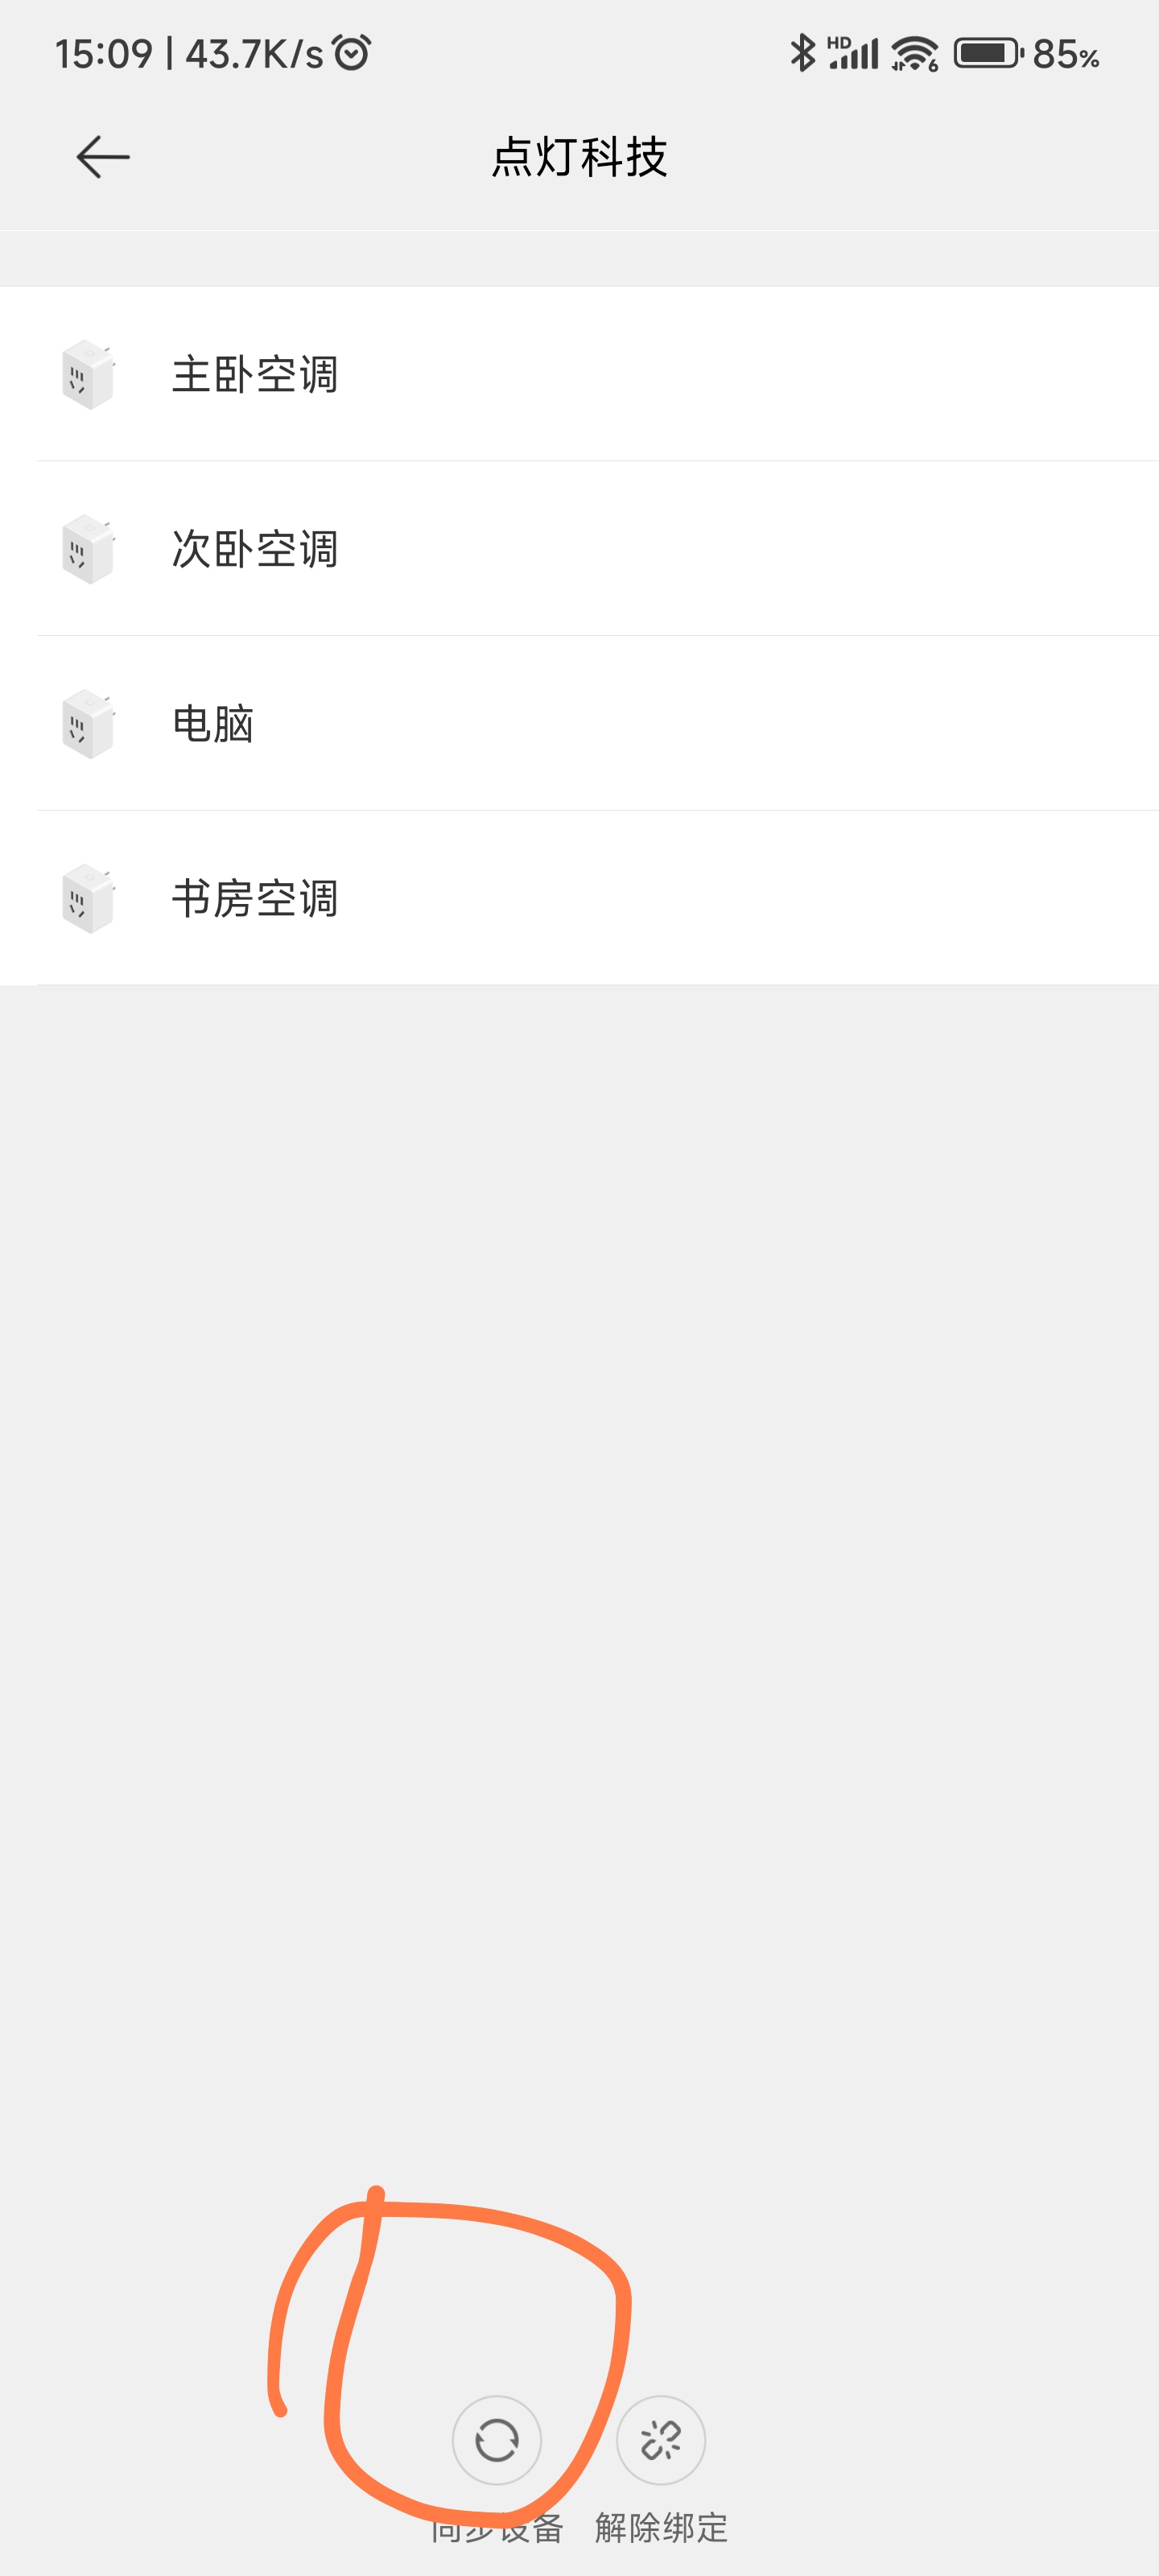
如果这里出现了你刚新加的设备说明就成功了.
然后就可以用小爱控制了


 浙公网安备 33010602011771号