[Next] 六.next的优化
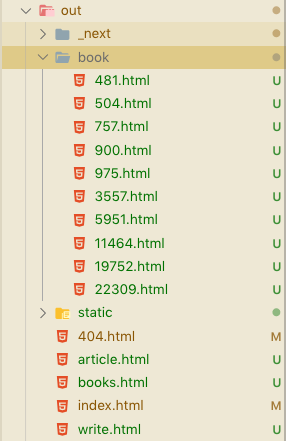
导出 html 并开启服务
我们将 pages 下页面导出为静态 HTML 页面.首先,next.config.js 在应用程序的根目录中创建一个名为的文件,并添加以下内容
exportPathMap: async function() {
    return {
        "/": { page: "/" },
        "/books": { page: "/books" },
        "/article": { page: "/article" },
        "/write": { page: "/write" }
    };
},
然后打开 package.json 并添加 scripts 为以下内容:
  "build": "next build",
  "export": "next export"
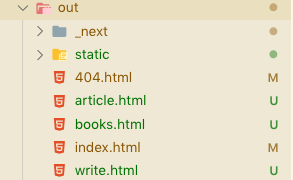
现在,您可以 out 在项目内部的目录中看到导出的 HTML 内容.
现在需要在本地开启一个静态服务器,进行测试
npm install -g serve

cd out

serve -p 8866
serve 是一个非常简单的静态 Web 服务器
导出其他页面
将以下内容添加到 next.config.js 文件中:
  exportPathMap: async function() {
    const paths = {
      "/": { page: "/" },
      "/books": { page: "/books" },
      "/article": { page: "/article" },
      "/write": { page: "/write" }
    };

    const res = await fetch("https://api.tvmaze.com/search/shows?q=batman");
    const data = await res.json();
    const shows = data.map(entry => entry.show);

    shows.forEach(show => {
      paths[`/book/${show.id}`] = {
        page: "/book/[id]",
        query: { id: show.id }
      };
    });

    return paths;
  },
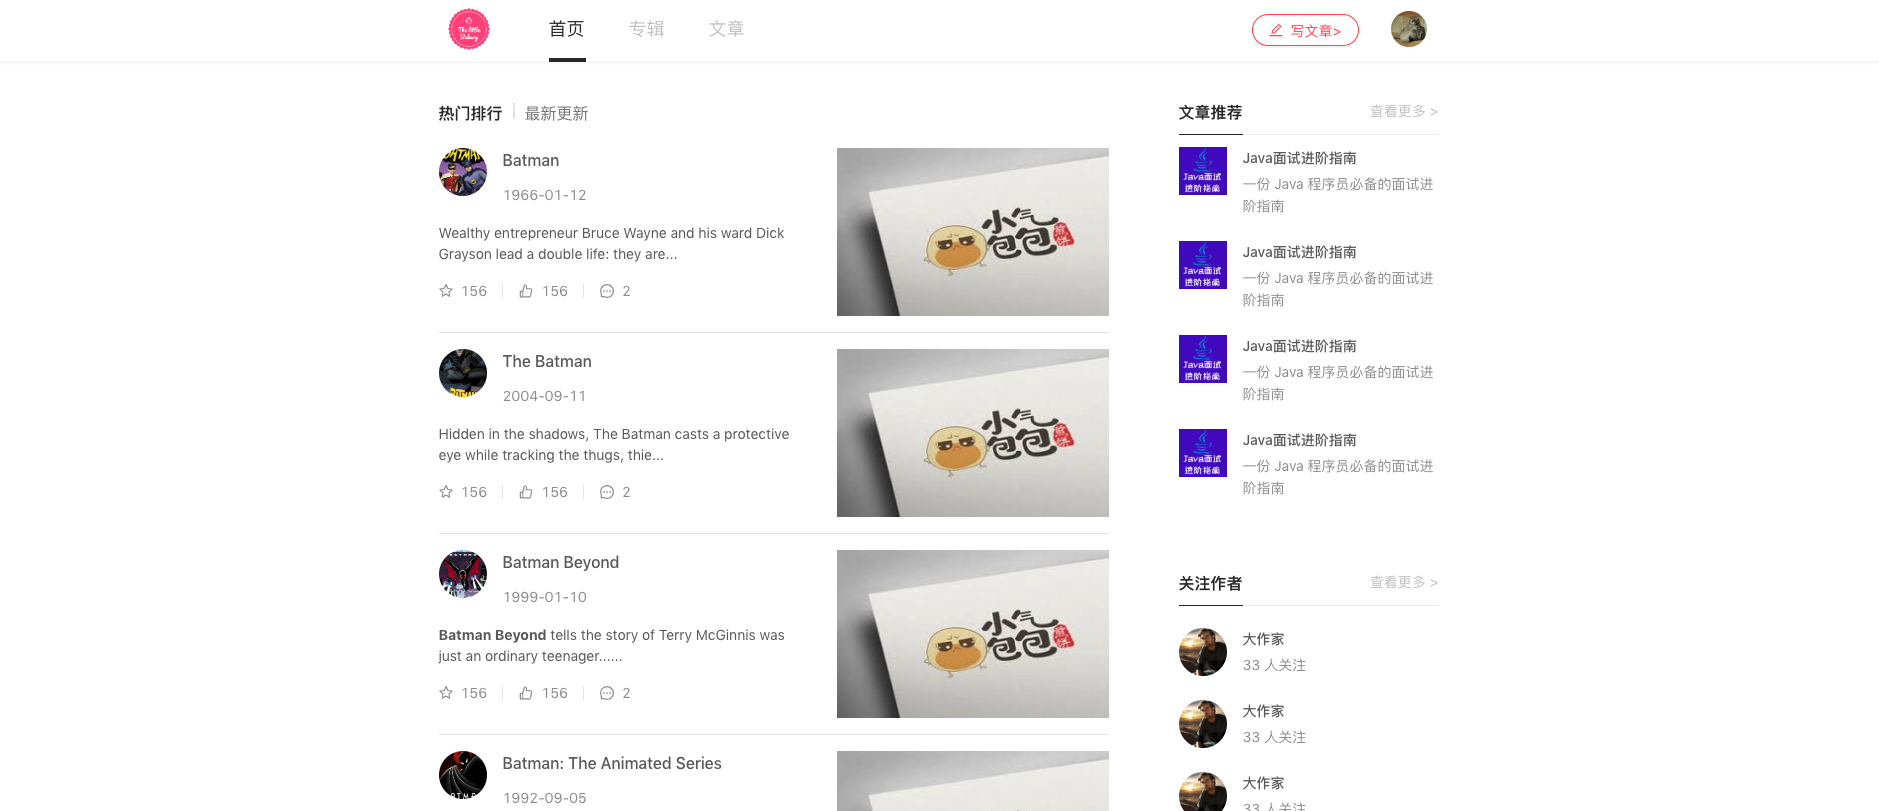
为了渲染详情页面,我们首先获取数据列表.然后,我们循环获取 id,并为其添加新路径并进行查询.
关闭本地服务器并在次执行
npm run export

cd out

serve -p 8080
运行 next export 命令时,Next.js 不会构建应用程序.页面/book/[id]已经存在于构建中,因此无需再次构建整个应用程序.但是,如果我们对应用程序进行了任何更改,则需要再次构建应用程序以获取这些更改,就是在执行一个 npm run build
添加 typescript
npm install --save-dev typescript @types/react @types/node @types/react-dom
将 index.js 更改为 index.tsx
生成的 tsconfig.json
{
  "compilerOptions": {
    "experimentalDecorators": true,
    "target": "es5",
    "lib": ["dom", "dom.iterable", "esnext"],
    "allowJs": true,
    "skipLibCheck": true,
    "strict": true,
    "forceConsistentCasingInFileNames": true,
    "noEmit": true,
    "esModuleInterop": true,
    "module": "esnext",
    "moduleResolution": "node",
    "resolveJsonModule": true,
    "isolatedModules": true,
    "jsx": "preserve"
  },
  "exclude": ["node_modules"],
  "include": ["next-env.d.ts", "**/*.ts", "**/*.tsx"]
}
index.tsx 页面提示缺少类型,因为我们没有告诉 TypeScript 它是 Next.js 页面,在 strict 模式下不允许隐式 any 类型.
import { NextPage } from 'next';

const Home: NextPage<{ userAgent: string }> = ({ userAgent }) => (
  <h1>Hello world! - user agent: {userAgent}</h1>
);

Home.getInitialProps = async ({ req }) => {
  const userAgent = req ? req.headers['user-agent'] || '' : navigator.userAgent;
  return { userAgent };
};

export default Home;
懒加载模块
创建 firebase 页面
整体项目代码 官方案例
添加 analyzer
安装依赖包
npm install firebase @zeit/next-bundle-analyzer cross-env --save
然后打开 package.json 并添加 scripts 为以下内容:
"analyze": "cross-env ANALYZE=true next build",
"analyze:server": "cross-env BUNDLE_ANALYZE=server next build",
"analyze:browser": "cross-env BUNDLE_ANALYZE=browser next build
现在的 next.config.js 所有配置
const fetch = require("isomorphic-unfetch");
const withBundleAnalyzer = require("@zeit/next-bundle-analyzer");
const withLess = require("@zeit/next-less");
const FilterWarningsPlugin = require("webpack-filter-warnings-plugin");

if (typeof require !== "undefined") {
  require.extensions[".less"] = file => {};
}

function HACK_removeMinimizeOptionFromCssLoaders(config) {
  config.module.rules.forEach(rule => {
    if (Array.isArray(rule.use)) {
      rule.use.forEach(u => {
        if (u.loader === "css-loader" && u.options) {
          delete u.options.minimize;
        }
      });
    }
  });
}

module.exports = withBundleAnalyzer(
  withLess({
    analyzeServer: ["server", "both"].includes(process.env.BUNDLE_ANALYZE),
    analyzeBrowser: ["browser", "both"].includes(process.env.BUNDLE_ANALYZE),
    bundleAnalyzerConfig: {
      server: {
        analyzerMode: "static",
        reportFilename: "../bundles/server.html"
      },
      browser: {
        analyzerMode: "static",
        reportFilename: "../bundles/client.html"
      }
    },
    exportPathMap: async function() {
      const paths = {
        "/": { page: "/" },
        "/books": { page: "/books" },
        "/article": { page: "/article" },
        "/write": { page: "/write" }
      };

      const res = await fetch("https://api.tvmaze.com/search/shows?q=batman");
      const data = await res.json();
      const shows = data.map(entry => entry.show);

      shows.forEach(show => {
        paths[`/book/${show.id}`] = {
          page: "/book/[id]",
          query: { id: show.id }
        };
      });

      return paths;
    },
    lessLoaderOptions: {
      javascriptEnabled: true
    },
    webpack(config) {
      config.plugins.push(
        new FilterWarningsPlugin({
          exclude: /mini-css-extract-plugin[^]*Conflicting order between:/
        })
      );
      HACK_removeMinimizeOptionFromCssLoaders(config);
      return config;
    }
  })
);
直接执行
npm run analyze
服务器文件分析
客户端文件分析
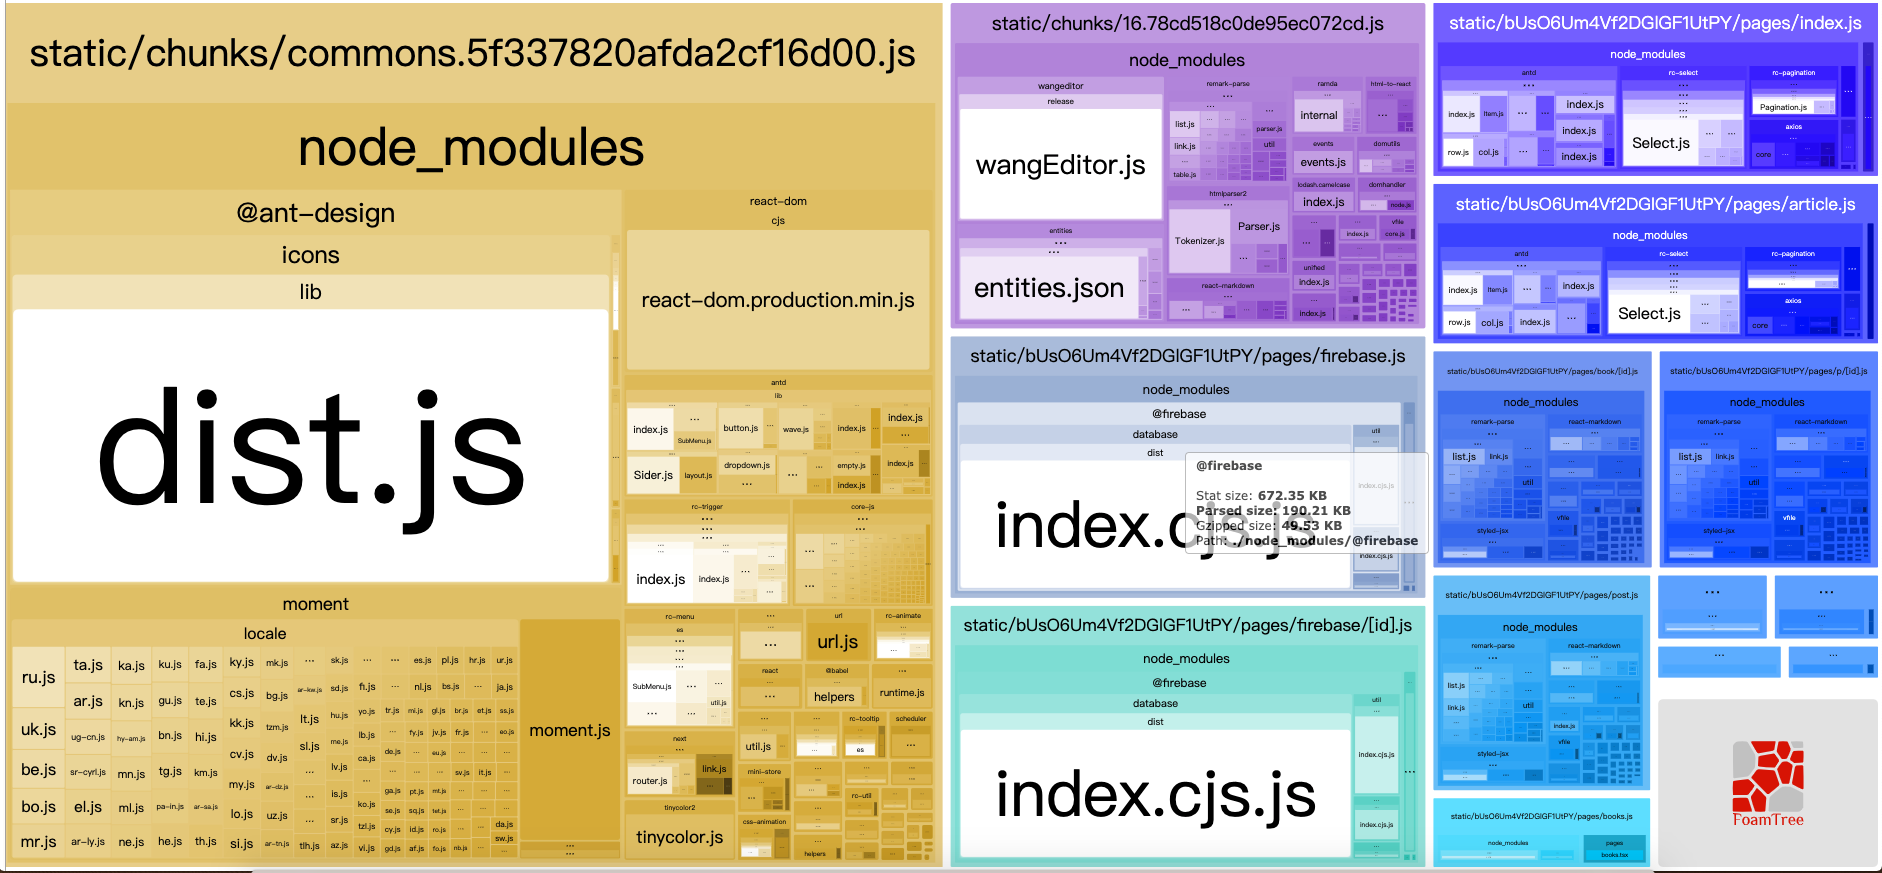
firebase 文件分析详情
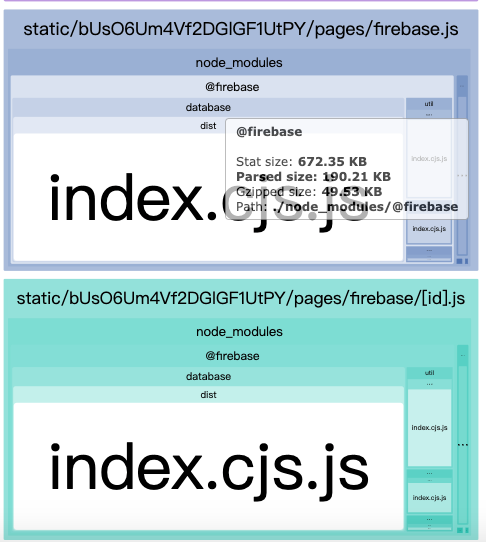
可以看到当前 firebase 和 firebase/[id].js 存在对 firebase 模块的引用
延迟加载
仅当用户尝试导航到其他页面时,我们才使用 firebase 模块.可以使用 Next.js 的动态导入功能轻松地做到这一点.
修改 lib/load-db.js
export default async function loadDb() {
  const firebase = await import('firebase/app');
  await import('firebase/database');

  try {
    firebase.initializeApp({
      databaseURL: 'https://hacker-news.firebaseio.com'
    });
  } catch (err) {
    // we skip the "already exists" message which is
    // not an actual error when we're hot-reloading
    if (!/already exists/.test(err.message)) {
      console.error('Firebase initialization error', err.stack);
    }
  }

  return firebase.database().ref('v0');
}
使用 import()函数加载 firebase 模块,用 await 来等待并解析模块.
再次执行
npm run analyze
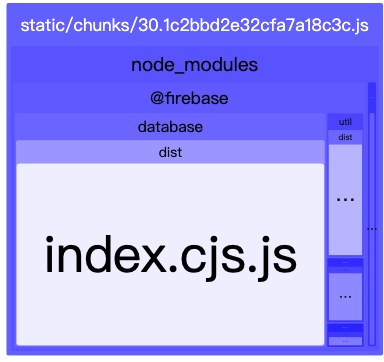
firebase 模块具有自己的 bundle,static/chunks/[a-random-string].js.当您尝试导入 firebase/app 和 firebase/database 模块时,将加载此 bundle.
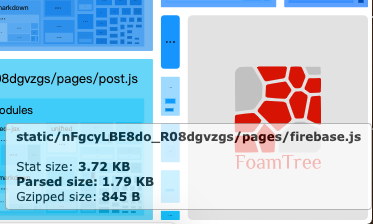
可以看到,firebse 和 firebase/[id].js 文件缩小了不少
进行测试
由于需要更真实的测试在线上的表现,我们需要重新构建.
npm run build
npm run start
然后输入 localhost:8866 (与 dev 不一样),之后进入 firebase 页面在进入 firebase 详情页面.
实际上只会第一次浏览页面时加载,当 firebase 页面导入 firebase/app 和 firebase/database 模块,会加载 firebase 的 bundle.等再次进入的时候,改 bundle 已经加载过,就不会再次加载`
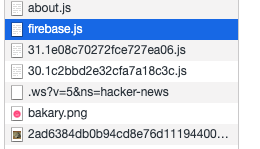
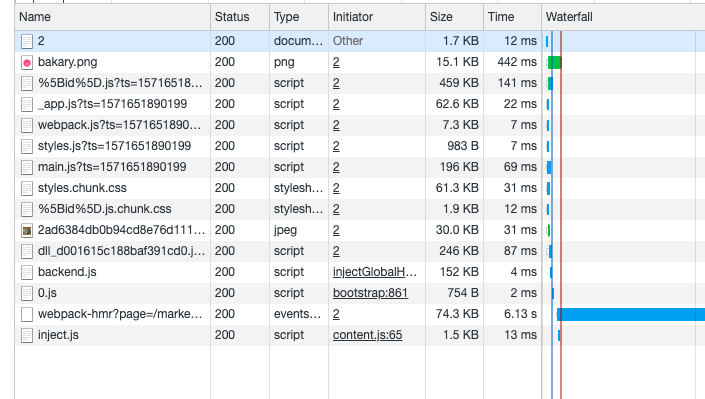
如图,再次加载没有请求

延迟加载的模块减少了主要 JavaScript 包的大小,带来了更快的加载速度
使用 import 的要点
  async componentDidMount() {
    const SimpleMDE = await import("simplemde");
    const marked = await import("marked");
    const hljs = await import("highlight.js");
  ......

  new SimpleMDE.default()
  hljs.default.highlightAuto(code).value
  marked.default
  }
与正常的 import 加载不用的是,import('xxx')加载的形式会将返回的模块放到一个 default 字段中进行保存
延迟加载组件
在一个组件里面同时使用 3 个 markdown 相关组件
import Markdown from "react-markdown";
import marked from "marked";
import Highlight from "react-highlight";
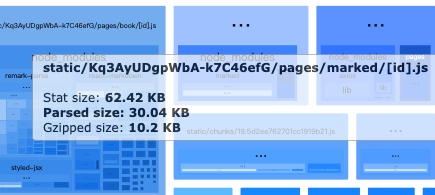
导致这个页面过于庞大
执行npm run analyze看看 markdown/[id]大小
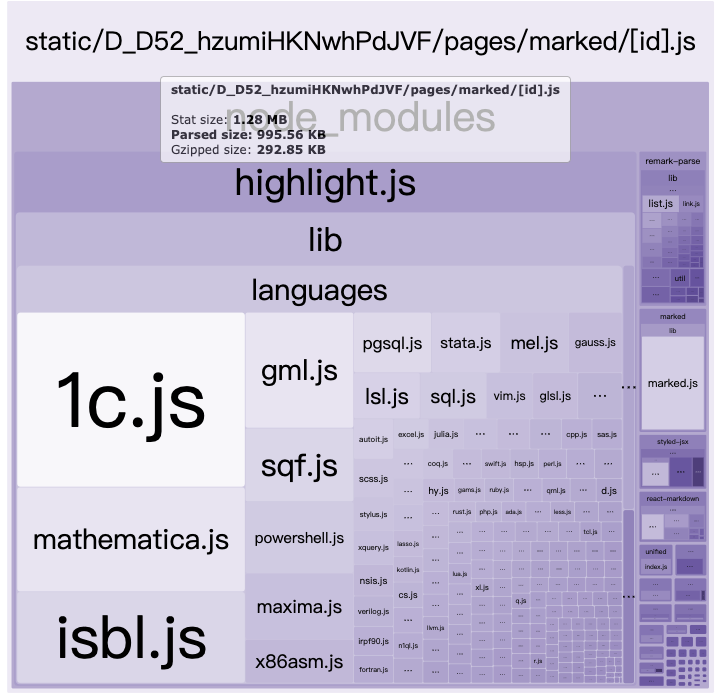
但是我们不需要在一开始就使用这些模块,只有需要加载 markdown 文本时才需要.因此,如果我们仅在使用时才加载,那将大大减少初始 bundle,有助于页面快地加载.
使用 HOC 高阶组件抽离渲染
新建 lib/with-post.js
import Layout from "../components/MyLayout";
import dynamic from "next/dynamic";
import marked from "marked";

const Highlight = dynamic(() => import("react-highlight"));

marked &&
  marked.setOptions({
    gfm: true,
    tables: true,
    breaks: true
  });

function WithPost(InnerComponent, options) {
  return class extends React.Component {
    constructor(props) {
      super(props);
      this.renderMarkdown = this.renderMarkdown.bind(this);
    }

    renderMarkdown(id) {
      // If a code snippet contains in the markdown content
      // then use Highlight component
      if (id === 1 || id === "1") {
        return (
          <Layout>
            <h1>{options.title}</h1>
            <h3>当前id=>{id}</h3>
            <div className="markdown">
              <Highlight innerHTML>{marked(options.content)}</Highlight>
            </div>
          </Layout>
        );
      }

      // If not, simply render the generated HTML from markdown
      return (
        <Layout>
          <h1>{options.title}</h1>
          <h3>当前id=>{id}</h3>
          <div className="markdown">
            <div dangerouslySetInnerHTML={{ __html: marked(options.content) }} />
          </div>
        </Layout>
      );
    }

    render() {
      return <InnerComponent renderMarkdown={this.renderMarkdown}></InnerComponent>;
    }
  };
}

export default WithPost;
修改 marked/[id].js
import React, { Component } from "react";
import withPost from "../../lib/with-post";
import { withRouter } from "next/router";

const data = {
  title: "Deploy apps with ZEIT now",
  content: `
          Deploying apps to ZEIT now is pretty easy.
          Simply run the following command from your app root:
          ~~~bash
          npm i -g now # one time command
          now
          ~~~
        `
};

class Post extends Component {
  constructor(props) {
    super(props);
  }

  render() {
    return <div>{this.props.renderMarkdown(this.props.router.query.id)}</div>;
  }
}

Post = withRouter(Post);
Post = withPost(Post, data);
export default Post;
现在需要使用 Next.js 中的动态导入将 react-highlight 组件转换为动态组件.最终实现这些组件仅在将要在页面中呈现时才加载.可以使用该 next/dynamic 来创建动态组件.
动态组件
//import Highlight from 'react-highlight'
import dynamic from 'next/dynamic';

const Highlight = dynamic(() => import('react-highlight'));
访问 localhost:6688,可以在 network 中找到单次 Highlight 的 bundle 引入
仅在需要时加载
if (id === 1 || id === "1") {
  return (
    <Layout>
      <h1>{options.title}</h1>
      <h3>当前id=>{id}</h3>
      <div className="markdown">
        <Highlight innerHTML>{marked(options.content)}</Highlight>
      </div>
    </Layout>
  );
}
当前判断 id 是否为 1,如果是就加载 Highlight,否则就正常插入 html
使用动态组件后,就会将组件单独实现一个 bundle,加载时候直接加载这一个 bundle 就行了
效果也是实现了 javascript 主文件的精简,同时所以 marked/[id].js 的大小,能够根据实际来判断是否加载一大段可能不需要的代码.
为了模拟真实的服务器渲染效果,需要重新构建
npm run build
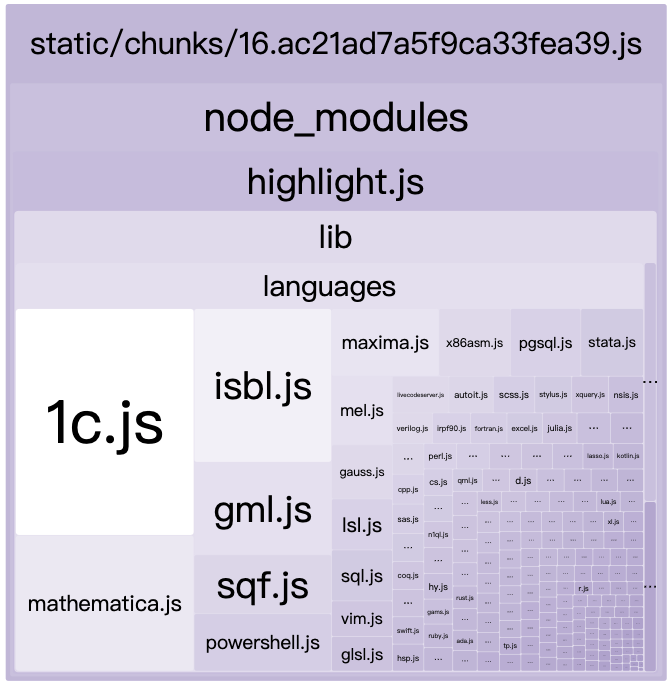
npm run start
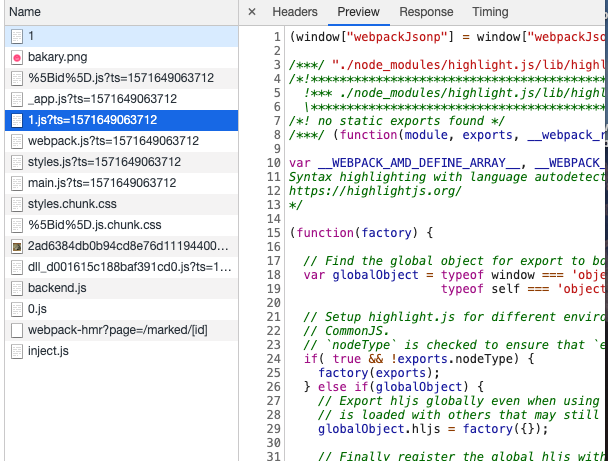
上图中可以看到,highlight 的 bundle 名称是 16.[chunkname].js
输入http://localhost:8866/marked/1,可以在head里面发现<link rel="preload" href="/_next/static/chunks/commons.972eca8099a2576b25d9.js" as="script">的存在.之后再切换为其它的 id,这一个 js 文件就没有在 head 中引入
创建 awp 页面
新建 pages/awp.js
export const config = { amp: true };

export default function Awp(props) {
  return <p>Welcome to the AMP only Index page!!</p>;
}
通过添加 amp: 'hybrid'以下内容来创建混合 AMP 页面
import { useAmp } from 'next/amp';

export const config = { amp: 'hybrid' };

export default function Awp(props) {
  const isAmp = useAmp();
  return <p>Welcome to the {isAmp ? 'AMP' : 'normal'} version of the Index page!!</p>;
}
自动静态优化
如果没有阻塞数据要求,则 Next.js 会自动确定页面为静态页面(可以预呈现).判断标准就是 getInitialProps 在页面中是否存在.
如果 getInitialProps 存在,则 Next.js 不会静态优化页面.相反,Next.js 将使用其默认行为并按请求呈现页面(即服务器端呈现).
如果 getInitialProps 不存在,则 Next.js 会通过将其预呈现为静态 HTML 来自动静态优化您的页面.在预渲染期间,路由器的 query 对象将为空,因为 query 在此阶段我们没有信息要提供.query 水合后,将在客户端填充任何值.
此功能允许 Next.js 发出包含服务器渲染页面和静态生成页面的混合应用程序.这样可以确保 Next.js 始终默认发出快速的应用程序.
静态生成的页面仍然是反应性的:Next.js 将对您的应用程序客户端进行水化处理,使其具有完全的交互性.
优点是优化的页面不需要服务器端计算,并且可以立即从 CDN 位置流式传输到最终用户.为用户带来超快的加载体验.
- 在大多数情况下,你并不需要一个自定义的服务器,所以尝试添加 target: 'serverless'
- getInitialProps 是页面是否静态的主要决定因素,如果不需要 SSR,请不要添加到页面
- 并非所有动态数据都必须具有 SSR,例如,如果它在登录后,或者您不需要 SEO,那么在这种情况下,最好在外部进行获取 getInitialProps 使用静态 HTML 加载速度

 浙公网安备 33010602011771号