vuex的Store简单使用过程
介绍
Store的代码结构一般由State、Getters、Mutation、Actions这四种组成,也可以理解Store是一个容器,Store里面的状态与单纯的全局变量是不一样的,无法直接改变store中的状态。想要改变store中的状态,只有一个办法,显示地提交mutation。
import Vue from 'vue'
import Vuex from 'vuex'

Vue.use(Vuex)

export default new Vuex.Store({
  state: {

  },
  getters:{

  },
  mutations: {

  },
  actions: {

  }
})
简单的Store
小朋友,要是没有安装vue-cli,不要看这个文档,看了也没用,咳咳···,创建一个vue项目直截了当,找到一个合适的文件夹,在此目录下打开终端,使用vue-cli命令行创建项目(项目名为murenziwei)
vue create murenziwei
你会被提示选取一个 preset。你可以选默认的包含了基本的 Babel + ESLint 设置的 preset,也可以选“手动选择特性”来选取需要的特性。

按下Enter,等da我现在只需要一个能运行的vue项目就行,命令执行完成后,文件夹会自动生成一个vue项目
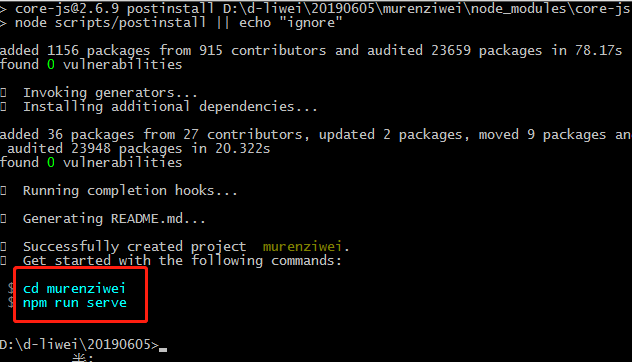
按照上面图片红色框的命令来执行
/*切换目录*/
cd murenziwei
/*启动项目*/
npm run serve
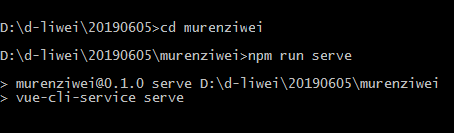
启动项目完毕后,打开浏览器,输入从终端得到的网址

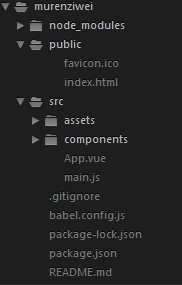
到这,我们开始安装router、vuex。此时的项目结构如图以下
Ctrl+C退出启动,继续执行vue-cli,脚手架安装插件router和vuex开始
安装插件router
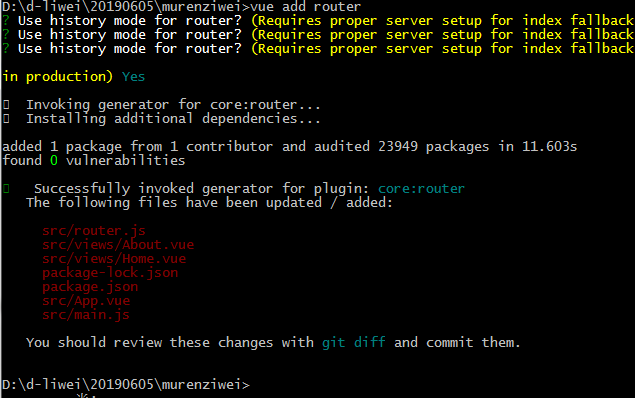
vue add router
输入一个大写Y,按下Enter
安装插件vuex
做法同上
vue add vuex

我们再重新看一下此时的项目结构,多了router.js和store.js,其它相关的文件也被修改

启动vue项目,npm run serve,在store.js中添加一个新状态count
import Vue from 'vue'
import Vuex from 'vuex'

Vue.use(Vuex)

export default new Vuex.Store({
  state: {
  	count:1
  },
  mutations: {

  },
  actions: {

  }
})
修改组件HelloWorld,开始使用Store里注册的新状态
<template>
  <div class="hello">
    <h1>{{ this.$store.state.count }}</h1>

  </div>
</template>

<script>
export default {
  name: 'HelloWorld',
  props: {
    msg: String
  }
}
</script>

<!-- Add "scoped" attribute to limit CSS to this component only -->
<style scoped>
h3 {
  margin: 40px 0 0;
}
ul {
  list-style-type: none;
  padding: 0;
}
li {
  display: inline-block;
  margin: 0 10px;
}
a {
  color: #42b983;
}
</style>
浏览效果

往store.js里的mustations添加改变状态值的加减功能,
import Vue from 'vue'
import Vuex from 'vuex'

Vue.use(Vuex)

export default new Vuex.Store({
  state: {
  	count:1
  },
  mutations: {
  	addmu(state){state.count++},
  	lessmu(state){state.count--}
  },
  actions: {

  }
})
回到HelloWorld组件, 添加增加和减少按钮,用来提交store的mutation
<template>
  <div class="hello">
    <h1>{{ this.$store.state.count }}</h1>
    <div>
      <button @click="addfn()">增加</button>
      <button @click="lessfn()">减少</button>
    </div>

  </div>
</template>

<script>
export default {
  name: 'HelloWorld',
  props: {
    msg: String
  },
  methods:{
    addfn(){
       //提交名为addmu的mutations
       this.$store.commit('addmu');
    },
    lessfn(){
       //提交名为lessmu的mutations
       this.$store.commit('lessmu');
    }
  }
}
</script>

<!-- Add "scoped" attribute to limit CSS to this component only -->
<style scoped>
h3 {
  margin: 40px 0 0;
}
ul {
  list-style-type: none;
  padding: 0;
}
li {
  display: inline-block;
  margin: 0 10px;
}
a {
  color: #42b983;
}
</style>
效果如下

由于mutation必须同步执行的限制,不方便实现复杂的功能。不过,别担心,看见了那个Actions吗?它就不受约束!我们可以在 它内部执行异步操作
修改store.js
import Vue from 'vue'
import Vuex from 'vuex'

Vue.use(Vuex)

export default new Vuex.Store({
  state: {
  	count:1
  },
  mutations: {
  	addmu(state){state.count++},
  	lessmu(state){state.count--}
  },
  actions: {
  	addac({commit}){commit('addmu')},
  	lessac({commit}){commit('lessmu')}
  }
})
修改HelloWorld组件,将提交mutation改为分发Action,Actions支持载荷方式和对象方式
<template>
  <div class="hello">
    <h1>{{ this.$store.state.count }}</h1>
    <div>
      <button @click="addfn()">增加</button>
      <button @click="lessfn()">减少</button>
    </div>

  </div>
</template>

<script>
export default {
  name: 'HelloWorld',
  props: {
    msg: String
  },
  methods:{
    addfn(){
       //以载荷方式分发
       this.$store.dispatch('addac');
    },
    lessfn(){
       //以对象方式分发
       this.$store.dispatch({type:'lessac'});
    }
  }
}
</script>

<!-- Add "scoped" attribute to limit CSS to this component only -->
<style scoped>
h3 {
  margin: 40px 0 0;
}
ul {
  list-style-type: none;
  padding: 0;
}
li {
  display: inline-block;
  margin: 0 10px;
}
a {
  color: #42b983;
}
</style>
效果如下

为了更直观的感受下Store的魅力,在views文件夹中添加一个About.vue也使用store状态
About.vue
<template>
  <div class="about">
    <h1>This is an about page</h1>
    <HelloWorld/>
  </div>
</template>
<script>
// @ is an alias to /src
import HelloWorld from '@/components/HelloWorld.vue'

export default {
  name: 'home',
  components: {
    HelloWorld
  }
}
</script>
跳转About.vue或者Home.vue,store里面的状态值是怎么样的就是怎么样的?


 浙公网安备 33010602011771号