自动化测试之pytest框架
1、运行方式
2、断言
3、Fixture
4、参数化
5、运行测试
6、跳过测试
7、生成测试报告
8、pytest插件
1、运行方式
1. 命令行模式
命令行中执行 pytest -s login.py
2. 主函数模式
if __name__ == '__main__':
    pytest.main(["-s", "login.py"])
3. pytest.ini
在 pytest.ini 文件中配置 pytest 的运行参数。
注意点:
1. 位置:配置文件一般会放在项目的根目录下
2. 编码:必须是ANSI,可以使用文本编辑工具修改编码格式
3. 规则:无论是哪种运行方式,都会读取配置文件,是最高级的
4. 文件开头第一行除了注释,一定为 [pytest] ,这是固定格式,文件名 pytest.ini 也是固定的,不能自己重命名
常用参数:
addopts 命令行的参数,用空格分隔
testpaths 测试用例的路径
markers 标记参数,赋值方式为 key:value
python_files 模块的命名规则 xx.py
python_classes 类名的命名规则 Xxx
python_functions 方法的命名规则 **
required_plugins 插件的使用
xfail_strict = true 禁用xpass
2、断言
pytest 单元测试框架并没有提供专门的断言方法,而是直接使用Python 的 assert 进行断言。
import pytest

# 功能:用于计算 a 与 b 相加的和
def add(a, b):
    return a + b

# 功能:用于判断素数
def is_prime(n):
    if n <= 1:
        return False
    for i in range(2, n):
        if n % i == 0:
            return False
        return True

# 测试相等
def test_add_1():
    assert add(3, 4) == 7

# 测试不相等
def test_add_2():
    assert add(17, 22) != 50

# 测试大于或等于
def test_add_3():
    assert add(17, 22) <= 50

# 测试小于或等于
def test_add_4():
    assert add(17, 22) >= 38

# 测试包含
def test_in():
    a = "hello"
    b = "he"
    assert b in a

# 测试不包含
def test_not_in():
    a = "hello"
    b = "hi"
    assert b not in a

# 判断是否为 True
def test_true_1():
    assert is_prime(13)

# 判断是否为 True
def test_true_2():
    assert is_prime(7) is True

# 判断是否不为 True
def test_true_3():
    assert not is_prime(4)

# 判断是否不为 True
def test_true_4():
    assert is_prime(6) is not True

# 判断是否为 False
def test_false_1():
    assert is_prime(8) is False


if __name__ == '__main__':
    pytest.main(["-s", "0701.py"])
3、Fixture
Fixture 通常用来对测试方法、测试函数、测试类和整个测试文件进行初始化或还原测试环境。
1. setup_module/teardown_module:在当前文件中,在所有测试用例执行之前与之后执行。
2. setup_function/teardown_function:在每个测试函数之前与之后执行。
3. setup/teardown:在每个测试函数之前与之后执行。这两个方法同样可以作用于类方法。
4、参数化
# argnames:参数名
# argvalues:参数对应值,类型必须为可迭代类型,一般使用list
@pytest.mark.parametrize(argnames, argvalues, indirect=False,ids=None, scope=None)
示例:
import pytest

class TestLogin:
    @pytest.mark.parametrize(("username", "password"), [("zhangsan", "zhangsan123"), (" xiaoming", "xiaoming123")])
    def test_a(self, username, password):
        print(username)
        print(password)
        assert 1
5、运行测试
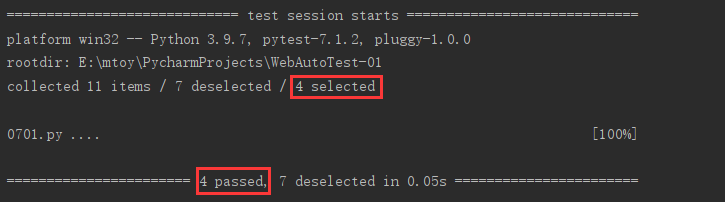
1. 运行名称中包含某字符串的测试用例
例如:通过“-k”来指定在名称中包含“add”的测试用例
pytest -k add test.py
if __name__ == '__main__':
    pytest.main(["-k", "add", "test.py"])
2. 减少测试的运行冗长
pytest -q test.py
if __name__ == '__main__':
    pytest.main(["-q", "test.py"])

3. 如果出现一条测试用例失败,则退出测试
这在测试用例的调试阶段是有用的,当出现一条失败的测试用例时,应该先通过调试让这条测试用例运行通过,而不是继续执行后面的测试用例。
pytest -x test.py
if __name__ == '__main__':
    pytest.main(["-x", "test.py"])

4. 运行测试目录
测试目录既可以指定相对路径(如 ./test_dir ) , 也可以指定绝对路径(如D:\pytest_sample\test_dir)。
pytest ./test_dir
5. 指定特定类或方法执行
这里指定运行 test_fixtures_02.py 文件中 TestMultiply 类下的 test_numbers_5_6()方法,文件名、类名和方法名之间用“::”符号分隔。
pytest test_fixtures_02.py::TestMultiply::test_numbers_5_6
6、跳过测试
使用方式:在需要跳过的测试脚本之上加上装饰器 @pytest.mark.skipif(condition, reason="xxx")
# condition:跳过的条件,必传参数
# reason:标注原因,必传参数
@pytest.mark.skipif(condition, reason=None)
7、生成测试报告
1. 生成 JUnit XML 文件
pytest ./test_dir --junit-xml=./report/log.xml
2. 生成在线测试报告
pytest ./test_dir --pastebin=all
上述代码可生成一个 session-log 链接,复制链接,通过浏览器打开,会得到一张 HTML格式的测试报告。
8、pytest 插件
pip install pytest-html
pytest ./ --html=./report/result.html
2. pytest-rerunfailures
pytest-rerunfailures 可以在测试用例失败时进行重试。
pip install pytest-rerunfailures
通过“--reruns”参数设置测试用例运行失败后的重试次数。
pytest -v test.py --reruns 3
3. pytest-parallel
pytest-parallel 扩展可以实现测试用例的并行运行。
pip install pytest-parallel
参数“--tests-per-worker”用来指定线程数,“auto”表示自动分配。
pytest -q test.py --tests-per-worker auto
示例:
from time import sleep

def test_01():
    sleep(3)

def test_02():
    sleep(5)

def test_03():
    sleep(6)
不使用线程运行测试用例花费14.05s,使用后被缩短到 6.02s。
4. pytest-ordering
控制函数执行顺序。
pip3 install pytest-ordering
使用:
1)标记于被测试函数,@pytest.mark.run(order=x)
2)根据order传入的参数来解决运行顺序
3)order值全为正数或全为负数时,运行顺序:值越小,优先级越高
4)正数和负数同时存在:正数优先级高

 浙公网安备 33010602011771号