SpringBoot从0到0.7——第二天
 今天来搭建一个登陆界面进行跳转,不带有数据库,看似就很简单的一个界面,却让我学习了好长时间去了解学习他的原理,能看懂的话还是尽量去看源码。
SpringBoot从0到0.7——第二天
今天来搭建一个登陆界面进行跳转,不带有数据库,看似就很简单的一个界面,却让我学习了好长时间去了解学习他的原理,能看懂的话还是尽量去看源码。
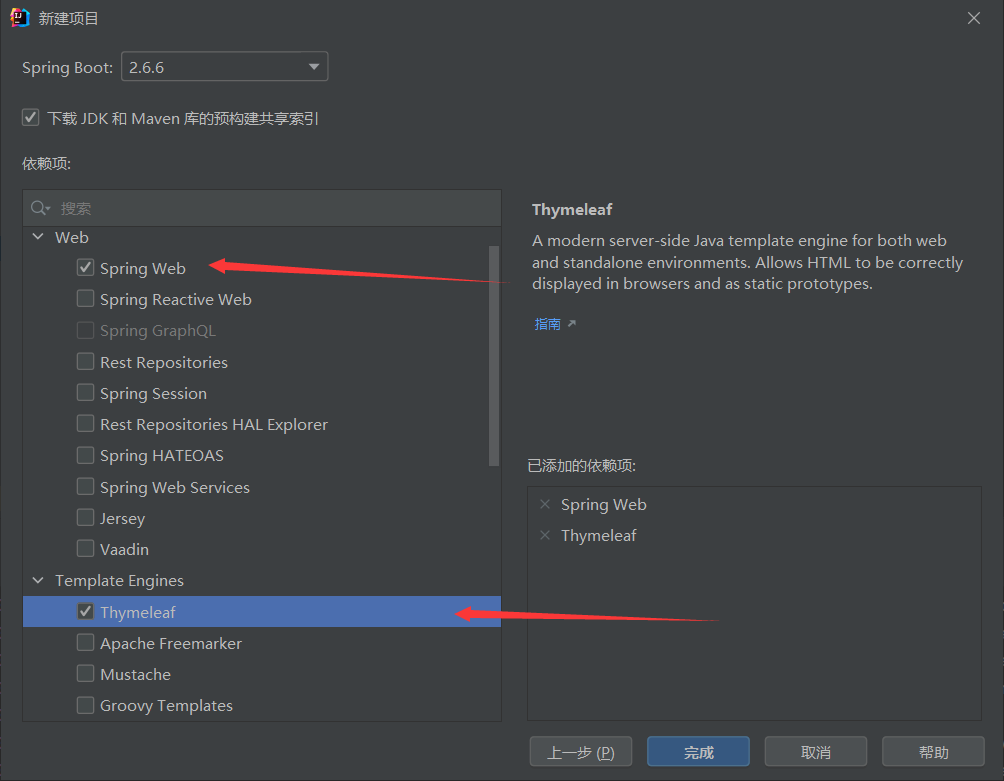
首先创建一个项目,添加Spring Web 和 模板引擎
添加模板引擎的第二种方法,在pom.xml里面添加
<dependency>
      <groupId>org.springframework.boot</groupId>
      <artifactId>spring-boot-starter-thymeleaf</artifactId>
</dependency>
添加网页,在resources下的templates创建html网页
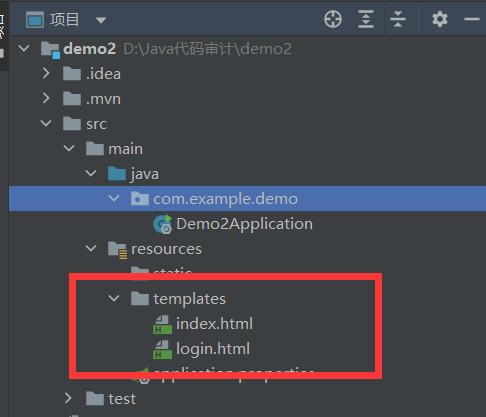
打开login.html开始编辑,index.php作为成功界面
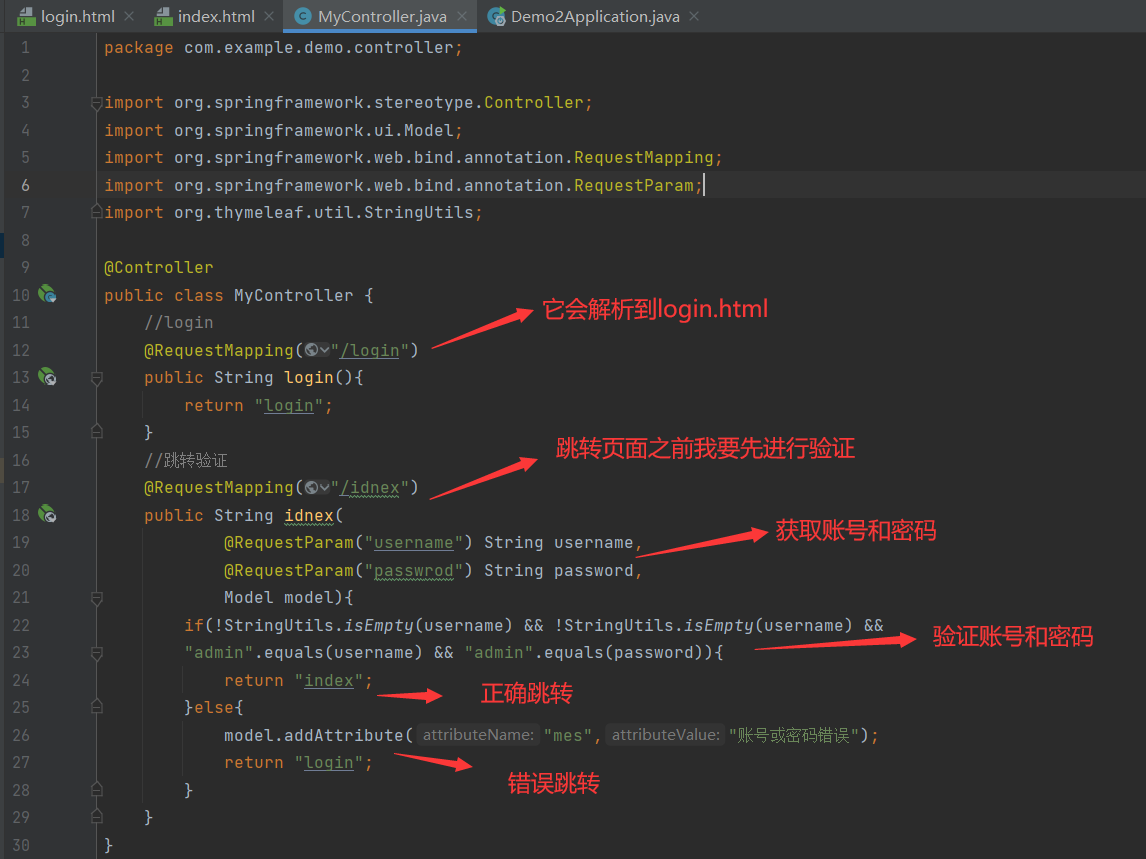
开始创建controller包,并在包下创建MyController类,创建Http接口
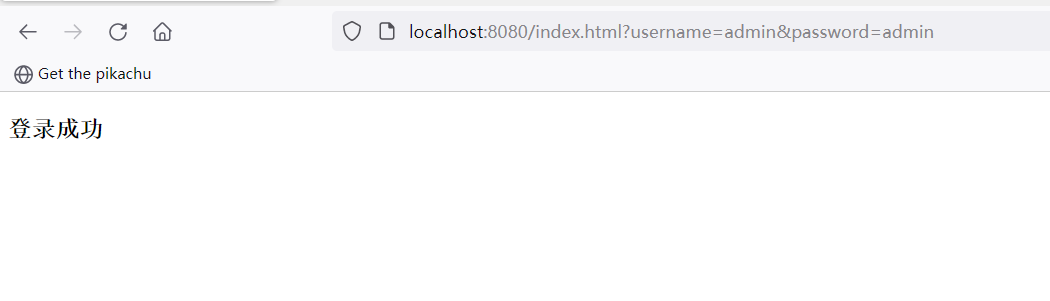
运行代码看看情况如何

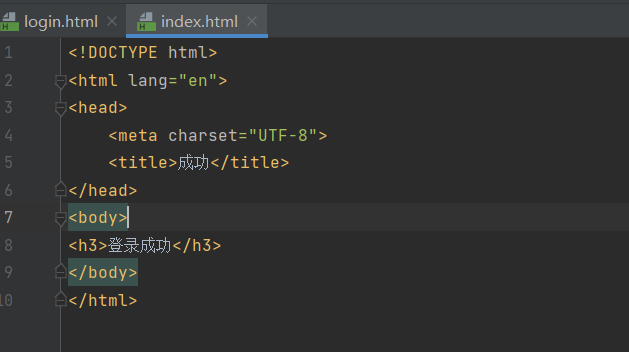
输入正确
输入错误没有任何提示,所以我们要增加一个提示,在login.html里面加上一行代码
<p style="color:red" th:text="${msg}" th:if="${not #strings.isEmpty(msg)}"></p>
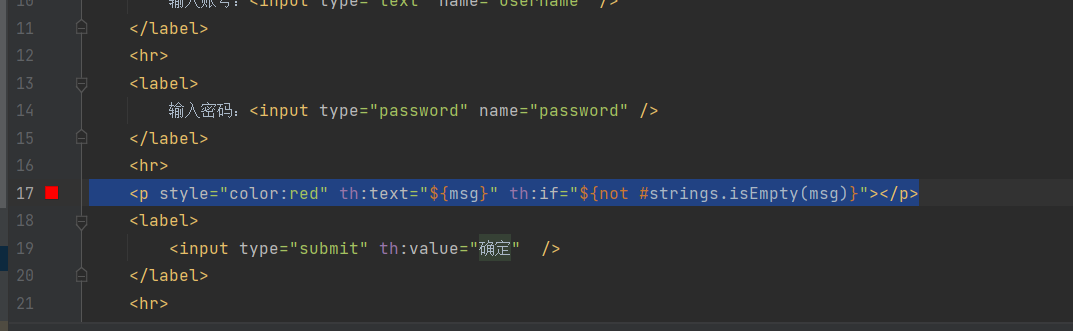
看一下效果,输入错误后他会提示错误

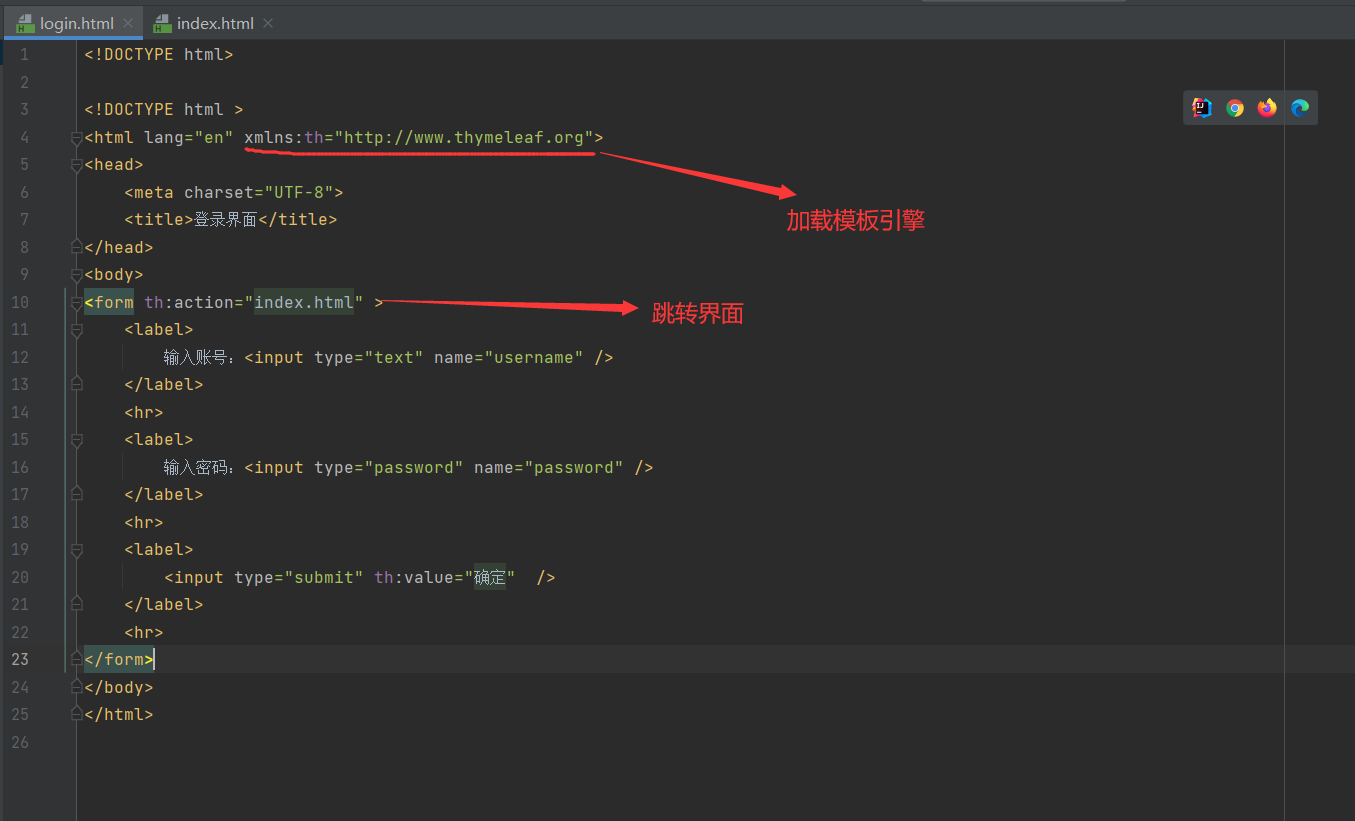
login.html代码
<!DOCTYPE html>

<!DOCTYPE html >
<html lang="en" xmlns:th="http://www.thymeleaf.org">
<head>
    <meta charset="UTF-8">
    <title>登录界面</title>
</head>
<body>
<form th:action="index.html" >
    <label>
        输入账号:<input type="text" name="username" />
    </label>
    <hr>
    <label>
        输入密码:<input type="password" name="password" />
    </label>
    <hr>
    <p style="color:red" th:text="${msg}" th:if="${not #strings.isEmpty(msg)}"></p>
    <label>
        <input type="submit" th:value="确定"  />
    </label>
    <hr>
</form>
</body>
</html>
MyController代码
package com.example.demo.controller;

import org.springframework.stereotype.Controller;
import org.springframework.ui.Model;
import org.springframework.web.bind.annotation.RequestMapping;
import org.springframework.web.bind.annotation.RequestParam;
import org.thymeleaf.util.StringUtils;

@Controller
public class MyController {
    //login
    @RequestMapping("/login")
    public String login(){
        return "login";
    }
    //跳转验证
    @RequestMapping({"/","/index.html"})
    public String login(
            @RequestParam("username") String username,
            @RequestParam("password")  String password,
            Model model) {
        if (!StringUtils.isEmpty(username) && !StringUtils.isEmpty(username) &&
                "admin".equals(username) && "admin".equals(password)) {
            return "index";
        } else {
            model.addAttribute( "msg", "用户名或密码错误");
            return "login";
        }

    }
}


 浙公网安备 33010602011771号