Android添加布局和按键
 我拿LinearLayout 线性布局来做演示,推荐书籍 《基于android studio的app案列教程(第2版)—宋三华》
Android添加布局和按键
Android布局方式分为
1.LinearLayout (线性布局)
3.FrameLayout (帧布局)
4.TableLayout (表格布局)
5.RecyclerView (循环使徒)
我拿LinearLayout 线性布局来做演示,推荐书籍 《基于android studio的app案列教程(第2版)—宋三华》 讲的很详细,很好理解,没有基础也能看。
首先:找到app下的activity_main.xml,双击打开,

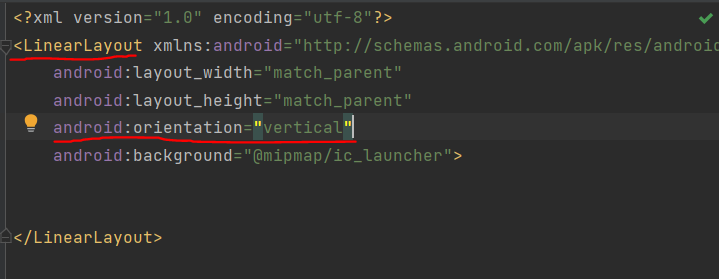
我们将布局方式改为LinearLayout ,同时使用垂直方向布局(vertical),水平方向布局为horizontal。
这时候我们得到了一个空白的线性布局,这时候就可以在布局中添加按键(设置背景看我的文章:Android添加背景和设置app图标)
一行里面添加两个Button按键,添加三个按键就是在LinearLayout之中含有三个Button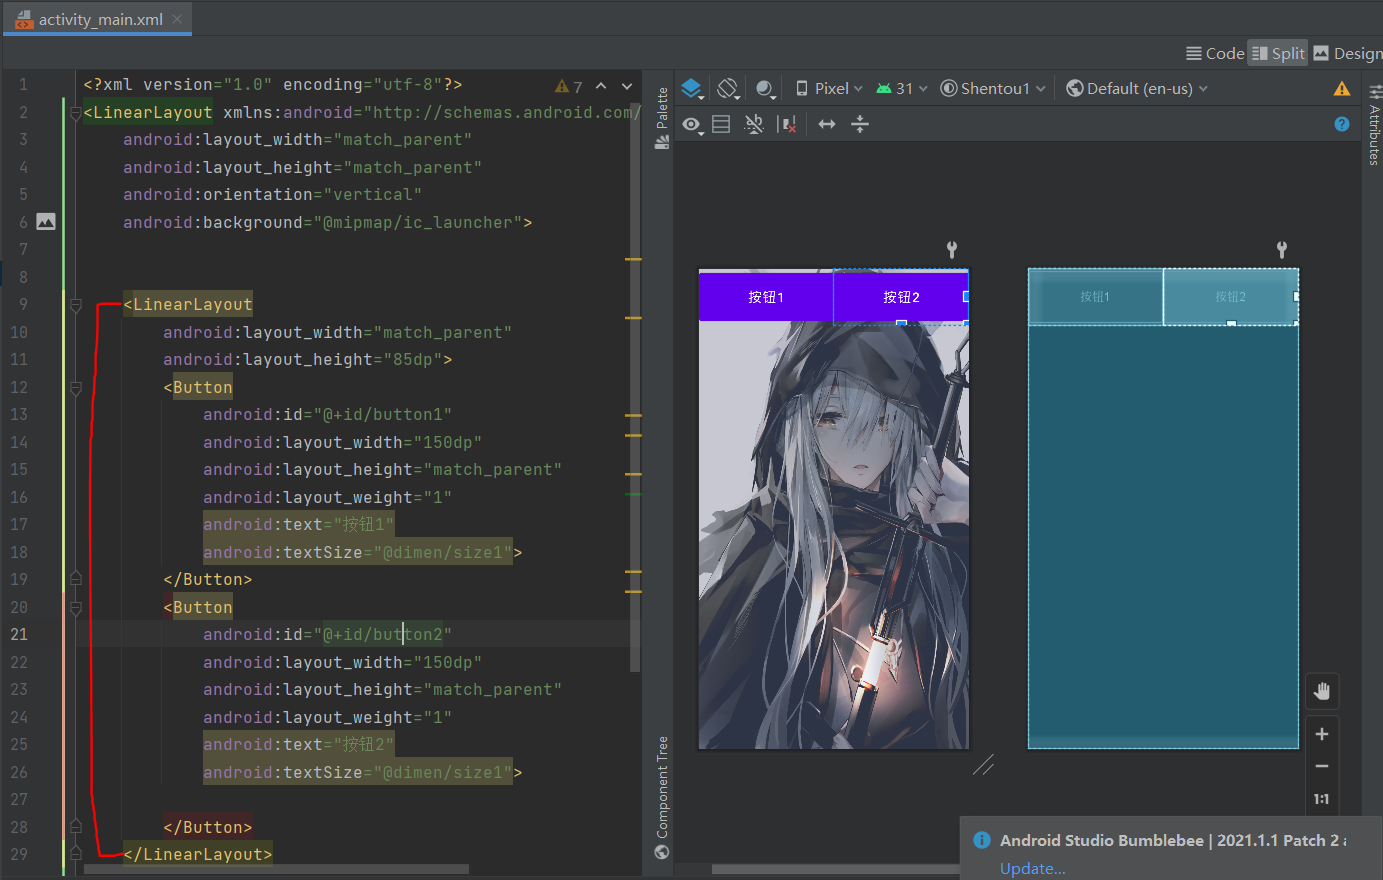
将以下代码保存到activity_main.xml可直接使用,添加背景还需要自己配置 Android添加背景和设置app图标
<?xml version="1.0" encoding="utf-8"?>
<LinearLayout xmlns:android="http://schemas.android.com/apk/res/android"
    android:layout_width="match_parent"
    android:layout_height="match_parent"
    android:orientation="vertical">

    <LinearLayout
        android:layout_width="match_parent"
        android:layout_height="270dp">
    </LinearLayout>

    <LinearLayout
        android:layout_width="match_parent"
        android:layout_height="85dp">
        <Button
            android:id="@+id/button1"
            android:layout_width="150dp"
            android:layout_height="match_parent"
            android:layout_weight="1"
            android:text="馒头1"
            android:textSize="20dp">
        </Button>
        <Button
            android:id="@+id/button2"
            android:layout_width="150dp"
            android:layout_height="match_parent"
            android:layout_weight="1"
            android:text="馒头2"
            android:textSize="20dp">

        </Button>
    </LinearLayout>
    <LinearLayout
        android:layout_width="match_parent"
        android:layout_height="85dp">
        <Button
            android:id="@+id/button3"
            android:layout_width="150dp"
            android:layout_height="match_parent"
            android:layout_weight="1"
            android:text="馒头3"
            android:textSize="20dp"
            >
        </Button>
        <Button
            android:id="@+id/button4"
            android:layout_width="150dp"
            android:layout_height="match_parent"
            android:layout_weight="1"
            android:text="馒头4"
            android:textSize="20dp">

        </Button>
    </LinearLayout>
    <LinearLayout
        android:layout_width="match_parent"
        android:layout_height="85dp">
        <Button
            android:id="@+id/button5"
            android:layout_width="150dp"
            android:layout_height="match_parent"
            android:layout_weight="1"
            android:text="馒头5"
            android:textSize="20dp">
        </Button>
        <Button
            android:id="@+id/button6"
            android:layout_width="150dp"
            android:layout_height="match_parent"
            android:layout_weight="1"
            android:text="馒头6"
            android:textSize="20dp">

        </Button>
    </LinearLayout>
    <LinearLayout
        android:layout_width="match_parent"
        android:layout_height="85dp">
        <Button
            android:id="@+id/button7"
            android:layout_width="150dp"
            android:layout_height="match_parent"
            android:layout_weight="1"
            android:text="馒头7"
            android:textSize="20dp">
        </Button>
        <Button
            android:id="@+id/button8"
            android:layout_width="150dp"
            android:layout_height="match_parent"
            android:layout_weight="1"
            android:text="馒头8"
            android:textSize="20dp">

        </Button>
    </LinearLayout>
    <LinearLayout
        android:layout_width="match_parent"
        android:layout_height="85dp">
        <Button
            android:id="@+id/button9"
            android:layout_width="150dp"
            android:layout_height="match_parent"
            android:layout_weight="1"
            android:text="馒头9"
            android:textSize="20dp">
        </Button>
        <Button
            android:id="@+id/button10"
            android:layout_width="150dp"
            android:layout_height="match_parent"
            android:layout_weight="1"
            android:text="馒头10"
            android:textSize="20dp">

        </Button>
    </LinearLayout>


</LinearLayout>
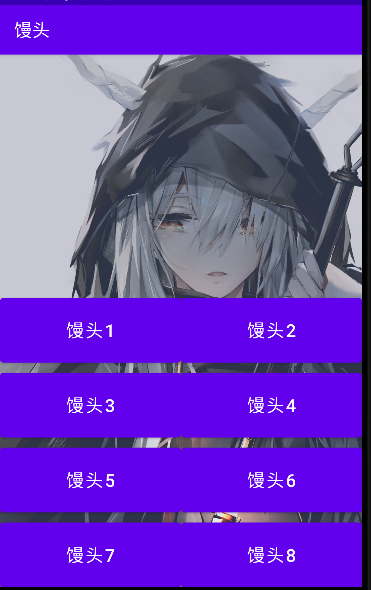
很简单,通过布局可以随着你的想法,添加不同的组件来构造你想要的模型


 浙公网安备 33010602011771号