一周搭建一个简单的微服务架构(1)
场景
公司领导脑门子一热,要求做一个电商平台,还必须用上最新的微服务架构。于是架构师小刘,就开始了微服务架构的搭建。
电商平台少不了用户表、订单表、产品表等。业务就是用户登录、查看商品列表、下单、付款、收货,就先以这么个基本需求,搭建一个简单框架吧。
商城
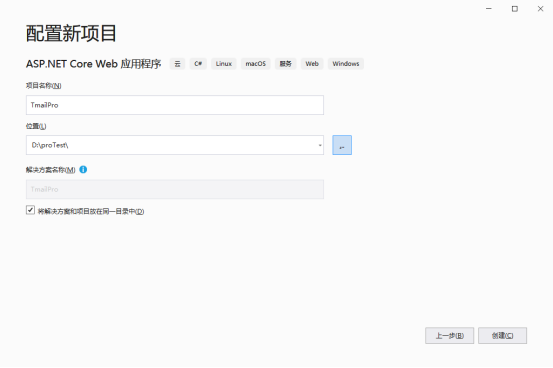
新建一个MVC的项目,名字为:Tmail,解决方案的名字也跟着变为Tmail。

API服务
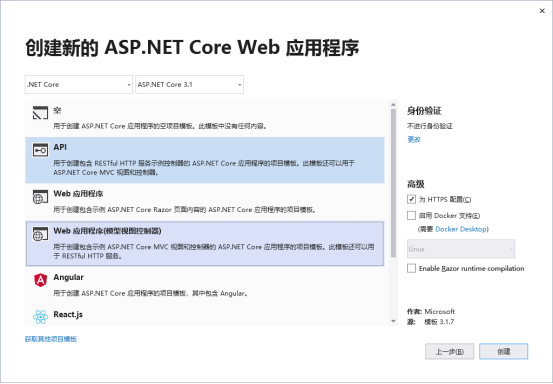
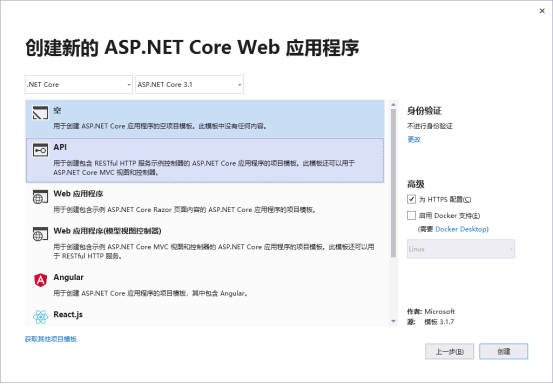
以Order的业务为基础,在当前解决方案内,新建一个API项目:OrderService,这就是我们的第一个微服务。注意:这里选择API项目
启动微服务:

需要给微服务增加安全机制,直接上流程图:
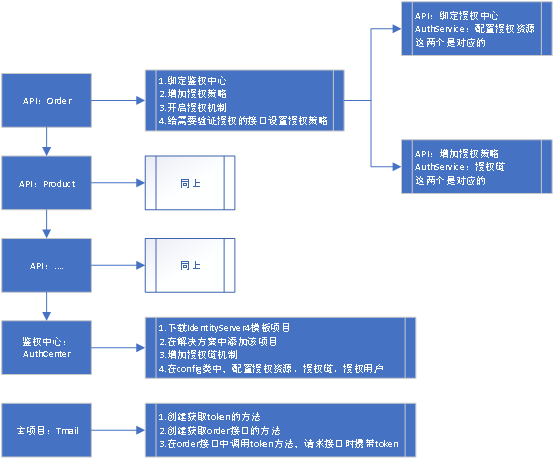
从上图可知,我们还需要新建一个AuthCenter的项目,这里稍等下,我们先把order服务搞定,按照流程图的步骤:
(1)绑定授权中心、增加授权策略
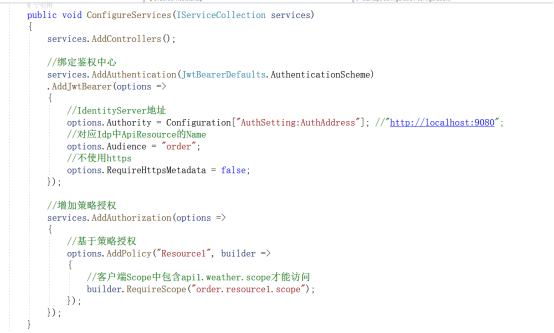
//绑定鉴权中心
            services.AddAuthentication(JwtBearerDefaults.AuthenticationScheme)
            .AddJwtBearer(options =>
            {
                //IdentityServer地址
                options.Authority = Configuration["AuthSetting:AuthAddress"]; //"http://localhost:9080";
                //对应Idp中ApiResource的Name
                options.Audience = "order";
                //不使用https
                options.RequireHttpsMetadata = false;
            });

            //增加策略授权
            services.AddAuthorization(options =>
            {
                //基于策略授权
                options.AddPolicy("Resource1", builder =>
                {
                    //客户端Scope中包含api1.weather.scope才能访问
                    builder.RequireScope("order.resource1.scope");
                });
            });
(2)开启授权机制
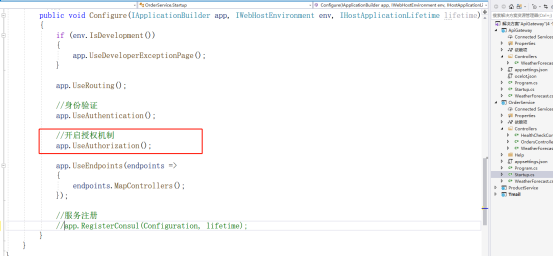
//开启授权机制
            app.UseAuthorization();
(3)给需要验证授权的接口设置授权策略
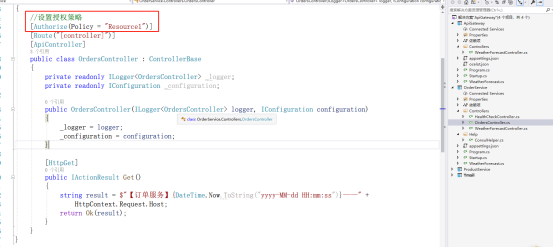
//设置授权策略
    [Authorize(Policy = "Resource1")]
鉴权中心
(1)下载IdentityServer4模板项目
随便找个文件夹,shift+鼠标右键,选择powershell,输入:
dotnet new is4inmem --name AuthService
执行完毕以下文件

(2)在解决方案中添加该项目
(3)在Startup.cs文件中,增加授权链机制
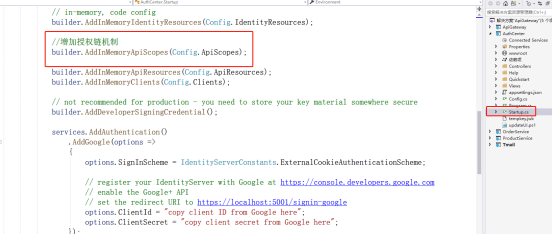
//增加授权链机制
            builder.AddInMemoryApiScopes(Config.ApiScopes);
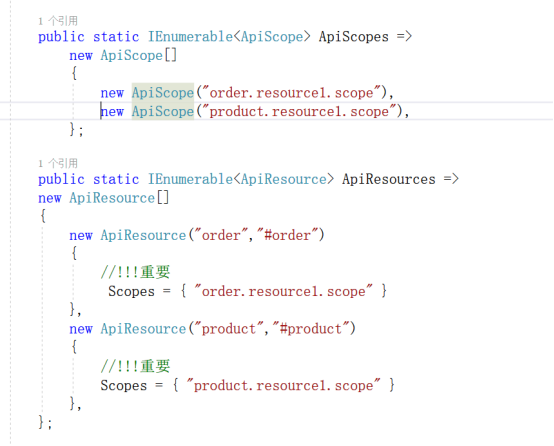
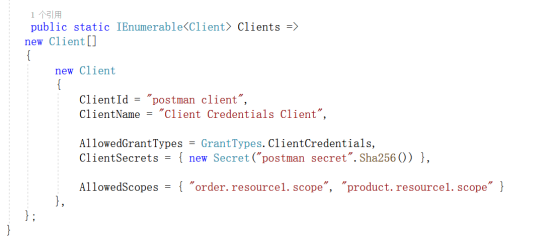
(4)在config类中,配置授权资源、授权链、授权用户
// Copyright (c) Brock Allen & Dominick Baier. All rights reserved.
// Licensed under the Apache License, Version 2.0. See LICENSE in the project root for license information.


using IdentityServer4;
using IdentityServer4.Models;
using System.Collections.Generic;

namespace AuthCenter
{
    public static class Config
    {
        public static IEnumerable<IdentityResource> IdentityResources =>
            new IdentityResource[]
            {
                new IdentityResources.OpenId(),
                new IdentityResources.Profile(),
            };

        public static IEnumerable<ApiScope> ApiScopes =>
            new ApiScope[]
            {
                new ApiScope("order.resource1.scope"),
                new ApiScope("product.resource1.scope"),
            };

        public static IEnumerable<ApiResource> ApiResources =>
        new ApiResource[]
        {
            new ApiResource("order","#order")
            {
                //!!!重要
                 Scopes = { "order.resource1.scope" }
            },
            new ApiResource("product","#product")
            {
                //!!!重要
                Scopes = { "product.resource1.scope" }
            },
        };

        public static IEnumerable<Client> Clients =>
       new Client[]
       {
            new Client
            {
                ClientId = "postman client",
                ClientName = "Client Credentials Client",

                AllowedGrantTypes = GrantTypes.ClientCredentials,
                ClientSecrets = { new Secret("postman secret".Sha256()) },

                AllowedScopes = { "order.resource1.scope", "product.resource1.scope" }
            },
       };
    }
}
商城调用微服务
(1)HomeController里面,写GetToken的方法
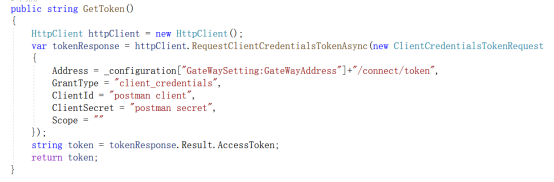
public string GetToken()
        {
            HttpClient httpClient = new HttpClient();
            var tokenResponse = httpClient.RequestClientCredentialsTokenAsync(new ClientCredentialsTokenRequest
            {
                Address = _configuration["GateWaySetting:GateWayAddress"]+"/connect/token",
                GrantType = "client_credentials",
                ClientId = "postman client",
                ClientSecret = "postman secret",
                Scope = ""
            });
            string token = tokenResponse.Result.AccessToken;
            return token;
        }
注意,图片上的地址是API网关的地址,你需要把这个地址改为鉴权中心的地址
(2)HomeController里面,写GetOrder的方法

public async Task<string> GetOrder()
        {
            var Client = new RestClient(gateWayAddress);
            var request = new RestRequest("/orders", Method.GET);

            var accessToken = _commonHelp.GetToken();
            request.AddHeader("Authorization", "Bearer " + accessToken);

            var response = await Client.ExecuteAsync(request);
            if (response.StatusCode != HttpStatusCode.OK)
            {
                return response.StatusCode + " " + response.Content;
            }
            return response.Content;
        }
注意:这里把gateWayAddress的地址改为:鉴权中心项目的地址。(这里后期都会改为API网关的地址);还有要把_commonHelp去掉,我用了一些通用类,方便其他类调用,不可能每个页面都写一遍gettoken的实现。
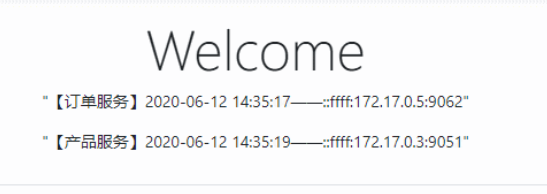
(3)调用GetOrder
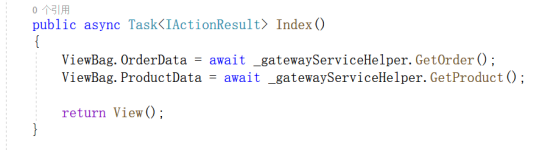
 ViewBag.OrderData = await _gatewayServiceHelper.GetOrder();
            ViewBag.ProductData = await _gatewayServiceHelper.GetProduct();
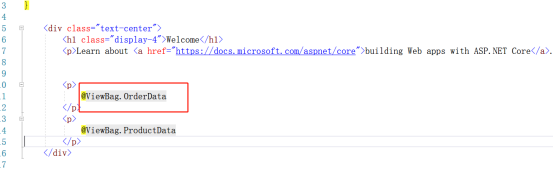
(4)页面绑定数据
(5)启动商城项目(注意,微服务、鉴权中心,这两个项目都要保持启动)

 浙公网安备 33010602011771号