spring security安全框架整理(上)
springboot依赖
<!--spring security-->
<dependency>
        <groupId>org.springframework.boot</groupId>
        <artifactId>spring-boot-starter-security</artifactId>
</dependency>
简介
特点
1、和spring无缝整合
2、全面的权限控制
3、转为Web开发而设计
1)旧版本不能脱离Web环境使用
2)新版本对整个框架进行了分层抽取,分成了核心模块和 Web 模块。单独引入核心模块就可以脱离 Web 环境
4、重量级
与shiro对比shiro的特点
1、轻量级
2、通用性
1)好处:不限于Web环境,可以脱离Web环境使用
2)缺陷:在Web环境下一些特定的需求需要手动编写代码实现
spring security入门
新建springboot工程或moudle,添加web和security依赖,写一个Controller,快速测试一下,会在启动目录中看到随机生成的密码,用户名默认为user

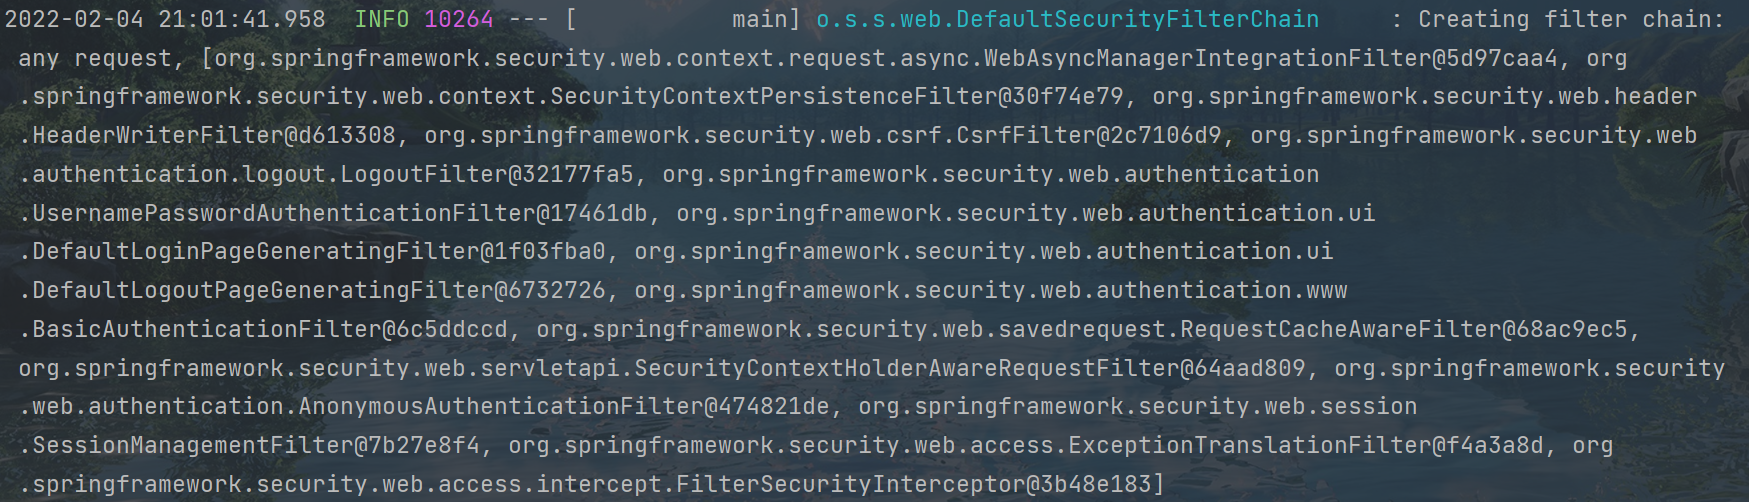
基本原理
本质就是一个过滤链
从项目的启动日志就可以看到
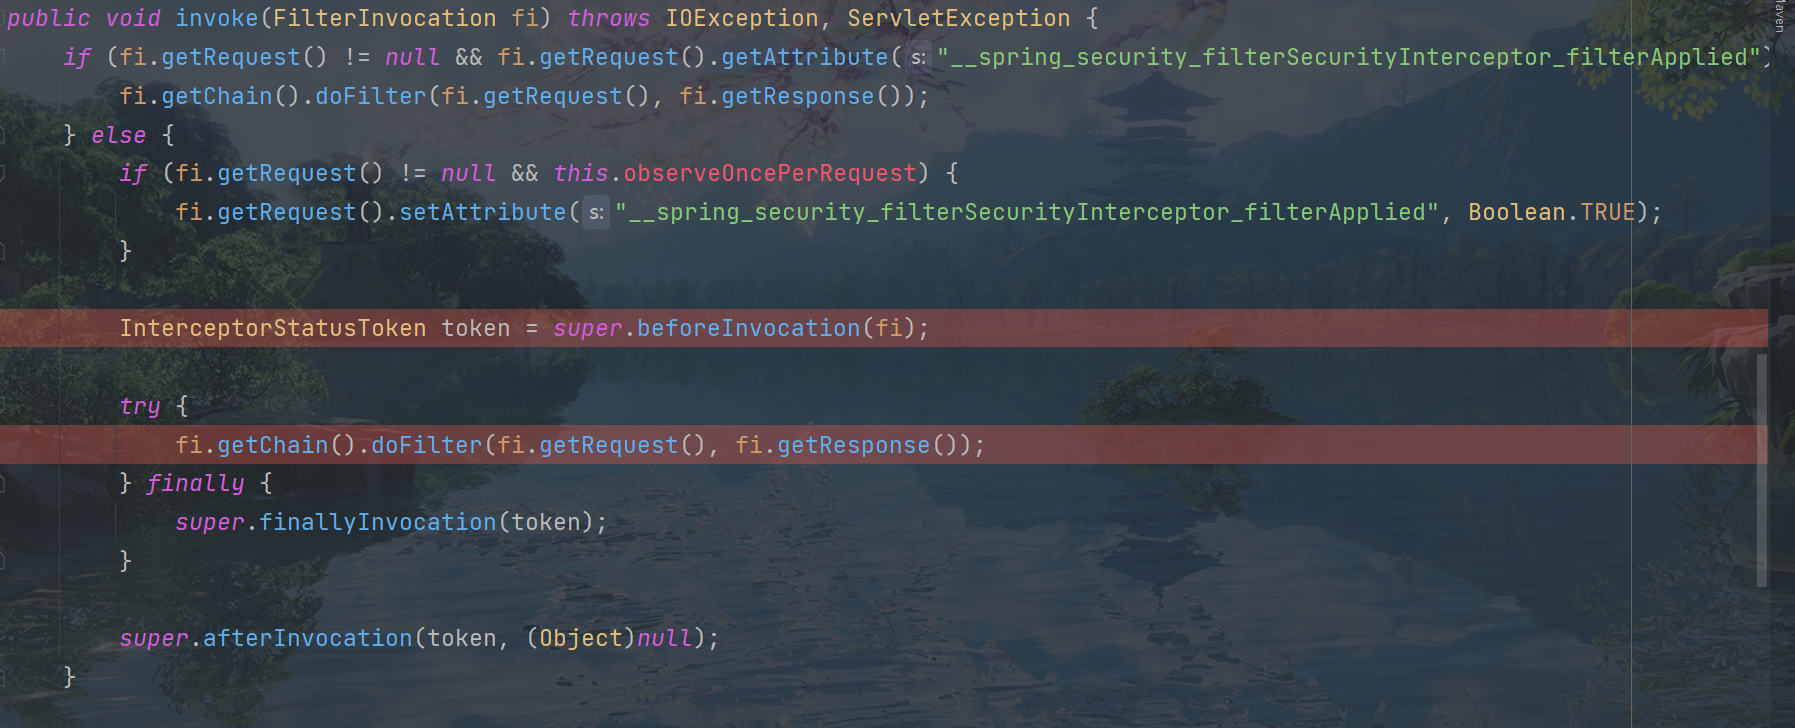
来看三个过滤器的源码

可以看到就是一个过滤器

核心验证放行
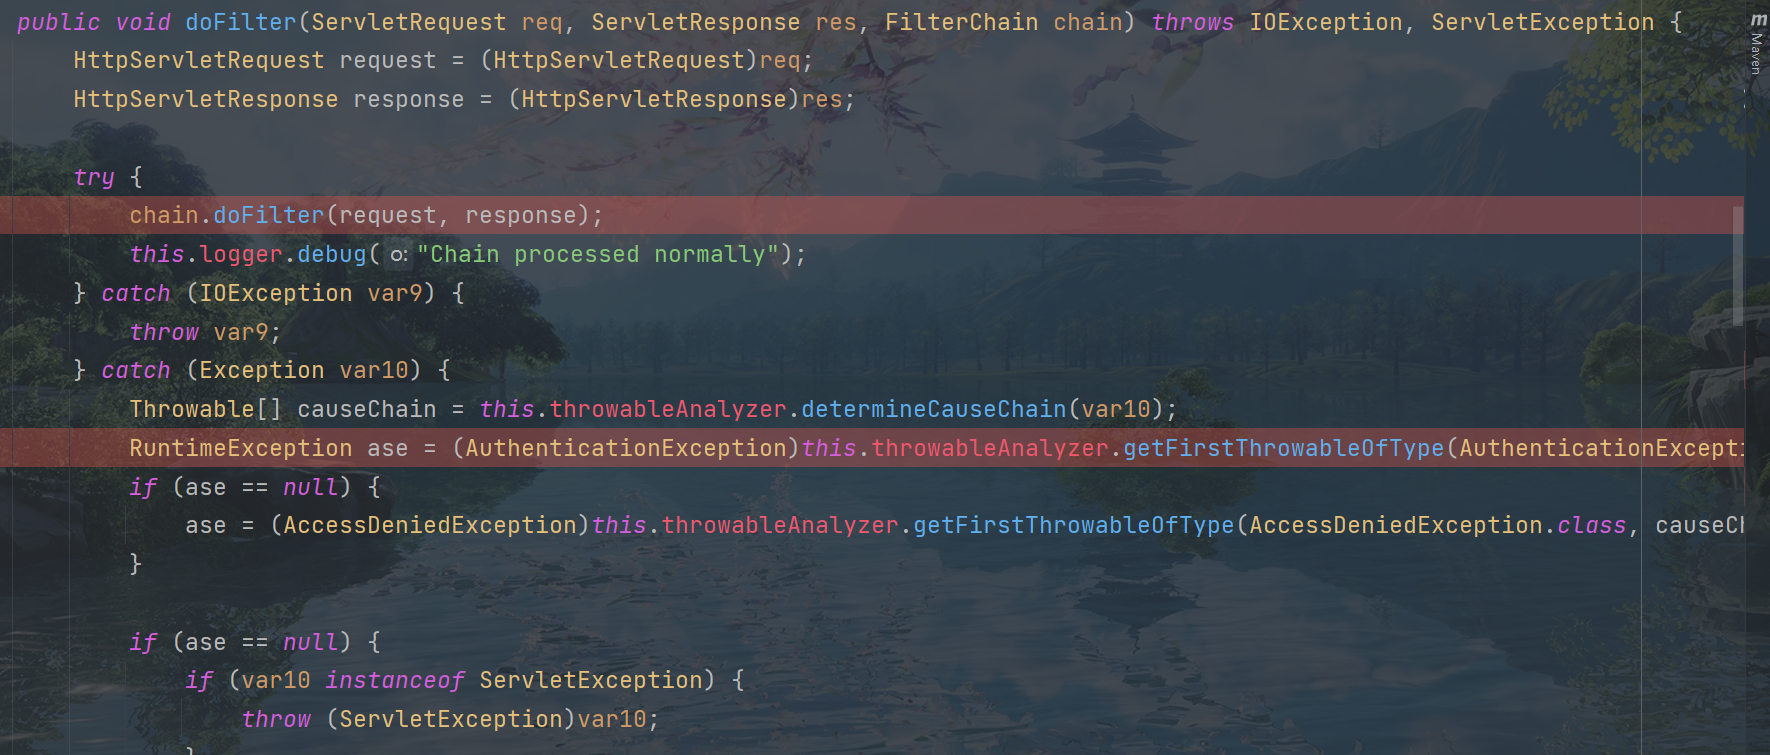
ExceptionTranslationFilter:是个异常过滤器,用来处理在认证授权过程中抛出的异常
自从有了springboot之后,对于spring security提供了自动化配置方案,可以使用较少的配置来使用spring security
两个重要的接口
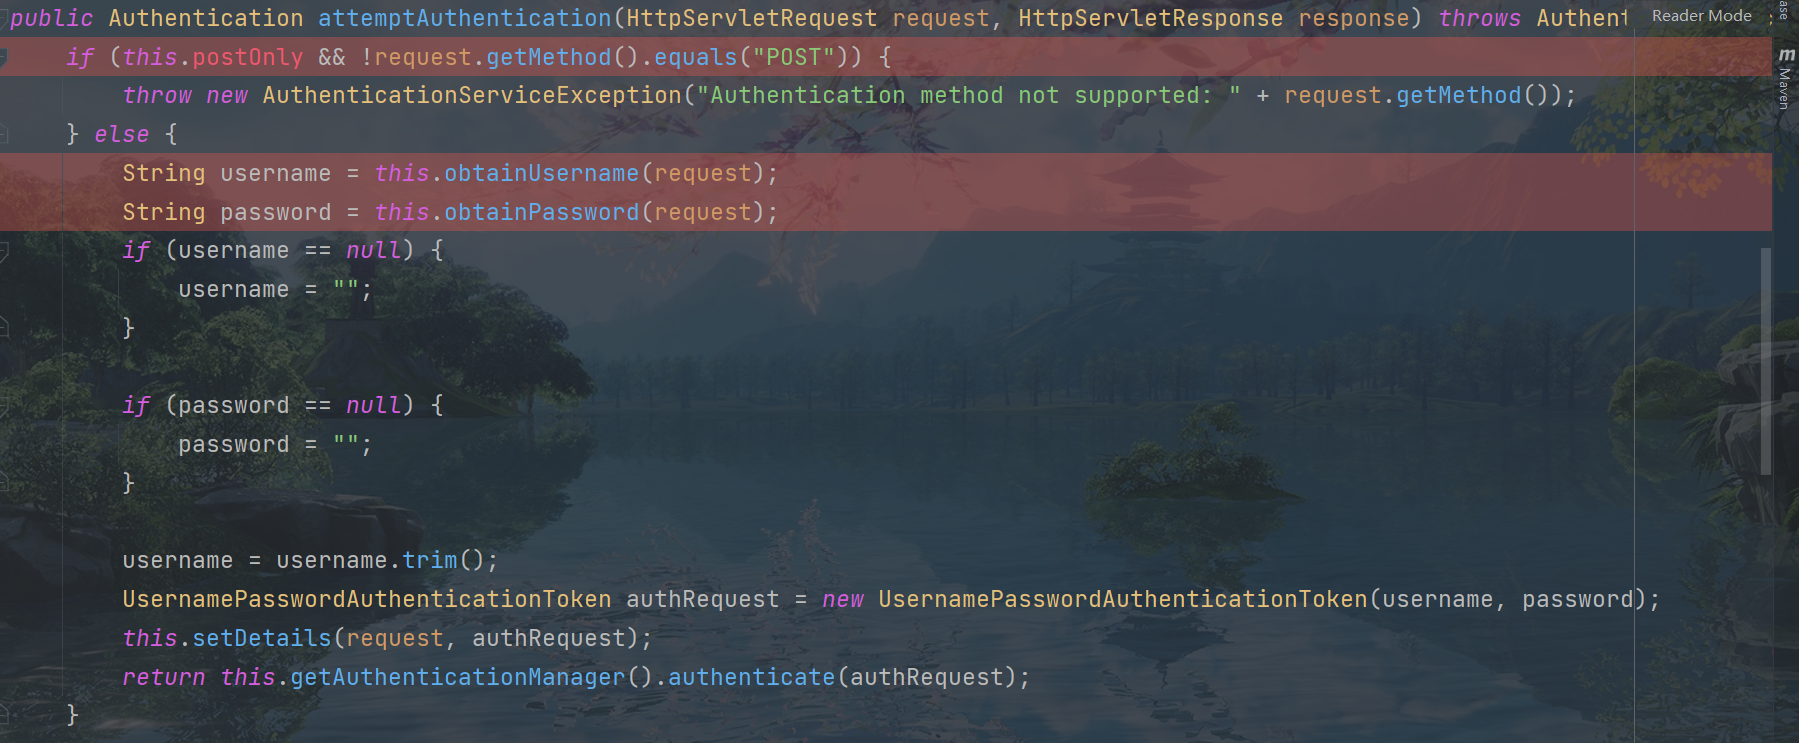
UserDetailsService 接口
查询数据库用户名和密码的过程
1、创建类继承UserNamePasswordAuthenticationFilter,重写是三个方法
2、创建类实现UserDetailsService 接口,编写查询过程,返回User对象,这个User对象是框架自带的
PasswordEncoder接口
用于返回User中密码的加密
Web权限方案
用户认证
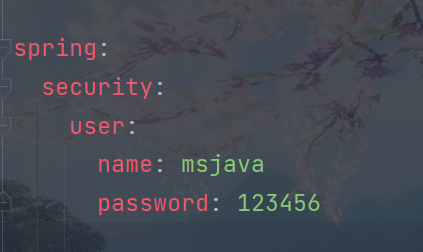
设置登录的用户名和密码
1)通过配置文件
2)通过配置类
package com.jn.security.config;

import org.springframework.context.annotation.Bean;
import org.springframework.context.annotation.Configuration;
import org.springframework.security.config.annotation.authentication.builders.AuthenticationManagerBuilder;
import org.springframework.security.config.annotation.web.configuration.WebSecurityConfigurerAdapter;
import org.springframework.security.crypto.bcrypt.BCryptPasswordEncoder;
import org.springframework.security.crypto.password.PasswordEncoder;

/**
 * @author 江南大学1033190417
 * @date 2022/2/4 22:22
 */
@Configuration
public class SecurityConfig extends WebSecurityConfigurerAdapter {
    @Override
    protected void configure(AuthenticationManagerBuilder auth) throws Exception {
        BCryptPasswordEncoder passwordEncoder=new BCryptPasswordEncoder();
        String password = passwordEncoder.encode("123456");//加密
        auth.inMemoryAuthentication().withUser("wy").password(password).roles("admin");
    }

    @Bean
    PasswordEncoder passwordEncoder(){
        return new BCryptPasswordEncoder();//默认没有
    }
}
3)自定义编写实现类
第一步:创建配置类,设置使用哪个userDetailService实现类
package com.jn.security.config;

import org.springframework.beans.factory.annotation.Autowired;
import org.springframework.context.annotation.Bean;
import org.springframework.context.annotation.Configuration;
import org.springframework.security.config.annotation.authentication.builders.AuthenticationManagerBuilder;
import org.springframework.security.config.annotation.web.builders.WebSecurity;
import org.springframework.security.config.annotation.web.configuration.WebSecurityConfigurerAdapter;
import org.springframework.security.core.userdetails.UserDetailsService;
import org.springframework.security.crypto.bcrypt.BCryptPasswordEncoder;
import org.springframework.security.crypto.password.PasswordEncoder;

/**
 * @author 江南大学1033190417
 * @date 2022/2/4 22:36
 */
@Configuration
public class SecurityConfig1 extends WebSecurityConfigurerAdapter {

    @Autowired
    private UserDetailsService userDetailsService;

    @Override
    protected void configure(AuthenticationManagerBuilder auth) throws Exception {
        auth.userDetailsService(userDetailsService).passwordEncoder(password());

    }

    @Bean
    PasswordEncoder password() {
        return new BCryptPasswordEncoder();
    }
}
第二步:编写实现类,返回User对象,user对象有用户名密码和操作权限
package com.jn.security.service.impl;

import org.springframework.security.core.GrantedAuthority;
import org.springframework.security.core.authority.AuthorityUtils;
import org.springframework.security.core.userdetails.User;
import org.springframework.security.core.userdetails.UserDetails;
import org.springframework.security.core.userdetails.UserDetailsService;
import org.springframework.security.core.userdetails.UsernameNotFoundException;
import org.springframework.security.crypto.bcrypt.BCryptPasswordEncoder;
import org.springframework.stereotype.Service;

import java.util.List;

/**
 * @author 江南大学1033190417
 * @date 2022/2/4 22:47
 */
@Service("userDetailsService")
public class MyUserDetailsService implements UserDetailsService {


    @Override
    public UserDetails loadUserByUsername(String s) throws UsernameNotFoundException {
        //模拟查询数据库
        List<GrantedAuthority> auths= AuthorityUtils.commaSeparatedStringToAuthorityList("role");
        return new User("msjava",new BCryptPasswordEncoder().encode("123"),auths);
    }
}
整合数据库
    @Autowired
    private UserMapper userMapper;

    @Override
    public UserDetails loadUserByUsername(String username) throws UsernameNotFoundException {
        //模拟查询数据库
        QueryWrapper<com.jn.security.entity.User> wrapper = new QueryWrapper<>();
        wrapper.eq("username",username);
        com.jn.security.entity.User user=userMapper.selectOne(wrapper);
        if (user==null){
            throw new UsernameNotFoundException("用户名不存在");
        }
        List<GrantedAuthority> auths=AuthorityUtils.commaSeparatedStringToAuthorityList("role");
        return new User(user.getUsername(), new BCryptPasswordEncoder().encode(user.getPassword()), auths);
    }
自定义登录页
重写配置类中所继承类的方法
    @Override
    protected void configure(HttpSecurity http) throws Exception {
        http.formLogin()
                .loginPage("/login.html")//自定义自己的登录页
                .loginProcessingUrl("/user/login")//登录访问路径
                .defaultSuccessUrl("/test/index").permitAll()//登陆成功后跳转路径
                .and().authorizeRequests().antMatchers("/","/test/hello","/user/login").permitAll()//放行路径,不需要认证
                .anyRequest().authenticated()
                .and().csrf().disable();//关闭csrf防护,后面会提到
    }
<!DOCTYPE html>
<html lang="en">
<head>
    <meta charset="UTF-8">
    <title>Title</title>
</head>
<body>
<form action="/user/login" method="post">
    用户名:<input type="text" name="username"/><!--注意name必须是username和password-->
    <br>
    密  码:<input type="password" name="password">
    <br>
    <input type="submit" value="登录">
</form>
</body>
</html>
基于角色或权限的访问控制
hasAuthority方法
如果当前用户具有指定的权限,返回true,否则false
第一步:设置访问路径有哪些权限

也可以指定多个角色

第二步:在UserDetailsService的接口实现类里对返回的user设置权限

hasRole方法
如果用户具备给定角色就允许访问,否则出现403,如果当前用户具有指定角色,返回true
与上一个区别,看源码

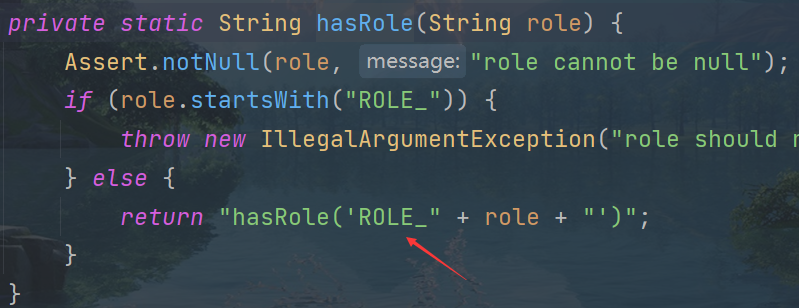
会在设置的权限前加ROLE字段,所以在userDetailsService中设置权限时要加上
有hasRole就有hasAnyRole
自定义无权限页面
默认页面
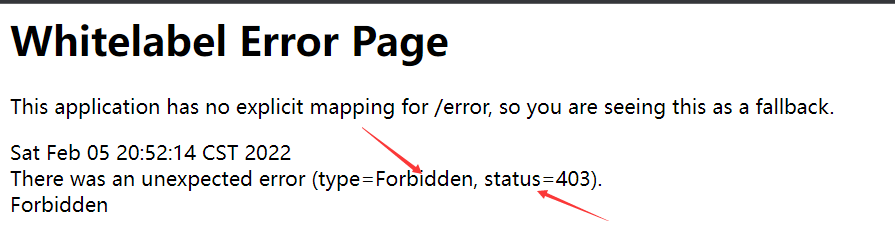
非常的丑
只要在配置类中配置一下就好了

注解的使用
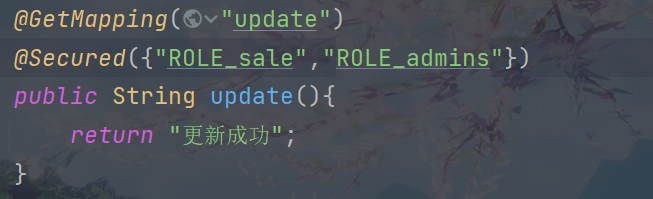
@Secured
判断是有具有角色,注意这里匹配的角色前要加ROLE_,如果有这个角色,就可以访问这个方法
首先要在启动类中开启功能

@PreAuthorize
进入方法前的权限认证,可以将登录用户的roles/permissions参数传递到方法中
首先也要开启注解功能


@PostAuthorize
在方法执行之后进行权限认证,适合验证带有返回值的
先开器注解功能

用法和上一个类似
@PostFilter
权限认证之后对数据进行过滤
@PreFilter
对传入的参数做过滤
自定义对出登录

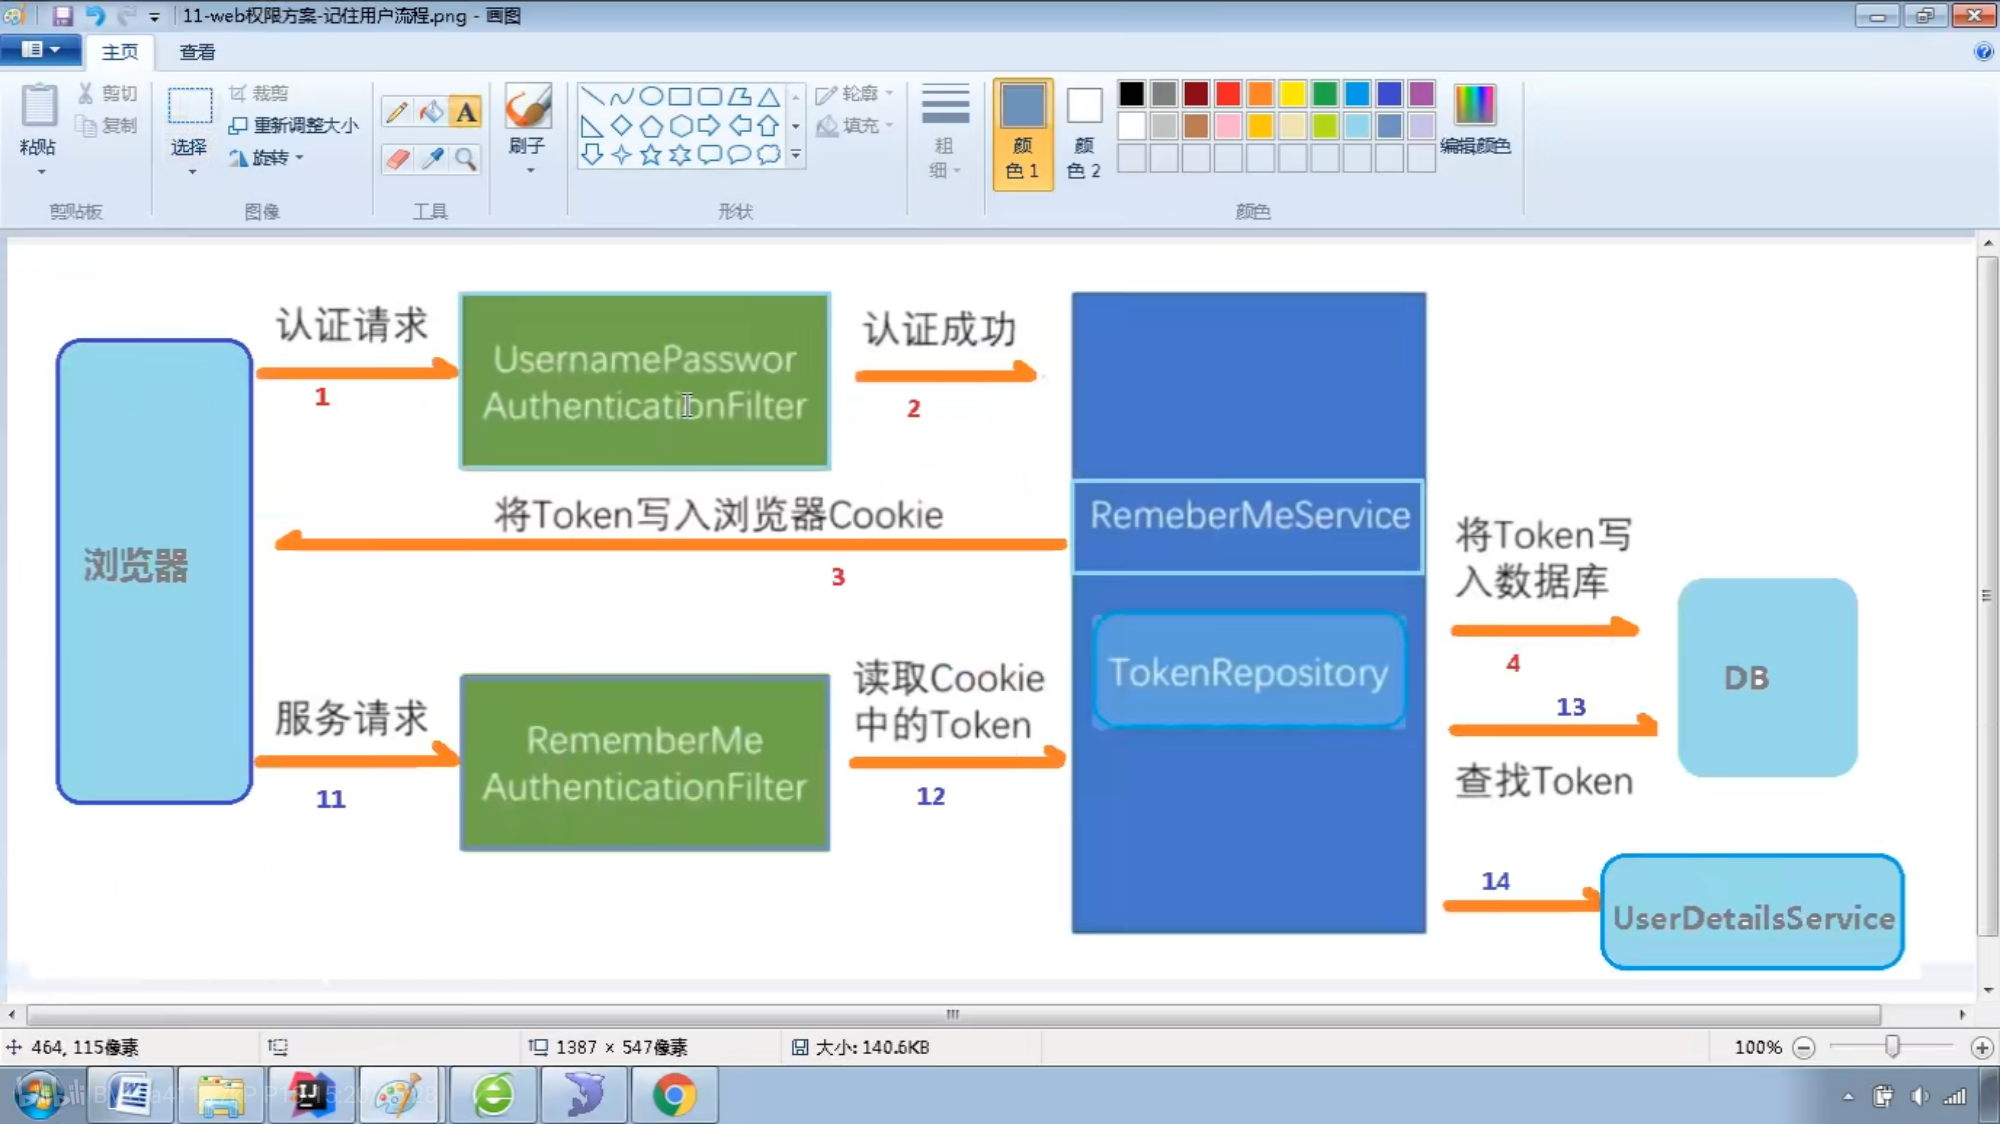
自动登录
使用cookie
原理
第一步:创建爱你数据库表,也可以用框架自带的自动创建

第二步:配置类,注入数据源,配置操作数据库对象
    @Autowired
    private DataSource dataSource;

    //配置对象
    @Bean
    public PersistentTokenRepository persistentTokenRepository(){
        JdbcTokenRepositoryImpl jdbcTokenRepository=new JdbcTokenRepositoryImpl();
        jdbcTokenRepository.setDataSource(dataSource);
        jdbcTokenRepository.setCreateTableOnStartup(true);//自动创建表
        return jdbcTokenRepository;
    }
第三步:配置类配置自动登录
.and().rememberMe().tokenRepository(persistentTokenRepository())
.tokenValiditySeconds(60)//设置有效时长(秒)
.userDetailsService(userDetailsService)
第四步:在登录页面添加复选框
<input type="checkbox" name="remember-me">自动登录<!--name必须是这个-->
CSRF理解
跨域请求伪造,默认开启保护,只对POST,PUT,DELETE保护
在登录页中加入隐藏域
<input type="hidden" th:name="${_csrf.parameterName}" th:value="${_csrf.token}">

 浙公网安备 33010602011771号