虚拟机ipv6环境搭建操作指南
一、vmware的相关配置
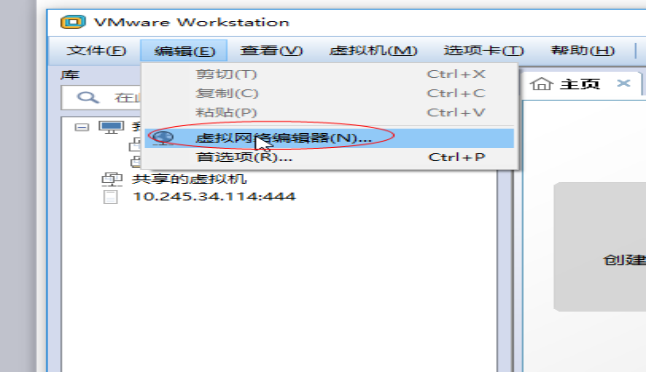
(1)点击编辑,选择虚拟网络编辑器
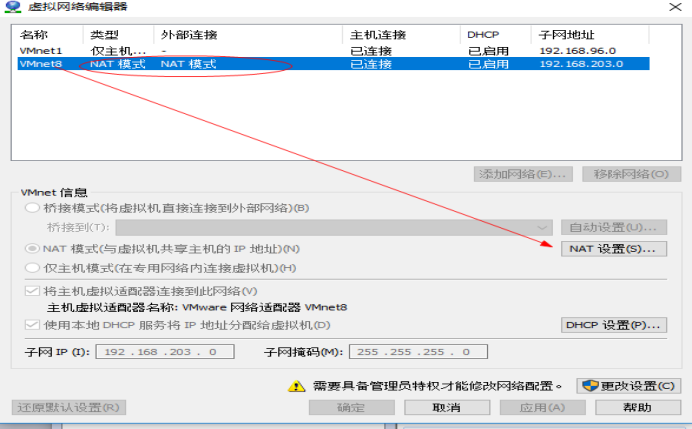
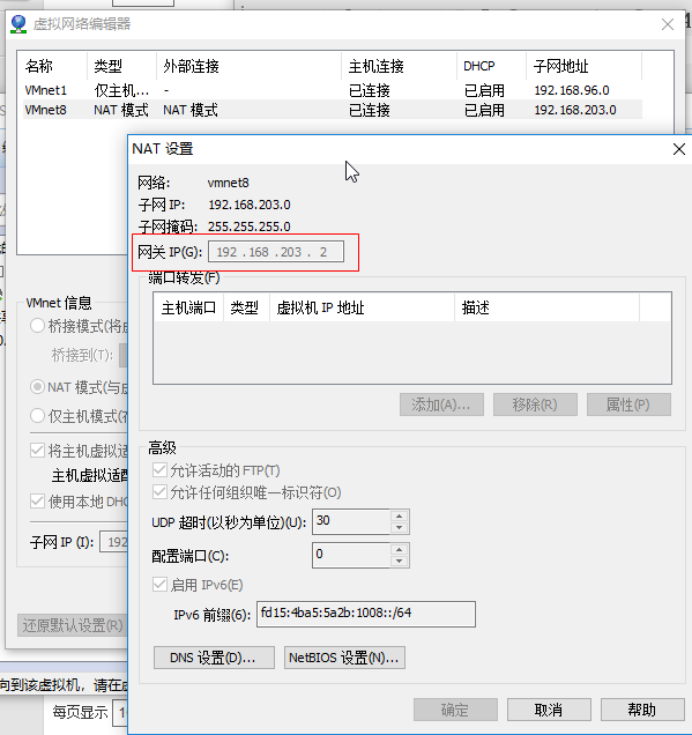
(2)选择带NAT模式的VMnet8网络,点击NAT设置
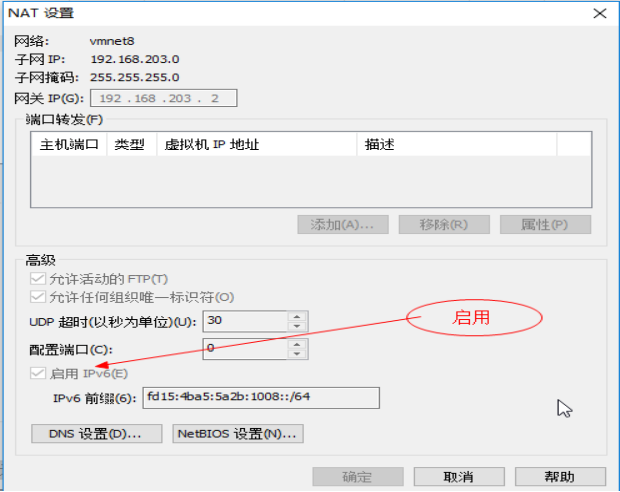
(3)在NAT设置中启用IPV6
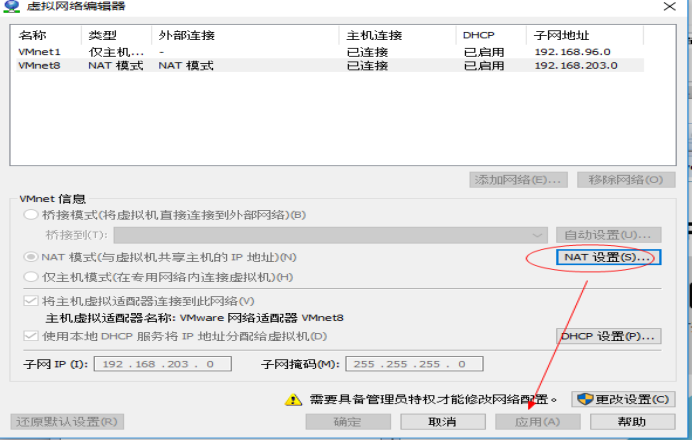
(4)设置好后,点击应用
(5)再选择镜像,右键设置镜像的网络适配器模式为NAT模式,
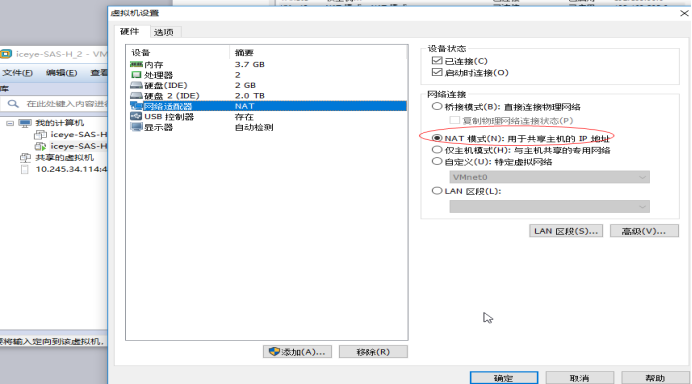
以上过程只是建立了主机与虚拟机之间的ipv6信道。
二、虚拟机相关设置
登录虚拟机,在虚拟机中进行ipv6的网络设置,
命令行操作如下:
1. vi /etc/sysctl.conf
# /etc/sysctl.conf
#
# When the kernel panics, automatically reboot in 5 seconds
kernel.panic = 5
# Delay a few seconds and then panic.
kernel.panic_on_oops = 1
# bug38137
net.ipv4.neigh.default.gc_thresh1 = 10240
net.ipv4.neigh.default.gc_thresh2 = 20480
net.ipv4.neigh.default.gc_thresh3 = 40960
# bug33044
net.ipv4.conf.all.arp_ignore = 1
net.ipv4.conf.all.arp_announce = 2
# bug111629
net.ipv4.conf.default.accept_redirects = 0
net.ipv4.conf.all.accept_redirects = 0
net.ipv4.conf.all.secure_redirects=0
net.ipv4.conf.default.secure_redirects=0
#要增加的部分
net.ipv6.conf.all.disable_ipv6=0
net.ipv6.conf.default.disable_ipv6=0
net.ipv6.conf.lo.disable_ipv6=0
2. sysctl -p
#此处为实体机配置,虚拟机中不用设置,已自动生成
//3. ifconfig M inet6 add f380::245:74/112
//4. route -A inet6 add ::/0 gw f380::245:ffff
//或者 route -A inet6 add default gw f380::245:ffff
5.开启apache监听IPv6的地址
vi /etc/apache2/vhosts.d/00_default_ssl_vhost.conf
设置
Listen 0.0.0.0:443
Listen [::]:443
6.重启apache :apachectl restart
7.ifconfig查看虚拟机的ipv6地址,取图中的地址访问
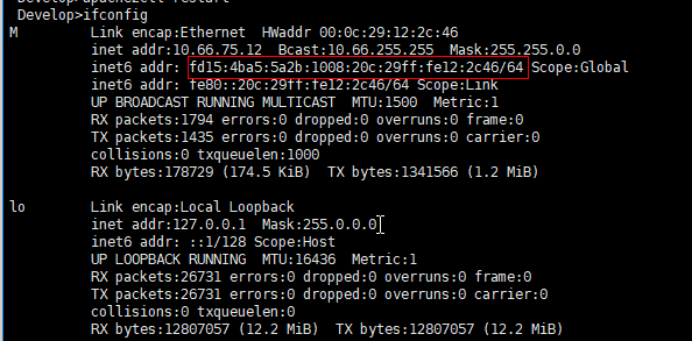
利用ipv6地址访问设备,注意格式[ipv6]
https://[fd15:4ba5:5a2b:1008:20c:29ff:fe12:2c46]/
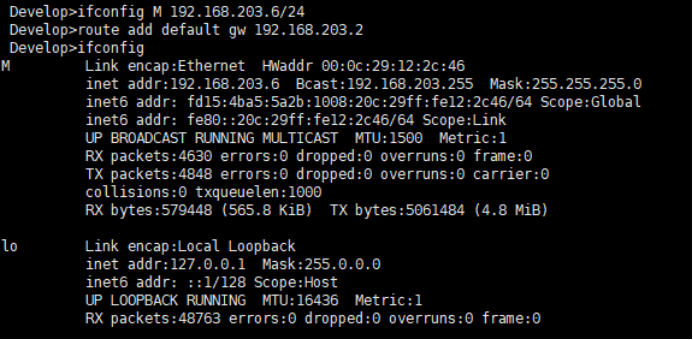
三、虚拟机配置ipv4也可访问
(1)查看虚拟机的子网ip和网关
(2)在命令行配置虚拟机ip和网关
(3) 虚拟机关机后重启,需要重新执行命令
sysctl -p
apachectl restart

 浙公网安备 33010602011771号