


77、缓存---SpringCache---整合&体验@Cacheable
1、导入依赖
        <!--缓存-->
        <dependency>
            <groupId>org.springframework.boot</groupId>
            <artifactId>spring-boot-starter-cache</artifactId>
        </dependency>
由于我们使用redis作为缓存,所以导入redis的依赖
        <dependency>
            <groupId>org.springframework.boot</groupId>
            <artifactId>spring-boot-starter-data-redis</artifactId>
        </dependency>
2、写配置
(1)自动配置了哪些
CacheAutoConfiguration会导入RedisCacheConfiguration
自动配置好了缓存管理器RedisCacheManager
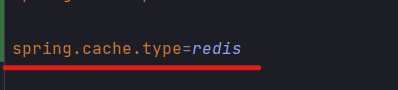
(2)配置使用redis作为缓存
(3)测试使用缓存
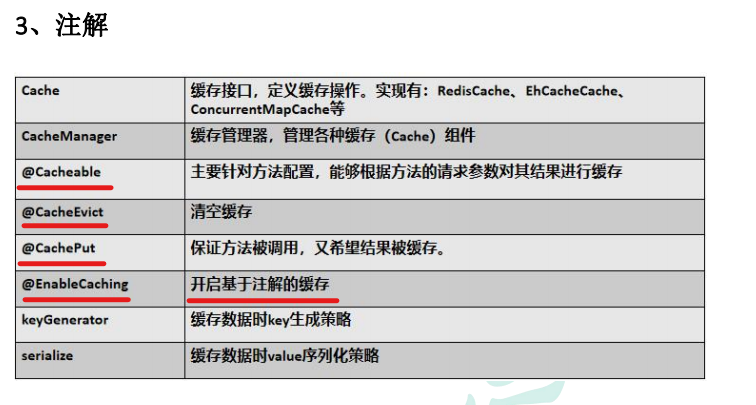
@Caching:组合以上多个操作
@CacheConfig:在类级别共享缓存的相同配置
开启缓存功能:在Springboot的Application类上加上注解@EnableCaching
只需要注解就能完成缓存操作
     * 1、每一个需要缓存的数据都需要我们指定放到那个名字的缓存【缓存的分区(按照业务类型分)】
     * 2、@Cacheable({"catagory"})
     *          代表当前方法的结果需要缓存,如果缓存中有,方法不调用
     *          如果缓存中没有,会调用方法,最后将方法的结果放入缓存
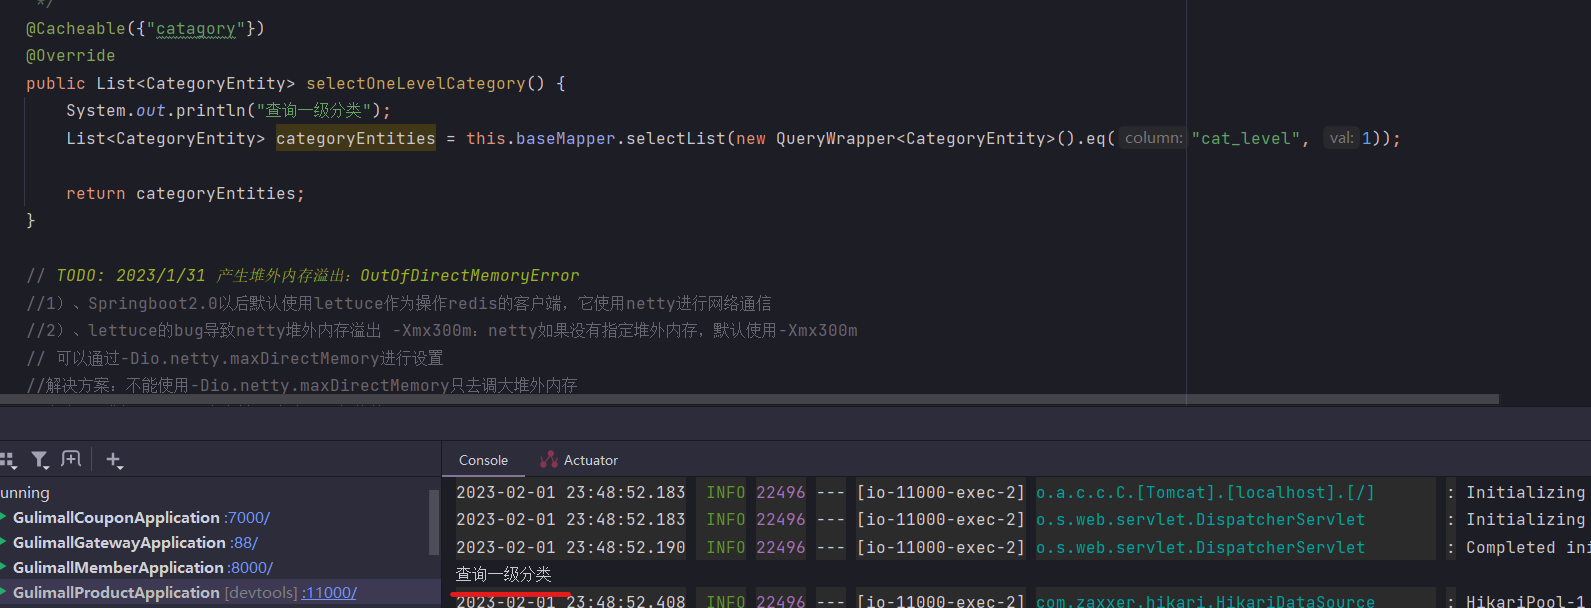
我们第一次调用会打印,但是以后调用就不会打印,并且redis中存储了我们的catalog数据
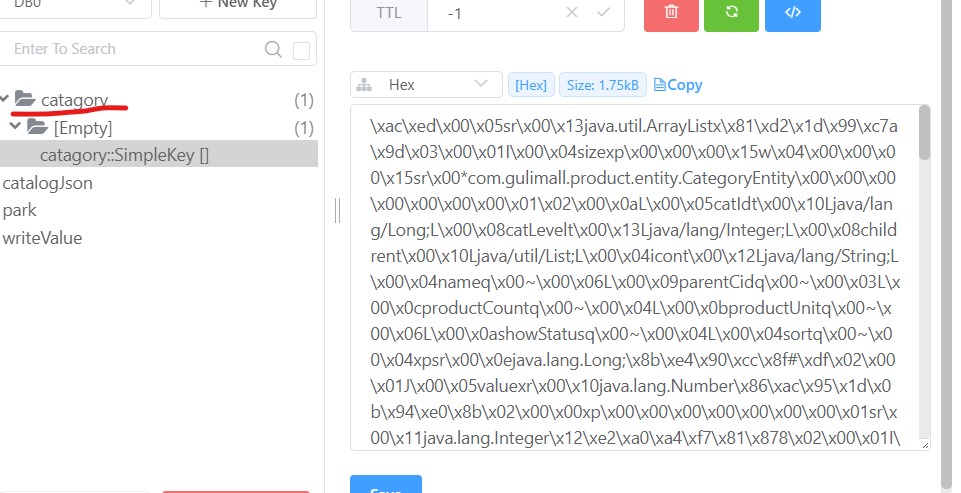
@Cacheable的默认行为:
1)如果缓存中有数据,就不会调用方法
2)key自动生成,缓存的名字::simpleKey[]是默认生成的key值
3)缓存的value值,默认使用的jdk序列化机制,将序列化后的数据放到redis
4)默认ttl过期时间为-1,即永不过期
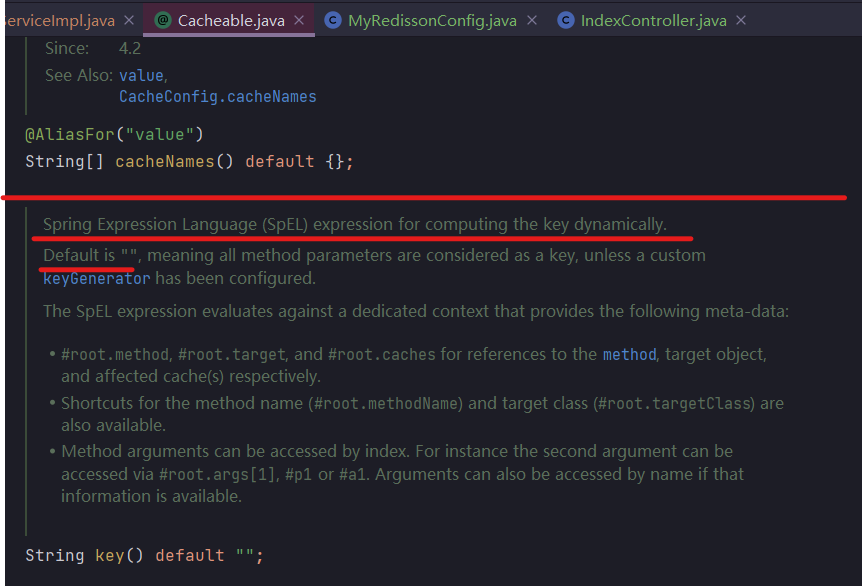
我们需要几个自定义行为:
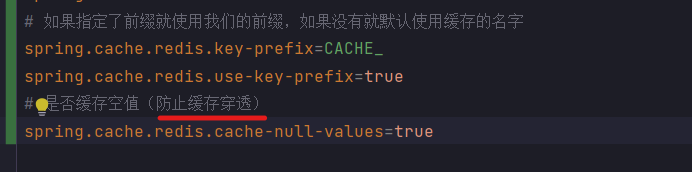
1)指定生成的缓存使用key

2)指定缓存的ttl时间======》配置文件编写spring.cache.redis.time-to-live=3600000(毫秒为单位)
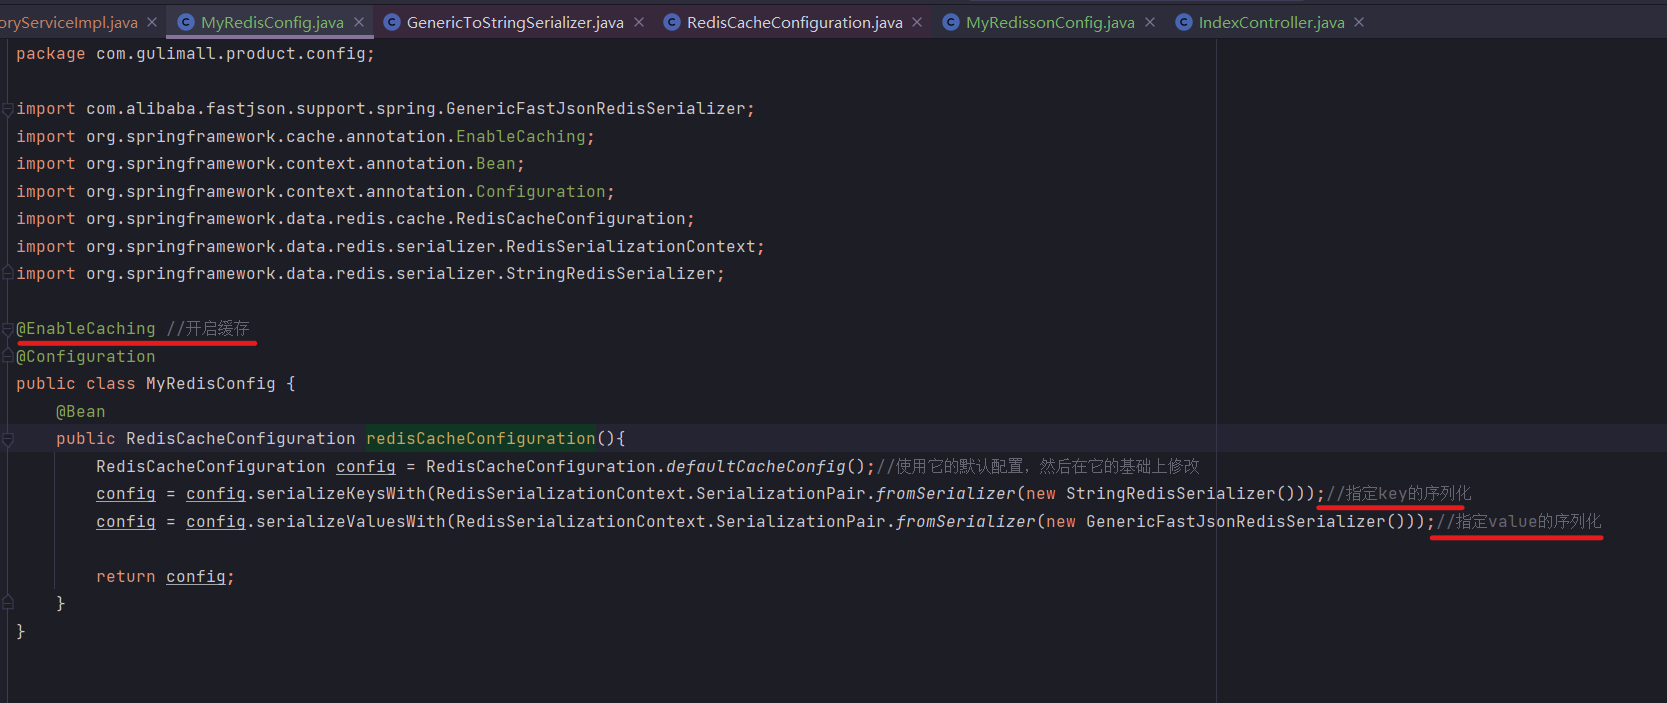
3)将数据保存为json格式,这样别的语言也可以获取到=》编写rediscache的配置文件,如下
把开启缓存的注解写到配置类上就行,不用再写到Application类上了。
缓存效果如下:

但是我们注意到ttl时间为-1,也就是说我们再application.properties中的配置没有用了
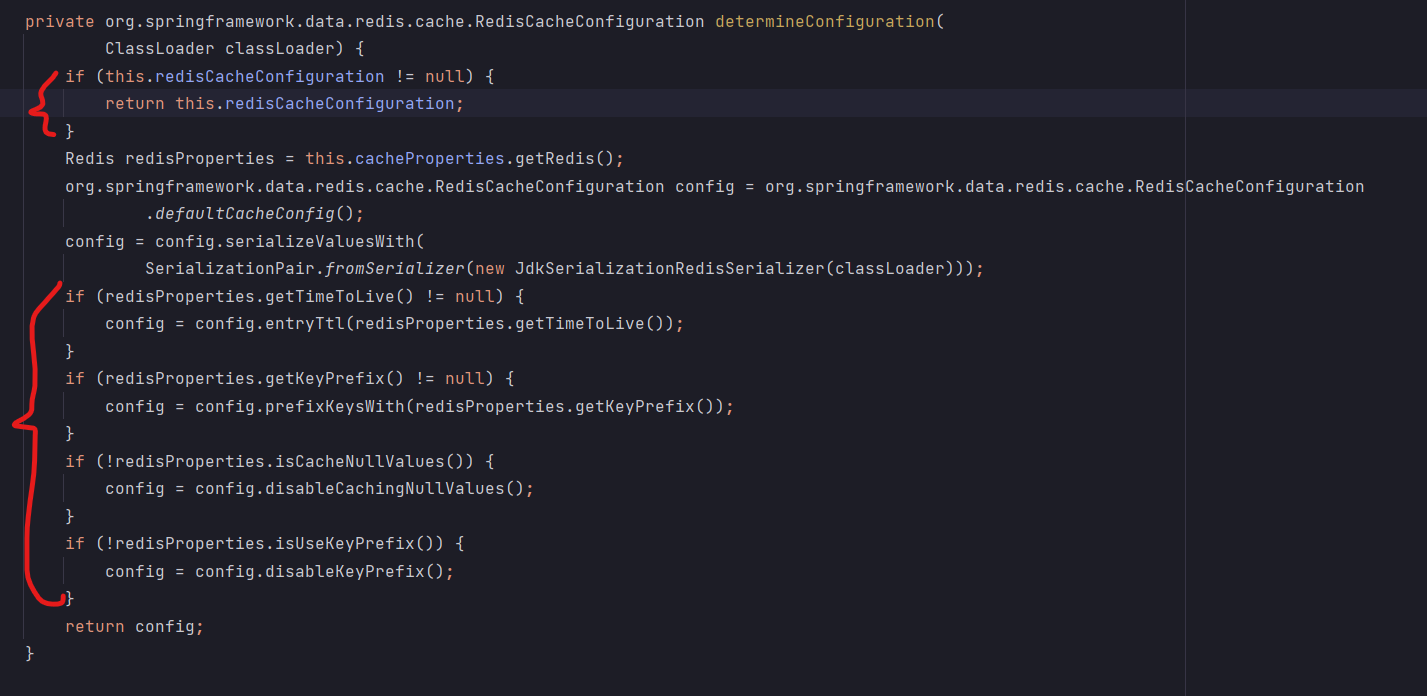
原因:package org.springframework.boot.autoconfigure.cache包下的RedisCacheConfiguration类中的默认方法determineConfiguration
 ,
,
下面的if都没有执行,因为我们的redisCacheConfiguration对象已经创建(不为空),解决办法如下:直接把所有的默认配置(if条件语句)都复制到我们的配置文件中

但是从源码中我们看到Redis redisProperties = this.cacheProperties.getRedis();
即redisProperties 是从CacheProperties类中获取的。我们查看CacheProperties源码
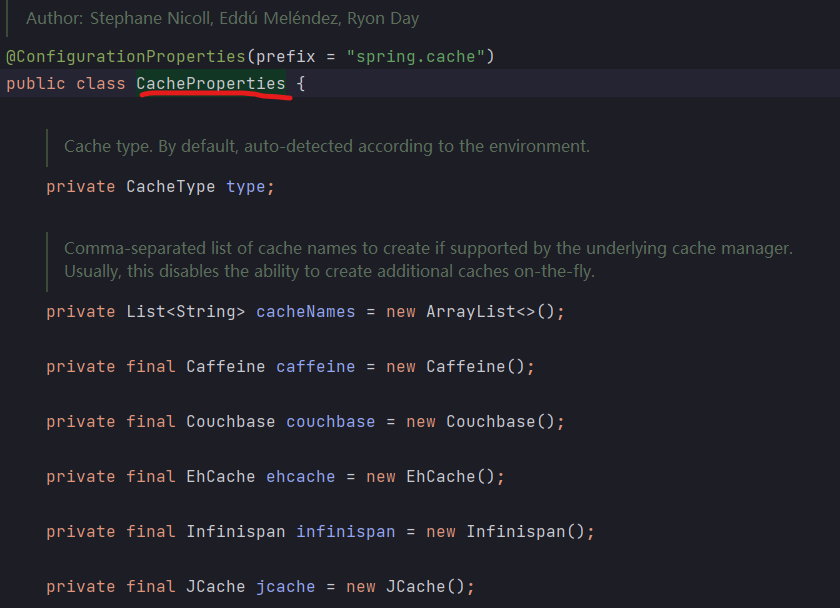
发现CacheProperties跟我们的配置文件中编写的cache的配置进行绑定了。因为CacheProperties指定了配置的前缀为spring.cache,并且我们配置文件中的有关cache的前缀也是spring.cache
发现没有将CacheProperties放到容器中(没有@Bean注解),所以我们无法在自己的配置类中注入这个类
解决办法:
@EnableConfigurationProperties(CacheProperties.class) //配置绑定功能
然后在我们的配置类就能注入CacheProperties类了
完整代码如下:
package com.gulimall.product.config;

import com.alibaba.fastjson.support.spring.GenericFastJsonRedisSerializer;
import org.springframework.beans.factory.annotation.Autowired;
import org.springframework.boot.autoconfigure.cache.CacheProperties;
import org.springframework.boot.context.properties.EnableConfigurationProperties;
import org.springframework.cache.annotation.EnableCaching;
import org.springframework.context.annotation.Bean;
import org.springframework.context.annotation.Configuration;
import org.springframework.data.redis.cache.RedisCacheConfiguration;
import org.springframework.data.redis.serializer.RedisSerializationContext;
import org.springframework.data.redis.serializer.StringRedisSerializer;

@EnableConfigurationProperties(CacheProperties.class) //配置绑定功能
@EnableCaching //开启缓存
@Configuration
public class MyRedisConfig {

    @Autowired
    CacheProperties cacheProperties;

    @Bean
    public RedisCacheConfiguration redisCacheConfiguration(){
        RedisCacheConfiguration config = RedisCacheConfiguration.defaultCacheConfig();//使用它的默认配置,然后在它的基础上修改
        config = config.serializeKeysWith(RedisSerializationContext.SerializationPair.fromSerializer(new StringRedisSerializer()));//指定key的序列化
        config = config.serializeValuesWith(RedisSerializationContext.SerializationPair.fromSerializer(new GenericFastJsonRedisSerializer()));//指定value的序列化

        CacheProperties.Redis redisProperties = cacheProperties.getRedis();

        if (redisProperties.getTimeToLive() != null) {
            config = config.entryTtl(redisProperties.getTimeToLive());
        }
        if (redisProperties.getKeyPrefix() != null) {
            config = config.prefixKeysWith(redisProperties.getKeyPrefix());
        }
        if (!redisProperties.isCacheNullValues()) {
            config = config.disableCachingNullValues();
        }
        if (!redisProperties.isUseKeyPrefix()) {
            config = config.disableKeyPrefix();
        }

        return config;
    }
}

 浙公网安备 33010602011771号