logstash日志采集工具的安装部署
1.从官网下载安装包,并通过Xftp5上传到机器集群上
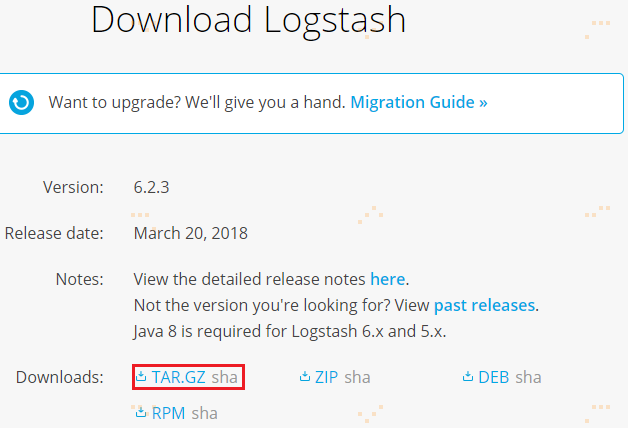
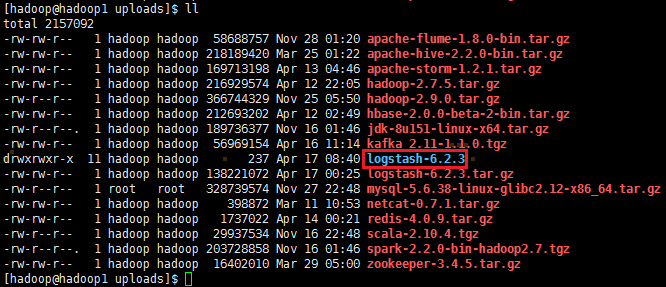
下载logstash-6.2.3.tar.gz版本,并通过Xftp5上传到hadoop机器集群的第一个节点node1上的/opt/uploads/目录:

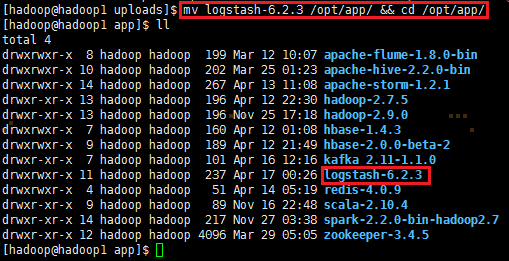
2、解压logstash-6.2.3.tar.gz,并把解压的安装包移动到/opt/app/目录上
tar zxvf logstash-6.2.3.tar.gz

mv logstash-6.2.3 /opt/app/ && cd /opt/app/
3、修改环境变量,编辑/etc/profile,并生效环境变量,输入如下命令:
sudo vi /etc/profile
添加如下内容:
export LOGSTASH_HOME=/opt/app/logstash-6.2.3
export PATH=:PATH:PATH:LOGSTASH_HOME/bin
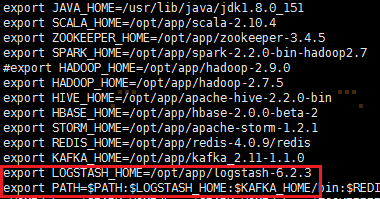
使环境变量生效:source /etc/profile
4、配置文件类型
4.1 log-kafka配置文件
输入源为nginx的日志文件,输出源为kafka
|
1
2
3
4
5
6
7
8
9
10
11
12
13
14
15
16
17
18
|
input { file { path => "/var/logs/nginx/*.log" discover_interval => 5 start_position => "beginning" }}output { kafka { topic_id => "accesslog" codec => plain { format => "%{message}" charset => "UTF-8" } bootstrap_servers => "hadoop1:9092,hadoop2:9092,hadoop3:9092" }} |
4.2 file-kafka配置文件
输入源为txt文件,输出源为kafka
|
1
2
3
4
5
6
7
8
9
10
11
12
13
14
15
16
17
18
19
20
21
|
input { file { codec => plain { charset => "GB2312" } path => "D:/GameLog/BaseDir/*/*.txt" discover_interval => 30 start_position => "beginning" }}output { kafka { topic_id => "gamelog" codec => plain { format => "%{message}" charset => "GB2312" } bootstrap_servers => "hadoop1:9092,hadoop2:9092,hadoop3:9092" }} |
4.3 log-elasticsearch配置文件
输入源为nginx的日志文件,输出源为elasticsearch
|
1
2
3
4
5
6
7
8
9
10
11
12
13
14
15
16
17
|
input { file { type => "flow" path => "var/logs/nginx/*.log" discover_interval => 5 start_position => "beginning" }}output { if [type] == "flow" { elasticsearch { index => "flow-%{+YYYY.MM.dd}" hosts => ["hadoop1:9200", "hadoop2:9200", "hadoop3:9200"] } }} |
4.4 kafka-elasticsearch配置文件
输入源为kafka的accesslog和gamelog主题,并在中间分别针对accesslog和gamelog进行过滤,输出源为elasticsearch。当input里面有多个kafka输入源时,client_id => "es*"必须添加且需要不同,否则会报错javax.management.InstanceAlreadyExistsException: kafka.consumer:type=app-info,id=logstash-0。
|
1
2
3
4
5
6
7
8
9
10
11
12
13
14
15
16
17
18
19
20
21
22
23
24
25
26
27
28
29
30
31
32
33
34
35
36
37
38
39
40
41
42
43
44
45
46
47
48
49
50
51
52
53
54
55
56
57
58
59
60
61
62
63
64
65
66
67
68
|
input { kafka { type => "accesslog" codec => "plain" auto_offset_reset => "earliest" client_id => "es1" group_id => "es1" topics => ["accesslog"] bootstrap_servers => "hadoop1:9092,hadoop2:9092,hadoop3:9092" } kafka { type => "gamelog" codec => "plain" auto_offset_reset => "earliest" client_id => "es2" group_id => "es2" topics => ["gamelog"] bootstrap_servers => "hadoop1:9092,hadoop2:9092,hadoop3:9092" }}filter { if [type] == "accesslog" { json { source => "message" remove_field => ["message"] target => "access" } } if [type] == "gamelog" { mutate { split => { "message" => " " } add_field => { "event_type" => "%{message[3]}" "current_map" => "%{message[4]}" "current_x" => "%{message[5]}" "current_y" => "%{message[6]}" "user" => "%{message[7]}" "item" => "%{message[8]}" "item_id" => "%{message[9]}" "current_time" => "%{message[12]}" } remove_field => ["message"] } }}output { if [type] == "accesslog" { elasticsearch { index => "accesslog" codec => "json" hosts => ["hadoop1:9200","hadoop2:9200","hadoop3:9200"] } } if [type] == "gamelog" { elasticsearch { index => "gamelog" codec => plain { charset => "UTF-16BE" } hosts => ["hadoop1:9200","hadoop2:9200","hadoop3:9200"] } }} |
注:UTF-16BE为解决中文乱码,而不是UTF-8
5、logstash启动
logstash -f /opt/app/logstash-6.2.3/conf/flow-kafka.conf

6、logstash遇到的问题
1) 在使用logstash采集日志时,如果我们采用file为input类型,采用不能反复对一份文件进行测试!第一次会成功,之后就会失败!
参考资料:
https://blog.csdn.net/lvyuan1234/article/details/78653324

 浙公网安备 33010602011771号