【SpringCloud】03 消费者订单模块构建
创建订单模块,模块名称:Consumer-Order-Port-80
小提示:80端口,使用IP地址访问时不需要写80端口,默认的
配置依赖坐标:
<dependencies>
    <dependency>
        <groupId>org.springframework.boot</groupId>
        <artifactId>spring-boot-starter-web</artifactId>
    </dependency>
    <dependency>
        <groupId>org.springframework.boot</groupId>
        <artifactId>spring-boot-starter-actuator</artifactId>
    </dependency>

    <dependency>
        <groupId>org.springframework.boot</groupId>
        <artifactId>spring-boot-devtools</artifactId>
        <scope>runtime</scope>
        <optional>true</optional>
    </dependency>
    <dependency>
        <groupId>org.projectlombok</groupId>
        <artifactId>lombok</artifactId>
        <optional>true</optional>
    </dependency>
    <dependency>
        <groupId>org.springframework.boot</groupId>
        <artifactId>spring-boot-starter-test</artifactId>
        <scope>test</scope>
    </dependency>
</dependencies>
创建的Application.yml文件只需要配置端口号:
server:
  port: 80
创建启动类:
package cn.dzz.springcloud;

import org.springframework.boot.SpringApplication;
import org.springframework.boot.autoconfigure.SpringBootApplication;

/**
 * @author ArkD42
 * @file SpringCloud-ATGG-2020
 * @create 2020年08月24日 22:41
 */
@SpringBootApplication
public class ConsumerOrderPort80Application {
    public static void main(String[] args) {
        SpringApplication.run(ConsumerOrderPort80Application.class);
    }
}
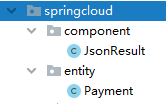
从提供者模块复制Json传输对象,和实体类:
到这个消费者订单模块中
这里的端口调用没有听明白。。。
看操作就好了,这里先是创建一个配置类:
然后注入了一个RestTemplate的Bean实例:
package cn.dzz.springcloud.configuration;

import org.springframework.beans.factory.annotation.Configurable;
import org.springframework.context.annotation.Bean;
import org.springframework.context.annotation.Configuration;
import org.springframework.web.client.RestTemplate;

/**
 * @author ArkD42
 * @file SpringCloud-ATGG-2020
 * @create 2020年08月24日 22:50
 */
@Configuration
public class ApplicationContextConfiguration {

    @Bean
    public RestTemplate restTemplate(){
        return new RestTemplate();
    }
}
再新建了订单控制器:
package cn.dzz.springcloud.controller;

import cn.dzz.springcloud.component.JsonResult;
import cn.dzz.springcloud.entity.Payment;
import lombok.extern.slf4j.Slf4j;
import org.springframework.web.bind.annotation.GetMapping;
import org.springframework.web.bind.annotation.RequestMapping;
import org.springframework.web.bind.annotation.RestController;
import org.springframework.web.client.RestTemplate;

import javax.annotation.Resource;

/**
 * @author ArkD42
 * @file SpringCloud-ATGG-2020
 * @create 2020年08月24日 22:47
 */

@Slf4j
@RestController
@RequestMapping("order")
public class OrderController {
    // HttpClient & RestTemplate
    @Resource
    private RestTemplate restTemplate;

    public static final String PAYMENT_URL = "http://localhost:8001";

    @GetMapping("consumer/payment/create")
    public JsonResult<Payment> createPayment(Payment payment) {
        return  restTemplate.postForObject(
                PAYMENT_URL + "/payment/create", // 接口地址URL
                payment, // 请求参数对象
                JsonResult.class // JSON封装类的字节实例
        );
    }
}
其实到这里的意思应该可以理解了,这里这个订单模块是通过这个方法来调用我们的提供者支付模块的那个插入方法,
首先需要了一个Rest模版实例,然后需要提供者模块的接口根路径,再拼接具体的方法的路径,和需要的参数
引入Payment实体类和JsonResult,一个是因为泛型和参数类型的需要,另外一个是因为前后端分离共同遵守的JSON格式约定
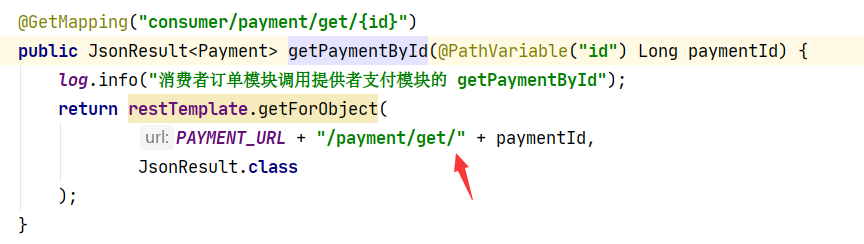
再补全后面的按ID查询方法:
package cn.dzz.springcloud.controller;

import cn.dzz.springcloud.component.JsonResult;
import cn.dzz.springcloud.entity.Payment;
import lombok.extern.slf4j.Slf4j;
import org.springframework.web.bind.annotation.GetMapping;
import org.springframework.web.bind.annotation.PathVariable;
import org.springframework.web.bind.annotation.RequestMapping;
import org.springframework.web.bind.annotation.RestController;
import org.springframework.web.client.RestTemplate;

import javax.annotation.Resource;

/**
 * @author ArkD42
 * @file SpringCloud-ATGG-2020
 * @create 2020年08月24日 22:47
 */

@Slf4j
@RestController
@RequestMapping("order")
public class OrderController {
    // HttpClient & RestTemplate
    @Resource
    private RestTemplate restTemplate;

    public static final String PAYMENT_URL = "http://localhost:8001";

    @GetMapping("consumer/payment/create")
    public JsonResult<Payment> createPayment(Payment payment) {
        log.info("消费者订单模块调用提供者支付模块的 createPayment");
        return  restTemplate.postForObject(
                PAYMENT_URL + "/payment/create", // 接口地址URL
                payment, // 请求参数对象
                JsonResult.class // JSON封装类的字节实例
        );
    }

    @GetMapping("consumer/payment/get/{id}")
    public JsonResult<Payment> getPaymentById(@PathVariable("id") Long paymentId) {
        log.info("消费者订单模块调用提供者支付模块的 getPaymentById");
        return restTemplate.getForObject(
                PAYMENT_URL + "/payment/get" + paymentId,
                JsonResult.class
        );
    }
}
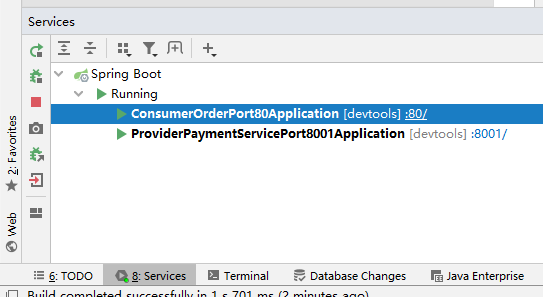
现在同时启动两个模块:
访问改地址
http://localhost/order/consumer/payment/get/2
Whitelabel Error Page
This application has no explicit mapping for /error, so you are seeing this as a fallback.
原因是因为少写了斜杠没对上接口:
修正后重新访问:
{"code":200,"message":"查询数据成功","data":{"id":2,"serial":"aaabbb222"}}
数据确实访问到了
控制台打印输出了这个方法:

但是很奇怪,为什么我们的提供者支付模块的这个方法它没有调用???
这里应该被触发了才对:
再测试我们的写操作试试:
http://localhost/order/consumer/payment/create?serial=aaabbb333
{"code":200,"message":"插入数据成功","data":null}
虽然我们之前的在提供者支付模块的操作中能够看到数据库的记录增加了,但是在这里的调用却失效了
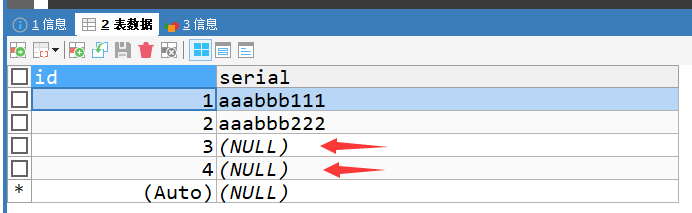
原因只是因为之前的请求参数并没有添加@RequestBody。。。

再次操作:
RunDashboard的配置:
其实这个RunDashboard在SSM框架中就有使用过,不过并未称为RunDashboard,而是叫Services
即SSM框架的每一个模块都可以是一个War包,被Tomcat部署运行
但是我使用的IDEA 2020.1中并未有对SpringBoot这样的自动支持。。。
所以需要手动在Workspace.xml中进行配置
  <component name="RunDashboard">
    <option name="configurationTypes">
      <set>
        <option value="SpringBootApplicationConfigurationType" />
      </set>
    </option>
    <option name="ruleStates">
      <list>
        <RuleState>
          <option name="name" value="ConfigurationTypeDashboardGroupingRule" />
        </RuleState>
        <RuleState>
          <option name="name" value="StatusDashboardGroupingRule" />
        </RuleState>
      </list>
    </option>
  </component>
但是尝试过后发现,IDEA关闭会立即删除这个配置。。。
然后又更改尝试了使用这个设置中开启了选项:

然后RunDashBoard才会有,但是不是提示了,是直接启动就赋予了
回顾刚刚的我们的工程结构:
这两个部分是重复的
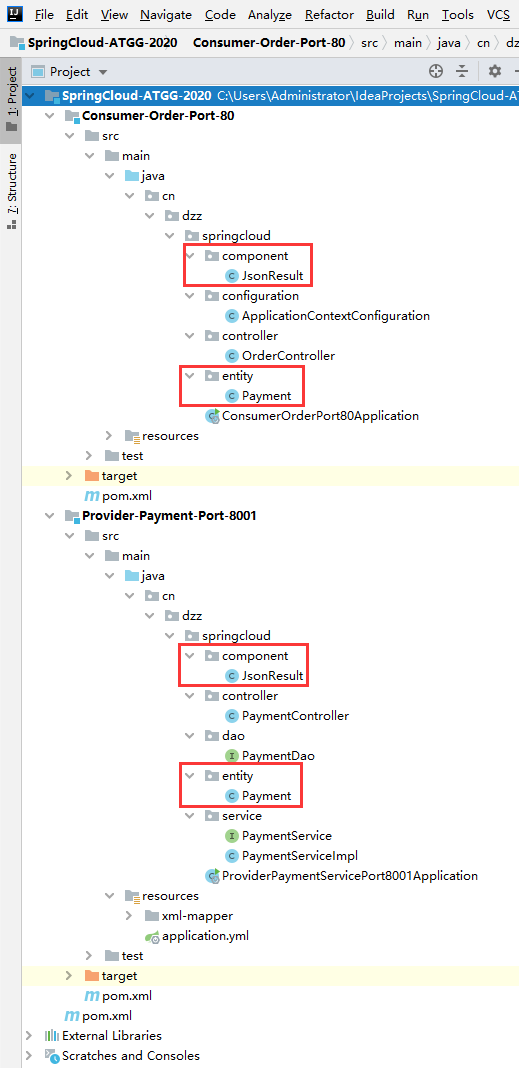
这就需要工程重构了
工程重构:
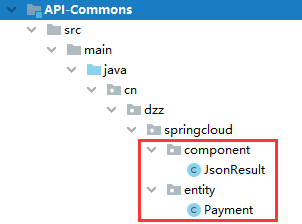
新建一个模块,用来抽取这些公共部分:
模块名称:API-Commons
导入依赖坐标:
<dependencies>
    <!-- https://mvnrepository.com/artifact/cn.hutool/hutool-all -->
    <dependency>
        <groupId>cn.hutool</groupId>
        <artifactId>hutool-all</artifactId>
        <version>5.4.0</version>
    </dependency>
    <dependency>
        <groupId>org.projectlombok</groupId>
        <artifactId>lombok</artifactId>
    </dependency>
    <dependency>
        <groupId>org.springframework.boot</groupId>
        <artifactId>spring-boot-devtools</artifactId>
    </dependency>
</dependencies>
粘贴对应的两个包:
然后清除,和安装
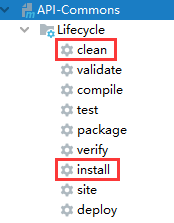
小提示:其实点击安装Install包括了前面的步骤
运行打印:
[INFO] Scanning for projects...
[INFO]
[INFO] -------------------< cn.dzz.springcloud:API-Commons >-------------------
[INFO] Building API-Commons 1.0-SNAPSHOT
[INFO] --------------------------------[ jar ]---------------------------------
[INFO]
[INFO] --- maven-resources-plugin:2.6:resources (default-resources) @ API-Commons ---
[INFO] Using 'UTF-8' encoding to copy filtered resources.
[INFO] Copying 0 resource
[INFO]
[INFO] --- maven-compiler-plugin:3.1:compile (default-compile) @ API-Commons ---
[INFO] Changes detected - recompiling the module!
[INFO] Compiling 2 source files to C:\Users\Administrator\IdeaProjects\SpringCloud-ATGG-2020\API-Commons\target\classes
[INFO]
[INFO] --- maven-resources-plugin:2.6:testResources (default-testResources) @ API-Commons ---
[INFO] Using 'UTF-8' encoding to copy filtered resources.
[INFO] skip non existing resourceDirectory C:\Users\Administrator\IdeaProjects\SpringCloud-ATGG-2020\API-Commons\src\test\resources
[INFO]
[INFO] --- maven-compiler-plugin:3.1:testCompile (default-testCompile) @ API-Commons ---
[INFO] Nothing to compile - all classes are up to date
[INFO]
[INFO] --- maven-surefire-plugin:2.12.4:test (default-test) @ API-Commons ---
[INFO] No tests to run.
[INFO]
[INFO] --- maven-jar-plugin:2.4:jar (default-jar) @ API-Commons ---
[INFO] Building jar: C:\Users\Administrator\IdeaProjects\SpringCloud-ATGG-2020\API-Commons\target\API-Commons-1.0-SNAPSHOT.jar
[INFO]
[INFO] --- maven-install-plugin:2.4:install (default-install) @ API-Commons ---
[INFO] Installing C:\Users\Administrator\IdeaProjects\SpringCloud-ATGG-2020\API-Commons\target\API-Commons-1.0-SNAPSHOT.jar to C:\maven store\cn\dzz\springcloud\API-Commons\1.0-SNAPSHOT\API-Commons-1.0-SNAPSHOT.jar
[INFO] Installing C:\Users\Administrator\IdeaProjects\SpringCloud-ATGG-2020\API-Commons\pom.xml to C:\maven store\cn\dzz\springcloud\API-Commons\1.0-SNAPSHOT\API-Commons-1.0-SNAPSHOT.pom
[INFO] ------------------------------------------------------------------------
[INFO] BUILD SUCCESS
[INFO] ------------------------------------------------------------------------
[INFO] Total time:  3.389 s
[INFO] Finished at: 2020-08-25T00:06:45+08:00
[INFO] ------------------------------------------------------------------------
然后删除两个模块的Entity的公共文件:
删除后Maven很快就会检查到缺失依赖

所以下一步是导入模块依赖:
<dependency>
    <groupId>cn.dzz.springcloud</groupId>
    <artifactId>API-Commons</artifactId>
    <version>${project.version}</version> <!--<version>1.0-SNAPSHOT</version>-->
</dependency>
可以写直接的版本号,也可以直接跟父工程约定的
这样就完成了

 浙公网安备 33010602011771号