
mysql 添加多版本数据库
win10,已有 5.6 版本,安装8.0版本
1、先在mysql官网下载社区版压缩包,下载后解压
https://dev.mysql.com/downloads/mysql/
配置环境变量
添加系统变量MySQL8_HOME

在系统变量Path添加Mysql8的bin路径

2、在目录下插件 my.ini文件,添加默认配置
# For advice on how to change settings please see
# http://dev.mysql.com/doc/refman/8.0/en/server-configuration-defaults.html
# *** DO NOT EDIT THIS FILE. It's a template which will be copied to the
# *** default location during install, and will be replaced if you
# *** upgrade to a newer version of MySQL.

[mysqld]

# Remove leading # and set to the amount of RAM for the most important data
# cache in MySQL. Start at 70% of total RAM for dedicated server, else 10%.
innodb_buffer_pool_size = 128M

# Remove leading # to turn on a very important data integrity option: logging
# changes to the binary log between backups.
# log_bin

# These are commonly set, remove the # and set as required.
basedir = D:\MySQL8.0\mysql-8.0.23-winx64
datadir = D:\MySQL8.0\mysql-8.0.23-winx64\data
port = 3307
server_id = 1


# Remove leading # to set options mainly useful for reporting servers.
# The server defaults are faster for transactions and fast SELECTs.
# Adjust sizes as needed, experiment to find the optimal values.
join_buffer_size = 128M
sort_buffer_size = 2M
read_rnd_buffer_size = 2M

sql_mode=NO_ENGINE_SUBSTITUTION,STRICT_TRANS_TABLES
上面的 basedir 和 datadir 为数据库目录
3、使用管理员打开终端,到达bin目录下,这里需要注意的是直接使用 "cd 路径" 可能不会跳转,需要在 cd 后面加上 /d。执行
mysqld --defaults-file=D:\MySQL8.0\mysql-8.0.23-winx64\my.ini --initialize --console
进行初始化,执行完之后会发现多出了 data 文件夹,并且会提示 “ A temporary password is generated for root@localhost: ?iimDdTh0Yq!” ,这个 ?iimDdTh0Yq! 就是临时密码,记录下来,如果这一步没有出现,那么说明安装失败,就需要根据提示信息去查询原因,我就是在这里卡了很久。
4、执行
mysqld install MySQL8 --defaults-file=“D:\MySQL8.0\mysql-8.0.23-winx64my.ini”
创建服务。出现

说明成功
5、win+R,输入 "regedit" 打开注册表,找到对应的服务,
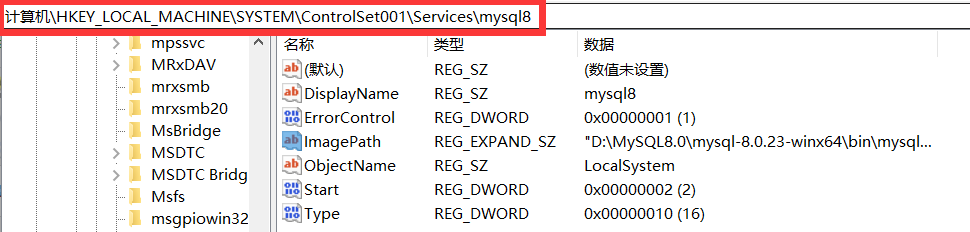
修改 ImagePath变量
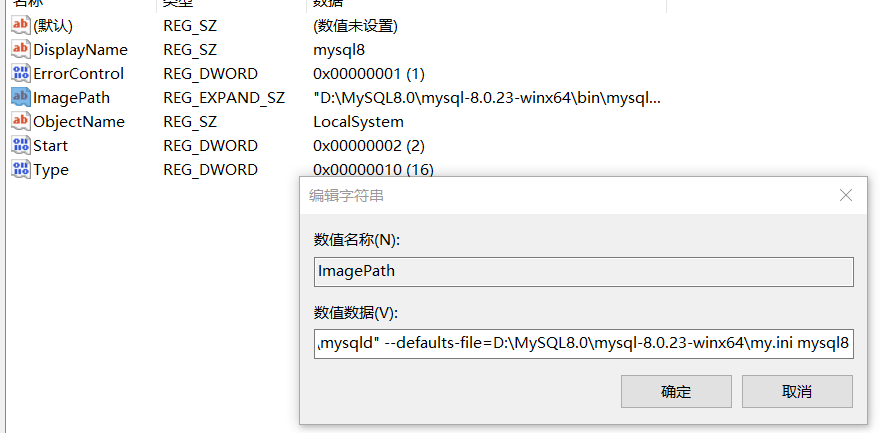
我这里是 ""D:\MySQL8.0\mysql-8.0.23-winx64\bin\mysqld" --defaults-file=D:\MySQL8.0\mysql-8.0.23-winx64\my.ini mysql8"。
接着win+r打开compmgmt.msc管理,找到 定义的服务名启动就可以了。
6、使用 navicat 连接,出现 "2059 - Authentication plugin 'caching_sha2_password' cannot be loaded" ,说明这个软件还不支持 MySQL 8 的验证方式,所以需要先改变验证方式,这里需要注意的是需要先关闭之前的 mysql 服务,然后才能在命令行使用命令直接连上 mysql8 版本的mysql,不然默认连接的是之前的mysql5.6,至于直接使用 mysql8 来连接8版本的却显示未定义不知道为什么。。。

连接 mysql8版本

7、连上后依次执行:
1,登录MySQL,使用命令
 mysql -u root -p或mysql -u root -ppassword【ps:-ppassword后面的密码是你的root密码】
2,修改加密规则
ALTER USER 'root'@'localhost' IDENTIFIED BY 'password' PASSWORD EXPIRE NEVER;
3,更新用户密码
ALTER USER 'root'@'localhost' IDENTIFIED WITH mysql_native_password BY 'password';
4,刷新权限
FLUSH PRIVILEGES;
5,重置密码
alter user 'root'@'localhost' identified by '你的密码';
8、最后使用 navicat 连接,

成功
借鉴博客:
Navicat ,SQLyog连接MySQL8 异常2059-Authentication plugin 'caching_sha2_password' cannot be loaded解决方案

 浙公网安备 33010602011771号