


AST抽象语法树
AST是Abstract Syntax Tree的缩写既"抽象语法树"它以树状的形式表现编程语言的语法结构。在线生成: https://astexplorer.net/ https://github.com/jamiebuilds/babel-handbook/blob/master/translations/en/plugin-handbook.md
生成过程:源码--词法分析--语法分析--抽象语法树
抽象语法树常见节点类型:https://github.com/babel/babylon/blob/master/ast/spec.md
转换AST
大多数情况下我们是用不到AST的,但是如果你需要做一些大型框架或者第三方工具的时候,那么AST将是你的不二选择. 例如babel、webpack、JD Taro、uni-app等第三方工具和框架都说用的AST。在利用webpack打包js代码的时候,webpack会在我们原有代码的基础新增一些代码;在利用babel打包js代码的时候,我们可以将高级代码转换为低级代码,这些都是通过AST来新增和修改的。
将JS代码转换成AST,其实就是将源代码的每一个组成部分拆解出来放到树中,拆解的过程非常复杂,所以我们可以借助第三方模块来帮我们实现拆解。npm install --save @babel/parser https://babeljs.io/docs/en/babel-parser。
// index.js
import * as parser from "@babel/parser";
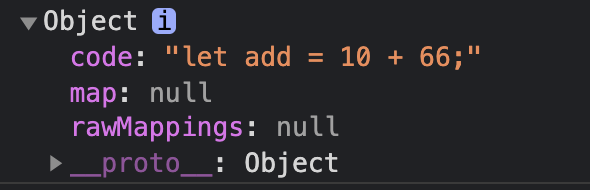
const code = `let sum = 10 + 66;`;
const ast = parser.parse(code);
console.log(ast);
 ------
修改AST
通过babel的traverse模块来遍历AST(https://babeljs.io/docs/en/babel-traverse#docsNav),通过@babel的generator模块来转换修改后的AST为代码。
// index.js
import * as parser from "@babel/parser";
import traverse from "@babel/traverse";
import generate from '@babel/generator';
// 转换成抽象语法树
const code = `let sum = 10 + 66;`;
const ast = parser.parse(code);
// 遍历抽象语法树
traverse(ast, {
    enter(path) { // path为当前遍历到的节点
        if(path.node.type === "Identifier"){
            // 修改满足条件的语法树节点
            path.node.name = "add";
            path.stop();
        }
    }
});
// 将抽象语法树转换成代码
const res = generate(ast);
 ------
创建AST节点
通过babel的types模块来创建语法树节点(npm install --save @babel/parser)然后push到body中,手动创建AST抽象语法树。https://babeljs.io/docs/en/babel-types。
在@babel/types模块中,所有语法树的节点类型都有对应的方法,直接调用对应方法即可创建,在创建的时候建议从内向外创建,最后再添加到body中。
// let sum = 10 + 66 的AST树的结构
"type": "File",
"program": {
    "type": "Program",
    "body": [
        {
            "type": "VariableDeclaration",
            "declarations": [
                {
                    "type": "VariableDeclarator",
                    "id": {
                        "type": "Identifier",
                        "name": "sum"
                    },
                    "init": {
                        "type": "BinaryExpression",
                        "left": {
                            "type": "NumericLiteral",
                            "value": 10
                        },
                        "operator": "+",
                        "right": {
                            "type": "NumericLiteral",
                            "value": 66
                        }
                    }
                }
            ],
            "kind": "let"
        }
    ],
}
// index.js 创建AST节点
import * as parser from "@babel/parser";
import traverse from "@babel/traverse";
import generate from '@babel/generator';
import * as t from '@babel/types';
let code = ``;
let ast = parser.parse(code);

// 需求: 要求手动创建 let sum = 10 + 66; 的节点, 添加到body(从内向外创建)
// 1.创建二元运算符左右参与运算的 字面量节点
let left = t.numericLiteral(10);
let right = t.numericLiteral(66);
// 2.创建二元运算符节点
let init = t.binaryExpression("+", left, right);
// 3.创建表达式标识符节点
let id = t.identifier("sum");
// 4.创建内部变量表达式节点
let variable = t.variableDeclarator(id, init);
// 5.创建外部变量表达式节点
let declaration = t.variableDeclaration("let", [variable]);
// 6.将组合好的节点添加到body中
ast.program.body.push(declaration);

let resultCode = generate(ast);
console.log(resultCode.code); // let sum = 10 + 66
删除AST
NodePath常用属性和方法:
── 属性
  - node   当前节点
  - parent  父节点
  - parentPath 父path
  - scope   作用域
  - context  上下文
  - ...
── 方法
  - get   当前节点
  - findParent  向父节点搜寻节点
  - getSibling 获取兄弟节点
  - replaceWith  用AST节点替换该节点
  - replaceWithMultiple 用多个AST节点替换该节点
  - insertBefore  在节点前插入节点
  - insertAfter 在节点后插入节点
  - remove   删除节点
  - ...
// index.js
import * as parser from "@babel/parser";
import traverse from "@babel/traverse";
import generate from '@babel/generator';
import * as t from '@babel/types';
let code = `
    console.log("meihao");
    let sum = 10 + 66;
    let minus = 66 - 33;
    console.log("it666");
`;
let ast = parser.parse(code);
traverse(ast, {
//enter方法什么时候调用: 只要遍历到一个节点就会调用, 并且还会传递一个NodePath对象,传递的这个对象中就保存了当前遍历到的节点
/*
    enter(path){
        console.log(path.node.name);
    }
*/
// traverse方法中除了有enter方法以外, 还有其它的方法,只要是抽象语法树中拥有的节点类型都有对应的方法。那么如果写的不是enter, 而是抽象语法树节点对应类型的方法,那么只有遍历到对应的类型才会调用
    Identifier(path){ // 遍历ast标识符的方法
        if(path.node.name === "sum"){
            path.parentPath.remove(); // 删除对应的父节点(let sum = 10 + 66;)
        }
    }
});
let resultCode = generate(ast);
console.log(resultCode);
webpack打包内容
webpack打包之后的内容被放到了一个自调用函数中;会将入口文件的路径作为key, 入口文件的内容作为value放到一个对象中传递给自调用函数;自调用函数中实现了require方法, 并且调用了自己实现的require方法;在调用自己实现的require方法时,入口文件路径作为key传递进去, 在内部通过这个路径取出对应的函数执行。
// webpack 打包index.js
(function (modules) {
    var installedModules = {}; // 内部定义的缓存对象
    function __webpack_require__(moduleId) {
        if (installedModules[moduleId]) { // 文件入口,./src/index.js
            return installedModules[moduleId].exports;
        }
        var module = installedModules[moduleId] = {
            i: moduleId,
            l: false,
            exports: {}
        };
        modules[moduleId].call(module.exports, module, module.exports, __webpack_require__);
        module.l = true;
        return module.exports;
    }
   // ... 省略
    return __webpack_require__(__webpack_require__.s = "./src/index.js"); // 自调用函数中实现了require方法
})
({
    "./src/index.js":  // key
        (function (module, exports, __webpack_require__) { // __webpack_require__ 默认没有
            console.log("index"); // index.js 文件内容
        })
});
多文件打包
// webpack 打包index.js,其中index.js中引入a.js和b.js
(function (modules) {
	   // 同上
})
({
    "./src/a.js":
        (function (module, exports) {
            module.exports = "mei"; // a.js中代码
        }),
    "./src/b/b.js":
        (function (module, exports) {
            module.exports = "33"; // b.js中代码
        }),
    "./src/index.js":
        (function (module, exports, __webpack_require__) {
            const name = __webpack_require__(/*! ./a.js */ "./src/a.js");
            const age = __webpack_require__(/*! ./b/b.js */ "./src/b/b.js");
            console.log("meihao");  // index.js中代码
            console.log(name, age); // index.js中代码
        })
});
// index.js代码
const name = require('./a.js');
const age = require('./b/b.js');

console.log("meihao");
console.log(name, age);
webpack打包单个文件实现
建一个自己的包myWebpack
// 新建一个项目文件夹,创建node_modules文件夹,里面创建自己的一个包myWebpack
// npm init 初始化myWebpack
// 新建一个bin文件夹,里面新建index.js
#! /usr/bin/env node
console.log('hello')
// package.json 加入一个bin命令
{
	...
  "bin": {
    "my-webpack": "bin/index.js" // 以后安装使用,执行my-webpack全局命令可以执行index.js
  }
}
// 执行 npm link // 这个指令会在node_modules文件夹下生成一个.bin文件夹,里面存放my-webpack的替身
// 最外层执行npx my-webpack 输出:console.log('hello')
文件目录: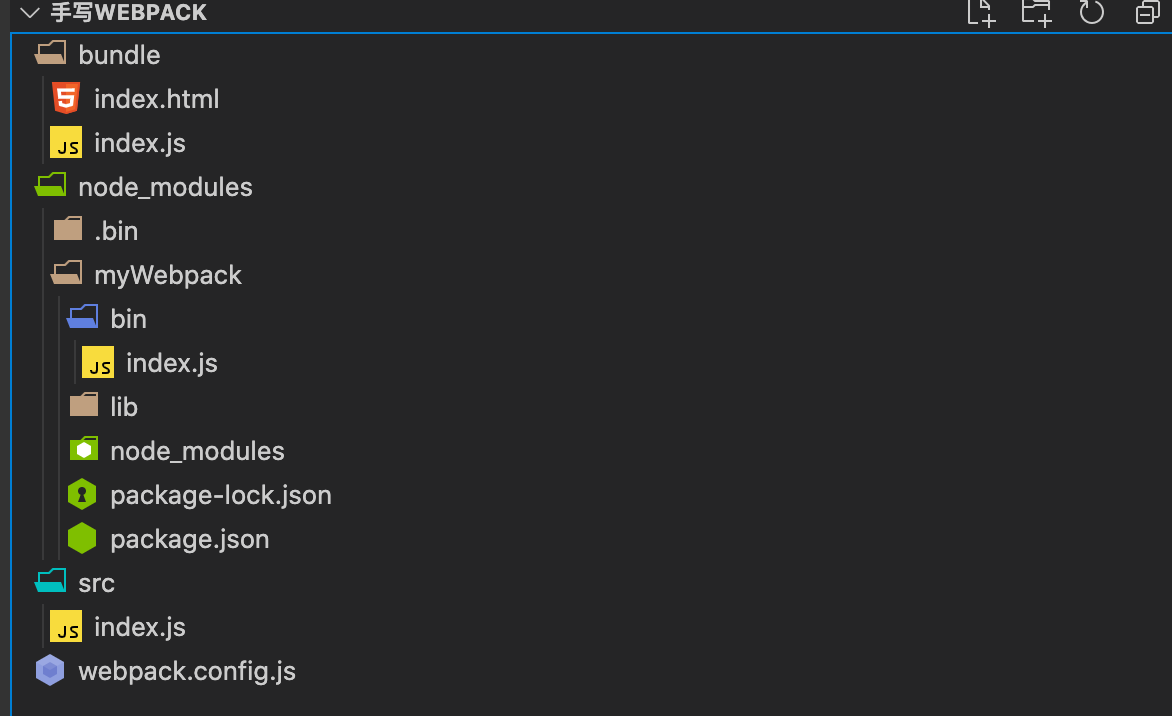
执行 npm link自动生成.bin文件夹,里面有这个文件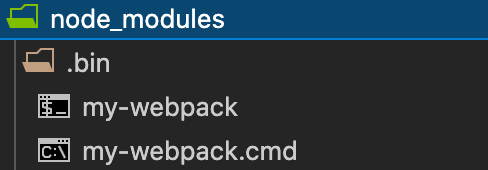
// node_modules/myWebpack/bin/index.js
#! /usr/bin/env node
// console.log('hello')
// process.cwd()作用: 获取当前执行指令的工作路径

const path = require("path");
const Complier = require("../lib/Complier.js");

const configPath = path.resolve(process.cwd(), "webpack.config.js");
// console.log(configPath) // /Users/meihao/手写webpack/webpack.config.js
const config = require(configPath);
// console.log(config);
/*
{
{
  devtool: 'none',
  mode: 'development',
  entry: './src/index.js',
  output: { filename: 'index.js', path: '/Users/meihao/手写webpack/bundle' }
}
*/
const cp = new Complier(config);
cp.run();
// node_modules/myWebpack/lib/Complier.js
const fs = require("fs");
const path = require("path");

class Complier {
    constructor(config){
        // 保存配置
        this.config = config;
        // 保存模块的依赖
        this.modules = {};
    }
    run(){
        this.buildModule();
        this.emitFile();
    }
    buildModule(){
        let code = this.getSource(this.config.entry);
        console.log(code); // console.log("这是要打包的index.js");
        this.modules[this.config.entry] = code; // 相当于webpack打包后的js代码中对应方法的传参
        console.log(this.modules); // {'./src/index.js': 'console.log("这是要打包的index.js");'}
    }
    getSource(modulePath){
        return fs.readFileSync(modulePath, "utf8");
    }
    emitFile(){
        // 1.读取EJS模板
        let templatePath = path.resolve(__dirname, "main.ejs");
        let template = fs.readFileSync(templatePath, "utf8");
        // console.log(template);
        // 2.利用变量替换模板中的内容
        let resultCode = ejs.render(template, {entryId: this.config.entry, modules: this.modules});
        // console.log(resultCode); // 用webpack.config.js中的入口指定文件和指定文件中的内容替换模板指定的变量
        // 3.将最终的内容写入到文件中
        // 3.1拿到输出的目录
        let outputDir = this.config.output.path;
        // console.log(outputDir);
        if(!fs.existsSync(outputDir)){
            fs.mkdirSync(outputDir);
        }
        let outputPath = path.resolve(outputDir, this.config.output.filename);
        fs.writeFileSync(outputPath, resultCode); // 模板代码写入webpack.config.js指定的输出文件
    }
}
module.exports = Complier;
将原生webpack打包生成的js代码变成一个模板,可以复用。https://ejs.bootcss.com/。需要用到的工具:EJS是一种模板引擎,用于生成JS代码
// node_modules/myWebpack/lib/main.ejs // 核心代码都是用webpack打包内容生成的模板,需要修改几个部分
(function (modules) {
 		...
    return __webpack_require__(__webpack_require__.s = "<%-entryId%>"); // 模板使用时<%-entryId%>会被替换为我们webpack.config.js里写的入口
})
({
    "<%-entryId%>": // key
        (function (module, exports, __webpack_require__) { // value
            <%-modules[entryId]%> // 我们写的模块的代码保存在modules[entryId]
        })
});
// 手写webpack/src/index.js
console.log("这是要打包的index.js");
// webpack.config.js
const path = require("path");
module.exports = {
    devtool: "none",
    mode: "development",
    entry: "./src/index.js",
    output: {
        filename: "index.js",
        path: path.resolve(__dirname, "bundle")
    }
};
webpack打包多个文件实现
// node_modules/myWebpack/lib/main.ejs // 模板代码修改
...
({ // 自调用方法最后传参修改
    <% for(let key in modules) {%>
    "<%-key%>": // key
        (function (module, exports, __webpack_require__) { // value
            <%-modules[key]%>
        }),
    <% } %>
});
// node_modules/myWebpack/lib/Complier.js
...
const parser = require("@babel/parser");
const traverse =  require("@babel/traverse").default;
const generate = require('@babel/generator').default;
const t = require('@babel/types');

class Complier {
		//... 相比单文件打包,需要修改到的地方
    buildModule(modulePath){
        // 1.拿到主模块代码
        let code = this.getSource(modulePath);
        // 2.修改当前模块的代码
        let {resultCode, dependencies} = this.parseModule(code);
        // 3.将主模块的路径和代码保存到modules中
        this.modules[modulePath] = resultCode;
        // 4.处理依赖模块, 将依赖模块的路径和代码也保存到modules中
        dependencies.forEach((depPath) => {
            this.buildModule(depPath);
        })
    }
    parseModule(code){
        // 1.将当前模块的代码转换成抽象语法树
        let ast = parser.parse(code);
        // 定义变量保存主模块地址
        let rootPath = path.dirname(this.config.entry);
        // 定义数组保存当前模块所有的依赖
        let dependencies = [];
        // 2.修改抽象语法树中的内容
        traverse(ast, {
            CallExpression(nodePath){
                let node = nodePath.node;
                if(node.callee.name === "require"){
                    // 2.1将require修改为__webpack_require__
                  	// 目的:const name = __webpack_require__(/*! ./a.js */ "./src/a.js");
                    node.callee.name = "__webpack_require__";
                    // 2.2修改require导入的路径
                    let modulePath = node.arguments[0].value;
                    modulePath = ".\\" +path.join(rootPath, modulePath); // 修改require里的路径
                    modulePath = modulePath.replace(/\\/g, "/"); // 正常路径分隔符\,但是webpack需要的是/
                    dependencies.push(modulePath); // index.js依赖的文件数组
                    node.arguments = [t.StringLiteral(modulePath)]; // 重新转成ast节点
                }
            }
        });
        // 3.将修改之后的抽象语法树转换成代码
        let resultCode = generate(ast).code;
        // 4.返回结果
        return {resultCode, dependencies};
    }
}
module.exports = Complier;
// index.js
const name = require('./a.js');
const age = require('./b/b.js');

console.log("这是要打包的index.js");
console.log(name, age);
手写同步Loader
Loader本质就是一个函数,我们只需要自定义一个模块,在模块中暴露一个函数,在函数中实现Loader相关的功能即可。
👉 webpack在使用loader的时候, 会将当前打包的内容传递给当前的loader
👉 webpack在使用loader的时候, 会修改loader中的this, 所以定义loader的函数只能是ES5的函数, 不能是ES6函数
// 自己定义的 ReplaceLoader.js
module.exports = function (source) { // sorce就是webpack 通过loader传递进来的要打包的代码
    source = source.replace(/meihao/g, "替换后的meihao");
    return source;
};

// 待打包的 index.js
console.log("meihao");

// 打包后的 index.js
...
/***/ "./src/index.js":
/*!**********************!*\
  !*** ./src/index.js ***!
  \**********************/
/*! no static exports found */
/***/ (function(module, exports) {
console.log("替换后的meihao");
/***/ })
/******/ });
// webpack.config.js
const path = require("path");
module.exports = {
    devtool: "none",
    mode: "development",
    entry: "./src/index.js",
    output: {
        filename: "index.js",
        path: path.resolve(__dirname, "bundle")
    },
    module: {
        rules: [
            {
                test: /\.js$/,
                exclude: /node_modules/,
                use: [{
                    loader: path.resolve(__dirname, 'loader/ReplaceLoader.js') // 指定loader为loader文件夹下的ReplaceLoader.js
                }]
            }
        ]
    }
};
Loader参数处理
处理Loader参数
在webpack.config.js中配置Loader的时候,可以通过options配置一些额外的参数,在编写Loader的时候通过loader函数中的this获取。this.query.xxx,https://www.webpackjs.com/api/loaders/#this-query。也可以通过第三方插件:loader-utils模块获取,npm install --save-d loader-utils;用法:let options = loaderUtils.getOptions(this); options.xxx
// webpack.config.js
use: [{
    loader: path.resolve(__dirname, 'loader/ReplaceLoader.js'),
    options: {
        name: "webpack 下配置的options name"
    }
}]
// ReplaceLoader.js 中
const loaderUtils = require('loader-utils');
module.exports = function (source) { // sorce就是webpack 通过loader传递进来的要打包的代码
  	// let name = this.query.name
		let options = loaderUtils.getOptions(this);
    source = source.replace(/meihao/g, options.name);
    return source;
};
校验Loader参数
通过schema-utils模块来校验,npm install --save-d schema-utils。
// ReplaceLoader.js
const loaderUtils = require('loader-utils');
const validateOptions = require('schema-utils');
module.exports = function (source) {
    // 1.获取webpack传递过来的参数
    let options = loaderUtils.getOptions(this);
    // 2.定制校验的规则
    let schema = {
        type: "object", // 传递参数类型为对象
        properties: {
            name: { // 可以传递name参数
                type: "string" // name参数的数据类型必须是字符串类型
            }
        },
        additionalProperties: false
    };
    // 3.利用校验方法校验传递过来的参数是否符合指定的规则
    validateOptions(schema, options, 'RepalceLoader');
    source = source.replace(/meihao/g, options.name);
    return source;
};
简化Loader导入
如果需要使用自己编写的Loader,我们需要通过path指定loader的路径,可以通过webpack的第三方插件resolveLoader配置来简化。
// webpack.config.js
const path = require("path");

module.exports = {
    ...
    resolveLoader:{
        // modules: [ 'node_modules', './loader'], // 第一种方式
        alias: {
            ReplaceLoader: path.resolve(__dirname, 'loader/ReplaceLoader.js')
        }
    },
    module: {
        rules: [
            {
                test: /\.js$/,
                use: [{
                    // loader: path.resolve(__dirname, 'loader/ReplaceLoader.js'),
                    loader: 'ReplaceLoader',
                    options: {
                        name: "webpack 下配置的options name"
                    }
                }]
            }
        ]
    }
};
手写异步Loader
Loader中有异步操作,不能立刻返回,需要使用webpack提供的方法。
可以通过以下代码返回异步操作的结果
let callback = this.async();
第一个参数必须是 Error 或者 null
第二个参数是一个 string 或者 Buffer。
可选的:第三个参数必须是一个可以被这个模块解析的 source map。
可选的:第四个选项,会被 webpack 忽略,可以是任何东西(例如一些元数据)
callback(null, result, map, meta);
// ReplaceLoader.js
module.exports = function (source) {
		...
   	let callback = this.async();
    setTimeout(function () { // 在异步操作中返回结果,直接使用return会报错
        source = source.replace(/meihao/g, options.name);
        callback(null, source);
    }, 5000);
};
实现style-loader和less-loader
style-loader的作用是将css代码插入到html的head标签中。less-loader的作用是将less代码转换成css代码。
loader文件夹下新建less-loader.js和style-loader.js。
// style-loader.js
module.exports = function (source) {
    let style = `
    	let style = document.createElement("style");
    	style.innerHTML = ${JSON.stringify(source)};
    	document.head.appendChild(style);
    `;
    return style;   // 注意点: 在loader中返回的数据必须是字符串类型或者是二进制类型(Buffer)
}
// less-loader.js
const less = require('less');
module.exports = function (source) {
    let callback = this.async();
    less.render(source, function (err, obj) {   // 把传入的less风格css文件代码渲染成普通css代码
        callback(err, obj.css);
    });
};
// webpack.config.js 配置module.rules规则
{
    test: /\.less$/,
    use: [{
        loader: path.resolve(__dirname, 'loader/style-loader')
    },{
        loader: path.resolve(__dirname, 'loader/less-loader')
    }]
}
手写webpack增加Loader功能
在之前手写webpack的基础上,手写loader功能处理less文件;如果读取到的是JS文件,直接交给打包方法打包即可。如果读取到的不是JS文件,那么就需要先交给对应的Loader处理之后才能交给打包方法打包。所以我们需要在读取文件的方法中判断,当前读取到的内容是否是需要交给Loader具体规则如上。
// my-webpack中修改Complier.js的读取文件代码方法getSource修改
getSource(modulePath){ // ./src/index.less
    let content = fs.readFileSync(modulePath, "utf8");
    // 1.拿到配置文件中的所有规则
    let rules = this.config.module.rules;
    // 2.依次取出每一个规则
    rules.forEach(function (rule) {
        // 通过解构赋值, 那么对应的正则表达式和对应的loader
        let {test, use} = rule;
        // 判断当前的文件是否需要通过loader来处理
        if(test.test(modulePath)){
            // 由于loader需要从右至左,从下至上的执行,所以需要从后往前取
            for(let i = use.length - 1; i >= 0; i--){
                let loader = require(use[i]['loader']);
                content = loader(content); // 拿到需要根据对应规则解析的文件代码,传入指定的loader方法中,具体方法在loader指定的文件中。
            }
        }
    })
    // 如果读取到的是JS代码, 那么可以直接返回
    // 如果读取到的不是JS代码, 那么就需要通过loader处理之后才能返回
    return content;
}
// less-loader.js 指定的loader方法需要修改
const less = require('less');

module.exports = function (source) {
    // let callback = this.async(); // 这个是webpack自己的方法,手写webpack需要换个实现方式
    let css = '';
    less.render(source, function (err, obj) {
        // callback(err, obj.css);
        css = obj.css;
    });
    return css;
};
发布订阅模式
发布订阅模式:(你去买东西断货了,老板让你留下联系方式,到货了给你打电话,这就是发布订阅模式;老板就是发布者,你就是订阅者,订阅者将电话添加到了发布者的缓存列表中(电话簿),当发布者到货后就会遍历缓存列表依次通知所有订阅者)。
// ./src/SyncHook.js
class SyncHook { // 定义一个发布者类
    constructor(args){
        this.tasks = []; // 缓存列表
        this.args = args; // 定义属性保存将来会给订阅者传递多少个参数
    }
    tap(tag, task){ // 订阅方法
        this.tasks.push(task);
    }
    call(...args){ // 发布方法(展开表达式自动将传入的多个参数变成一个数组)
        if(args.length < this.args.length){
            return new Error("参数个数不对");
        }
        args = args.slice(0, this.args.length);
        this.tasks.forEach(function (task) {
            task(...args);
        })
    }
}
module.exports = SyncHook;
/* 测试代码
// 1.创建发布者
let hook = new SyncHook(["name", "price"]);
// 2.订阅者像发布者订阅
hook.tap("zs", function (name, price) {
    console.log(name, price);
});
hook.tap("ls", function (name, price) {
    console.log(name, price);
});
hook.tap("ww", function (name, price) {
    console.log(name, price);
});
// 3.发布者发布消息
hook.call("豪车", 88888, 666); // 豪车 88888
 */
tapable
Tapable实际是一套发布订阅模式的实现,其实上面的SyncHook类就是Tapable中提供的一种实现。npm install -D tapable。
tapable支持多种模式:
const {
  // 同步串行勾子
    SyncHook,
    SyncBailHook,
    SyncWaterfallHook,
    SyncLoopHook,
  // 异步并行勾子
    AsyncParallelHook,
    AsyncParallelBailHook,
 // 异步串行勾子
    AsyncSeriesHook,
    AsyncSeriesBailHook,
    AsyncSeriesWaterfallHook
 } = require("tapable");
SyncHook同步串行钩子,SyncHook不关心订阅函数(事件处理函数)的返回值,在收到消息(触发事件)之后,会按照订阅的先后顺序执行所有的订阅函数(事件处理函数)。
SyncBailHook
同步串行钩子SyncBailHook关心订阅函数(事件处理函数)的返回值,在收到消息(触发事件)之后,会按照订阅的先后顺序执行所有的事件处理函数,但是如果在执行的过程中有一个订阅函数返回的不是undefined 就会停止执行后续函数。
// index.js
// const { SyncBailHook } = require('tapable');
const SyncBailHook = require('./SyncBailHook.js');
class Lesson {
    constructor() {
        this.hooks = {
            vue: new SyncBailHook(["des"]), // 创建一个发布者对象
        }
    }
    tap(){
        this.hooks.vue.tap("zs", function (des) {  // 订阅消息
            console.log("zs", des);
            // return "1"; // 取消注释,结果:zs vue课程上线了
            return undefined; // 没有return语句默认返回undefined
        });
        this.hooks.vue.tap("ls", function (des) {
            console.log("ls", des);
            // return "2";
        });
        this.hooks.vue.tap("ww", function (des) {
            console.log("ww", des);
            return "3";
        });
    }
    call(){
        this.hooks.vue.call("传给订阅消息函数的参数"); // 发布消息
    }
}
let ls = new Lesson();
ls.tap();
ls.call();
/*
    zs vue课程上线了
    ls vue课程上线了
    ww vue课程上线了
*/
自己实现 SyncBailHook ,需要修改发布订阅实现的 SyncHook 的call方法。
call(...args){
    if(args.length < this.args.length){
        return new Error("参数个数不对");
    }
    args = args.slice(0, this.args.length);
    // this.tasks.forEach(function (task) {
    //     task(...args);
    // })
    for(let i = 0; i < this.tasks.length; i++){
        let task = this.tasks[i];
        let result = task(...args);
        if(result !== undefined){ // 判断返回值
            break;
        }
    }
}
SyncWaterfallHook
SyncWaterfallHook关心订阅函数(事件处理函数)的返回值,在收到消息(触发事件)之后,会按照订阅的先后顺序执行所有的事件处理函数,并且会将上一个订阅函数的返回值作为参数传递给下一个订阅函数。
tap(){ // 订阅消息
    this.hooks.vue.tap("tag1", function (des) {
        console.log("tag1", des);
        return "1";
    });
    this.hooks.vue.tap("tag2", function (des) {
        console.log("tag2", des); // 1
        return "2";
    });
    this.hooks.vue.tap("tag3", function (des) {
        console.log("tag3", des); // 2
        return "3";
    });
}
call(){ // 发布消息
    this.hooks.vue.call("传给订阅消息函数的参数");
}
自己实现 SyncWaterfallHook ,需要修改发布订阅实现的 SyncHook 的call方法。
call(...args){
    if(args.length < this.args.length){
        return new Error("参数个数不对");
    }
    args = args.slice(0, this.args.length);

    let [firstTask, ...others] = this.tasks;
    let result = firstTask(...args); // 拿到第一个函数的返回值
    others.forEach(function (task) {
        result = task(result);
    });
}
SyncLoopHook
SyncLoopHook关心订阅函数(事件处理函数)的返回值,在收到消息(触发事件)之后,会按照订阅的先后顺序执行所有的事件处理函数并且如果订阅函数的返回值不是undefined就会一直执行当前订阅函数。
tap(){
    this.hooks.vue.tap("tag1", (des) => {
        console.log("tag1", des);
        // return "1";
        this.index++;
        return this.index === 3 ? undefined : '随便返回';
    });
    this.hooks.vue.tap("tag2", function (des) {
        console.log("tag2", des); // 没有返回值默认undefined
        // return "2";
    });
    this.hooks.vue.tap("tag3", function (des) {
        console.log("tag2", des);
        // return "3";
    });
}
call(){
    this.hooks.vue.call("传给订阅消息函数的参");
}
自己实现 SyncLoopHook ,需要修改发布订阅实现的 SyncHook 的call方法。
call(...args){
    if(args.length < this.args.length){
        return new Error("参数个数不对");
    }
    args = args.slice(0, this.args.length);

    this.tasks.forEach(function (task) {
        let result = undefined;
        do{
            result = task(...args);
        }while (result !== undefined); // 返回值不等于undefined就一直执行
    })
}
AsyncParallelHook
发出消息后,会同时执行所有的订阅函数并且在执行订阅函数时会自动传递一个callback参数,每个订阅函数执行完毕之后必须通过callback告诉系统订阅函数已经执行完毕了,当所有订阅函数都调用完callback后会通过回调函数的方式告诉callAsync全部执行完毕了。
// 如果使用的是异步的钩子, 那么就只能通过 tapAsync 来订阅消息
asyncParallelHookObj.tapAsync("tag", (value, callback) => { // value为call函数传入的值
  setTimeout(() => { // 订阅者订阅的方法函数必须是一个异步函数
		callback(); // 执行默认的 callback 回调函数,告诉 AsyncParallelHook 当前订阅函数执行完毕
  }, 1000)
})
// 如果使用的是异步的钩子, 那么就只能通过callAsync来发布消息
call(){
    asyncParallelHookObj.callAsync("传给订阅消息函数的参数", function () {
      // 所有callback函数执行完后执行的的方法
        console.log("end");
    });
}
// 完整例子
// const { AsyncParallelHook } = require('tapable');
const AsyncParallelHook = require('./AsyncParallelHook.js');

class Lesson {
    constructor() {
        this.hooks = {
            vue: new AsyncParallelHook(["des"]) // 创建一个发布者对象
        }
    }
    tap(){
        this.hooks.vue.tapAsync("zs", (des, cb) => {
            setTimeout(function () {
                console.log("zs", des);
                cb();
            }, 3000);
        });
        this.hooks.vue.tapAsync("ls", function (des, cb) {
            setTimeout(function () {
                console.log("ls", des);
                // cb(); // 没有这个就永远不会执行 console.log("end");
            }, 2000);
        });
    }
    call(){
        this.hooks.vue.callAsync("vue课程上线了", function () {
            console.log("end");
        });
    }
}
let ls = new Lesson();
ls.tap();
ls.call();
自己实现 AsyncParallelHook ,需要修改发布订阅实现的 SyncHook 的tap方法和call方法。
tapAsync(tag, task){ // tap方法改名
    this.tasks.push(task);
}
callAsync(...args){ // call 方法改名并修改逻辑
    if(args.length < this.args.length){
        return new Error("参数个数不对");
    }
    args = args.slice(0, this.args.length + 1); // AsyncParallelHook除了参数,还会默认添加一个回调函数,args.length只是拿到了创建AsyncParallelHook对象的时候指定的参数个数。
    // 1.取出监听的回调函数
    let finalTask = args.pop();
    // 2.定义一个回调函数
    let index = 0;
    let done = () => {
        index++;
        if(index === this.tasks.length){ // 判断回调函数执行的次数是否等于订阅函数的个数
            finalTask(); // 执行监听的回调函数
        }
    };
    // 2.遍历执行所有的订阅函数
    this.tasks.forEach(function (task) {
        task(...args, done);
    })
}
AsyncParallelHook除了可以通过tapAsync和callAsync来订阅发布消息以外,还可以通过tapPromise和promise来订阅发布消息。
// 通过tapPromise来订阅消息,那么就必须返回一个Promise对象; tapPromise来订阅消息,必须通过resolve来告诉它当前的订阅函数执行完毕了
asyncParallelHookObj.tapPromise("tag", (value) => { // value为call函数传入的值
	return new Promise(function (resolve, reject) {
  	  setTimeout(function () {
  	      console.log(value); // 传给订阅消息函数的参数
  	      resolve();
  	  }, 3000);
	})
})
// 通过promise来发布消息, 那么就必须通过.then来监听是否所有的订阅函数都执行完毕了
asyncParallelHookObj.promise("传给订阅消息函数的参数").then(function () {
    console.log("end");
});
自己实现 AsyncParallelHook ,需要修改发布订阅实现的 SyncHook 的tap方法和call方法。
tapPromise(tag, task){ // tap 改名,用于订阅的方法
    this.tasks.push(task);
}
promise(...args){ // call改名用于发布的方法
    if(args.length < this.args.length){
        return new Error("参数个数不对");
    }
    args = args.slice(0, this.args.length);
    let result = this.tasks.map(function (task) { // 拿到所以订阅者方法的返回值数组
        return task(...args);
    });
    return Promise.all(result);
}
AsyncSeriesHook
AsyncSeriesHook异步串行钩子,和AsyncParallelHook一样都是异步执行的,不同的是AsyncSeriesHook是串行,前面一个执行完后面一个才能执行。
// const { AsyncSeriesHook } = require('tapable');
const AsyncSeriesHook = require('./AsyncSeriesHook.js');

class Lesson {
  constructor() {
    this.hooks = {
      vue: new AsyncSeriesHook(["des"]),  // 创建一个发布者对象
    }
    this.index = 0;
  }
  tap() {
    this.hooks.vue.tapAsync("zs", (des, cb) => { // 订阅消息
      setTimeout(function () {
        console.log("zs", des);
        cb(); // 没有这个,后面的方法得不到执行
      }, 3000);
    });
    this.hooks.vue.tapAsync("ls", function (des, cb) {
      setTimeout(function () {
        console.log("ls", des);
        cb();
      }, 2000);
    });
    this.hooks.vue.tapAsync("ww", function (des, cb) {
      setTimeout(function () {
        console.log("ww", des);
        cb();
      }, 1000);
    });
  }
  call() {
    this.hooks.vue.callAsync("通知时间调用了,开始执行订阅方法", function () { // 发布消息
      console.log("end");
    });
  }
}
let ls = new Lesson();
ls.tap();
ls.call();

/*
  zs 通知时间调用了,开始执行订阅方法
  ls 通知时间调用了,开始执行订阅方法
  ww 通知时间调用了,开始执行订阅方法
  end
*/
自己实现 AsyncSeriesHook ,需要修改发布订阅实现的 SyncHook 的tap方法和call方法。
tapAsync(tag, task){ // tap方法改名
    this.tasks.push(task);
}
callAsync(...args){
    if(args.length < this.args.length){
        return new Error("参数个数不对");
    }
    args = args.slice(0, this.args.length + 1);
    // 1.取出监听的回调函数
    let finalTask = args.pop();
    // 2.利用递归函数实现依次执行订阅函数
    let index = 0;
    let next = () => {
        if(index === this.tasks.length){
            finalTask();
            return;
        }
        let task = this.tasks[index];
        index++;
        task(...args, next);
    }
    next(); // next 相当于 AsyncParallelHook 的callback回调函数
}
AsyncSeriesHook除了可以通过tapAsync和callAsync来订阅发布消息以外,还可以通过tapPromise和promise来订阅发布消息。
// 通过tapPromise来订阅消息,那么就必须返回一个Promise对象; tapPromise来订阅消息,必须通过resolve来告诉它当前的订阅函数执行完毕了
asyncParallelHookObj.tapPromise("tag", (value) => { // value为call函数传入的值
	return new Promise(function (resolve, reject) {
  	  setTimeout(function () {
  	      console.log(value); // 传给订阅消息函数的参数
  	      resolve();
  	  }, 3000);
	})
})
// 通过promise来发布消息, 那么就必须通过.then来监听是否所有的订阅函数都执行完毕了
asyncParallelHookObj.promise("传给订阅消息函数的参数").then(function () {
    console.log("end");
});
自己实现 AsyncSeriesHook ,需要修改发布订阅实现的 SyncHook 的tap方法和call方法。
tapPromise(tag, task){ // tap 改名,用于订阅的方法
    this.tasks.push(task);
}
promise(...args){ // call改名用于发布的方法
    if(args.length < this.args.length){
        return new Error("参数个数不对");
    }
    args = args.slice(0, this.args.length + 1);
    // 1.取出第一个订阅函数和其它的订阅函数
    let [firstTask, ...others] = this.tasks;
    return others.reduce(function (promise, task) {
        return promise.then(()=> {
            return task(...args); // others执行到最后一个依旧返回一个promise,即上面tapPromise的return
        });
    }, firstTask(...args));
}
reduce方法
let arr = [1, 3, 5];
let res = arr.reduce(function (initValue, curValue, curIndex) {
    console.log(initValue, curValue, curIndex);
    return initValue + curValue;
}, 100);
console.log(res);
/*
    100 1 0
    101 3 1
    104 5 2
    109
*/
AsyncSeriesWaterfallHook
AsyncSeriesWaterfallHook异步串行钩子,和前面讲解的AsyncSeriesHook一样,前面的订阅函数没有执行完后面的订阅函数就不执行,和前面讲解的SyncWaterfallHook一样,会将上一个订阅函数的返回值传递给下一个的订阅函数。
tap(){
    this.hooks.vue.tapAsync("tag1", (des, cb) => {
        setTimeout(function () {
            console.log("tag1", des);
            cb('null', "1"); // cb('error', "1"); null表示正常,error表示出错
        }, 3000);
    });
    this.hooks.vue.tapAsync("tag2", function (des, cb) {
        setTimeout(function () {
            console.log("tag2", des);
            cb(null, "2");
        }, 2000);
    });
    this.hooks.vue.tapAsync("tag3", function (des, cb) {
        setTimeout(function () {
            console.log("tag3", des);
            cb();
        }, 1000);
    });
}
call(){
    this.hooks.vue.callAsync("传给订阅消息函数的参数", function () {
        console.log("end");
    });
}
/*
class Lesson {
    constructor() {
        this.hooks = {
            // 创建一个发布者对象
            vue: new AsyncSeriesWaterfallHook(["des"]),
        }
        this.index = 0;
    }
    tap(){...}
    call(){...}
}
let ls = new Lesson();
ls.tap();
ls.call();
结果:
	tag1 传给订阅消息函数的参数
	tag2 1
	tag3 2
	end
*/
自己实现 AsyncSeriesWaterfallHook ,需要修改发布订阅实现的 SyncHook 的tap方法和call方法。
tapAsync(tag, task){
    this.tasks.push(task);
}
// 用于发布的方法
callAsync(...args){
    if(args.length < this.args.length){
        return new Error("参数个数不对");
    }
    args = args.slice(0, this.args.length + 1);
    // 1.取出监听的回调函数
    let finalTask = args.pop();
    // 2.通过递归函数实现依次执行订阅函数
    let index = 0;
    let next = (error, ...data) => {
        let task = this.tasks[index]; // 取出当前订阅函数
        if(!task){ // 如果没有取到就表示所有订阅函数执行完了
            finalTask();
            return;
        }
        if(index === 0){ // 如果是第一个就将发布消息的参数传递给它
            task(...args, next);
        }
        else{ // 如果不是第一个就需要判断是否有错
            if(error === "error"){
                finalTask();
            }else{ // 如果没有错误就将上一个订阅函数返回值传递给它
                task(...data, next);
            }
        }
        index++;
    }
    next();
}
AsyncSeriesWaterfallHook除了可以通过tapAsync和callAsync来订阅发布消息以外,还可以通过tapPromise和promise来订阅发布消息。
tap(){
    this.hooks.vue.tapPromise("tag1", (des) => {
        return new Promise(function (resolve, reject) {
            setTimeout(function () {
                console.log("tag1", des);
                // resolve("1"); // 成功
                reject("出错了"); // 失败
            }, 3000);
        })
    });
    this.hooks.vue.tapPromise("tag2", function (des) {
        return new Promise(function (resolve, reject) {
            setTimeout(function () {
                console.log("tag2", des);
                resolve("2");
            }, 3000);
        })
    });
    this.hooks.vue.tapPromise("tag3", function (des) {
        return new Promise(function (resolve, reject) {
            setTimeout(function () {
                console.log("tag3", des);
                resolve("3");
            }, 3000);
        })
    });
}
call(){
    this.hooks.vue.promise("传给订阅消息函数的参")
        .then(function () {
            console.log("end");
        })
        .catch(function (err) {
            console.log(err);
        });
}
自己实现 AsyncSeriesWaterfallHook ,需要修改发布订阅实现的 SyncHook 的tap方法和call方法。
tapPromise(tag, task){
    this.tasks.push(task);
}
promise(...args){
    if(args.length < this.args.length){
        return new Error("参数个数不对");
    }
    args = args.slice(0, this.args.length + 1);
    // 1.取出第一个订阅函数和其它的订阅函数
    let [firstTask, ...others] = this.tasks;
    return others.reduce(function (promise, task) {
        return promise.then((data) => {
            return task(data);
        });
    }, firstTask(...args));
}
手写Plugin
插件是一个类;插件可以在打包过程中的特定阶段执行;Webpack通过Tapable在不同的阶段发送了不同的通知,只需要在编写插件时注册我们需要监听的通知即可实现在webpack打包过程中的不同阶段执行我们订阅的方法。
插件的基本格式:
class CustomPlugin {
    constructor(options){
        console.log("插件被创建了", options);
    }
    apply(compiler){ // 插件创建后会执行这个方法
        console.log("插件被执行了", options);
    }
}
module.exports = CustomPlugin;
其中,apply方法的 compiler 参数包含了webpack打包的配置,通过compiler.options获取;除了包含了webpack打包的配置以外,还包含了webpack各阶段消息发布者。eg:
entryOption: 给webpack编译器传递配置文件之后,在 webpack 选项中的 entry 被处理过之后调用
run:   webpack编译器run方法被执行
emit:  打包文件写入之前
afterEmit: 打包文件写入之后
done:  打包完成
clean-webpack-plugin, 会在打包之前清空指定目录。自己实现一个CleanWebpackPlugin插件:
// plugin/clean-webpack-plugin.js
const path = require("path");
const fs = require("fs");

class CleanWebpackPlugin {
    constructor(options){
        console.log("插件被创建了", options);
    }
    apply(compiler){ // 插件一旦创建就会执行这个方法
        // console.log("插件被执行了");
        // 可以通过compiler对象的options拿到webpack的配置文件
        // console.log(compiler.options);
        // console.log(compiler.hooks); // 查看webpack包含哪些钩子函数
        let outputPath = compiler.options.output.path;
        compiler.hooks.entryOption.tap("CleanWebpackPlugin", () => { // 订阅函数(SyncBailHook)
            this.cleanDir(outputPath);
        });
    }
    cleanDir(dirPath){
        // 注意点: 在NodeJS中不能直接删除非空的目录
        // 1.判断是否是一个非空的目录
        if(fs.statSync(dirPath).isDirectory() && fs.readdirSync(dirPath).length !== 0){
            // 2.如果不是一个非空的目录, 那么就先删除这个目录中的内容
            let files = fs.readdirSync(dirPath);
            files.forEach((file)=>{
                let filePath = path.resolve(dirPath, file);
                if(fs.statSync(filePath).isDirectory()){
                    this.cleanDir(filePath);
                }else{
                    fs.unlinkSync(filePath);
                }
            })
        }
        // 3.如果是一个非空的目录, 那么就直接删除这个目录
        fs.rmdirSync(dirPath);
    }
}
module.exports = CleanWebpackPlugin;
Webpack增加Plugin功能
// node_modules/myWebpack/lib/Complier.js
const fs = require("fs");
const ejs = require("ejs");
const path = require("path");
const parser = require("@babel/parser");
const traverse =  require("@babel/traverse").default;
const generate = require('@babel/generator').default;
const t = require('@babel/types');
const {
    SyncHook,
    SyncBailHook,
} = require("tapable");

class Complier {
    constructor(config){
        this.config = config;
        this.modules = {};
        this.hooks = { // 增加发布者,创建发布者
            entryOption: new SyncBailHook(),
            done: new SyncHook()
        }
        // 获取插件数组, 调用插件的apply方法, 并且将当前的编译对象传递给插件
        let plugins = this.config.plugins;
        plugins.forEach((plugin) => {
            plugin.apply(this);
        });
    }
    run(){
        this.buildModule(this.config.entry);
        this.emitFile();
        this.hooks.done.call(); // webpack打包好文件后发布done的消息
    }
    buildModule(modulePath){
        let code = this.getSource(modulePath); // 拿到主模块代码
        let {resultCode, dependencies} = this.parseModule(code); // 修改当前模块的代码
        this.modules[modulePath] = resultCode; // 将主模块的路径和代码保存到modules中
        dependencies.forEach((depPath) => { // 处理依赖模块, 将依赖模块的路径和代码也保存到modules中
            this.buildModule(depPath);
        })
    }
    parseModule(code){
        let ast = parser.parse(code);
        let rootPath = path.dirname(this.config.entry);
        let dependencies = [];
        traverse(ast, {
            CallExpression(nodePath){
                let node = nodePath.node;
                if(node.callee.name === "require"){
                    node.callee.name = "__webpack_require__"; // 将require修改为__webpack_require__
                    let modulePath = node.arguments[0].value; // 修改require导入的路径
                    modulePath = ".\\" +path.join(rootPath, modulePath);
                    modulePath = modulePath.replace(/\\/g, "/");
                    dependencies.push(modulePath);
                    node.arguments = [t.StringLiteral(modulePath)];
                }
            }
        });
        let resultCode = generate(ast).code;
        return {resultCode, dependencies};
    }
    getSource(modulePath){
        let content = fs.readFileSync(modulePath, "utf8");
        if(!this.config.module){
            return content;
        }
        let rules = this.config.module.rules;
        rules.forEach(function (rule) {
            let {test, use} = rule;
            if(test.test(modulePath)){
                // 由于loader需要从右至左, 从下至上的执行, 所以需要从后往前取
                for(let i = use.length - 1; i >= 0; i--){
                    let loader = require(use[i]['loader']);
                    content = loader(content);
                }
            }
        })
        return content;
    }
    emitFile(){
        let templatePath = path.resolve(__dirname, "main.ejs");
        let template = fs.readFileSync(templatePath, "utf8");
        let resultCode = ejs.render(template, {entryId: this.config.entry, modules: this.modules});
        let outputDir = this.config.output.path;
        if(!fs.existsSync(outputDir)){
            fs.mkdirSync(outputDir);
        }
        let outputPath = path.resolve(outputDir, this.config.output.filename);
        fs.writeFileSync(outputPath, resultCode);
    }
}
module.exports = Complier;
// node_modules/myWebpack/bin/index.js
#! /usr/bin/env node
const path = require("path");
const Complier = require("../lib/Complier.js");
// process.cwd()作用: 获取当前执行指令的工作路径
const configPath = path.resolve(process.cwd(), "webpack.config.js");
const config = require(configPath);
const cp = new Complier(config);
cp.hooks.entryOption.call();  // 创建好Compier对象,拿到webpack配置之后,执行发布消息,执行订阅方法
cp.run();
// plugin/clean-webpack-plugin.js
const path = require("path");
const fs = require("fs");

class CleanWebpackPlugin {
    constructor(options){
        console.log("插件被创建了", options);
    }
    apply(compiler){
        let outputPath = compiler.config.output.path;
        compiler.hooks.entryOption.tap("CleanWebpackPlugin", () => { // 订阅
            this.cleanDir(outputPath);
        });
    }
    cleanDir(dirPath){
        if(!fs.existsSync(dirPath)){
            return;
        }
        // 注意点: 在NodeJS中不能直接删除非空的目录
        // 1.判断是否是一个非空的目录
        if(fs.statSync(dirPath).isDirectory() && fs.readdirSync(dirPath).length !== 0){
            // 2.如果是一个非空的目录, 那么就先删除这个目录中的内容
            let files = fs.readdirSync(dirPath);
            files.forEach((file)=>{
                let filePath = path.resolve(dirPath, file);
                if(fs.statSync(filePath).isDirectory()){
                    this.cleanDir(filePath);
                }else{
                    fs.unlinkSync(filePath);
                }
            })
        }
        // 3.如果不是一个非空的目录, 那么就直接删除这个目录
        fs.rmdirSync(dirPath);
    }
}
module.exports = CleanWebpackPlugin;
// webpack.config.js
const path = require("path");
const CleanWebpackPlugin = require('./plugin/clean-webpack-plugin.js');

module.exports = {
    devtool: "none",
    mode: "development",
    entry: "./src/index.js",
    output: {
        filename: "index.js",
        path: path.resolve(__dirname, "bundle")
    },
    plugins: [
        new CleanWebpackPlugin({
            name: "meihao"
        })
    ]
};
npx my-Webpack 执行手写的webpack打包

 浙公网安备 33010602011771号