django身份认证、权限认证、频率校验使用及源码分析
一. 身份认证源码分析
1.1 APIView源码的分析
APIView源码之前分析过https://www.cnblogs.com/maoruqiang/p/11135335.html,里面主要将request对象进行了封装,提供了额外的方法与属性,同时让装饰的CBV中方法忽略CSRF校验,最后还提供了身份认证、权限认证、频率校验等功能。
二. 身份认证源码分析及使用
2.1 身份认证源码分析
在APIView中的dispatch方法中提供了三大校验:

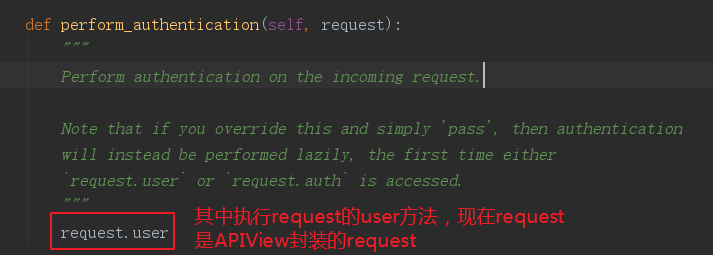
进入self.perform_authentication(request)方法
返回APIView的dispatch方法中:

进入self.initialize_request(request, *args, **kwargs)
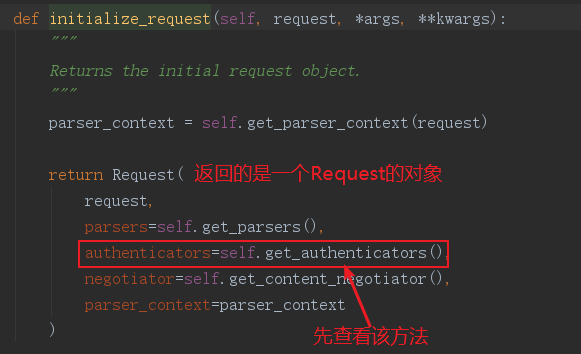
进入self.get_authenticators()

此时继承APIView的类中没有定义该属性,所以看看APIView中有没有
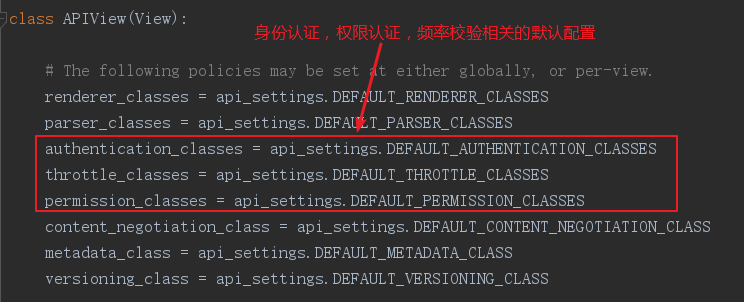
这里进入api_settings,搜索身份认证相关的配置
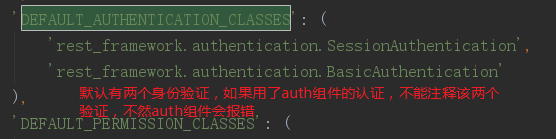
我们将其复制到django项目中的settings.py中:
REST_FRAMEWORK = {
    # 身份认证配置,实际上这是全局配置
     'DEFAULT_AUTHENTICATION_CLASSES': (
        'rest_framework.authentication.SessionAuthentication',
        'rest_framework.authentication.BasicAuthentication',
     )
}
随后回到requst.user,因为request是Request的对象,所以只需的是Request的user方法
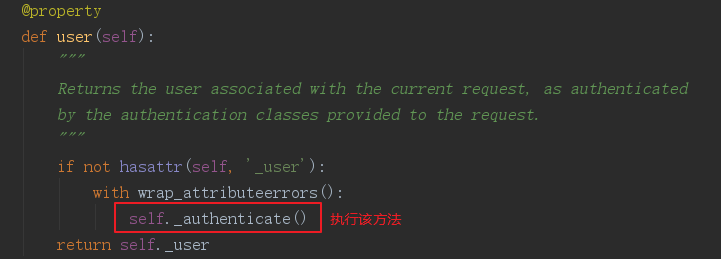
点击进入self._authenticate()
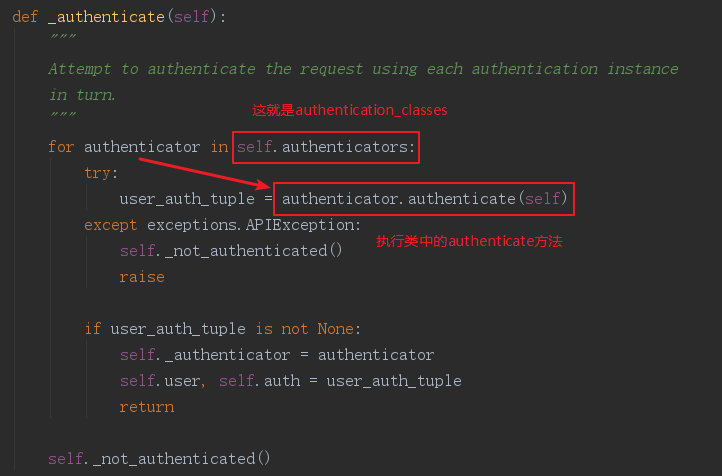
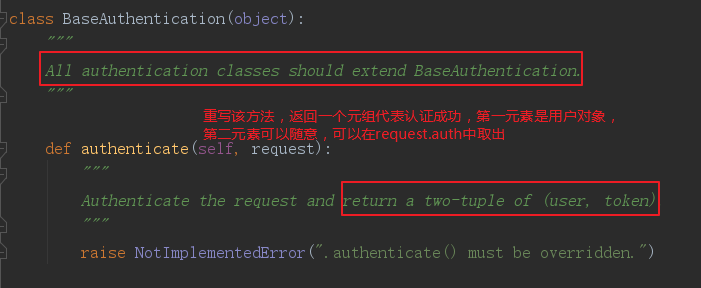
这就意味着我们要重写authenticate方法,那么要继承什么类吗,去之前复制到settings.py中默认的两个身份认证类中看看(将字符串复制出来改成导包的形式即可点击进入),随后进入其父类BaseAuthentication
在应用文件夹下新建myauthenticate.py文件,其中书写如下:
from rest_framework.authentication import BaseAuthentication
from rest_framework.exceptions import AuthenticationFailed
from django.contrib import auth


# 身份认证组件
class AuthenticateSybil(BaseAuthentication):
    def authenticate(self, request):
        username = request.data.get('username')
        pwd = request.data.get('password')
        print('身份认证开始', username, pwd)
        user_obj = auth.authenticate(username=username, password=pwd)
        if user_obj:
            # 分别可以使用request.user, request.auth取到
            return user_obj, '认证通过'
        else:
            # 用于认证失败时返回信息给前端
            raise AuthenticationFailed('认证失败')
随便可以全局配置settings.py:
REST_FRAMEWORK = {
    # 身份认证配置
     'DEFAULT_AUTHENTICATION_CLASSES': (
        'rest_framework.authentication.SessionAuthentication',
        'rest_framework.authentication.BasicAuthentication',
        'app02.myauthticate.AuthenticateSybil'
     )
}
区部配置,在视图类中写即可
from rest_framework.views import APIView
from rest_framework.response import Response
from app02.myauthticate import AuthenticateSybil
# Create your views here.


class Test(APIView):
    authentication_classes = [AuthenticateSybil]
    #复制列表为空则是局部忽略校验
    authentication_classes = []
    def post(self, *args, **kwargs):
        print('成功进入视图函数')
        return Response({"name": "sybil"})
2.2 权限校验源码分析及使用

进入self.check_permissions(request)

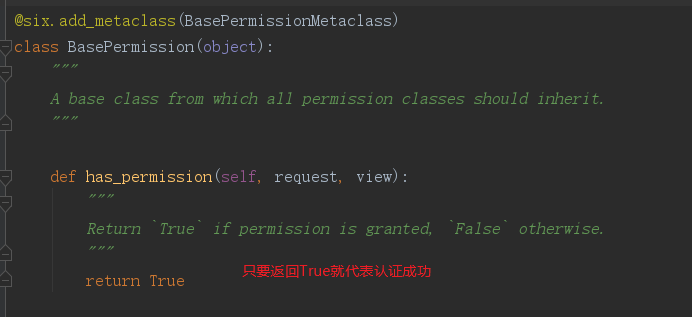
老样子,去api_settings中搜索权限校验类,看看他们怎么写的
同时看看permission_denied
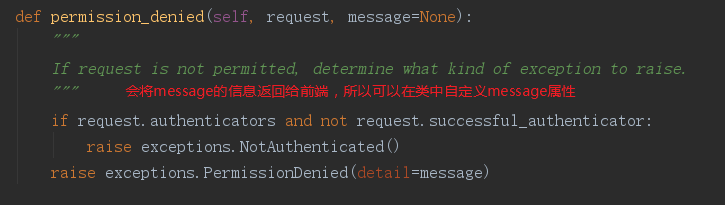
同样在myauthenticate.py中书写该认证
from rest_framework.permissions import BasePermission

# 权限认证组件
class PermissionSybil(BasePermission):
    message = ''

    def has_permission(self, request, view):
        print('权限认证开始')
        user_obj = request.user
        if not user_obj.is_superuser:
            self.message = '权限不足'
        else:
            return True
全局配置:
REST_FRAMEWORK = {
    # 身份认证配置
     'DEFAULT_AUTHENTICATION_CLASSES': (
        'rest_framework.authentication.SessionAuthentication',
        'rest_framework.authentication.BasicAuthentication',
        'app02.myauthticate.AuthenticateSybil'
     ),
    # 权限校验全局配置
    'DEFAULT_PERMISSION_CLASSES': (
        'rest_framework.permissions.AllowAny',
        'app02.myauthticate.PermissionSybil'
    )
}
局部配置
class Test(APIView):
    authentication_classes = [AuthenticateSybil]
    #局部配置,如果想忽略校验则将值改为空[]
    permission_classes = [PermissionSybil]

    def post(self, *args, **kwargs):
        print('成功进入视图函数')
        return Response({"name": "sybil"})
2.3 频率校验源码分析及使用
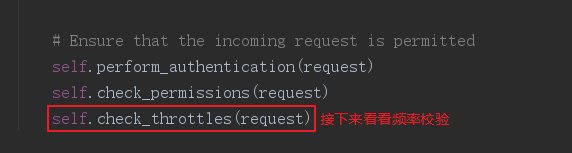
进入self.check_throttles(request)
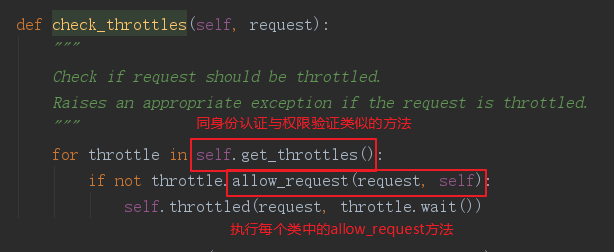
所以我们需要重写allow_request方法,点击进入频率校验的父类:
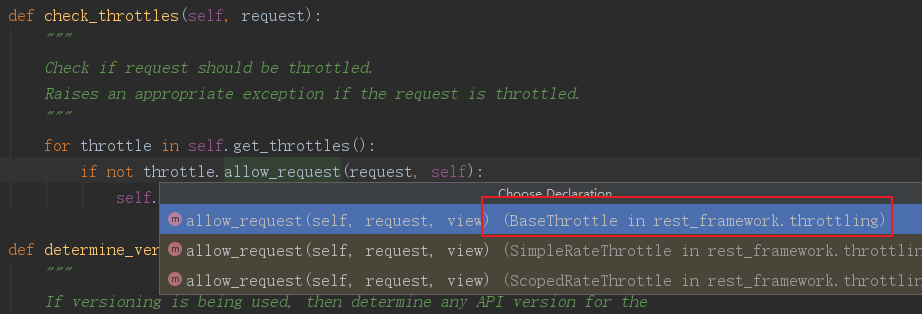
父类方法如下:

为了方便,我们使用SimpleRateThrottle
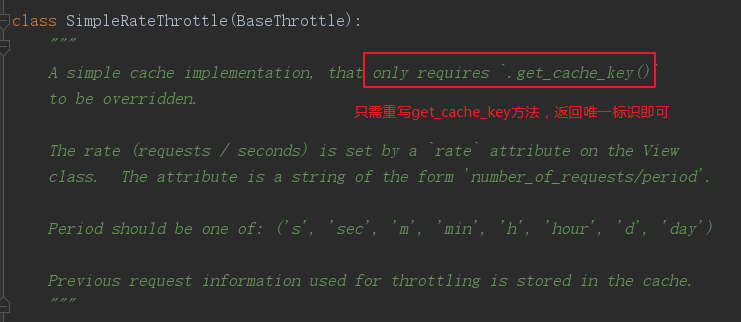
该类实例化时会执行__init__
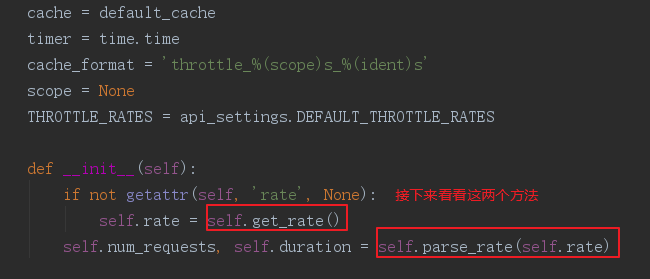
先看看get_rate()方法
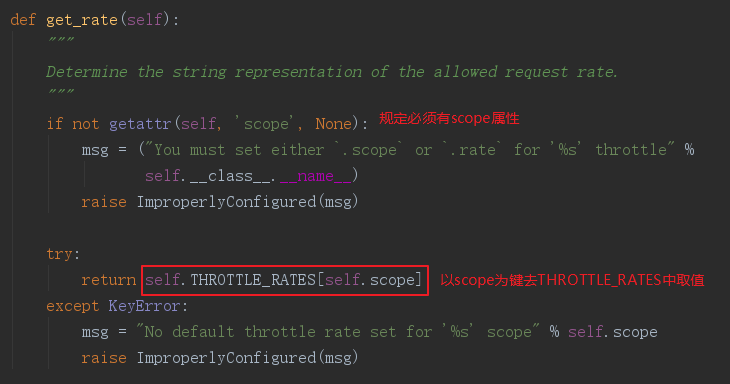
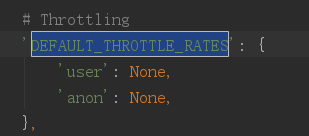
那么THROTTLE_RATES是啥,我们看看
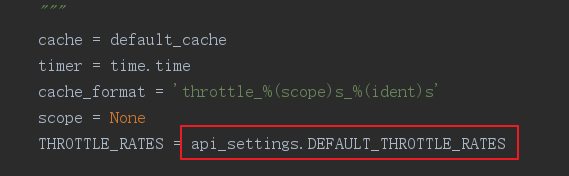
去api_settings中查看
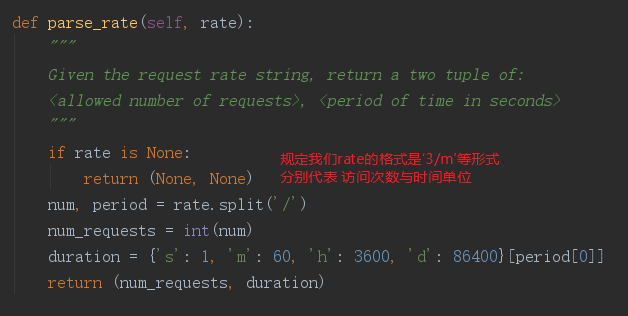
接下来看看self.parse_rate(self.rate)方法
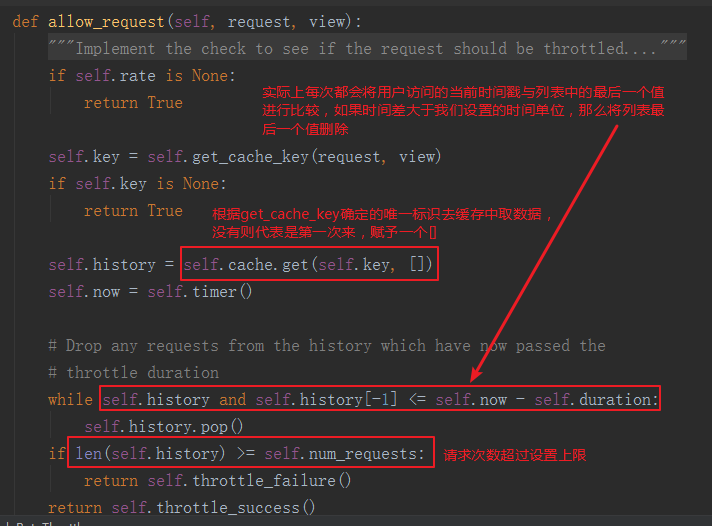
然后看看频率组件需要重写的allow_request
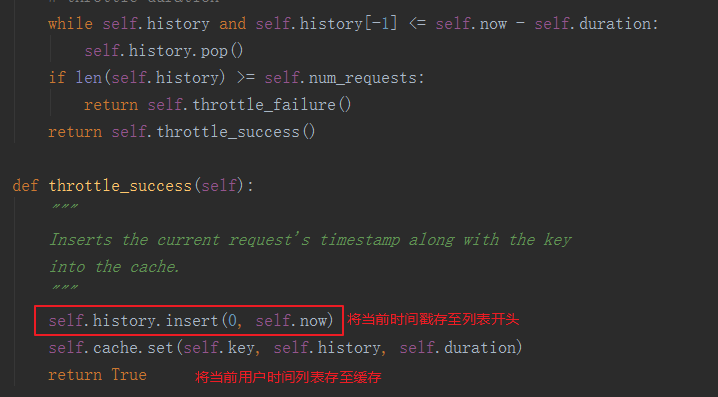
看看throttle_success
自定义频率组件,这里同样写在myauthenticate.py中
from rest_framework.throttling import SimpleRateThrottle

# 频率校验
class ThrottleSybil(SimpleRateThrottle):
    scope = 'Isybil'

    def get_cache_key(self, request, view):
        # 这里可以直接调用父类的get_ident获取唯一标识
        return super(ThrottleSybil, self).get_ident(request)
全局配置:
REST_FRAMEWORK = {
    # 身份认证配置
     'DEFAULT_AUTHENTICATION_CLASSES': (
        'rest_framework.authentication.SessionAuthentication',
        'rest_framework.authentication.BasicAuthentication',
        'app02.myauthticate.AuthenticateSybil'
     ),
    # 权限认证全局配置
    'DEFAULT_PERMISSION_CLASSES': (
        'rest_framework.permissions.AllowAny',
        'app02.myauthticate.PermissionSybil'
    ),
    # 频率校验全局配置
    'DEFAULT_THROTTLE_CLASSES': (
        'app02.myauthticate.ThrottleSybil',
    ),
    'DEFAULT_THROTTLE_RATES': {
        # 用户Isybil的频率限制,类中scope = 'Isybil'可以获取该限制
        'Isybil': '3/m',
    },
}
局部配置
from rest_framework.views import APIView
from rest_framework.response import Response
from app02.myauthticate import AuthenticateSybil, PermissionSybil, ThrottleSybil
# Create your views here.


class Test(APIView):
    authentication_classes = [AuthenticateSybil]
    permission_classes = [PermissionSybil]
    throttle_classes = [ThrottleSybil]

    def post(self, *args, **kwargs):
        print('成功进入视图函数')
        return Response({"name": "sybil"})

 浙公网安备 33010602011771号