
WinUI 3学习笔记(2)—— 用ListView来展示集合
在WPF的时代,我们多是使用ListBox和ListView来展示,纵向滚动条显示的集合数据。这两个控件的默认样式,以及对触控的支持,已完全落后于时代。他们两个分别长这样,和Win10及Win11的风格完全不沾边。

今天我来看下WinUI 3中适用于Desktop App的ListView,我们略过ListBox是因为ListBox使用较为简单,通常用于将少量数据同时显示在页面上。
而显示需要滚动条的大量数据,会推荐使用ListView,同时ListView的表现形式也较为丰富。例如分组,拖拽,缩放,以及页头页脚的自定义。
本篇我们将试着应用以上这些特性到Desktop App中,通过WinUI 3库,我们不再需要Xaml Islands这样曲线救国的做法。而是真正在Desktop App中用上原生的新ListView。
首先我们来看分组,WinUI 3中的ListView通过CollectionViewSource这个组件来实现分组功能。当然我们也可以通过嵌套集合的方式来实现,例如将ListView的ListViewItem同样也包含一个ListView/ItemsControl。但是这样做有一些缺陷,第一是会破坏UI虚拟化(UI virtualization),因为用于虚拟化的容器(Item Container)在面对重复的Item才会起到效果,用ListView/ItemsControl这样的可变集合作为Item,在数量增多后会有明显的性能问题。第二是嵌套集合的话,SeletedItem和ItemClick处理起来会比较困难。所以我更推荐使用CollectionViewSource。
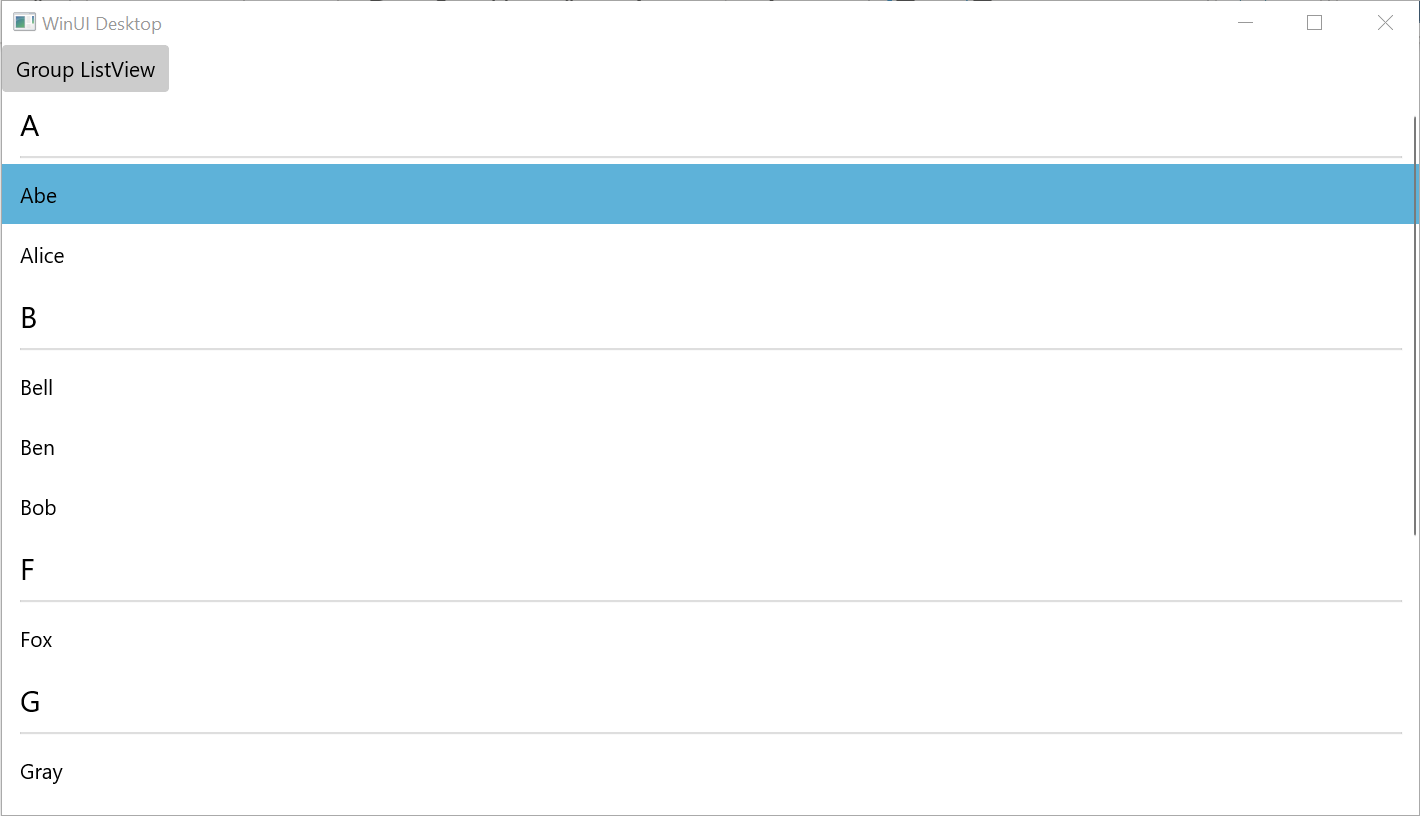
ListView的分组并不复杂,在XAML中我们需要于Resources节点中放置CollectionViewSource对象,该对象是真正数据源的一个视图。我们可以对这个视图做分组和排序,但不会自动影响到真正的数据源。
假设我们有一个Person类:
    public class Person
    {
        public string Name { get; set; }
    }
并构建了PersionList作为数据源,同时创建了分组视图PersonGroup。
            this.PersonList = new List<Person>
            {
                new Person{ Name = "Abe"},
                new Person{ Name = "Alice"},
                new Person{ Name = "Bell"},
                new Person{ Name = "Ben"},
                new Person{ Name = "Bob"},
                new Person{ Name = "Fox"},
                new Person{ Name = "Gray"},
                new Person{ Name = "James"},
                new Person{ Name = "Jane"},
                new Person{ Name = "Roy"},
                new Person{ Name = "Vincent"}
            };
            PersonGroup = PersonList.GroupBy(p => p.Name.First().ToString());
那么我们在XAML中,将通过如下形式的binding来使用该分组视图:
    <Grid>
        <Grid.Resources>
            <CollectionViewSource x:Name="personListCVS" IsSourceGrouped="True" Source="{x:Bind PersonGroup}"/>
        </Grid.Resources>
        <ListView ItemsSource="{x:Bind personListCVS.View}">
            <ListView.GroupStyle>
                <GroupStyle>
                <GroupStyle.HeaderTemplate>
                    <DataTemplate>
                        <TextBlock Text="{Binding Key}"/>
                    </DataTemplate>
                </GroupStyle.HeaderTemplate>
                </GroupStyle>
            </ListView.GroupStyle>
            <ListView.ItemTemplate>
                <DataTemplate>
                    <TextBlock Text="{Binding Name}"></TextBlock>
                </DataTemplate>
            </ListView.ItemTemplate>
        </ListView>
    </Grid>
上面的XAML中定义简单的仅TextBlock的HeaderTemplate和ItemTemplate,实际生产中可按需编写更复杂的模板。
接下来我们看拖拽的实现,这里我们创建一个DragDropPage.xaml,假设ListView作为被拖走数据的一方,在DataTemplate的子节点上,将CanDrag设置为True,因为接受数据的需要,我们要明确被拖拽走的是个什么东西,通过DragStarting事件可以获得被操作的UIElement。
        <ListView Grid.Column="0" ItemsSource="{x:Bind PersonList}">
            <ListView.ItemTemplate>
                <DataTemplate>
                    <TextBlock Text="{Binding Name}" CanDrag="True" DragStarting="TextBlock_DragStarting"></TextBlock>
                </DataTemplate>
            </ListView.ItemTemplate>
        </ListView>
作为接受拖拽对象的ComboxBox,除了设置AllowDrop=True以外,还需要通过DragOver来响应图标的变化(假设在鼠标移过来后,图标从“无效”的样式转变成了“复制”,表示可以接受该数据),以及通过Drop来处理接受数据。
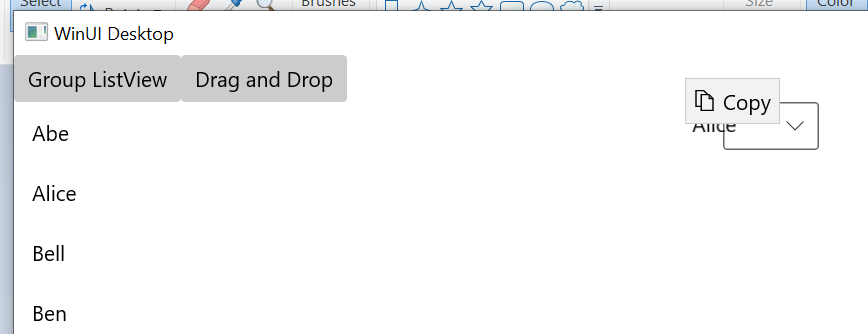
        <ComboBox Grid.Column="1" ItemsSource="{x:Bind PersonList}" SelectedItem="{x:Bind SelectedPerson,Mode=TwoWay}"
                  AllowDrop="True" DragOver="ComboBox_DragOver" Drop="ComboBox_Drop">
            <ComboBox.ItemTemplate>
                <DataTemplate>
                    <TextBlock Text="{Binding Name}"></TextBlock>
                </DataTemplate>
            </ComboBox.ItemTemplate>
        </ComboBox>
在创建本篇的Sample Code时,WinUI 3 的SDK版本已经从0.5更新到0.8了(稳定版)。但是在Drop事件里依然遇到了bug,无法访问DragEventArgs中的DataView来获取DragStarting时存放的数据。这个问题已经有大量的issue开给了某软,并不是WinUI 3库本身的bug,锅已丢给CsWinRT项目,但什么时候修好就不知道了。
Unable to drop files onto Grid in WinUI3 Desktop · Issue #2715 · microsoft/microsoft-ui-xaml (github.com)
DataView无法使用,直接影响了应用间的数据传递。对于本篇的APP内部的拖拽,倒是可以写个Property绕过去。拖拽操作的流程先是通过DragStarting来获取和存放要传递的数据。DragOver负责更改图标,反馈给用户某个控件可以接受Drop操作。最后由Drop来接受数据和更新UI。
        private void ComboBox_Drop(object sender, DragEventArgs e)
        {
            //if (e.DataView.Contains(StandardDataFormats.Text))
            //{
            //    var name = await e.DataView.GetTextAsync();
            //    this.SelectedPerson = this.PersonList.FirstOrDefault(p => p.Name == name);
            //}

            this.SelectedPerson = DragPerson;
        }

        private void ComboBox_DragOver(object sender, DragEventArgs e)
        {
            e.AcceptedOperation = DataPackageOperation.Copy;
        }

        private void TextBlock_DragStarting(UIElement sender, DragStartingEventArgs args)
        {
            DragPerson = (sender as TextBlock).DataContext as Person;
            //args.Data.SetData(StandardDataFormats.Text, DragPerson.Name);
        }
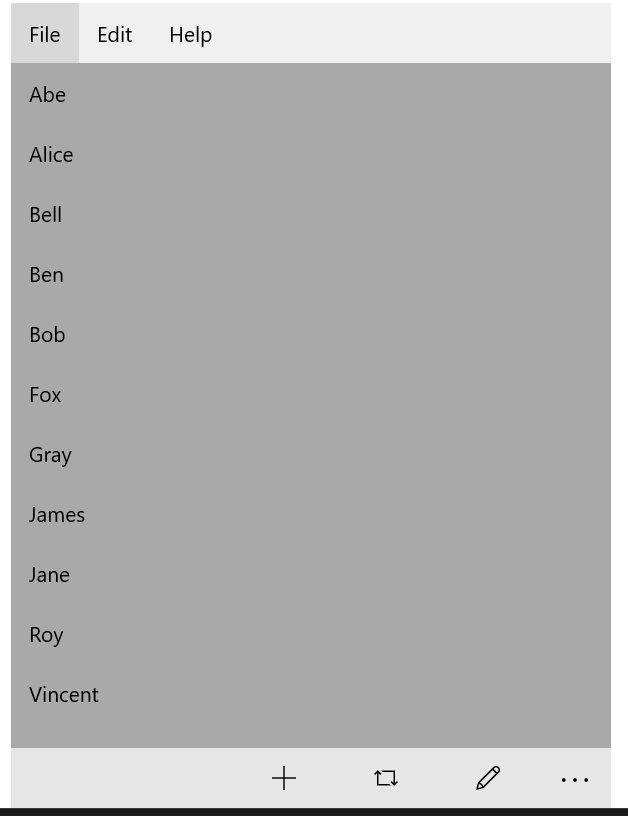
本篇最后我想讨论下<ListView.Header>和<ListView.Footer>,通常认为额外做一个<StackPanel>或<Grid>放置在ListView的上下方即可。不过我想说的是,如果遇到Layout变化,通过VisaulState等方式来位移控件的情况,一个整体的ListView会比较方便。在ListViewHeaderFooterPage中,假设ListView上方存在MenuBar,下部需要CommandBar。如果这两个控件一直和ListView保持紧密的联系,那就可以放到Header和Footer中作为一个整体。
以上就是本篇对WinUI 3中ListView的一些讨论。缩放视图打算后面结合SemanticZoom 再来演示。感谢阅读到这里的同学们!
Sample Code:
https://github.com/manupstairs/WinUI3Samples/tree/main/WinUI3Samples/ListViewSample
以下链接,是MS Learn上Windows开发的入门课程,单个课程三十分钟到60分钟不等,如需补充基础知识的同学点这里:
开始使用 Visual Studio 开发 Windows 10 应用

 浙公网安备 33010602011771号