Nginx学习
一、初识Nginx
1.1、Nginx的三个主要应用场景:
静态资源服务:通过本地文件系统提供服务
反向代理服务:Nginx的强大性能,缓存,负责均衡
API服务: OpenResty
1.2 Nginx的优点
高并发,高性能
可扩展性好
高可靠性
热部署
BSD许可证
1.3 Nginx的组成
Nginx二进制可执行文件
Nginx.conf配置文件
access.log 访问日志
error.log错误日志
二、安装Nginx
2.1 下载
http://nginx.org/en/download.html
或者直接在系统中下载
wget http://nginx.org/download/nginx-1.14.2.tar.gz
解压
[root@localhost ~]# tar -zxvf nginx-1.14.2.tar.gz
查看解压后的目录
[root@localhost nginx-1.14.2]# ll
total 732
drwxr-xr-x. 6 1001 1001   4096 Oct 24 23:27 auto
-rw-r--r--. 1 1001 1001 288742 Dec  4  2018 CHANGES
-rw-r--r--. 1 1001 1001 440121 Dec  4  2018 CHANGES.ru
drwxr-xr-x. 2 1001 1001    168 Oct 24 23:27 conf        #配置
-rwxr-xr-x. 1 1001 1001   2502 Dec  4  2018 configure
drwxr-xr-x. 4 1001 1001     72 Oct 24 23:27 contrib
drwxr-xr-x. 2 1001 1001     40 Oct 24 23:27 html
-rw-r--r--. 1 1001 1001   1397 Dec  4  2018 LICENSE
drwxr-xr-x. 2 1001 1001     21 Oct 24 23:27 man          #帮忙
-rw-r--r--. 1 1001 1001     49 Dec  4  2018 README
drwxr-xr-x. 9 1001 1001     91 Oct 24 23:27 src           #源代码
2.2 编译安装
指定安装目录
[root@localhost nginx-1.14.2]# ./configure --prefix=/home/zzs/nginx
报错
checking for OS
 + Linux 3.10.0-1062.el7.x86_64 x86_64
checking for C compiler ... not found

./configure: error: C compiler cc is not found
安装依赖包
[root@localhost nginx-1.14.2]# yum -y install make zlib-devel gcc *c++ libtool opensl openssl-devel
安装成功后继续执行,安装成功
[root@localhost nginx-1.14.2]# ./configure --prefix=/home/zzs/nginx


nginx path prefix: "/home/zzs/nginx"
  nginx binary file: "/home/zzs/nginx/sbin/nginx"
  nginx modules path: "/home/zzs/nginx/modules"
  nginx configuration prefix: "/home/zzs/nginx/conf"
  nginx configuration file: "/home/zzs/nginx/conf/nginx.conf"
  nginx pid file: "/home/zzs/nginx/logs/nginx.pid"
  nginx error log file: "/home/zzs/nginx/logs/error.log"
  nginx http access log file: "/home/zzs/nginx/logs/access.log"
  nginx http client request body temporary files: "client_body_temp"
  nginx http proxy temporary files: "proxy_temp"
  nginx http fastcgi temporary files: "fastcgi_temp"
  nginx http uwsgi temporary files: "uwsgi_temp"
  nginx http scgi temporary files: "scgi_temp"
编译后多了一个文件夹
[root@localhost nginx-1.14.2]# cd objs
[root@localhost objs]# ll
total 80
-rw-r--r--. 1 root root 17107 Oct 25 23:07 autoconf.err
-rw-r--r--. 1 root root 39435 Oct 25 23:07 Makefile
-rw-r--r--. 1 root root  6896 Oct 25 23:07 ngx_auto_config.h
-rw-r--r--. 1 root root   657 Oct 25 23:07 ngx_auto_headers.h
-rw-r--r--. 1 root root  5725 Oct 25 23:07 ngx_modules.c             #所有要编译的模块都放在这个文件中
drwxr-xr-x. 9 root root    91 Oct 25 23:07 src
执行编译
[root@localhost nginx-1.14.2]# make
编译完成
objs/ngx_modules.o \
-ldl -lpthread -lcrypt -lpcre -lz \
-Wl,-E
sed -e "s|%%PREFIX%%|/home/zzs/nginx|" \
    -e "s|%%PID_PATH%%|/home/zzs/nginx/logs/nginx.pid|" \
    -e "s|%%CONF_PATH%%|/home/zzs/nginx/conf/nginx.conf|" \
    -e "s|%%ERROR_LOG_PATH%%|/home/zzs/nginx/logs/error.log|" \
    < man/nginx.8 > objs/nginx.8
make[1]: Leaving directory `/root/nginx-1.14.2'
安装
[root@localhost nginx-1.14.2]# make install
完成后显示如下
cp conf/scgi_params \
    '/home/zzs/nginx/conf/scgi_params.default'
test -f '/home/zzs/nginx/conf/nginx.conf' \
    || cp conf/nginx.conf '/home/zzs/nginx/conf/nginx.conf'
cp conf/nginx.conf '/home/zzs/nginx/conf/nginx.conf.default'
test -d '/home/zzs/nginx/logs' \
    || mkdir -p '/home/zzs/nginx/logs'
test -d '/home/zzs/nginx/logs' \
    || mkdir -p '/home/zzs/nginx/logs'
test -d '/home/zzs/nginx/html' \
    || cp -R html '/home/zzs/nginx'
test -d '/home/zzs/nginx/logs' \
    || mkdir -p '/home/zzs/nginx/logs'
make[1]: Leaving directory `/root/nginx-1.14.2'
三、Nginx配置文件编写
3.1 配置文件规则
- 配置文件由指令与指令块构成
- 每条指令以;分号结尾,指令与参数间以空格符号分隔
- 指令块以 {} 大括号将多条指令组织在一起
- include语句允许组合多个配置文件以提升可维护性
- 使用#符号添加注释,提高可读性使用$符号使用变量
- 部分指令的参数支持正则表达式
3.2 nginx命令
启动nginx
[root@localhost ~]# cd /home/zzs/nginx/
[root@localhost nginx]# ls
client_body_temp  conf  fastcgi_temp  html  logs  proxy_temp  sbin  scgi_temp  uwsgi_temp
[root@localhost nginx]# cd sbin/
[root@localhost sbin]# ls
nginx
[root@localhost sbin]# ./nginx
重新载入配置文件
[root@localhost sbin]# ./nginx -s reload
3.3 搭建一个静态web服务器
首先在安装目录下新建静态网站的文件夹
[root@localhost nginx]# ll
total 4
drwx------. 2 nobody root    6 Oct 31 04:15 client_body_temp
drwxr-xr-x. 2 root   root 4096 Oct 31 05:24 conf
drwxr-xr-x. 7 root   root  226 Oct 31 05:24 dlib        #这个就是我创建的文件夹
drwx------. 2 nobody root    6 Oct 31 04:15 fastcgi_temp
drwxr-xr-x. 2 root   root   40 Oct 26 03:09 html
drwxr-xr-x. 2 root   root   58 Oct 31 04:54 logs
drwx------. 2 nobody root    6 Oct 31 04:15 proxy_temp
drwxr-xr-x. 2 root   root   19 Oct 26 03:09 sbin
drwx------. 2 nobody root    6 Oct 31 04:15 scgi_temp
drwx------. 2 nobody root    6 Oct 31 04:15 uwsgi_temp
修改config文件
    server {
        listen       8080;       #修改监听端口
        server_name  localhost;

        #charset koi8-r;

        #access_log  logs/host.access.log  main;

        location / {
            alias  dlib/;               #修改路径
            #root   html;
            #index  index.html index.htm;
        }
重新载入配置文件
[root@localhost sbin]# ./nginx -s reload
访问报错

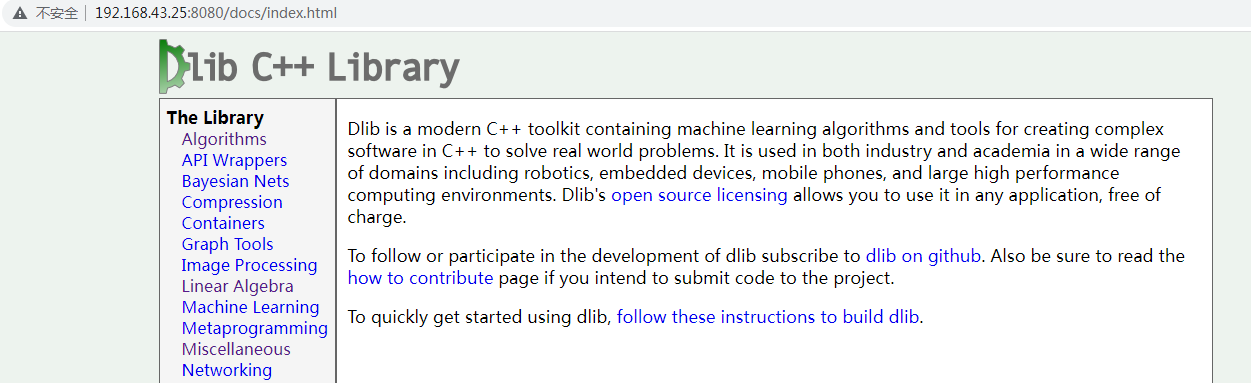
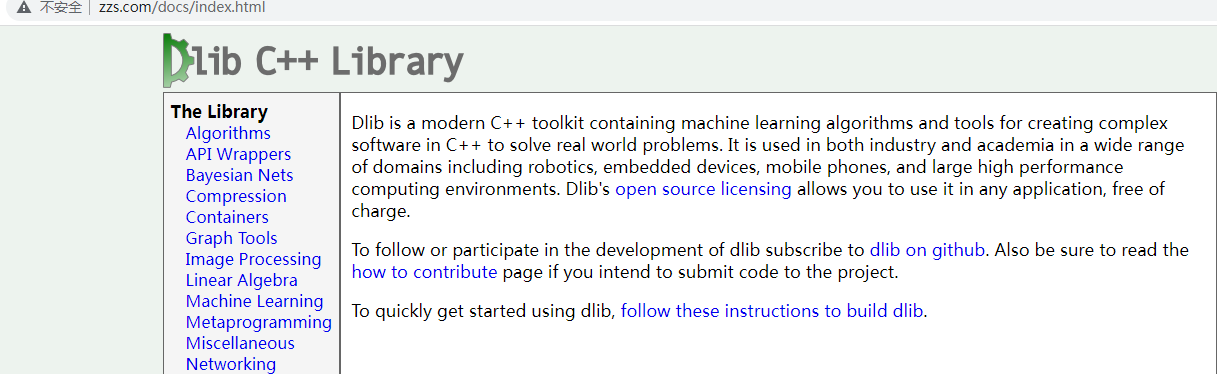
修改dlib下的文件名称
[root@localhost dlib]# cp documentation.html index.html
重新访问
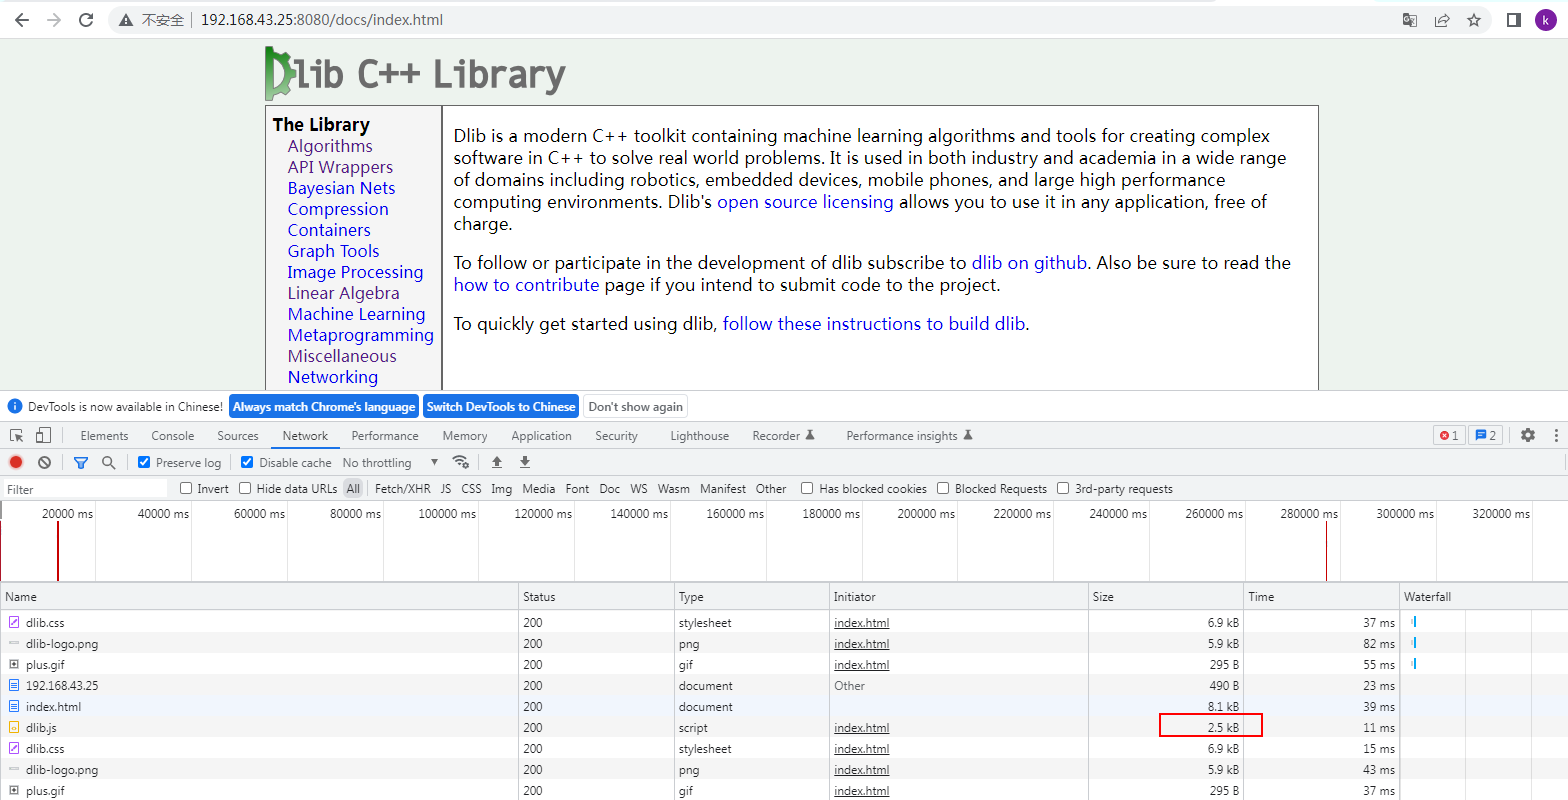
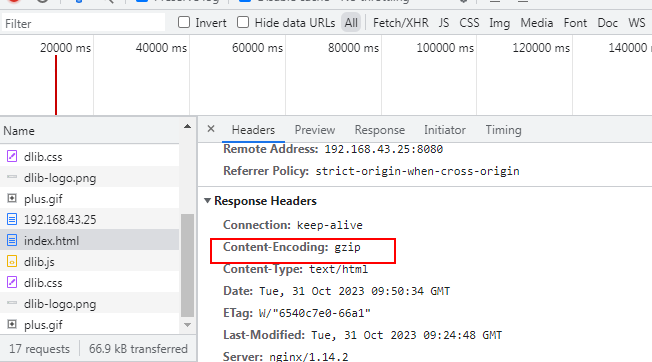
3.4 gzip应用
在nginx.conf配置文件中打开gzip选项,然后重新载入配置文件
gzip on;
打开调试页面发现文件小了很多
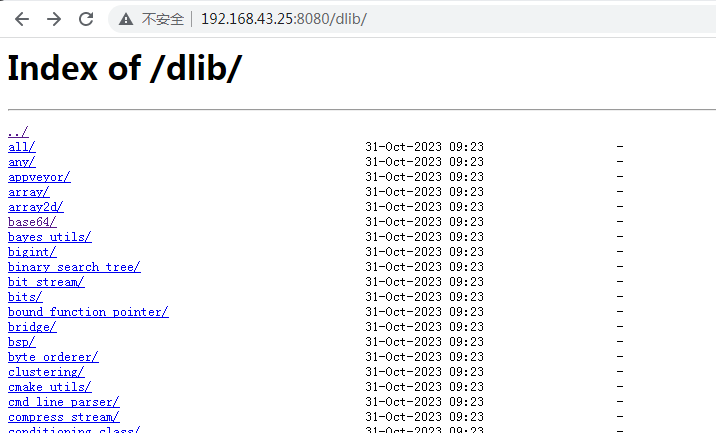
3.5 autoindex 参数应用
修改config参数
    server {
        listen       8080;
        server_name  localhost;

        #charset koi8-r;

        #access_log  logs/host.access.log  main;

        location / {
            alias  dlib/;
            autoindex on;        #添加这个参数
           #root   html;
           #index  index.html index.htm;
        }
重新载入配置文件
[root@localhost sbin]# ./nginx -s reload
访问测试
3.6 set $limit_rate 参数,限制浏览器访问速度
   server {
        listen       8080;
        server_name  localhost;

        #charset koi8-r;

        #access_log  logs/host.access.log  main;

        location / {
            alias  dlib/;
            autoindex on;
            set $limit_rate 1k;   #限制浏览器的访问速度,没秒传输1k的数据到浏览器中
3.7 日志参数 log_format
设置日志格式
http {
    include       mime.types;
    default_type  application/octet-stream;

    log_format  main  '$remote_addr - $remote_user [$time_local] "$request" '
                      '$status $body_bytes_sent "$http_referer" '
                      '"$http_user_agent" "$http_x_forwarded_for"';
设置日志存放的位置
server {
        listen       8080;
        server_name  localhost;

        #charset koi8-r;

        access_log  logs/host.access.log  main;
四、搭建反向代理服务器
4.1 搭建反向代理服务器
反向代理服务器 :192.168.43.14
上游服务器 : 192.168.43.25
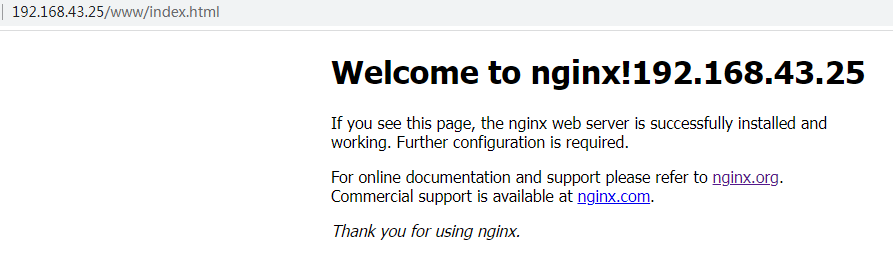
上游服务器就是前面实验的dlib静态网站实验用例,修改其配置
    server {
        listen       192.168.43.25:8080;         #只能本机的地址访问
        server_name  localhost;
重新启动上游服务器的nginx
[root@localhost sbin]# ./nginx -s stop
[root@localhost sbin]# ./nginx
配置反向代理服务器中nginx的配置
http {
    include       mime.types;
    default_type  application/octet-stream;

    upstream local {
         server 192.168.43.25:8080        #增加上游服务器
    }
配置域名
    server {
        listen       80;
        server_name  zzs.com;
location中设置代理路径
        location / {
            proxy_set_header Host $host;
            proxy_set_header X-Real-IP $remote_addr;
            proxy_set_header X-Forwarded-For $proxy_add_x_forwarded_for;
            proxy_pass http://local
访问测试
4.2 设置反向代理服务器的缓存
首先设置缓存参数
http {
    include       mime.types;
    default_type  application/octet-stream;

    proxy_cache_path /tmp/nginxcache levels=1:2 keys_zone=my_cache:10m max_size=3g inactive=60m use_temp_path=off;
使用缓存参数
        location / {
            proxy_set_header Host $host;
            proxy_set_header X-Real-IP $remote_addr;
            proxy_set_header X-Forwarded-For $proxy_add_x_forwarded_for;

            proxy_cache my_cache;
            proxy_cache_key $host$uri$is_args$args;
            proxy_cache_valid 200 304 302 1d;        #那些响应不返回

            proxy_pass http://local;
重新加载服务,停止上游服务,继续查案,正常访问。
4.3、负责均衡的策略
1、轮询
2、weight 权重越高,分配的客户端越多;
3、ip_hash 每个请求按照ip的hash结果分配,这样每个客户端固定访问一个后端服务器,可以解决session的问题;
    upstream myserver{
       ip_hash
       server 192.168.43.14:80;
       server 192.168.43.14:8080;
    }
4、fair 按照后端服务器的响应时间分配,响应时间越短的优先分配;
    upstream myserver{
       server 192.168.43.14:80;
       server 192.168.43.14:8080;
       fair;
    }
五、Nginx的动静分离
动态请求和静态请求分开;
创建两个文件夹分别模仿动态数据和静态数据;
[root@localhost data]# cd /data
[root@localhost data]# ls
image  www
修改配置文件:
    server {
        listen       80;
        server_name  192.168.43.25;
        location /www/ {
             root   /data/;
             index  index.html index.htm;
        }

        location /image/ {
             root  /data/;
             autoindex on;
        }
访问测试

六、Nginx配置高可用
两台测试主机:
192.168.43.25 keepalive 主
192.168.43.14 keepalive 备
需要两台都按照nginx,keepalive
[root@localhost conf]# yum install keepalived -y
查看安装
[root@localhost conf]# rpm -qa keepalived
keepalived-1.3.5-19.el7.x86_64
修改25的keepalive的配置文件
global_defs {
   notification_email {
     acassen@firewall.loc
     failover@firewall.loc
     sysadmin@firewall.loc
   }
   notification_email_from Alexandre.Cassen@firewall.loc
   smtp_server 192.168.43.25
   smtp_connect_timeout 30
   router_id LVS_DEVEL
}

vrrp_script chk_http_port {

    script "/usr/local/src/nginx_check.sh"

    interval 2  #(检测脚本执行的间隔)

    weight 2
}

vrrp_instance VI_1 {
    state MASTER    #备份服务器上将 MASTER 改为 BACKUP
    interface ens33 #网卡
    virtual_router_id 51 #主、备机的virtual_router_id必须相同
    priority 100  #主、备机取不同的优先级,主机值较大,备份机值较小
    advert_int 1
    authentication {
        auth_type PASS
        auth_pass 1111
    }
    virtual_ipaddress {
        192.168.43.26  //VRRP H虚拟机地址
    }
}
修改14的配置
global_defs {
   notification_email {
     acassen@firewall.loc
     failover@firewall.loc
     sysadmin@firewall.loc
   }
   notification_email_from Alexandre.Cassen@firewall.loc
   smtp_server 192.168.43.14
   smtp_connect_timeout 30
   router_id LVS_DEVEL
}

vrrp_script chk_http_port {

    script "/usr/local/src/nginx_check.sh"

    interval 2  #(检测脚本执行的间隔)

    weight 2
}

vrrp_instance VI_1 {
    state BACKUP    #备份服务器上将 MASTER 改为 BACKUP
    interface ens33 #网卡
    virtual_router_id 51 #主、备机的virtual_router_id必须相同
    priority 100  #主、备机取不同的优先级,主机值较大,备份机值较小
    advert_int 1
    authentication {
        auth_type PASS
        auth_pass 1111
    }
    virtual_ipaddress {
        192.168.43.26  //VRRP H虚拟机地址
    }
}
https://www.jianshu.com/p/5403818b1b34

 浙公网安备 33010602011771号