Windows docker k8s asp.net core
在上一篇文章 Ubuntu 18 Kubernetes的Install and Deploy 我们在ubuntu在部署了k8s集群, 今天来看看windows下怎么搞。
主要点有:
1) windows 下搭建k8s 单节点
2)ap.net core 制作和发布镜像 ,重点在于发布到私有的harbor上(Ubuntu18 安装搭建Harbor)
3)部署到k8s集群上
安装
1.下载 k8s-for-docker-desktop,前查看自己docker的版本(我这里是19.03.1所以直接下载master),然后下载对应的分支
2.切换到对应的目录,开始加载镜像,这里通过PowerShell的方式加载: .\load_images.ps1 (也可以通过Bash Shell的方式加载:./load_images.sh), 如果出现:在此系统上禁止运行脚本 的错误,通过执行 set-ExecutionPolicy RemoteSigned 可以解决
拉取完毕后(需要检查是否全部成功拉取) 需要在在Docker for Windows中启用K8S

![]()
配置K8s
1.切换运行上下文至docker-for-desktop ,验证Kubernetes状态(目前是单节点)
kubectl config use-context docker-for-desktop
kubectl cluster-info
kubectl get nodes

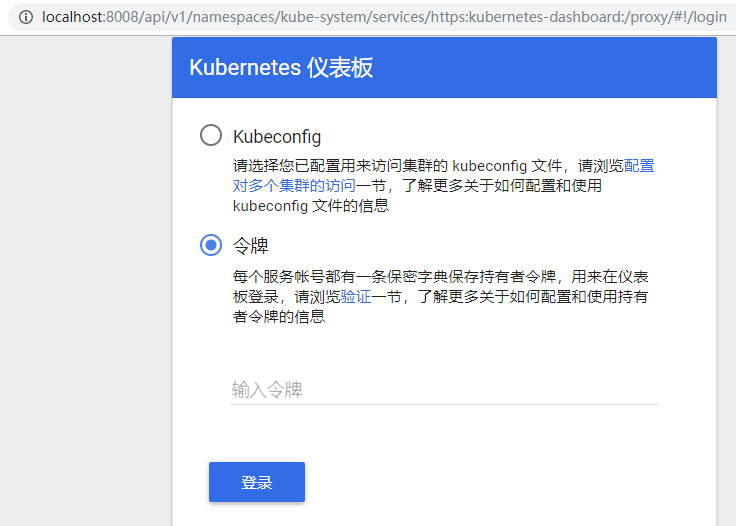
2.部署Kubernetes Dashboard& 开启API Server访问代理,向外部提供面板访问
kubectl create -f kubernetes-dashboard.yaml #需要在k8s-for-docker-desktop 目录下执行
kubectl proxy --address='0.0.0.0' --port=8008 --accept-hosts='^*$'

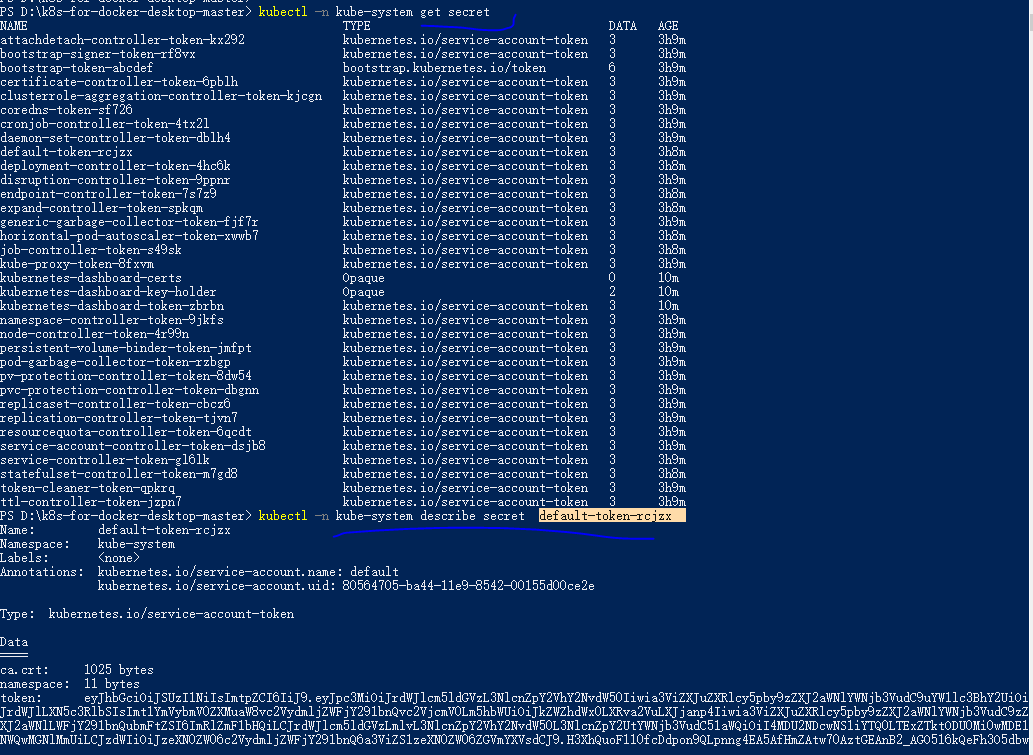
创建用户并获取token
kubectl create serviceaccount dashboard -n default
kubectl create clusterrolebinding dashboard-admin -n default --clusterrole=cluster-admin --serviceaccount=default:dashboard
kubectl -n kube-system get secret
kubectl -n kube-system describe secret  <name>
![]()
![]()
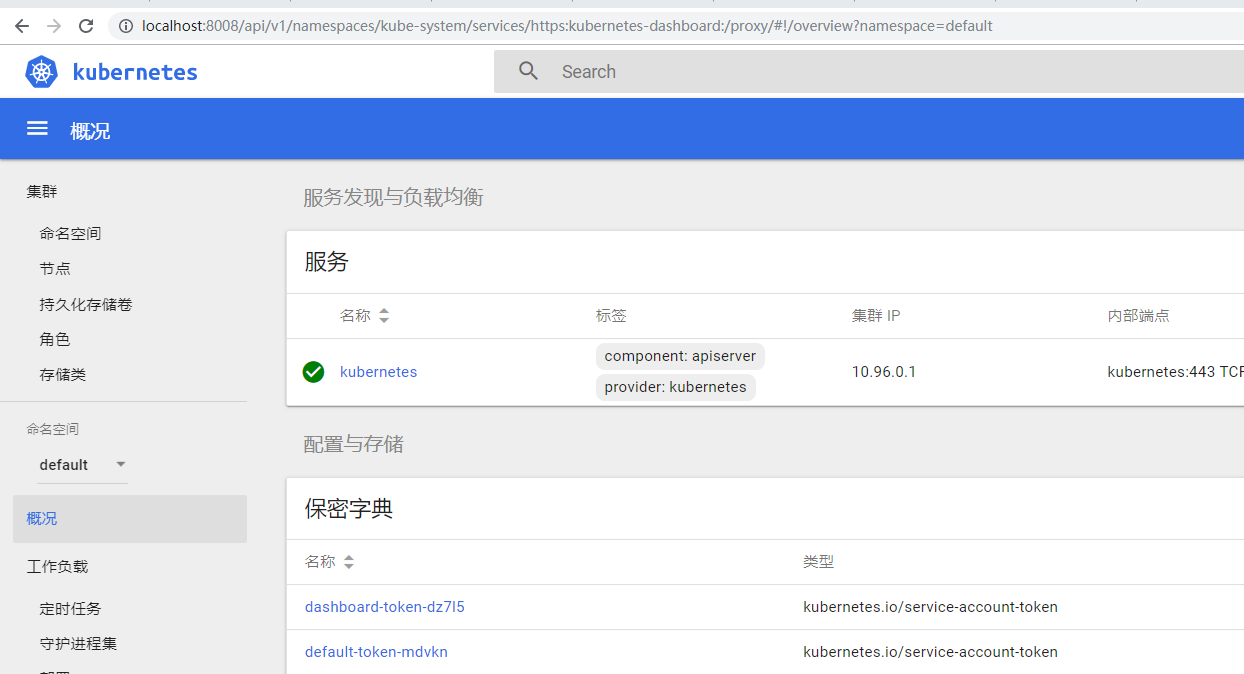
输入token后
![]()
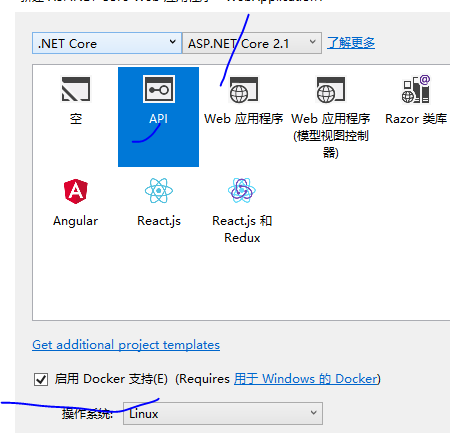
准备一个k8sWebApi
在创建webapi项目的(创建的时候选择启用docker 会自动生成Dockerfiel文件)
![]()
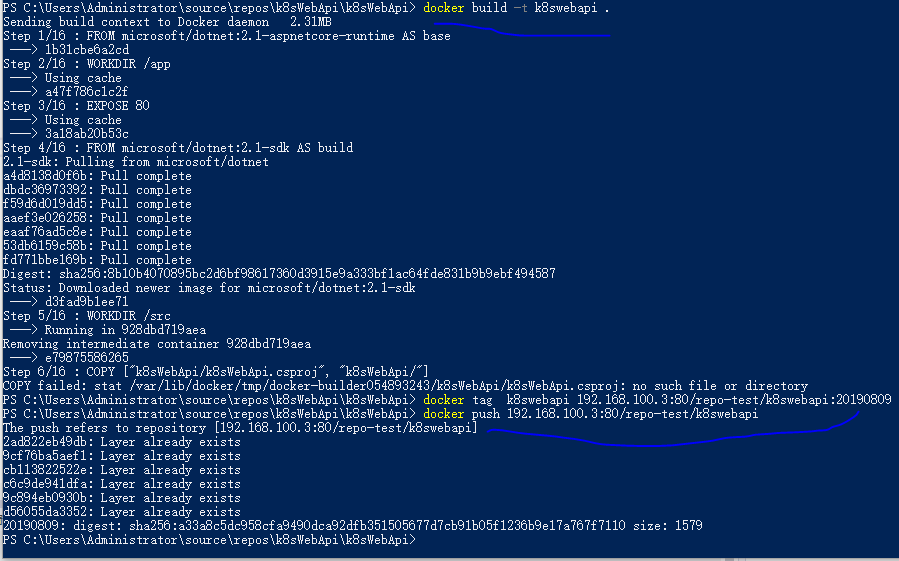
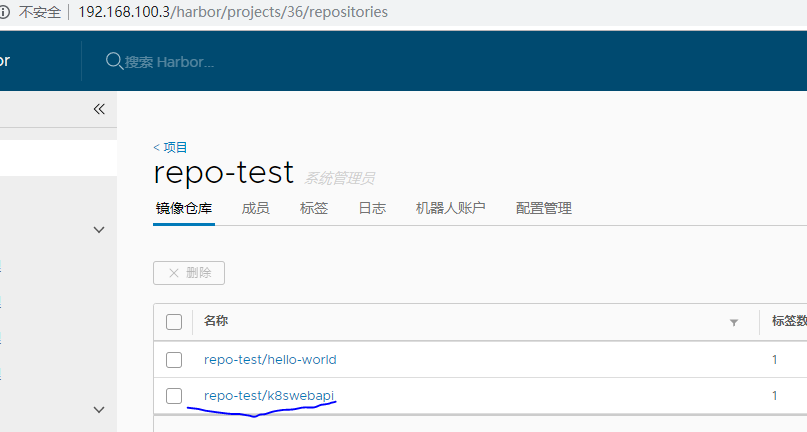
然后切换到目录自作镜像 并发布到私有仓库:(有关harbor请参考 Ubuntu18 安装搭建Harbor)
docker build -t k8swebapi .
#给镜像打tag(镜像的格式为,镜像仓库IP:端口/镜像名称)
docker tag  k8swebapi 192.168.100.3:80/repo-test/k8swebapi:20190809
docker push 192.168.100.3:80/repo-test/k8swebapi
![]()
部署webapi到k8s
1.准备namespace.yaml
apiVersion: v1
kind: Namespace
metadata:
   name: aspnetcore
   labels:
     name: aspnetcore
注意我们的deploy是有名称空间的, 所以在创建 secret的时候必须指定-n=aspnetcore
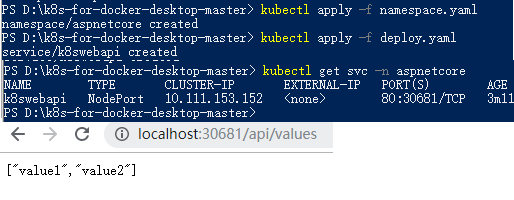
2.通过kubectl部署到K8S (以下操作在ubuntu下的k8s集群同样适用)
首先,确保你的Docker for Windows以及Kubernetes都启动起来了。然后,在Powershell中通过kubectl完成API的部署,然后验证,
kubectl apply -f namespace.yaml
kubectl apply -f deploy.yaml
kubectl get svc -n aspnetcore
#删除的时候顺序要倒过来
#kubectl delete -f deploy.yaml
#kubectl delete -f namespace.yaml
#查看k8swebapi状态
kubectl get deployment k8swebapi -n aspnetcore
kubectl describe deployment k8swebapi -n aspnetcore
kubectl describe replicaset -n aspnetcore #查看ReplicaSet的状态
kubectl describe pod -n aspnetcore #查看Pod的状态
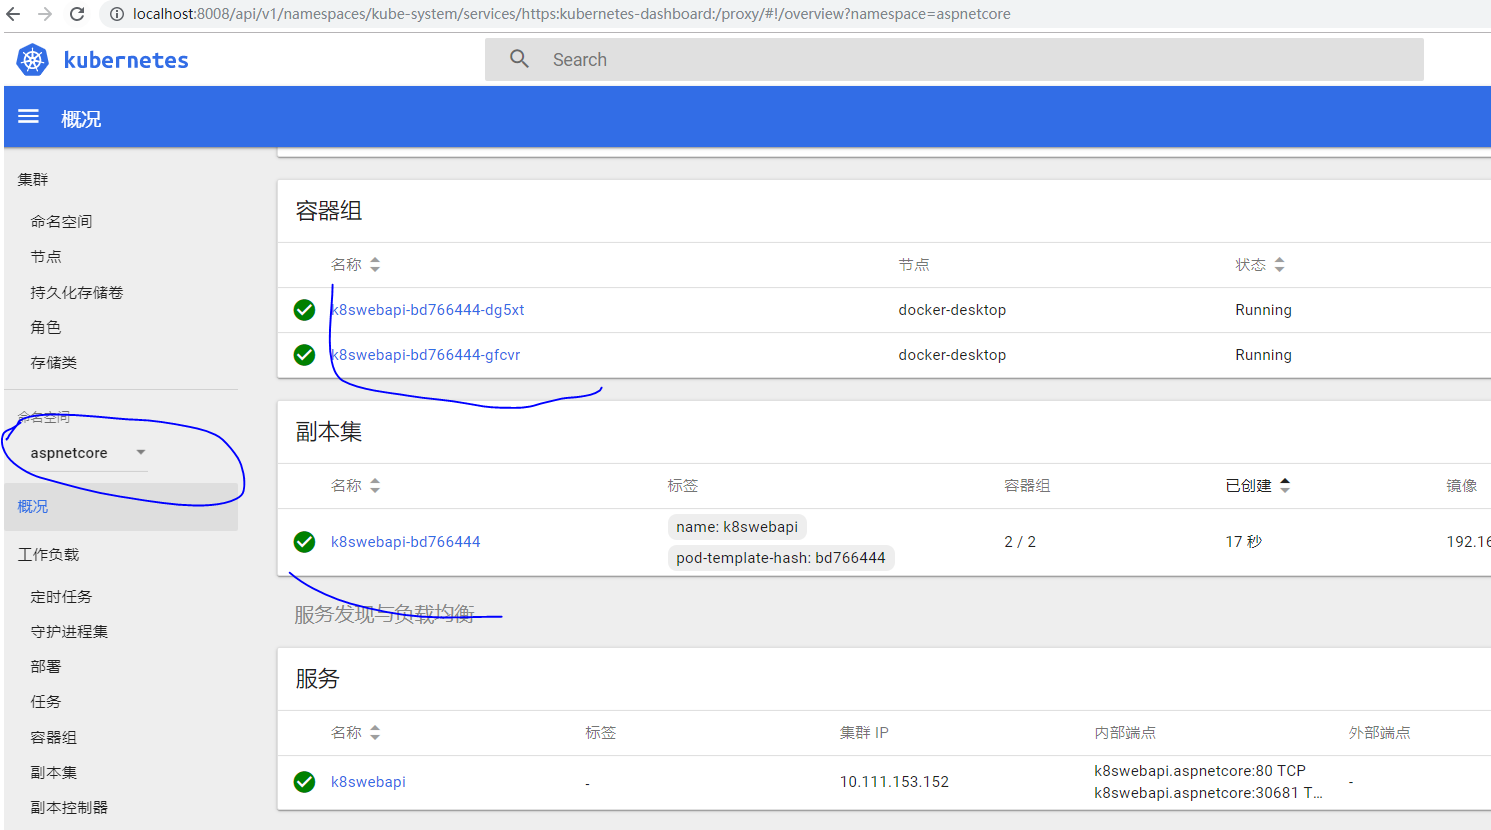
![]()
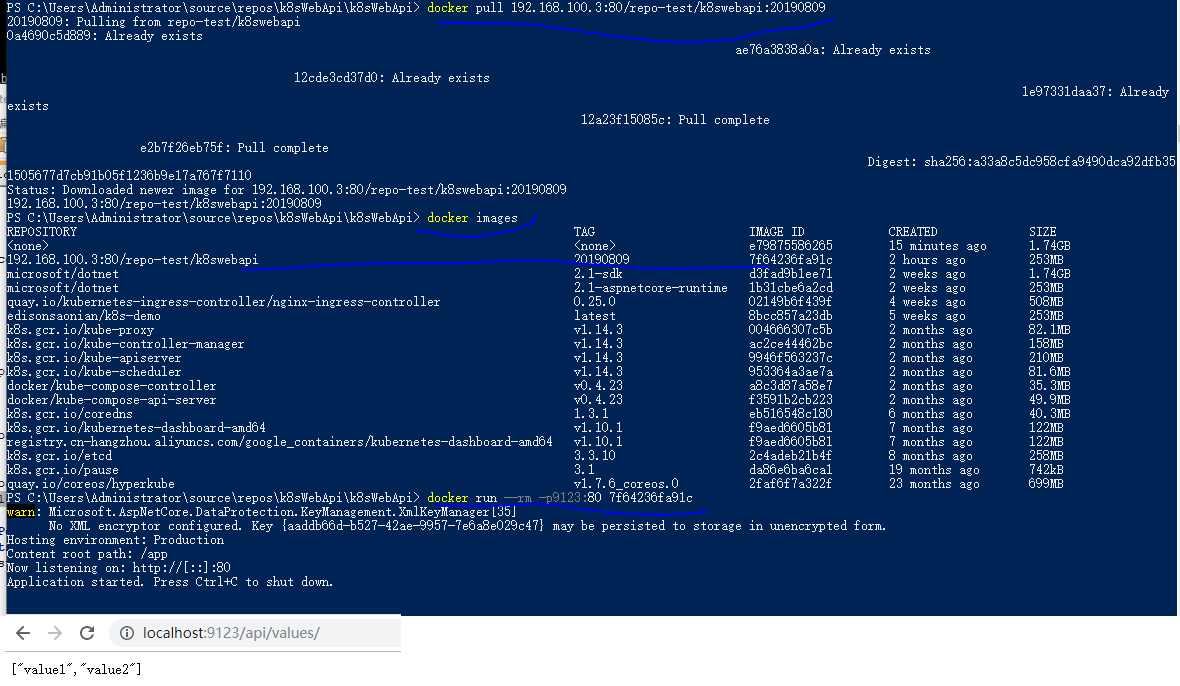
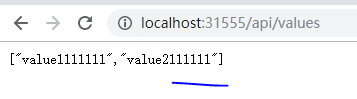
我这里的http://localhost:xxx/api/values 在ubuntu下是不能访问的(在windows下的k8s 是1.14.3,ubuntu是1.15.2 估计是版本的问题)
![]()
3.在K8S中对WebAPI的伸缩
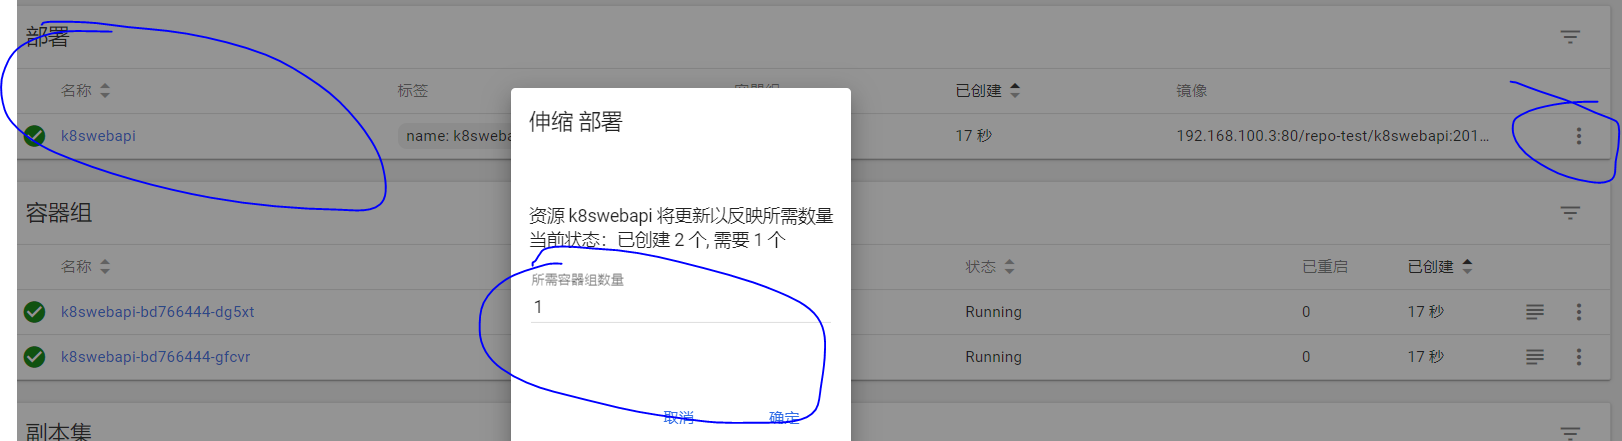
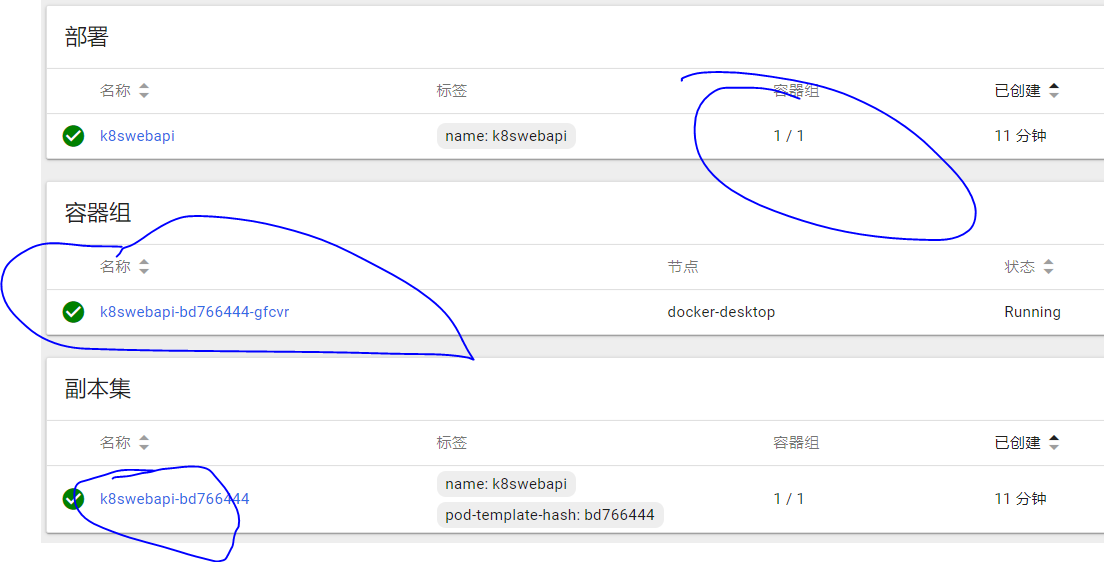
在Dashboard中,我们可以可视化地对我们的Deployment进行容器实例的伸缩,在弹出的伸缩选项对话框中输入个数,例如我们这里从2个缩减为1个,然后确定。如下图所示:
![]()
![]()
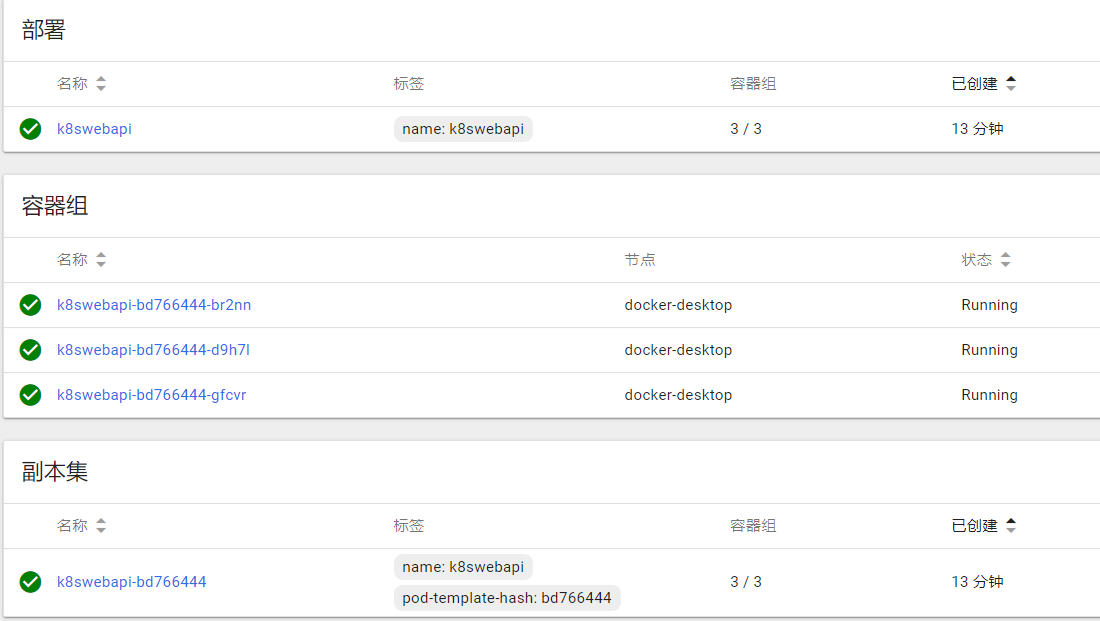
除了在Dashboard中可视化地操作进行伸缩,也可以通过kubectl来进行,例如下面这句命令,将容器实例扩展到3个。需要注意的是,由于我们的k8swebapi所在的命名空间是在aspnetcore下,因此也需要指明--namespace=aspnetcore。
![]()
在K8S中,提供了一个autoscale接口来实现服务的自动伸缩,它会采用默认的自动伸缩策略(例如根据CPU的负载情况)来帮助我们实现弹性伸缩的功能。例如下面这句命令可以实现我们的k8s-demo可以伸缩的范围是1~3个,根据负载情况自己伸缩,在没有多少请求量压力很小时收缩为一个,在压力较大时启动另一个实例来降低负载。
kubectl autoscale deployment k8swebapi --min=1 --max=3 --namespace=aspnetcore
来一个ubuntu18 k8s集群下面的机截图

![]()
--2019-8-15
滚动更新
修改deploy.yaml文件,并执行 kubectl apply -f deploy.yaml
apiVersion: apps/v1
kind: Deployment
metadata:
  name: k8swebapi
  namespace: aspnetcore
  labels:
    name: k8swebapi
spec:
  replicas: 5
  minReadySeconds: 10
  strategy:
    type: RollingUpdate
    rollingUpdate:
      maxSurge: 25%
      maxUnavailable: 25%

  selector:
    matchLabels:
      name: k8swebapi
  template:
    metadata:
      labels:
        name: k8swebapi
    spec:
      imagePullSecrets:
      - name: regsecret
      containers:
      - name: k8swebapi
        image: 192.168.100.5:80/admin/k8swebapi:20190809
        ports:
        - containerPort: 80
        imagePullPolicy: Always

---

kind: Service
apiVersion: v1
metadata:
  name: k8swebapi
  namespace: aspnetcore
spec:
  type: NodePort
  ports:
    - port: 80
      targetPort: 80
  selector:
    name: k8swebapi
修改程序重新push

修改deploy的镜像路径 image: 192.168.100.5:80/admin/k8swebapi:20190815 ,然后执行 kubectl apply -f deploy.yaml 更新后如下,api已经发生变化
参考
K8S的滚动升级RollingUpdate
ASP.NET Core on K8S深入学习(1)K8S基础知识与集群搭建
ASP.NET Core on K8S学习初探(2)K8S基本概念快速一览


 浙公网安备 33010602011771号