
SpringBoot(1.5.6.RELEASE)源码解析
转自 https://www.cnblogs.com/dylan-java/p/7450914.html
启动SpringBoot,需要在入口函数所在的类上添加@SpringBootApplication注解
1 @SpringBootApplication
2 public class Application {
3     public static void main(String[] args) {
4         SpringApplication.run(Application.class, args);
5     }
6 }
我们来看一下@SpringBootApplication注解
 1 @Target(ElementType.TYPE)
 2 @Retention(RetentionPolicy.RUNTIME)
 3 @Documented
 4 @Inherited
 5 @SpringBootConfiguration
 6 @EnableAutoConfiguration
 7 @ComponentScan(excludeFilters = {
 8         @Filter(type = FilterType.CUSTOM, classes = TypeExcludeFilter.class),
 9         @Filter(type = FilterType.CUSTOM, classes = AutoConfigurationExcludeFilter.class) })
10 public @interface SpringBootApplication {
11     @AliasFor(annotation = EnableAutoConfiguration.class, attribute = "exclude")
12     Class<?>[] exclude() default {};
13
14     @AliasFor(annotation = EnableAutoConfiguration.class, attribute = "excludeName")
15     String[] excludeName() default {};
16
17     @AliasFor(annotation = ComponentScan.class, attribute = "basePackages")
18     String[] scanBasePackages() default {};
19
20     @AliasFor(annotation = ComponentScan.class, attribute = "basePackageClasses")
21     Class<?>[] scanBasePackageClasses() default {};
22 }
1 @Target(ElementType.TYPE)
2 @Retention(RetentionPolicy.RUNTIME)
3 @Documented
4 @Configuration
5 public @interface SpringBootConfiguration {
6 }
从上面的代码可以看出@SpringBootApplication = @Configuration + @EnableAutoConfiguration + @ComponentScan
@Configuration注解(可以理解为xml里面的<beans>标签),一般和@Bean注解(可以理解为xml里面的<bean>标签)搭配使用。使用这2个注解可以创建一个配置类,示例如下
 1 @Configuration
 2 public class Config {
 3     @Bean
 4     public People people() {
 5         People people = new People();
 6         people.setAge(26);
 7         people.setName("Dylan");
 8         people.setGender(1);
 9         return people;
10     }
11 }

可以替代xml配置文件里
1 <beans>
2     <bean id="people" class="com.dylan.java.beans.People">
3         <property name="age" value="26"></property>
4         <property name="name" value="Dylan"></property>
5         <property name="gender" value="1"></property>
6     </bean>
7 </beans>
@EnableAutoConfiguration注解自动载入应用程序所需要的所有Bean,这依赖于SpringBoot在类路径中的查找
 1 @SuppressWarnings("deprecation")
 2 @Target(ElementType.TYPE)
 3 @Retention(RetentionPolicy.RUNTIME)
 4 @Documented
 5 @Inherited
 6 @AutoConfigurationPackage
 7 @Import(EnableAutoConfigurationImportSelector.class)
 8 public @interface EnableAutoConfiguration {
 9     String ENABLED_OVERRIDE_PROPERTY = "spring.boot.enableautoconfiguration";
10
11     Class<?>[] exclude() default {};
12
13     String[] excludeName() default {};
14 }
@EnableAutoConfiguration注解使用@Import注解导入EnableAutoConfigurationImportSelector类,此类继承了AutoConfigurationImportSelector类,而AutoConfigurationImportSelector类的selectImports方法就是关键所在
 1 @Override
 2 public String[] selectImports(AnnotationMetadata annotationMetadata) {
 3     if (!isEnabled(annotationMetadata)) {
 4         return NO_IMPORTS;
 5     }
 6     try {
 7         AutoConfigurationMetadata autoConfigurationMetadata = AutoConfigurationMetadataLoader
 8                 .loadMetadata(this.beanClassLoader);
 9         AnnotationAttributes attributes = getAttributes(annotationMetadata);
10         List<String> configurations = getCandidateConfigurations(annotationMetadata,
11                 attributes);
12         configurations = removeDuplicates(configurations);
13         configurations = sort(configurations, autoConfigurationMetadata);
14         Set<String> exclusions = getExclusions(annotationMetadata, attributes);
15         checkExcludedClasses(configurations, exclusions);
16         configurations.removeAll(exclusions);
17         configurations = filter(configurations, autoConfigurationMetadata);
18         fireAutoConfigurationImportEvents(configurations, exclusions);
19         return configurations.toArray(new String[configurations.size()]);
20     }
21     catch (IOException ex) {
22         throw new IllegalStateException(ex);
23     }
24 }
1 protected List<String> getCandidateConfigurations(AnnotationMetadata metadata,
2             AnnotationAttributes attributes) {
3     List<String> configurations = SpringFactoriesLoader.loadFactoryNames(
4             getSpringFactoriesLoaderFactoryClass(), getBeanClassLoader());
5     Assert.notEmpty(configurations,
6             "No auto configuration classes found in META-INF/spring.factories. If you "
7                     + "are using a custom packaging, make sure that file is correct.");
8     return configurations;
9 }
1 protected Class<?> getSpringFactoriesLoaderFactoryClass() {
2     return EnableAutoConfiguration.class;
3 }
可以看出,该方法使用了Spring Core包的SpringFactoriesLoader类的loadFactoryNames方法,该方法会查询classpath下的JAR文件中包含的/META/spring.factories文件,从文件中读取配置文件名(这里是org.springframework.boot.autoconfigure.EnableAutoConfiguration)的属性,例如
在jar:file:/C:/Users/guiqingqing/.m2/repository/org/springframework/boot/spring-boot-autoconfigure/1.5.6.RELEASE/spring-boot-autoconfigure-1.5.6.RELEASE.jar!/META-INF/spring.factories文件找到如下配置
# Auto Configure
org.springframework.boot.autoconfigure.EnableAutoConfiguration=\
org.springframework.boot.autoconfigure.admin.SpringApplicationAdminJmxAutoConfiguration,\
org.springframework.boot.autoconfigure.aop.AopAutoConfiguration,\
org.springframework.boot.autoconfigure.amqp.RabbitAutoConfiguration,\
org.springframework.boot.autoconfigure.batch.BatchAutoConfiguration,\
org.springframework.boot.autoconfigure.cache.CacheAutoConfiguration,\
org.springframework.boot.autoconfigure.cassandra.CassandraAutoConfiguration,\
org.springframework.boot.autoconfigure.cloud.CloudAutoConfiguration,\
org.springframework.boot.autoconfigure.context.ConfigurationPropertiesAutoConfiguration,\
org.springframework.boot.autoconfigure.context.MessageSourceAutoConfiguration,\
org.springframework.boot.autoconfigure.context.PropertyPlaceholderAutoConfiguration,\
org.springframework.boot.autoconfigure.couchbase.CouchbaseAutoConfiguration,\
org.springframework.boot.autoconfigure.dao.PersistenceExceptionTranslationAutoConfiguration,\
org.springframework.boot.autoconfigure.data.cassandra.CassandraDataAutoConfiguration,\
org.springframework.boot.autoconfigure.data.cassandra.CassandraRepositoriesAutoConfiguration,\
org.springframework.boot.autoconfigure.data.couchbase.CouchbaseDataAutoConfiguration,\
org.springframework.boot.autoconfigure.data.couchbase.CouchbaseRepositoriesAutoConfiguration,\
org.springframework.boot.autoconfigure.data.elasticsearch.ElasticsearchAutoConfiguration,\
org.springframework.boot.autoconfigure.data.elasticsearch.ElasticsearchDataAutoConfiguration,\
org.springframework.boot.autoconfigure.data.elasticsearch.ElasticsearchRepositoriesAutoConfiguration,\
org.springframework.boot.autoconfigure.data.jpa.JpaRepositoriesAutoConfiguration,\
org.springframework.boot.autoconfigure.data.ldap.LdapDataAutoConfiguration,\
org.springframework.boot.autoconfigure.data.ldap.LdapRepositoriesAutoConfiguration,\
org.springframework.boot.autoconfigure.data.mongo.MongoDataAutoConfiguration,\
org.springframework.boot.autoconfigure.data.mongo.MongoRepositoriesAutoConfiguration,\
org.springframework.boot.autoconfigure.data.neo4j.Neo4jDataAutoConfiguration,\
org.springframework.boot.autoconfigure.data.neo4j.Neo4jRepositoriesAutoConfiguration,\
org.springframework.boot.autoconfigure.data.solr.SolrRepositoriesAutoConfiguration,\
org.springframework.boot.autoconfigure.data.redis.RedisAutoConfiguration,\
org.springframework.boot.autoconfigure.data.redis.RedisRepositoriesAutoConfiguration,\
org.springframework.boot.autoconfigure.data.rest.RepositoryRestMvcAutoConfiguration,\
org.springframework.boot.autoconfigure.data.web.SpringDataWebAutoConfiguration,\
org.springframework.boot.autoconfigure.elasticsearch.jest.JestAutoConfiguration,\
org.springframework.boot.autoconfigure.freemarker.FreeMarkerAutoConfiguration,\
org.springframework.boot.autoconfigure.gson.GsonAutoConfiguration,\
org.springframework.boot.autoconfigure.h2.H2ConsoleAutoConfiguration,\
org.springframework.boot.autoconfigure.hateoas.HypermediaAutoConfiguration,\
org.springframework.boot.autoconfigure.hazelcast.HazelcastAutoConfiguration,\
org.springframework.boot.autoconfigure.hazelcast.HazelcastJpaDependencyAutoConfiguration,\
org.springframework.boot.autoconfigure.info.ProjectInfoAutoConfiguration,\
org.springframework.boot.autoconfigure.integration.IntegrationAutoConfiguration,\
org.springframework.boot.autoconfigure.jackson.JacksonAutoConfiguration,\
org.springframework.boot.autoconfigure.jdbc.DataSourceAutoConfiguration,\
org.springframework.boot.autoconfigure.jdbc.JdbcTemplateAutoConfiguration,\
org.springframework.boot.autoconfigure.jdbc.JndiDataSourceAutoConfiguration,\
org.springframework.boot.autoconfigure.jdbc.XADataSourceAutoConfiguration,\
org.springframework.boot.autoconfigure.jdbc.DataSourceTransactionManagerAutoConfiguration,\
org.springframework.boot.autoconfigure.jms.JmsAutoConfiguration,\
org.springframework.boot.autoconfigure.jmx.JmxAutoConfiguration,\
org.springframework.boot.autoconfigure.jms.JndiConnectionFactoryAutoConfiguration,\
org.springframework.boot.autoconfigure.jms.activemq.ActiveMQAutoConfiguration,\
org.springframework.boot.autoconfigure.jms.artemis.ArtemisAutoConfiguration,\
org.springframework.boot.autoconfigure.flyway.FlywayAutoConfiguration,\
org.springframework.boot.autoconfigure.groovy.template.GroovyTemplateAutoConfiguration,\
org.springframework.boot.autoconfigure.jersey.JerseyAutoConfiguration,\
org.springframework.boot.autoconfigure.jooq.JooqAutoConfiguration,\
org.springframework.boot.autoconfigure.kafka.KafkaAutoConfiguration,\
org.springframework.boot.autoconfigure.ldap.embedded.EmbeddedLdapAutoConfiguration,\
org.springframework.boot.autoconfigure.ldap.LdapAutoConfiguration,\
org.springframework.boot.autoconfigure.liquibase.LiquibaseAutoConfiguration,\
org.springframework.boot.autoconfigure.mail.MailSenderAutoConfiguration,\
org.springframework.boot.autoconfigure.mail.MailSenderValidatorAutoConfiguration,\
org.springframework.boot.autoconfigure.mobile.DeviceResolverAutoConfiguration,\
org.springframework.boot.autoconfigure.mobile.DeviceDelegatingViewResolverAutoConfiguration,\
org.springframework.boot.autoconfigure.mobile.SitePreferenceAutoConfiguration,\
org.springframework.boot.autoconfigure.mongo.embedded.EmbeddedMongoAutoConfiguration,\
org.springframework.boot.autoconfigure.mongo.MongoAutoConfiguration,\
org.springframework.boot.autoconfigure.mustache.MustacheAutoConfiguration,\
org.springframework.boot.autoconfigure.orm.jpa.HibernateJpaAutoConfiguration,\
org.springframework.boot.autoconfigure.reactor.ReactorAutoConfiguration,\
org.springframework.boot.autoconfigure.security.SecurityAutoConfiguration,\
org.springframework.boot.autoconfigure.security.SecurityFilterAutoConfiguration,\
org.springframework.boot.autoconfigure.security.FallbackWebSecurityAutoConfiguration,\
org.springframework.boot.autoconfigure.security.oauth2.OAuth2AutoConfiguration,\
org.springframework.boot.autoconfigure.sendgrid.SendGridAutoConfiguration,\
org.springframework.boot.autoconfigure.session.SessionAutoConfiguration,\
org.springframework.boot.autoconfigure.social.SocialWebAutoConfiguration,\
org.springframework.boot.autoconfigure.social.FacebookAutoConfiguration,\
org.springframework.boot.autoconfigure.social.LinkedInAutoConfiguration,\
org.springframework.boot.autoconfigure.social.TwitterAutoConfiguration,\
org.springframework.boot.autoconfigure.solr.SolrAutoConfiguration,\
org.springframework.boot.autoconfigure.thymeleaf.ThymeleafAutoConfiguration,\
org.springframework.boot.autoconfigure.transaction.TransactionAutoConfiguration,\
org.springframework.boot.autoconfigure.transaction.jta.JtaAutoConfiguration,\
org.springframework.boot.autoconfigure.validation.ValidationAutoConfiguration,\
org.springframework.boot.autoconfigure.web.DispatcherServletAutoConfiguration,\
org.springframework.boot.autoconfigure.web.EmbeddedServletContainerAutoConfiguration,\
org.springframework.boot.autoconfigure.web.ErrorMvcAutoConfiguration,\
org.springframework.boot.autoconfigure.web.HttpEncodingAutoConfiguration,\
org.springframework.boot.autoconfigure.web.HttpMessageConvertersAutoConfiguration,\
org.springframework.boot.autoconfigure.web.MultipartAutoConfiguration,\
org.springframework.boot.autoconfigure.web.ServerPropertiesAutoConfiguration,\
org.springframework.boot.autoconfigure.web.WebClientAutoConfiguration,\
org.springframework.boot.autoconfigure.web.WebMvcAutoConfiguration,\
org.springframework.boot.autoconfigure.websocket.WebSocketAutoConfiguration,\
org.springframework.boot.autoconfigure.websocket.WebSocketMessagingAutoConfiguration,\
org.springframework.boot.autoconfigure.webservices.WebServicesAutoConfiguration
获取自动配置的类之后调用removeDuplicates方法先去除重复,然后调用sort方法进行排序,接下来调用getExclusions方法获取配置的exclude的类,比如@SpringBootApplication(exclude = {DataSourceAutoConfiguration.class}),然后这些exclude的类也会被排除
然后是调用filter方法,该方法决定哪些bean自动配置,哪些不配置。去classpath下的JAR文件中包含的/META/spring.factories文件里查询org.springframework.boot.autoconfigure.AutoConfigurationImportFilter对应的配置,这里找到的是org.springframework.boot.autoconfigure.condition.OnClassCondition,检查规则如下
经过上面的去重,排序,排除,(这里会有2个线程分别对前一半和后一半做检查)遍历所有剩下的class
首先看是否有@ConditionalOnClass注解,如果没有那么不过滤,表示需要配置这个bean
如果有@ConditionalOnClass注解再看这个注解依赖的类是否为空,如果为空,那么也不过滤,表示需要配置这个bean
如果@ConditionalOnClass注解依赖的类不为空,那么再看classpath下能不能找到这个依赖的类,如果能找不到,那么也不过滤,表示需要配置这个bean,否则过滤,表示不配置这个bean
例如FreeMarkerAutoConfiguration类
1 @Configuration
2 @ConditionalOnClass({ freemarker.template.Configuration.class, FreeMarkerConfigurationFactory.class })
4 @AutoConfigureAfter(WebMvcAutoConfiguration.class)
5 @EnableConfigurationProperties(FreeMarkerProperties.class)
6 public class FreeMarkerAutoConfiguration {
7 }
该类的@ConditionalOnClass注解里有freemarker.template.Configuration.class和FreeMarkerConfigurationFactory.class类,如果classpath下能找到这2个类,那么就会自动加载FreeMarkerAutoConfiguration类
最后去classpath下的JAR文件中包含的/META/spring.factories文件里查询org.springframework.boot.autoconfigure.AutoConfigurationImportListener对应的属性作为监听器,然后发布一个AutoConfigurationImportEvent事件
最后交代一下,selectImports方法的调用时机,是在SpringBoot启动时,AbstractApplicationContext类refresh方法 -> invokeBeanFactoryPostProcessors方法 -> PostProcessorRegistrationDelegate类的invokeBeanFactoryPostProcessors方法 -> invokeBeanDefinitionRegistryPostProcessors方法 -> ConfigurationClassPostProcessor类的postProcessBeanDefinitionRegistry方法 -> processConfigBeanDefinitions方法 -> ConfigurationClassParser类的parse方法 -> processDeferredImportSelectors方法
 1 private void processDeferredImportSelectors() {
 2     List<DeferredImportSelectorHolder> deferredImports = this.deferredImportSelectors;
 3     this.deferredImportSelectors = null;
 4     Collections.sort(deferredImports, DEFERRED_IMPORT_COMPARATOR);
 5
 6     for (DeferredImportSelectorHolder deferredImport : deferredImports) {
 7         ConfigurationClass configClass = deferredImport.getConfigurationClass();
 8         try {
 9             String[] imports = deferredImport.getImportSelector().selectImports(configClass.getMetadata());
10             processImports(configClass, asSourceClass(configClass), asSourceClasses(imports), false);
11         }
12         catch (BeanDefinitionStoreException ex) {
13             throw ex;
14         }
15         catch (Throwable ex) {
16             throw new BeanDefinitionStoreException(
17                     "Failed to process import candidates for configuration class [" +
18                     configClass.getMetadata().getClassName() + "]", ex);
19         }
20     }
21 }
@ComponentScan注解会自动扫描指定包(如果不指定,那么默认扫描当前类路径以及子路径下的所有类)下的全部标有@Component(包括@Service、@Repository、@Controller等子注解)的类,并注册成bean
接下来从SpringApplication.run(Application.class, args);代码开始一行行DEBUG进行分析
1 @SpringBootApplication(exclude = {DataSourceAutoConfiguration.class})
2 public class Application {
3     public static void main(String[] args) {
4         SpringApplication.run(Application.class, args);
5     }
6 }
1 public static ConfigurableApplicationContext run(Object source, String... args) {
2     return run(new Object[] { source }, args);
3 }
1 public static ConfigurableApplicationContext run(Object[] sources, String[] args) {
2     return new SpringApplication(sources).run(args);
3 }
最终会创建一个SpringApplication的对象,然后调用它的run方法
1 public SpringApplication(Object... sources) {
2     initialize(sources);
3 }
SpringApplication的构造函数会调用initialize方法进行初始化
 1 @SuppressWarnings({ "unchecked", "rawtypes" })
 2 private void initialize(Object[] sources) {
 3     if (sources != null && sources.length > 0) {
 4         this.sources.addAll(Arrays.asList(sources));
 5     }
 6     this.webEnvironment = deduceWebEnvironment();
 7     setInitializers((Collection) getSpringFactoriesInstances(
 8             ApplicationContextInitializer.class));
 9     setListeners((Collection) getSpringFactoriesInstances(ApplicationListener.class));
10     this.mainApplicationClass = deduceMainApplicationClass();
11 }
首先,会把sources参数(也就是com.dylan.java.springboot.template.Application的class对象)添加到SpringApplication对象的sources属性,该属性是一个LinkedHashSet类型
然后接下来的一行调用了deduceWebEnvironment方法
1 private boolean deduceWebEnvironment() {
2     for (String className : WEB_ENVIRONMENT_CLASSES) {
3         if (!ClassUtils.isPresent(className, null)) {
4             return false;
5         }
6     }
7     return true;
8 }
1 private static final String[] WEB_ENVIRONMENT_CLASSES = { "javax.servlet.Servlet",
2             "org.springframework.web.context.ConfigurableWebApplicationContext" };
该方法会调用ClassUtils类的isPresent方法,检查classpath中是否存在javax.servlet.Servlet类和org.springframework.web.context.ConfigurableWebApplicationContext类,并赋值给SpringApplication对象的webEnvironment属性,该属性是一个boolean类型,表示启动的程序是否是一个web应用程序
接下来是第7行,主要是初始化ApplicationContextInitializer
在classpath下的JAR文件中包含的/META/spring.factories文件里找到org.springframework.context.ApplicationContextInitializer对应的属性,然后实例化并排序,设置到SpringApplication对象的initializers属性,该属性是一个ArrayList类型
接下来是第8行,主要是初始化ApplicationListener
在classpath下的JAR文件中包含的/META/spring.factories文件里找到org.springframework.context.ApplicationListener对应的属性,然后实例化并排序,设置到SpringApplication对象的listeners属性,该属性是一个ArrayList类型
最后调用deduceMainApplicationClass方法找到main函数所在的类,实现的方式是获取当前方法调用栈,找到main函数的类,并设置到SpringApplication对象的mainApplicationClass属性,该属性是一个Class类型
 1 private Class<?> deduceMainApplicationClass() {
 2     try {
 3         StackTraceElement[] stackTrace = new RuntimeException().getStackTrace();
 4         for (StackTraceElement stackTraceElement : stackTrace) {
 5             if ("main".equals(stackTraceElement.getMethodName())) {
 6                 return Class.forName(stackTraceElement.getClassName());
 7             }
 8         }
 9     }
10     catch (ClassNotFoundException ex) {
11         // Swallow and continue
12     }
13     return null;
14 }
至此,SpringApplication对象的初始化完成
接下来看一下它的run方法
 1 public ConfigurableApplicationContext run(String... args) {
 2     StopWatch stopWatch = new StopWatch();
 3     stopWatch.start();
 4     ConfigurableApplicationContext context = null;
 5     FailureAnalyzers analyzers = null;
 6     configureHeadlessProperty();
 7     SpringApplicationRunListeners listeners = getRunListeners(args);
 8     listeners.starting();
 9     try {
10         ApplicationArguments applicationArguments = new DefaultApplicationArguments(
11                 args);
12         ConfigurableEnvironment environment = prepareEnvironment(listeners,
13                 applicationArguments);
14         Banner printedBanner = printBanner(environment);
15         context = createApplicationContext();
16         analyzers = new FailureAnalyzers(context);
17         prepareContext(context, environment, listeners, applicationArguments,
18                 printedBanner);
19         refreshContext(context);
20         afterRefresh(context, applicationArguments);
21         listeners.finished(context, null);
22         stopWatch.stop();
23         if (this.logStartupInfo) {
24             new StartupInfoLogger(this.mainApplicationClass)
25                     .logStarted(getApplicationLog(), stopWatch);
26         }
27         return context;
28     }
29     catch (Throwable ex) {
30         handleRunFailure(context, listeners, analyzers, ex);
31         throw new IllegalStateException(ex);
32     }
33 }
首先创建一个StopWatch对象并调用它的start方法,该类是Spring提供的一个计时器类,与本篇要讨论的东西无关,所在在这里不对它进行分析
第6行调用了configureHeadlessProperty方法,该方法只有一行代码,就是设置系统属性java.awt.headless,这里设置为true,表示运行在服务器端,在没有显示器和鼠标键盘的模式下工作,模拟输入输出设备功能
第7行通过getRunListeners方法获取SpringApplicationRunListeners对象,这个对象是一个SpringBoot事件广播器的管理者,它可以包含多个SpringApplicationRunListener,SpringApplication类中使用它们来间接调用ApplicationListener
在classpath下的JAR文件中包含的/META/spring.factories文件里找到org.springframework.boot.SpringApplicationRunListener对应的属性,然后实例化并排序
在jar:file:/C:/Users/guiqingqing/.m2/repository/org/springframework/boot/spring-boot/1.5.6.RELEASE/spring-boot-1.5.6.RELEASE.jar!/META-INF/spring.factories文件找到如下配置
# Run Listeners
org.springframework.boot.SpringApplicationRunListener=\
org.springframework.boot.context.event.EventPublishingRunListener
这里只有一个,就是EventPublishingRunListener,然后作为参数调用SpringApplicationRunListeners的构造函数,创建对象并返回,EventPublishingRunListener对象的实例被添加到SpringApplicationRunListeners对象的listeners属性中
看一下EventPublishingRunListener的构造函数
1 public EventPublishingRunListener(SpringApplication application, String[] args) {
2     this.application = application;
3     this.args = args;
4     this.initialMulticaster = new SimpleApplicationEventMulticaster();
5     for (ApplicationListener<?> listener : application.getListeners()) {
6         this.initialMulticaster.addApplicationListener(listener);
7     }
8 }
内部会创建一个Spring广播器SimpleApplicationEventMulticaster对象,它实际上是一个事件广播器,EventPublishingRunListener实现了SpringApplicationRunListener接口,我们看一下SpringApplicationRunListener接口的定义
 1 public interface SpringApplicationRunListener {
 2     void starting();
 3
 4     void environmentPrepared(ConfigurableEnvironment environment);
 5
 6     void contextPrepared(ConfigurableApplicationContext context);
 7
 8     void contextLoaded(ConfigurableApplicationContext context);
 9
10     void finished(ConfigurableApplicationContext context, Throwable exception);
11 }
该接口规定了SpringBoot的生命周期,在各个生命周期广播相应的事件,调用实际的ApplicationListener的onApplicationEvent方法
回到SpringApplication的run方法
第8行调用listeners的starting方法
1 public void starting() {
2     for (SpringApplicationRunListener listener : this.listeners) {
3         listener.starting();
4     }
5 }
该方法遍历所有的listeners,当然这里只有一个(EventPublishingRunListener),调用它的starting方法
1 @Override
2 @SuppressWarnings("deprecation")
3 public void starting() {
4     this.initialMulticaster.multicastEvent(new ApplicationStartedEvent(this.application, this.args));
5 }
这里会使用广播器(SimpleApplicationEventMulticaster)去广播事件,创建一个ApplicationStartedEvent对象作为参数
 1 @Override
 2 public void multicastEvent(ApplicationEvent event) {
 3     multicastEvent(event, resolveDefaultEventType(event));
 4 }
 5
 6 @Override
 7 public void multicastEvent(final ApplicationEvent event, ResolvableType eventType) {
 8     ResolvableType type = (eventType != null ? eventType : resolveDefaultEventType(event));
 9     for (final ApplicationListener<?> listener : getApplicationListeners(event, type)) {
10         Executor executor = getTaskExecutor();
11         if (executor != null) {
12             executor.execute(new Runnable() {
13                 @Override
14                 public void run() {
15                     invokeListener(listener, event);
16                 }
17             });
18         }
19         else {
20             invokeListener(listener, event);
21         }
22     }
23 }
可以看出multicastEvent方法会找到ApplicationListener的集合,然后依次调用invokeListener方法,而invokeListener方法内部则会调用ApplicationListener对象的onApplicationEvent方法
第10行创建一个DefaultApplicationArguments对象,它持有着args参数,就是main函数传进来的参数
第12行调用prepareEnvironment方法,该方法准备运行的环境,比如开发环境dev,测试环境test,还是生产环境prd,然后根据环境解析不同的配置文件
 1 private ConfigurableEnvironment prepareEnvironment(SpringApplicationRunListeners listeners, ApplicationArguments applicationArguments) {
 2     // Create and configure the environment
 3     ConfigurableEnvironment environment = getOrCreateEnvironment();
 4     configureEnvironment(environment, applicationArguments.getSourceArgs());
 5     listeners.environmentPrepared(environment);
 6     if (!this.webEnvironment) {
 7         environment = new EnvironmentConverter(getClassLoader())
 8                 .convertToStandardEnvironmentIfNecessary(environment);
 9     }
10     return environment;
11 }
getOrCreateEnvironment方法会检查之前设置的webEnvironment属性,如果是web程序,那么创建一个StandardServletEnvironment对象并返回,如果不是web程序,那么创建一个StandardEnvironment对象并返回
接下来是configureEnvironment方法,该方法会对上一步返回的environment做进一步的配置,调用configurePropertySources和configureProfiles,比如main函数传进来参数"--spring.profiles.active=dev",那么会在configurePropertySources方法里被添加到CommandLineArgs对象的optionArgs属性,不是以"--"开头的参数会被添加到nonOptionArgs属性。而configureProfiles方法这个时候就会获取到dev作为当前有效的profile并添加到environment的activeProfiles属性中,本例不传参数,所以基本上configureEnvironment方法什么都不做
然后调用listeners的environmentPrepared方法,发布一个ApplicationEnvironmentPreparedEvent事件,通过事件广播器,依次调用每个ApplicationListener对象的onApplicationEvent方法,这里我们重点分析ConfigFileApplicationListener的onApplicationEvent方法
 1 @Override
 2 public void onApplicationEvent(ApplicationEvent event) {
 3     if (event instanceof ApplicationEnvironmentPreparedEvent) {
 4         onApplicationEnvironmentPreparedEvent(
 5                 (ApplicationEnvironmentPreparedEvent) event);
 6     }
 7     if (event instanceof ApplicationPreparedEvent) {
 8         onApplicationPreparedEvent(event);
 9     }
10 }
1 private void onApplicationEnvironmentPreparedEvent(ApplicationEnvironmentPreparedEvent event) {
2     List<EnvironmentPostProcessor> postProcessors = loadPostProcessors();
3     postProcessors.add(this);
4     AnnotationAwareOrderComparator.sort(postProcessors);
5     for (EnvironmentPostProcessor postProcessor : postProcessors) {
6         postProcessor.postProcessEnvironment(event.getEnvironment(),
7                 event.getSpringApplication());
8     }
9 }
首先loadPostProcessors方法会去classpath下的JAR文件中包含的/META/spring.factories文件里找到org.springframework.boot.env.EnvironmentPostProcessor对应的属性,然后实例化并排序,设置到postProcessors变量,在把当前对象(ConfigFileApplicationListener的实例)也添加到postProcessors变量中,然后对postProcessors排序,遍历postProcessors,依次调用它们的postProcessEnvironment方法。我们来看ConfigFileApplicationListener的postProcessEnvironment方法
1 @Override
2 public void postProcessEnvironment(ConfigurableEnvironment environment,
3         SpringApplication application) {
4     addPropertySources(environment, application.getResourceLoader());
5     configureIgnoreBeanInfo(environment);
6     bindToSpringApplication(environment, application);
7 }
addPropertySources方法最终会调用到ConfigFileApplicationListener的内部类Loader的load方法,这个方法是解析我们配置的application.yml和application-dev.yml文件的实现所在
 1 public void load() {
 2     this.propertiesLoader = new PropertySourcesLoader();
 3     this.activatedProfiles = false;
 4     this.profiles = Collections.asLifoQueue(new LinkedList<Profile>());
 5     this.processedProfiles = new LinkedList<Profile>();
 6
 7     // Pre-existing active profiles set via Environment.setActiveProfiles()
 8     // are additional profiles and config files are allowed to add more if
 9     // they want to, so don't call addActiveProfiles() here.
10     Set<Profile> initialActiveProfiles = initializeActiveProfiles();
11     this.profiles.addAll(getUnprocessedActiveProfiles(initialActiveProfiles));
12     if (this.profiles.isEmpty()) {
13         for (String defaultProfileName : this.environment.getDefaultProfiles()) {
14             Profile defaultProfile = new Profile(defaultProfileName, true);
15             if (!this.profiles.contains(defaultProfile)) {
16                 this.profiles.add(defaultProfile);
17             }
18         }
19     }
20
21     // The default profile for these purposes is represented as null. We add it
22     // last so that it is first out of the queue (active profiles will then
23     // override any settings in the defaults when the list is reversed later).
24     this.profiles.add(null);
25
26     while (!this.profiles.isEmpty()) {
27         Profile profile = this.profiles.poll();
28         for (String location : getSearchLocations()) {
29             if (!location.endsWith("/")) {
30                 // location is a filename already, so don't search for more
31                 // filenames
32                 load(location, null, profile);
33             }
34             else {
35                 for (String name : getSearchNames()) {
36                     load(location, name, profile);
37                 }
38             }
39         }
40         this.processedProfiles.add(profile);
41     }
42
43     addConfigurationProperties(this.propertiesLoader.getPropertySources());
44 }
25行之前基本上是一些变量的实例化,会往profiles集合中添加default和null,直接跳过,接下来从profiles集合中取出对应的值进行解析,首先取出null
第28行getSearchLocations方法,首先会检查当前环境是否配置了spring.config.location,如果没有,那么会使用默认的搜索路径classpath:/,classpath:/config/,file:./,file:./config/,这里调用了Collections.reverse方法进行倒序,也就是先查找file:./config/,在查找file:./,再是classpath:/config/,最后查找classpath:/。笔者的application.yml和application-dev.yml都是直接在src/main/resources目录下,所以对应的是在location为classpath:/时调用load(String location, String name, Profile profile)方法(在没有配置spring.config.name的情况下,name默认为application)
 1 private void load(String location, String name, Profile profile) {
 2     String group = "profile=" + (profile == null ? "" : profile);
 3     if (!StringUtils.hasText(name)) {
 4         // Try to load directly from the location
 5         loadIntoGroup(group, location, profile);
 6     }
 7     else {
 8         // Search for a file with the given name
 9         for (String ext : this.propertiesLoader.getAllFileExtensions()) {
10             if (profile != null) {
11                 // Try the profile-specific file
12                 loadIntoGroup(group, location + name + "-" + profile + "." + ext,
13                         null);
14                 for (Profile processedProfile : this.processedProfiles) {
15                     if (processedProfile != null) {
16                         loadIntoGroup(group, location + name + "-"
17                                 + processedProfile + "." + ext, profile);
18                     }
19                 }
20                 // Sometimes people put "spring.profiles: dev" in
21                 // application-dev.yml (gh-340). Arguably we should try and error
22                 // out on that, but we can be kind and load it anyway.
23                 loadIntoGroup(group, location + name + "-" + profile + "." + ext,
24                         profile);
25             }
26             // Also try the profile-specific section (if any) of the normal file
27             loadIntoGroup(group, location + name + "." + ext, profile);
28         }
29     }
30 }
调用this.propertiesLoader.getAllFileExtensions()方法获取配置文件后缀名,分别是在PropertiesPropertySourceLoader类和YamlPropertySourceLoader类中getFileExtensions方法定义的
1 public class PropertiesPropertySourceLoader implements PropertySourceLoader {
2     @Override
3     public String[] getFileExtensions() {
4         return new String[] { "properties", "xml" };
5     }
6 }
1 public class YamlPropertySourceLoader implements PropertySourceLoader {
2     @Override
3     public String[] getFileExtensions() {
4         return new String[] { "yml", "yaml" };
5     }
6 }
第23行调用的loadIntoGroup方法里又调用doLoadIntoGroup方法,这个方法会检查配置文件是否存在,比如file:./config/下不存在,或是classpath:/下的application.properties不存在,最后发现classpath:/下的application.yml存在,然后对其进行解析
 1 public PropertySource<?> load(Resource resource, String group, String name,
 2             String profile) throws IOException {
 3     if (isFile(resource)) {
 4         String sourceName = generatePropertySourceName(name, profile);
 5         for (PropertySourceLoader loader : this.loaders) {
 6             if (canLoadFileExtension(loader, resource)) {
 7                 PropertySource<?> specific = loader.load(sourceName, resource,
 8                         profile);
 9                 addPropertySource(group, specific, profile);
10                 return specific;
11             }
12         }
13     }
14     return null;
15 }
这里有2个loader,PropertiesPropertySourceLoader和YamlPropertySourceLoader,先检查是否该由此loader去解析,检查的规则就是看文件后缀名是否在getFileExtensions方法返回的数组中存在,很显然,这里应该由YamlPropertySourceLoader去解析,笔者的application.yml很简单,内容如下
spring:
  profiles:
    active: dev
解析完成之后,调用了一个handleProfileProperties方法,这个方法里又会调用maybeActivateProfiles方法,此方法的addProfiles方法会把解析到的dev添加到profiles中去,removeUnprocessedDefaultProfiles方法会删除之前添加的default(此时只剩下dev),如果配置了include,也会被解析
然后再次遍历file:./config/,file:./,classpath:/config/,classpath:/,这次是查找到application-dev.yml并解析,过程就不重复分析了
回到SpringApplication的run方法
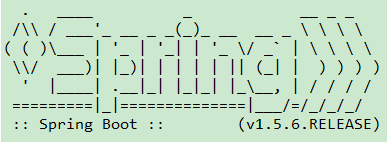
第14行调用printBanner方法,打印SpringBoot的LOGO
 1 private Banner printBanner(ConfigurableEnvironment environment) {
 2     if (this.bannerMode == Banner.Mode.OFF) {
 3         return null;
 4     }
 5     ResourceLoader resourceLoader = this.resourceLoader != null ? this.resourceLoader
 6             : new DefaultResourceLoader(getClassLoader());
 7     SpringApplicationBannerPrinter bannerPrinter = new SpringApplicationBannerPrinter(
 8             resourceLoader, this.banner);
 9     if (this.bannerMode == Mode.LOG) {
10         return bannerPrinter.print(environment, this.mainApplicationClass, logger);
11     }
12     return bannerPrinter.print(environment, this.mainApplicationClass, System.out);
13 }
方法内部会创建一个SpringApplicationBannerPrinter的对象,并调用print方法
1 public Banner print(Environment environment, Class<?> sourceClass, PrintStream out) {
2     Banner banner = getBanner(environment, this.fallbackBanner);
3     banner.printBanner(environment, sourceClass, out);
4     return new PrintedBanner(banner, sourceClass);
5 }
通过getBanner方法获取Banner对象
 1 private Banner getBanner(Environment environment, Banner definedBanner) {
 2     Banners banners = new Banners();
 3     banners.addIfNotNull(getImageBanner(environment));
 4     banners.addIfNotNull(getTextBanner(environment));
 5     if (banners.hasAtLeastOneBanner()) {
 6         return banners;
 7     }
 8     if (this.fallbackBanner != null) {
 9         return this.fallbackBanner;
10     }
11     return DEFAULT_BANNER;
12 }
第一步,调用Banners的无参构造创建一个Banners的对象,然后我们先看一下SpringApplicationBannerPrinter类里定义的几个静态属性
1 static final String BANNER_LOCATION_PROPERTY = "banner.location";
2
3 static final String BANNER_IMAGE_LOCATION_PROPERTY = "banner.image.location";
4
5 static final String DEFAULT_BANNER_LOCATION = "banner.txt";
6
7 static final String[] IMAGE_EXTENSION = { "gif", "jpg", "png" };
先看是否配置了系统属性banner.image.location,没有配置则在classpath中查找banner.gif,banner.jpg,banner.png,如果找到,则创建一个ImageBanner对象并添加到Banners对象的banners属性中,该属性是一个List类型,接下来看是否配置了banner.location属性,如果没有,则用默认的banner.txt,然后在classpath中查找banner.txt,如果找到,则创建一个ResourceBanner对象并添加到Banners对象的banners属性中,最后,如果Banners对象的banners不为空,也就是至少找到了banner.gif,banner.jpg,banner.png,banner.txt其中的一个,那么返回该Banners对象,否则返回默认的SpringBootBanner对象
接下来根据返回的不同Banners类型的对象调用具体的printBanner实现方法,所以如果要想打印自定义的LOGO,要么你在classpath下添加图片,要么添加banner.txt的文本文件,默认的SpringBootBanner会打印如下图
回到SpringApplication的run方法
第15行调用createApplicationContext方法,该方法创建SpringBoot的上下文
 1 protected ConfigurableApplicationContext createApplicationContext() {
 2     Class<?> contextClass = this.applicationContextClass;
 3     if (contextClass == null) {
 4         try {
 5             contextClass = Class.forName(this.webEnvironment
 6                     ? DEFAULT_WEB_CONTEXT_CLASS : DEFAULT_CONTEXT_CLASS);
 7         }
 8         catch (ClassNotFoundException ex) {
 9             throw new IllegalStateException(
10                     "Unable create a default ApplicationContext, "
11                             + "please specify an ApplicationContextClass",
12                     ex);
13         }
14     }
15     return (ConfigurableApplicationContext) BeanUtils.instantiate(contextClass);
16 }
通过判断当前是否是web环境决定创建什么类,如果是web程序,那么创建org.springframework.boot.context.embedded.AnnotationConfigEmbeddedWebApplicationContext的实例,否则创建org.springframework.context.annotation.AnnotationConfigApplicationContext的实例,这些都是定义在SpringApplication类的静态属性中
第16行创建FailureAnalyzers的对象,FailureAnalyzers的构造函数里调用了loadFailureAnalyzers方法,还是老规矩,在classpath下的JAR文件中包含的/META/spring.factories文件中找到org.springframework.boot.diagnostics.FailureAnalyzer对应的属性,实例化并排序,赋值给FailureAnalyzers对象的analyzers属性,主要是用来处理启动时发生一些异常时的一些分析
第17行调用prepareContext方法,准备上下文
 1 private void prepareContext(ConfigurableApplicationContext context,
 2             ConfigurableEnvironment environment, SpringApplicationRunListeners listeners,
 3             ApplicationArguments applicationArguments, Banner printedBanner) {
 4     context.setEnvironment(environment);
 5     postProcessApplicationContext(context);
 6     applyInitializers(context);
 7     listeners.contextPrepared(context);
 8     if (this.logStartupInfo) {
 9         logStartupInfo(context.getParent() == null);
10         logStartupProfileInfo(context);
11     }
12
13     // Add boot specific singleton beans
14     context.getBeanFactory().registerSingleton("springApplicationArguments",
15             applicationArguments);
16     if (printedBanner != null) {
17         context.getBeanFactory().registerSingleton("springBootBanner", printedBanner);
18     }
19
20     // Load the sources
21     Set<Object> sources = getSources();
22     Assert.notEmpty(sources, "Sources must not be empty");
23     load(context, sources.toArray(new Object[sources.size()]));
24     listeners.contextLoaded(context);
25 }
先给上下文设置环境,然后调用postProcessApplicationContext方法设置上下文的beanNameGenerator和resourceLoader(如果SpringApplication有的话)
接下来调用applyInitializers方法,拿到之前实例化SpringApplication对象的时候设置的ApplicationContextInitializer,调用它们的initialize方法,对上下文做初始化
介绍几个ApplicationContextInitializer,其他的不过多介绍,有兴趣的可以自己DEBUG
DelegatingApplicationContextInitializer: 从环境中(配置的context.initializer.classes)取出所有的ApplicationContextInitializer并执行
ContextIdApplicationContextInitializer: 设置上下文的id(name + ":" + profiles + ":" + index),笔者调试的id为(application:dev:8080)
下面一行调用listeners的contextPrepared方法,跟之前调用listeners的starting方法一样,只是EventPublishingRunListener的contextPrepared方法是个空实现
然后打印启动日志
2017-09-02 22:08:07.196 [INFO ][main]:com.dylan.java.springboot.template.Application[logStarting:48] - Starting Application on Dylan-PC with PID 5764 (F:\Dylan\workspace\template\target\classes started by Dylan in F:\Dylan\workspace\template)
2017-09-02 22:08:12.388 [INFO ][main]:com.dylan.java.springboot.template.Application[logStartupProfileInfo:597] - The following profiles are active: dev
打印完日志往上下文的beanFactory中注册一个singleton的bean,bean的名字是springApplicationArguments,bean的实例是之前实例化的ApplicationArguments对象
如果之前获取的printedBanner不为空,那么往上下文的beanFactory中注册一个singleton的bean,bean的名字是springBootBanner,bean的实例就是这个printedBanner
prepareContext方法的倒数第2行调用load方法注册启动类的bean定义,也就是调用SpringApplication.run(Application.class, args);的类,SpringApplication的load方法内会创建BeanDefinitionLoader的对象,并调用它的load()方法
1 public int load() {
2     int count = 0;
3     for (Object source : this.sources) {
4         count += load(source);
5     }
6     return count;
7 }
对所有的source(这里只有一个: class com.dylan.java.springboot.template.Application)都执行一次load(Object source)方法,这个方法又会调用load(Class<?> source)方法
 1 private int load(Class<?> source) {
 2     if (isGroovyPresent()) {
 3         // Any GroovyLoaders added in beans{} DSL can contribute beans here
 4         if (GroovyBeanDefinitionSource.class.isAssignableFrom(source)) {
 5             GroovyBeanDefinitionSource loader = BeanUtils.instantiateClass(source,
 6                     GroovyBeanDefinitionSource.class);
 7             load(loader);
 8         }
 9     }
10     if (isComponent(source)) {
11         this.annotatedReader.register(source);
12         return 1;
13     }
14     return 0;
15 }
由于@SpringBootApplication注解继承了@SpringBootConfiguration注解,@SpringBootConfiguration注解继承了@Configuration注解,@Configuration注解又继承了@Component注解,所以上面代码的第10行返回true,于是执行第11行和第12行代码
 1 class BeanDefinitionLoader {
 2     private final Object[] sources;
 3
 4     private final AnnotatedBeanDefinitionReader annotatedReader;
 5
 6     private final XmlBeanDefinitionReader xmlReader;
 7
 8     private BeanDefinitionReader groovyReader;
 9
10     ...
11 }
可以看出BeanDefinitionLoader中有多个加载BeanDefinition的Reader类,这里针对@SpringBootApplication注解使用了annotatedReader,调用register方法,因为启动类没有@Conditional注解,所以不能跳过注册的步骤
那么就老老实实的注册该BeanDefinition吧,没有设置bean是singleton还是prototype,那么默认使用singleton,而bean的名字,则默认是把类名的首字母变小写,也就是application,然后检查是否有@Lazy、@Primary、@DependsOn注解并设置AnnotatedBeanDefinition的属性,如果是AbstractBeanDefinition,还要检查是否有@Role、@Description注解并设置其属性,最后通过BeanDefinitionReaderUtils类的registerBeanDefinition方法注册BeanDefinition
最后调用listeners的contextLoaded方法,说明上下文已经加载,该方法先找到所有的ApplicationListener,遍历这些listener,如果该listener继承了ApplicationContextAware类,那么在这一步会调用它的setApplicationContext方法,设置context
遍历完ApplicationListener之后,创建ApplicationPreparedEvent事件对象,并广播出去,也就是调用所有ApplicationListener的onApplicationEvent方法
最后再回到SpringApplication的run方法,第19行调用refreshContext方法
 1 public ConfigurableApplicationContext run(String... args) {
 2     StopWatch stopWatch = new StopWatch();
 3     stopWatch.start();
 4     ConfigurableApplicationContext context = null;
 5     FailureAnalyzers analyzers = null;
 6     configureHeadlessProperty();
 7     SpringApplicationRunListeners listeners = getRunListeners(args);
 8     listeners.starting();
 9     try {
10         ApplicationArguments applicationArguments = new DefaultApplicationArguments(
11                 args);
12         ConfigurableEnvironment environment = prepareEnvironment(listeners,
13                 applicationArguments);
14         Banner printedBanner = printBanner(environment);
15         context = createApplicationContext();
16         analyzers = new FailureAnalyzers(context);
17         prepareContext(context, environment, listeners, applicationArguments,
18                 printedBanner);
19         refreshContext(context);
20         afterRefresh(context, applicationArguments);
21         listeners.finished(context, null);
22         stopWatch.stop();
23         if (this.logStartupInfo) {
24             new StartupInfoLogger(this.mainApplicationClass)
25                     .logStarted(getApplicationLog(), stopWatch);
26         }
27         return context;
28     }
29     catch (Throwable ex) {
30         handleRunFailure(context, listeners, analyzers, ex);
31         throw new IllegalStateException(ex);
32     }
33 }
第19行调用refreshContext方法,refreshContext方法又调用了refresh方法,而refresh方法又调用了context父类AbstractApplicationContext(真正的实现类是EmbeddedWebApplicationContext)的refresh方法,接着又调用AbstractApplicationContext的refresh方法
AbstractApplicationContext的refresh方法是本篇分析的重点,假如你通过ApplicationContext apc = new ClassPathXmlApplicationContext("beans.xml");的方式启动Spring,也是会调用这个refresh方法来初始化容器的,它主要是完成配置类的解析,各种BeanFactoryPostProcessor和BeanPostProcessor的注册,内置容器(tomcat)构造,国际化配置初始化,实例化非延迟加载的单例bean等
 1 @Override
 2 public void refresh() throws BeansException, IllegalStateException {
 3     synchronized (this.startupShutdownMonitor) {
 4         // Prepare this context for refreshing.
 5         prepareRefresh();
 6
 7         // Tell the subclass to refresh the internal bean factory.
 8         ConfigurableListableBeanFactory beanFactory = obtainFreshBeanFactory();
 9
10         // Prepare the bean factory for use in this context.
11         prepareBeanFactory(beanFactory);
12
13         try {
14             // Allows post-processing of the bean factory in context subclasses.
15             postProcessBeanFactory(beanFactory);
16
17             // Invoke factory processors registered as beans in the context.
18             invokeBeanFactoryPostProcessors(beanFactory);
19
20             // Register bean processors that intercept bean creation.
21             registerBeanPostProcessors(beanFactory);
22
23             // Initialize message source for this context.
24             initMessageSource();
25
26             // Initialize event multicaster for this context.
27             initApplicationEventMulticaster();
28
29             // Initialize other special beans in specific context subclasses.
30             onRefresh();
31
32             // Check for listener beans and register them.
33             registerListeners();
34
35             // Instantiate all remaining (non-lazy-init) singletons.
36             finishBeanFactoryInitialization(beanFactory);
37
38             // Last step: publish corresponding event.
39             finishRefresh();
40         }
41
42         catch (BeansException ex) {
43             if (logger.isWarnEnabled()) {
44                 logger.warn("Exception encountered during context initialization - " +
45                         "cancelling refresh attempt: " + ex);
46             }
47
48             // Destroy already created singletons to avoid dangling resources.
49             destroyBeans();
50
51             // Reset 'active' flag.
52             cancelRefresh(ex);
53
54             // Propagate exception to caller.
55             throw ex;
56         }
57
58         finally {
59             // Reset common introspection caches in Spring's core, since we
60             // might not ever need metadata for singleton beans anymore...
61             resetCommonCaches();
62         }
63     }
64 }
第3行使用synchronized关键字拿到startupShutdownMonitor的锁,close方法的第一行也是先获取该锁,说明启动容器和关闭容器都是同步操作的,是线程安全的
第5行调用prepareRefresh方法,该方法主要是做些准备工作,例如清空缓存,记录容器启动的时间,设置closed为false,设置active为true,初始化属性信息,验证必要的属性
这里的初始化属性信息和验证必要的属性方法默认是不做任何事情的,但有时候系统运行需要读取某些系统属性,没有这些属性,系统将运行不正常,这个时候,在创建容器之前就要对这些必须的属性做个验证,比如自己实现一个ApplicationContext并覆盖initPropertySources方法
1 public class MyApplicationContext extends AnnotationConfigEmbeddedWebApplicationContext {
2     protected void initPropertySources() {
3         getEnvironment().setRequiredProperties("dylan.required");
4     }
5 }
然后SpringApplication启动的方式也改下
1 @SpringBootApplication(exclude = {DataSourceAutoConfiguration.class})
2 public class Application {
3     public static void main(String[] args) {
4         SpringApplication springApplication = new SpringApplication(new Object[] {Application.class});
5         springApplication.setApplicationContextClass(MyApplicationContext.class);
6         springApplication.run(args);
7     }
8 }
那么当运行到initPropertySources();这个方法时,会调用自定义的ApplicationContext的initPropertySources方法,向environment中添加必要的属性,而运行getEnvironment().validateRequiredProperties();这个方法的时候,就会检查是否配置了"dylan.required"属性,如果没有配置,那么会抛出异常,容器启动失败
第8行通过obtainFreshBeanFactory方法获取到beanFactory
1 protected ConfigurableListableBeanFactory obtainFreshBeanFactory() {
2     refreshBeanFactory();
3     ConfigurableListableBeanFactory beanFactory = getBeanFactory();
4     if (logger.isDebugEnabled()) {
5         logger.debug("Bean factory for " + getDisplayName() + ": " + beanFactory);
6     }
7     return beanFactory;
8 }
refreshBeanFactory方法把refreshed属性设置成true,表示已经刷新了,下次再刷新就会抛出异常,不允许重复刷新,然后给beanFactory设置serializationId,就是之前通过ContextIdApplicationContextInitializer生成的id
getBeanFactory方法拿到ApplicationContext的beanFactory(之前创建上下文的时候,也就是调用createApplicationContext方法,GenericApplicationContext的构造函数里会实例化一个DefaultListableBeanFactory对象),然后返回
1 public GenericApplicationContext() {
2     this.beanFactory = new DefaultListableBeanFactory();
3 }
第11行调用prepareBeanFactory方法,该方法对beanFactory进行一系列的设置
 1 protected void prepareBeanFactory(ConfigurableListableBeanFactory beanFactory) {
 2     // Tell the internal bean factory to use the context's class loader etc.
 3     beanFactory.setBeanClassLoader(getClassLoader());
 4     beanFactory.setBeanExpressionResolver(new StandardBeanExpressionResolver(beanFactory.getBeanClassLoader()));
 5     beanFactory.addPropertyEditorRegistrar(new ResourceEditorRegistrar(this, getEnvironment()));
 6
 7     // Configure the bean factory with context callbacks.
 8     beanFactory.addBeanPostProcessor(new ApplicationContextAwareProcessor(this));
 9     beanFactory.ignoreDependencyInterface(EnvironmentAware.class);
10     beanFactory.ignoreDependencyInterface(EmbeddedValueResolverAware.class);
11     beanFactory.ignoreDependencyInterface(ResourceLoaderAware.class);
12     beanFactory.ignoreDependencyInterface(ApplicationEventPublisherAware.class);
13     beanFactory.ignoreDependencyInterface(MessageSourceAware.class);
14     beanFactory.ignoreDependencyInterface(ApplicationContextAware.class);
15
16     // BeanFactory interface not registered as resolvable type in a plain factory.
17     // MessageSource registered (and found for autowiring) as a bean.
18     beanFactory.registerResolvableDependency(BeanFactory.class, beanFactory);
19     beanFactory.registerResolvableDependency(ResourceLoader.class, this);
20     beanFactory.registerResolvableDependency(ApplicationEventPublisher.class, this);
21     beanFactory.registerResolvableDependency(ApplicationContext.class, this);
22
23     // Register early post-processor for detecting inner beans as ApplicationListeners.
24     beanFactory.addBeanPostProcessor(new ApplicationListenerDetector(this));
25
26     // Detect a LoadTimeWeaver and prepare for weaving, if found.
27     if (beanFactory.containsBean(LOAD_TIME_WEAVER_BEAN_NAME)) {
28         beanFactory.addBeanPostProcessor(new LoadTimeWeaverAwareProcessor(beanFactory));
29         // Set a temporary ClassLoader for type matching.
30         beanFactory.setTempClassLoader(new ContextTypeMatchClassLoader(beanFactory.getBeanClassLoader()));
31     }
32
33     // Register default environment beans.
34     if (!beanFactory.containsLocalBean(ENVIRONMENT_BEAN_NAME)) {
35         beanFactory.registerSingleton(ENVIRONMENT_BEAN_NAME, getEnvironment());
36     }
37     if (!beanFactory.containsLocalBean(SYSTEM_PROPERTIES_BEAN_NAME)) {
38         beanFactory.registerSingleton(SYSTEM_PROPERTIES_BEAN_NAME, getEnvironment().getSystemProperties());
39     }
40     if (!beanFactory.containsLocalBean(SYSTEM_ENVIRONMENT_BEAN_NAME)) {
41         beanFactory.registerSingleton(SYSTEM_ENVIRONMENT_BEAN_NAME, getEnvironment().getSystemEnvironment());
42     }
43 }
首先设置用于加载bean的类加载器,再设置可以解析bean表达式的表达式解析器(使用"#{xxx}"配置的属性),然后添加属性注册器,并添加了一个BeanPostProcessor - ApplicationContextAwareProcessor的实例
接着设置了6个忽略自动注入的接口(EnvironmentAware、EmbeddedValueResolverAware、ResourceLoaderAware、ApplicationEventPublisherAware、MessageSourceAware、ApplicationContextAware),为什么要忽略呢?因为上一步添加的BeanPostProcessor - ApplicationContextAwareProcessor,BeanPostProcessor会在会在bean初始化前后调用相应的方法,我们看一下ApplicationContextAwareProcessor的代码
 1 @Override
 2 public Object postProcessBeforeInitialization(final Object bean, String beanName) throws BeansException {
 3     AccessControlContext acc = null;
 4
 5     if (System.getSecurityManager() != null &&
 6             (bean instanceof EnvironmentAware || bean instanceof EmbeddedValueResolverAware ||
 7                     bean instanceof ResourceLoaderAware || bean instanceof ApplicationEventPublisherAware ||
 8                     bean instanceof MessageSourceAware || bean instanceof ApplicationContextAware)) {
 9         acc = this.applicationContext.getBeanFactory().getAccessControlContext();
10     }
11
12     if (acc != null) {
13         AccessController.doPrivileged(new PrivilegedAction<Object>() {
14             @Override
15             public Object run() {
16                 invokeAwareInterfaces(bean);
17                 return null;
18             }
19         }, acc);
20     }
21     else {
22         invokeAwareInterfaces(bean);
23     }
24
25     return bean;
26 }
27
28 private void invokeAwareInterfaces(Object bean) {
29     if (bean instanceof Aware) {
30         if (bean instanceof EnvironmentAware) {
31             ((EnvironmentAware) bean).setEnvironment(this.applicationContext.getEnvironment());
32         }
33         if (bean instanceof EmbeddedValueResolverAware) {
34             ((EmbeddedValueResolverAware) bean).setEmbeddedValueResolver(this.embeddedValueResolver);
35         }
36         if (bean instanceof ResourceLoaderAware) {
37             ((ResourceLoaderAware) bean).setResourceLoader(this.applicationContext);
38         }
39         if (bean instanceof ApplicationEventPublisherAware) {
40             ((ApplicationEventPublisherAware) bean).setApplicationEventPublisher(this.applicationContext);
41         }
42         if (bean instanceof MessageSourceAware) {
43             ((MessageSourceAware) bean).setMessageSource(this.applicationContext);
44         }
45         if (bean instanceof ApplicationContextAware) {
46             ((ApplicationContextAware) bean).setApplicationContext(this.applicationContext);
47         }
48     }
49 }
从上面红色标注的代码可以看出,在ApplicationContextAwareProcessor的postProcessBeforeInitialization方法里刚好帮我们做了这6个被忽略的Aware接口需要感知的动作
接下来的4行设置了几个自动装配的特殊规则,如果注入的是BeanFactory类型,则注入beanFactory对象,如果是ResourceLoader、ApplicationEventPublisher、ApplicationContext类型,则注入当前对象(Spring上下文 - context)
然后又注册了一个BeanPostProcessor - ApplicationListenerDetector,我们看下ApplicationListenerDetector的代码
1 @Override
2 public void postProcessMergedBeanDefinition(RootBeanDefinition beanDefinition, Class<?> beanType, String beanName) {
3     if (this.applicationContext != null) {
4         this.singletonNames.put(beanName, beanDefinition.isSingleton());
5     }
6 }
postProcessMergedBeanDefinition方法在什么时候调用的呢?DEBUG跟进代码可知,是doCreateBean -> applyMergedBeanDefinitionPostProcessors -> postProcessMergedBeanDefinition,该方法会往singletonNames属性添加以beanName为key、该bean定义是否为单例为value的键值对
 1 @Override
 2 public Object postProcessAfterInitialization(Object bean, String beanName) {
 3     if (this.applicationContext != null && bean instanceof ApplicationListener) {
 4         // potentially not detected as a listener by getBeanNamesForType retrieval
 5         Boolean flag = this.singletonNames.get(beanName);
 6         if (Boolean.TRUE.equals(flag)) {
 7             // singleton bean (top-level or inner): register on the fly
 8             this.applicationContext.addApplicationListener((ApplicationListener<?>) bean);
 9         }
10         else if (Boolean.FALSE.equals(flag)) {
11             if (logger.isWarnEnabled() && !this.applicationContext.containsBean(beanName)) {
12                 // inner bean with other scope - can't reliably process events
13                 logger.warn("Inner bean '" + beanName + "' implements ApplicationListener interface " +
14                         "but is not reachable for event multicasting by its containing ApplicationContext " +
15                         "because it does not have singleton scope. Only top-level listener beans are allowed " +
16                         "to be of non-singleton scope.");
17             }
18             this.singletonNames.remove(beanName);
19         }
20     }
21     return bean;
22 }
该BeanPostProcessor在bean初始化后,会检查该bean是否是ApplicationListener,如果是,那么会验证它是否是单例,如果不是单例,那么删除singletonNames中对应的key,这也正如它的名字一样 - ApplicationListener探测器
接着往下看
如果beanFactory中有名字是loadTimeWeaver的bean,那么注册一个BeanPostProcessor - LoadTimeWeaverAwareProcessor
LoadTimeWeaverAwareProcessor的代码
 1 @Override
 2 public Object postProcessBeforeInitialization(Object bean, String beanName) throws BeansException {
 3     if (bean instanceof LoadTimeWeaverAware) {
 4         LoadTimeWeaver ltw = this.loadTimeWeaver;
 5         if (ltw == null) {
 6             Assert.state(this.beanFactory != null,
 7                     "BeanFactory required if no LoadTimeWeaver explicitly specified");
 8             ltw = this.beanFactory.getBean(
 9                     ConfigurableApplicationContext.LOAD_TIME_WEAVER_BEAN_NAME, LoadTimeWeaver.class);
10         }
11         ((LoadTimeWeaverAware) bean).setLoadTimeWeaver(ltw);
12     }
13     return bean;
14 }
该BeanPostProcessor只对LoadTimeWeaverAware类型的bean做特殊处理,查了下Spring中实现LoadTimeWeaverAware接口的类,只有AspectJWeavingEnabler,在Spring中调用AspectJWeavingEnabler时,this.loadTimeWeaver尚未被初始化,那么会直接调用this.beanFactory.getBean方法获取对应的DefaultContextLoadTimeWeaver类型的bean,并设置到AspectJWeavingEnabler类型bean的loadTimeWeaver属性中。当容器中注册了loadTimeWeaver之后会给容器设置一个ContextTypeMatchClassLoader类型的临时类加载器,在织入切面时只有在bean实例化时织入切面才有意义,在进行一些类型比较或者校验的时候,比如判断一个bean是否是FactoryBean、BPP、BFPP,这时候不涉及到实例化,所以做字节码转换没有任何意义,而且还会增加无谓的性能消耗,所以在进行这些类型比较时使用这个临时的类加载器执行类加载。这个临时的类加载器会在容器初始化快结束时,容器bean实例化之前被清掉,代码在AbstractApplicationContext类的finishBeanFactoryInitialization方法
 1 protected void finishBeanFactoryInitialization(ConfigurableListableBeanFactory beanFactory) {
 2     ...
 3
 4     // Stop using the temporary ClassLoader for type matching.
 5     beanFactory.setTempClassLoader(null);
 6
 7     // Allow for caching all bean definition metadata, not expecting further changes.
 8     beanFactory.freezeConfiguration();
 9
10     // Instantiate all remaining (non-lazy-init) singletons.
11     beanFactory.preInstantiateSingletons();
12 }
设置完loadTimeWeaver后,再判断当前beanFactory是否含有名字为environment的bean,如果没有,那么把当前的environment注册进去
接着判断当前beanFactory是否含有名字为systemProperties的bean,如果没有,那么把System.getProperties()注册进去
最后判断当前beanFactory是否含有名字为systemEnvironment的bean,如果没有,那么把System.getenv()注册进去
至此refresh的prepareBeanFactory方法结束,再往下看refresh方法
第15行调用postProcessBeanFactory方法,该方法最终会调用到EmbeddedWebApplicationContext的postProcessBeanFactory方法,给beanFactory添加一个WebApplicationContextServletContextAwareProcessor类型的BeanPostProcessor,并添加了一个忽略装配的接口ServletContextAware,原理跟之前prepareBeanFactory方法分析的一样,WebApplicationContextServletContextAwareProcessor继承了ServletContextAwareProcessor,而ServletContextAwareProcessor的postProcessBeforeInitialization方法代码已经做了ServletContextAware该做的事情
 1 @Override
 2 public Object postProcessBeforeInitialization(Object bean, String beanName) throws BeansException {
 3     if (getServletContext() != null && bean instanceof ServletContextAware) {
 4         ((ServletContextAware) bean).setServletContext(getServletContext());
 5     }
 6     if (getServletConfig() != null && bean instanceof ServletConfigAware) {
 7         ((ServletConfigAware) bean).setServletConfig(getServletConfig());
 8     }
 9     return bean;
10 }
检查basePackages属性,如果设置了会使用ClassPathBeanDefinitionScanner扫描basePackages并注册被扫描到的bean
检查annotatedClasses属性,如果设置了会使用AnnotatedBeanDefinitionReader注册这些类型的bean
第18行调用invokeBeanFactoryPostProcessors方法,该方法主要是执行bean工厂的后置处理
首先,获取上下的beanFactoryPostProcessors,笔者在DEBUG的时候,发现此时有3个

这3个BeanFactoryPostProcessor是什么时候加进去的呢,前两个其实就是之前分析过的SpringApplication的run方法中调用prepareContext设置上下文的时候,其中有一步applyInitializers,在调用ConfigurationWarningsApplicationContextInitializer和SharedMetadataReaderFactoryContextInitializer的initialize方法中添加进去的,至于第3个,则是在listeners.contextLoaded(context);方法中被添加的,contextLoaded会发布ApplicationPreparedEvent事件,刚好被ConfigFileApplicationListener监听到,而ConfigFileApplicationListener的onApplicationEvent的方法中又会调用onApplicationPreparedEvent方法,没错,就是这个方法添加了PropertySourceOrderingPostProcessor
回归正题,获取到上下文的beanFactoryPostProcessors后,调用了PostProcessorRegistrationDelegate的静态方法invokeBeanFactoryPostProcessors,下面来详细分析一下这个方法
首先判断beanFactory是不是BeanDefinitionRegistry类型的,如果beanFactory是BeanDefinitionRegistry类型的实现类,那么
- 第一步,遍历上下文获取到的beanFactoryPostProcessors,如果是BeanDefinitionRegistryPostProcessor类型的,那么调用该postProcessor的postProcessBeanDefinitionRegistry方法
- 第二步,在beanFactory中查询BeanDefinitionRegistryPostProcessor类型的beanName数组,如果是实现了PriorityOrdered接口,那么获取bean并添加到priorityOrderedPostProcessors集合中,对其排序,并调用它的postProcessBeanDefinitionRegistry方法
- 第三步,在beanFactory中查询BeanDefinitionRegistryPostProcessor类型的beanName数组,如果之前没有处理过该bean(即没有实现PriorityOrdered接口)并实现了Ordered接口,那么获取bean并添加到orderedPostProcessors集合中,对其排序,并调用它的postProcessBeanDefinitionRegistry方法
- 第四步,在beanFactory中查询BeanDefinitionRegistryPostProcessor类型的beanName数组,如果之前没有处理过该bean(即没有实现PriorityOrdered和Ordered接口),那么获取bean,并调用它的postProcessBeanDefinitionRegistry方法
- 第五步,对上面调用了postProcessBeanDefinitionRegistry的后置处理器,调用postProcessBeanFactory方法
- 第六步,对在第一步中讲到的遍历beanFactoryPostProcessors后,不是BeanDefinitionRegistryPostProcessor类型的,那么调用它们的postProcessBeanFactory方法
如果beanFactory不是BeanDefinitionRegistry类型的实现类,那么直接遍历上下文获取到的beanFactoryPostProcessors,调用它们的postProcessBeanFactory方法
接下来,处理BeanFactoryPostProcessor,在beanFactory中查询BeanFactoryPostProcessor类型的beanName数组,遍历该数组,如果之前处理过,直接跳过,否则,获取实现了PriorityOrdered接口的bean,排序并调用它们的postProcessBeanFactory方法,再获取实现了Ordered接口的bean,排序并调用它们的postProcessBeanFactory方法,最后,获取没有实现PriorityOrdered和Ordered接口的bean,调用它们的postProcessBeanFactory方法
方法的最后,清空了beanFactory的缓存
总结一下该方法,其实就是按照一定的顺序,执行BeanFactoryPostProcessor接口的postProcessBeanFactory方法,BeanDefinitionRegistryPostProcessor接口继承了BeanFactoryPostProcessor接口,并定义了postProcessBeanDefinitionRegistry方法
顺序总结如下
1、上下文中beanFactoryPostProcessors并实现了BeanDefinitionRegistryPostProcessor接口 -> postProcessBeanDefinitionRegistry方法
2、beanFactory中实现了PriorityOrdered接口的BeanDefinitionRegistryPostProcessor -> postProcessBeanDefinitionRegistry方法
3、beanFactory中实现了Ordered接口的BeanDefinitionRegistryPostProcessor -> postProcessBeanDefinitionRegistry方法
4、beanFactory中没有实现PriorityOrdered和Ordered接口的BeanDefinitionRegistryPostProcessor -> postProcessBeanDefinitionRegistry方法
5、beanFactory中实现了PriorityOrdered接口的BeanDefinitionRegistryPostProcessor -> postProcessBeanFactory方法
6、beanFactory中实现了Ordered接口的BeanDefinitionRegistryPostProcessor -> postProcessBeanFactory方法
7、beanFactory中没有实现PriorityOrdered和Ordered接口的BeanDefinitionRegistryPostProcessor -> postProcessBeanFactory方法
8、上下文中beanFactoryPostProcessors没有实现BeanDefinitionRegistryPostProcessor接口 -> postProcessBeanFactory方法
9、beanFactory中实现了PriorityOrdered接口的BeanFactoryPostProcessor -> postProcessBeanFactory方法
10、beanFactory中实现了Ordered接口的BeanFactoryPostProcessor -> postProcessBeanFactory方法
11、beanFactory中没有实现PriorityOrdered和Ordered接口的BeanFactoryPostProcessor -> postProcessBeanFactory方法
可以看出,BeanDefinitionRegistryPostProcessor接口的postProcessBeanDefinitionRegistry方法要先于BeanFactoryPostProcessor接口的postProcessBeanFactory方法,它们都可以在Spring容器加载了bean的定义之后,在bean实例化之前,对bean的元数据进行修改
第21行调用registerBeanPostProcessors方法,该方法主要是注册bean的后置处理器
调用PostProcessorRegistrationDelegate的静态方法registerBeanPostProcessors

 浙公网安备 33010602011771号