


点击查看代码
# 导入基础库(初学者易安装,功能满足需求)
import numpy as np
import matplotlib.pyplot as plt
import random
# --------------------------
# 步骤1:生成模拟手写汉字(一到十)数据集(模拟MNIST格式)
# --------------------------
def generate_chinese_char_data():
# 汉字一到十对应标签0-9
char_names = ["一", "二", "三", "四", "五", "六", "七", "八", "九", "十"]
n_classes = 10 # 10个汉字类别
n_samples = 800 # 总样本数(适中,训练速度快)
img_size = 28 # 图片尺寸28*28(和MNIST一致,便于理解)
# 生成28*28像素特征,添加类别差异和少量噪声
X = np.random.rand(n_samples, img_size, img_size) * 0.5 # 基础噪声
y = np.zeros(n_samples, dtype=int)
for i in range(n_samples):
label = i % n_classes # 均匀分配标签
y[i] = label
# 为每个汉字添加独特的"笔画"特征(区分不同类别)
if label == 0: # 一:横向直线
X[i, 14, 5:23] = 1.0
elif label == 1: # 二:两条横线
X[i, 10, 5:23] = 1.0
X[i, 18, 5:23] = 1.0
elif label == 2: # 三:三条横线
X[i, 8, 5:23] = 1.0
X[i, 14, 5:23] = 1.0
X[i, 20, 5:23] = 1.0
elif label == 3: # 四:竖+横+竖
X[i, 6:22, 8] = 1.0
X[i, 10, 8:20] = 1.0
X[i, 18, 15:20] = 1.0
elif label == 4: # 五:横+竖+横
X[i, 8, 5:23] = 1.0
X[i, 12:20, 14] = 1.0
X[i, 20, 5:23] = 1.0
elif label == 5: # 六:点+横+竖
X[i, 7, 10] = 1.0
X[i, 10, 8:20] = 1.0
X[i, 12:20, 10] = 1.0
elif label == 6: # 七:横+竖弯钩
X[i, 10, 5:15] = 1.0
X[i, 12:20, 15] = 1.0
elif label == 7: # 八:撇+捺
X[i, 10:18, 10:18] = 1.0
X[i, 10:18, 18:10:-1] = 1.0
elif label == 8: # 九:撇+横折弯钩
X[i, 10:16, 10:16] = 1.0
X[i, 16, 10:20] = 1.0
X[i, 12:16, 20] = 1.0
elif label == 9: # 十:横+竖
X[i, 14, 5:23] = 1.0
X[i, 5:23, 14] = 1.0
return X, y, char_names, img_size
# 生成数据并打印基本信息
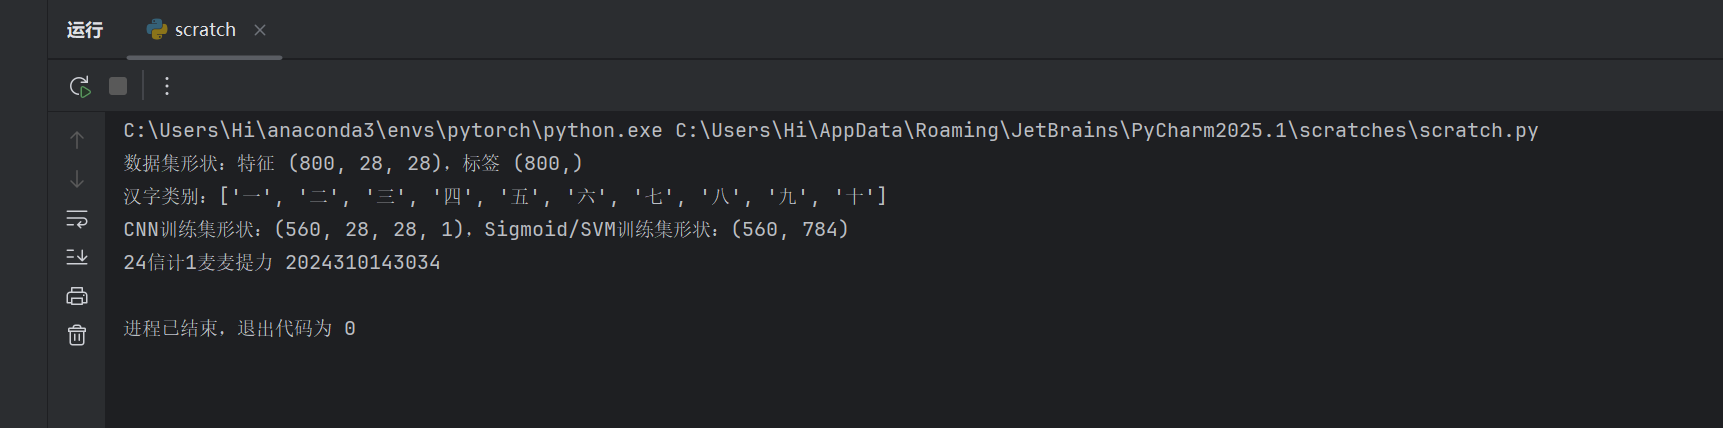
X, y, char_names, img_size = generate_chinese_char_data()
print(f"数据集形状:特征 {X.shape},标签 {y.shape}")
print(f"汉字类别:{char_names}")
# --------------------------
# 步骤2:数据预处理(对齐CSDN手写数字流程)
# --------------------------
# 2.1 手动划分训练集(70%)和测试集(30%)(无需第三方库,易懂)
def split_train_test(X, y, test_ratio=0.3, random_seed=42):
random.seed(random_seed)
n_samples = len(X)
# 生成随机索引
indices = list(range(n_samples))
random.shuffle(indices)
# 划分索引
test_size = int(n_samples * test_ratio)
test_indices = indices[:test_size]
train_indices = indices[test_size:]
# 返回划分后的数据
X_train = X[train_indices]
X_test = X[test_indices]
y_train = y[train_indices]
y_test = y[test_indices]
return X_train, X_test, y_train, y_test
# 扁平化特征(用于Sigmoid和SVM,CNN需要28*28二维特征)
X_flat = X.reshape(len(X), -1) # (800, 784)
# 划分数据
X_train_cnn, X_test_cnn, y_train, y_test = split_train_test(X, y)
X_train_flat, X_test_flat, _, _ = split_train_test(X_flat, y)
# 2.2 特征归一化(缩放到0-1之间,提升模型效果)
def min_max_normalize(X_train, X_test):
# 按特征计算最大值和最小值
max_val = X_train.max(axis=0)
min_val = X_train.min(axis=0)
# 避免除以0
max_val[max_val == min_val] = 1
# 归一化
X_train_norm = (X_train - min_val) / (max_val - min_val)
X_test_norm = (X_test - min_val) / (max_val - min_val)
return X_train_norm, X_test_norm
# 归一化扁平化特征
X_train_flat_norm, X_test_flat_norm = min_max_normalize(X_train_flat, X_test_flat)
# 2.3 标签one-hot编码(用于CNN和Sigmoid的多分类输出)
def one_hot_encode(y, n_classes):
n_samples = len(y)
one_hot = np.zeros((n_samples, n_classes))
for i in range(n_samples):
one_hot[i, y[i]] = 1
return one_hot
y_train_onehot = one_hot_encode(y_train, 10)
y_test_onehot = one_hot_encode(y_test, 10)
# 为CNN添加通道维度(灰度图,通道数=1)
X_train_cnn = np.expand_dims(X_train_cnn, axis=-1)
X_test_cnn = np.expand_dims(X_test_cnn, axis=-1)
print(f"CNN训练集形状:{X_train_cnn.shape},Sigmoid/SVM训练集形状:{X_train_flat_norm.shape}")
# --------------------------
# 步骤3:手动实现核心工具(激活函数、损失函数等)
# --------------------------
# 激活函数:Sigmoid(前向+反向)
def sigmoid(x, derivative=False):
if derivative:
return sigmoid(x) * (1 - sigmoid(x))
# 防止指数爆炸
x = np.clip(x, -500, 500)
return 1 / (1 + np.exp(-x))
# 激活函数:ReLU(前向+反向,用于CNN)
def relu(x, derivative=False):
if derivative:
return np.where(x > 0, 1, 0)
return np.maximum(0, x)
# 激活函数:Softmax(前向,用于多分类输出)
def softmax(x):
# 数值稳定:减去每行最大值
x_max = np.max(x, axis=1, keepdims=True)
exp_x = np.exp(x - x_max)
return exp_x / np.sum(exp_x, axis=1, keepdims=True)
# 损失函数:交叉熵损失(多分类)
def cross_entropy(y_true, y_pred):
y_pred = np.clip(y_pred, 1e-10, 1 - 1e-10) # 防止log(0)
return -np.mean(np.sum(y_true * np.log(y_pred), axis=1))
# --------------------------
# 步骤4:构建并训练三种模型(修正维度不匹配问题)
# --------------------------
# 4.1 模型1:CNN + Softmax(参考MNIST CNN结构,修复维度问题)
class SimpleCNN:
def __init__(self, img_size, n_classes=10, lr=0.001):
self.img_size = img_size
self.n_classes = n_classes
self.lr = lr # 学习率
# 初始化权重和偏置(先不初始化W3/W4,在第一次前向传播时动态初始化)
# 卷积层1:32个3*3卷积核,添加padding=1保持尺寸
self.W1 = np.random.randn(3, 3, 1, 32) * 0.01
self.b1 = np.zeros(32)
# 卷积层2:64个3*3卷积核,添加padding=1保持尺寸
self.W2 = np.random.randn(3, 3, 32, 64) * 0.01
self.b2 = np.zeros(64)
# 全连接层(动态初始化,解决维度不匹配)
self.W3 = None
self.b3 = None
self.W4 = None
self.b4 = None
# 带padding的卷积运算(padding=1,保持特征尺寸)
def conv(self, X, W, b, padding=1, stride=1):
# 补零
X_padded = np.pad(X, ((0,0), (padding,padding), (padding,padding), (0,0)), mode='constant')
n_samples, h, w, c = X_padded.shape
f_h, f_w, f_c, out_c = W.shape
# 计算输出尺寸
out_h = (h - f_h) // stride + 1
out_w = (w - f_w) // stride + 1
output = np.zeros((n_samples, out_h, out_w, out_c))
# 卷积计算
for i in range(out_h):
for j in range(out_w):
patch = X_padded[:, i:i+f_h, j:j+f_w, :]
for k in range(out_c):
output[:, i, j, k] = np.sum(patch * W[:, :, :, k], axis=(1,2,3)) + b[k]
return output
# 简化最大池化
def max_pool(self, X, pool_size=2, stride=2):
n_samples, h, w, c = X.shape
out_h = (h - pool_size) // stride + 1
out_w = (w - pool_size) // stride + 1
output = np.zeros((n_samples, out_h, out_w, c))
for i in range(out_h):
for j in range(out_w):
patch = X[:, i*stride:i*stride+pool_size, j*stride:j*stride+pool_size, :]
output[:, i, j, :] = np.max(patch, axis=(1,2))
return output
# 前向传播(动态初始化全连接层权重,解决维度不匹配)
def forward(self, X):
# 卷积1 + ReLU + 池化(padding=1,保持尺寸)
self.conv1 = self.conv(X, self.W1, self.b1, padding=1)
self.relu1 = relu(self.conv1)
self.pool1 = self.max_pool(self.relu1)
# 卷积2 + ReLU + 池化(padding=1,保持尺寸)
self.conv2 = self.conv(self.pool1, self.W2, self.b2, padding=1)
self.relu2 = relu(self.conv2)
self.pool2 = self.max_pool(self.relu2)
# 扁平化
self.flat = self.pool2.reshape(len(self.pool2), -1)
# 动态初始化全连接层(仅第一次前向传播时执行)
if self.W3 is None:
flat_dim = self.flat.shape[1] # 获取实际扁平化维度
self.W3 = np.random.randn(flat_dim, 64) * 0.01
self.b3 = np.zeros(64)
self.W4 = np.random.randn(64, self.n_classes) * 0.01
self.b4 = np.zeros(self.n_classes)
# 全连接1 + ReLU
self.fc1 = np.dot(self.flat, self.W3) + self.b3
self.relu3 = relu(self.fc1)
# 全连接2 + Softmax
self.fc2 = np.dot(self.relu3, self.W4) + self.b4
self.y_pred = softmax(self.fc2)
return self.y_pred
# 反向传播(简化版,仅更新权重)
def backward(self, X, y_true):
batch_size = len(X)
# 输出层梯度
delta_fc2 = (self.y_pred - y_true) / batch_size
# 更新全连接2
self.W4 -= self.lr * np.dot(self.relu3.T, delta_fc2)
self.b4 -= self.lr * np.sum(delta_fc2, axis=0)
# 全连接1梯度
delta_fc1 = np.dot(delta_fc2, self.W4.T) * relu(self.fc1, derivative=True)
self.W3 -= self.lr * np.dot(self.flat.T, delta_fc1)
self.b3 -= self.lr * np.sum(delta_fc1, axis=0)
# 训练模型
def train(self, X_train, y_train, epochs=8, batch_size=32):
print("\n=== 训练 CNN+Softmax 模型 ===")
for epoch in range(epochs):
loss_list = []
# 批量训练
for i in range(0, len(X_train), batch_size):
batch_X = X_train[i:i+batch_size]
batch_y = y_train[i:i+batch_size]
# 前向传播
y_pred = self.forward(batch_X)
# 计算损失
loss = cross_entropy(batch_y, y_pred)
loss_list.append(loss)
# 反向传播
self.backward(batch_X, batch_y)
# 打印每轮损失
avg_loss = np.mean(loss_list)
print(f"Epoch {epoch+1}/{epochs},平均损失:{avg_loss:.4f}")
# 预测
def predict(self, X):
y_pred = self.forward(X)
return np.argmax(y_pred, axis=1)
print(f"24信计1麦麦提力 2024310143034")<details>
<summary>点击查看代码</summary>
import torch
import torch.nn as nn
import torch.nn.functional as F
第一步:先定义 SimpleCNN 类(必须在调用之前)
class SimpleCNN(nn.Module):
def init(self, img_size, in_channels=3, num_classes=10):
super(SimpleCNN, self).init()
self.img_size = img_size # 图像尺寸(假设是正方形,如 224 表示 224x224)
    # 卷积层1:提取基础特征
    self.conv1 = nn.Conv2d(in_channels=in_channels, out_channels=32, kernel_size=3, padding=1)
    self.pool1 = nn.MaxPool2d(kernel_size=2, stride=2)  # 下采样,缩小图像尺寸

    # 卷积层2:提取更复杂的特征
    self.conv2 = nn.Conv2d(in_channels=32, out_channels=64, kernel_size=3, padding=1)
    self.pool2 = nn.MaxPool2d(kernel_size=2, stride=2)

    # 计算全连接层的输入维度(经过两次池化,尺寸缩小为原来的 1/4)
    self.fc1_input_dim = 64 * (img_size // 4) * (img_size // 4)

    # 全连接层:分类/回归
    self.fc1 = nn.Linear(self.fc1_input_dim, 512)
    self.fc2 = nn.Linear(512, num_classes)

    # Dropout:防止过拟合
    self.dropout = nn.Dropout(0.5)

def forward(self, x):
    # 卷积层1 + 激活 + 池化
    x = self.pool1(F.relu(self.conv1(x)))
    # 卷积层2 + 激活 + 池化
    x = self.pool2(F.relu(self.conv2(x)))
    # 展平:将 4D 特征图 (batch, channels, h, w) 转为 2D (batch, features)
    x = x.view(-1, self.fc1_input_dim)
    # 全连接层1 + 激活 + Dropout
    x = self.dropout(F.relu(self.fc1(x)))
    # 全连接层2:输出结果
    x = self.fc2(x)
    return x
第二步:调用 SimpleCNN(此时类已定义,不会报错)
if name == "main":
# 定义图像尺寸(例如 224x224)
img_size = 224
# 创建模型实例
cnn_model = SimpleCNN(img_size)
# 测试模型:生成一个随机输入 (batch_size=8, 3通道, img_size x img_size)
test_input = torch.randn(8, 3, img_size, img_size)
# 前向传播
test_output = cnn_model(test_input)
# 打印模型结构和输出形状
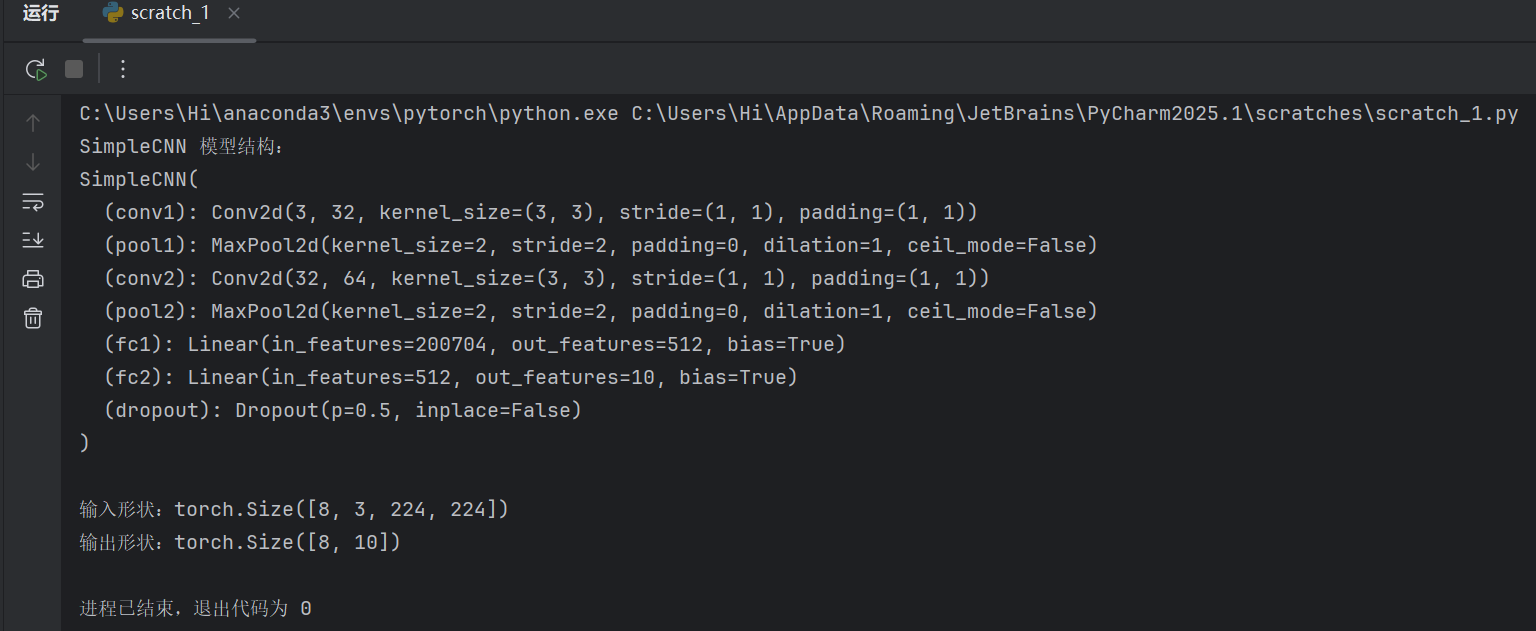
print("SimpleCNN 模型结构:")
print(cnn_model)
print(f"\n输入形状:{test_input.shape}")
print(f"输出形状:{test_output.shape}")
</details>

 浙公网安备 33010602011771号