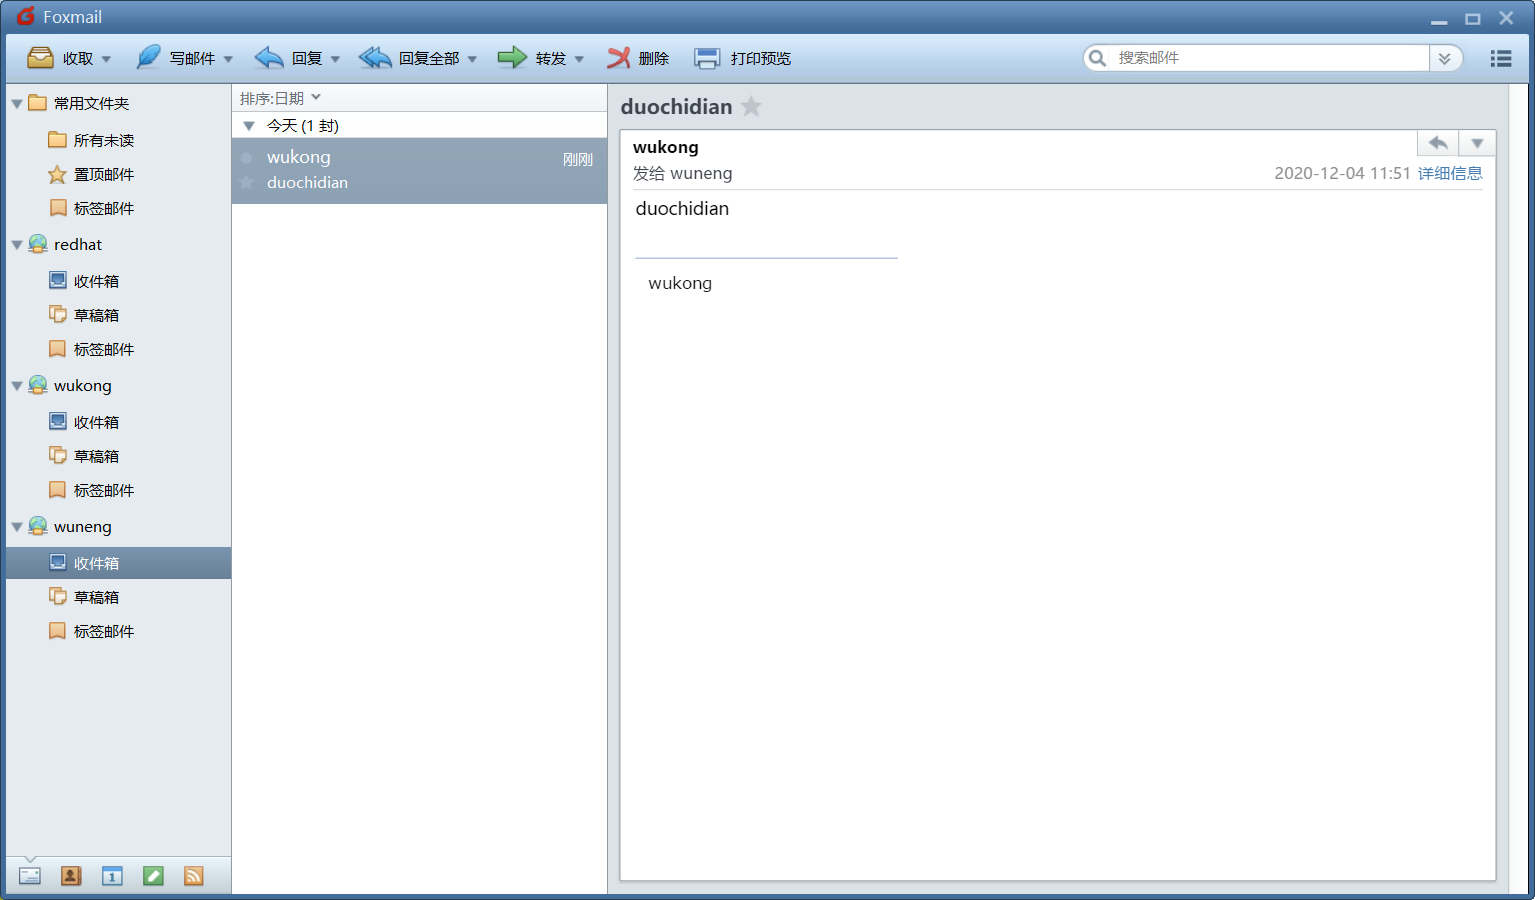
搭建邮件服务器,在foxmail上使用wukong@ceshi.com给wuneng@ceshi.com用户发一封邮件,内容为biechile。
1.装包,关闭防火墙,selinux
yum install -y postfix
systemctl stop firewalld
setenforce 0
2.编辑配置文件
vim /etc/postfix/main.cf
94 myhostname = mail.ceshi.com  -编辑主机名
102 mydomain = ceshi.com        -配置域名
118 myorigin = $mydomain        -指定发送邮件时显示的域名
132 inet_interfaces = all       -指定监听端口
184 mydestination = $myhostname, localhost.$mydomain, localhost, $mydomain -指定别人给你发邮件应该写什么主机名
283 mynetworks = 192.168.124.0/24, 127.0.0.0/8 -指定信任的客户端
315 relay_domains = $mydestination -指定可以帮忙转发的MTA主机
3.重启服务
[root@localhost ~]# systemctl restart postfix
4.安装dovecot包,编辑主配置文件
yum install -y dovecot
[root@localhost ~]# vim /etc/dovecot/dovecot.conf
24 protocols = imap pop3 lmtp
48 login_trusted_networks = 192.168.124.0/24 -设置允许登录的ip段
[root@localhost ~]# vim /etc/dovecot/conf.d/10-mail.conf -编辑文件
25    mail_location = mbox:~/mail:INBOX=/var/mail/%u -用户邮件所在地
5.开启sasl认证,安装sasl模块的软件包cyrus-sasl,编辑配置文件并追加内容
yum install -y cyrus-sasl
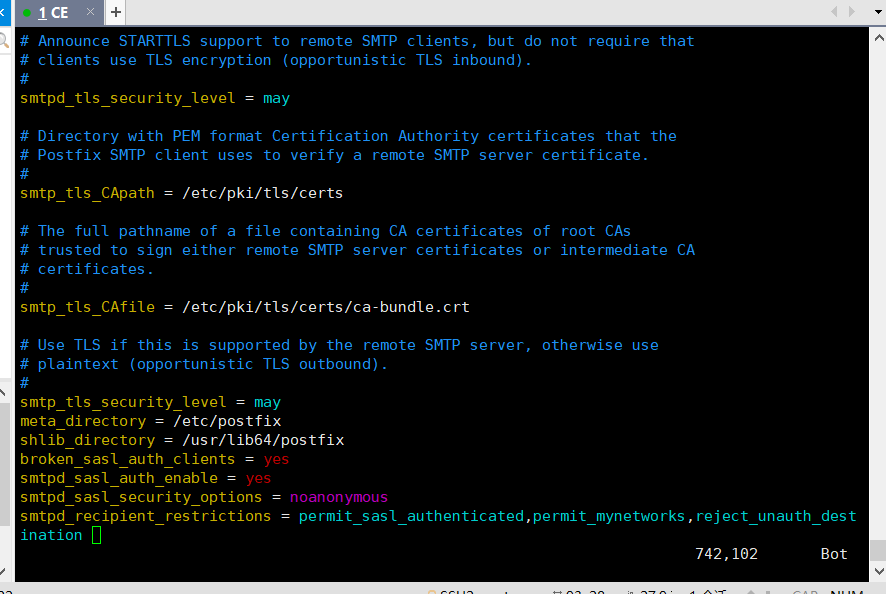
vim /etc/postfix/main.cf -编辑postfix配置文件
broken_sasl_auth_clients = yes #启用sasl对客户端进行认证
smtpd_sasl_auth_enable = yes #启用sasl认证
smtpd_sasl_security_options = noanonymous #禁用匿名用户
smtpd_recipient_restrictions = permit_sasl_authenticated,permit_mynetworks,reject_unauth_destination #定义收件人限定
![]()
6.重启服务并添加用户,更改权限
[root@localhost ~]# useradd wukong
[root@localhost ~]# useradd wuneng
[root@localhost ~]# passwd wukong
[root@localhost ~]# passwd wuneng
[root@localhost ~]# chmod 0600 /var/mail/* -如果不执行上面这个命令,可能会出现在系统中可以收到邮件,但是MUA无法收到邮件
[root@localhost ~]# systemctl restart postfix.service
[root@localhost ~]# systemctl restart dovecot
[root@localhost ~]# systemctl restart saslauthd.service
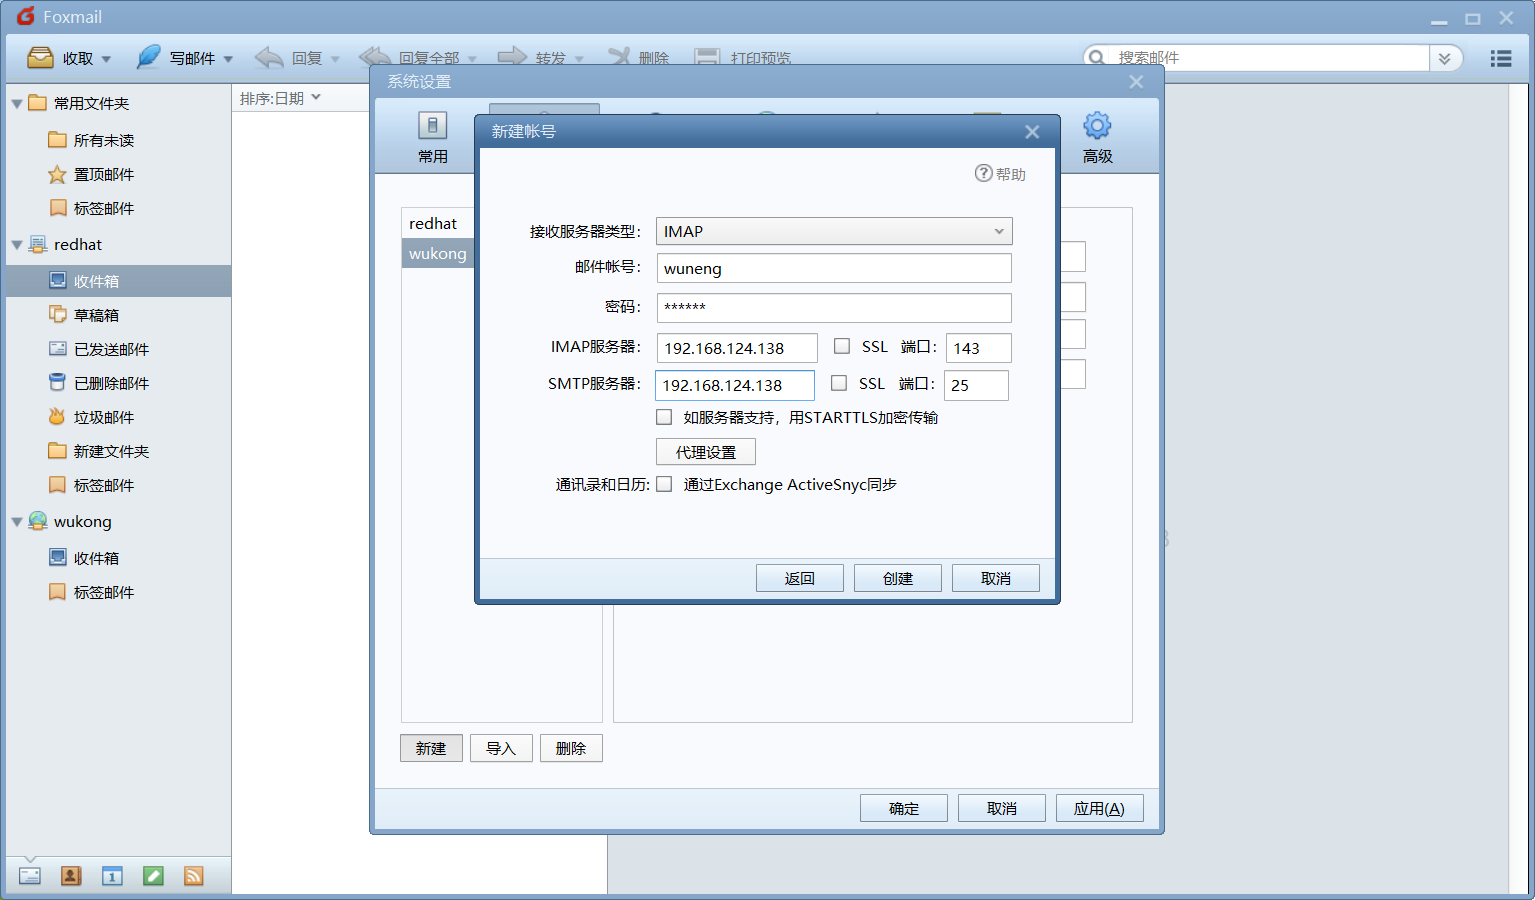
7.使用foxmail并添加用户
![]()
8.检测
![]()


 浙公网安备 33010602011771号