


Vuex
Vuex
1. vue中各个组件之间传值
1.父子组件父组件-->子组件,通过子组件的自定义属性:props
子组件-->父组件,通过自定义事件:this.$emit('事件名',参数1,参数2,...);
2.非父子组件或父子组件
通过数据总数Bus,this.$root.$emit('事件名',参数1,参数2,...)
通过数据总数Bus,this.$root.$emit('事件名',参数1,参数2,...)
3.非父子组件或父子组件
更好的方式是在vue中使用vuex
更好的方式是在vue中使用vuex
方法1: 用组件之间通讯。这样写很麻烦,并且写着写着,估计自己都不知道这是啥了,很容易写晕。
方法2: 我们定义全局变量。模块a的数据赋值给全局变量x。然后模块b获取x。这样我们就很容易获取到数据
方法2: 我们定义全局变量。模块a的数据赋值给全局变量x。然后模块b获取x。这样我们就很容易获取到数据
2. Vuex
官方解释:Vuex 是一个专为 Vue.js 应用程序开发的状态管理模式。可以想象为一个“前端数据库”(数据仓库),让其在各个页面上实现数据的共享包括状态,并且可操作
Vuex分成五个部分:
1.State:单一状态树
2.Getters:状态获取
3.Mutations:触发同步事件
4.Actions:提交mutation,可以包含异步操作
5.Module:将vuex进行分模块
3. vuex使用步骤
3.1 安装
打开项目所在文件目录,执行下载命令
npm install vuex -S如:

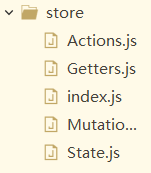
3.2 创建store模块,分别维护state/actions/mutations/getters
src/store/index.js
state.js
actions.js
mutations.js
getters.js
3.3 在store/index.js文件中新建vuex的store实例
并注册上面引入的各大模块
const store = new Vuex.Store({state,getters,actions,mutations})
const store = new Vuex.Store({state,getters,actions,mutations})
详看 4.1...
3.4 在main.js中导入并使用store实例
new Vue({el: '#app',
router,
store, //在main.js中导入store实例
components: {
App
},
template: '<App/>',
data: {
//自定义的事件总线对象,用于父子组件的通信
Bus: new Vue()
}
})
 1 // The Vue build version to load with the `import` command
 2 // (runtime-only or standalone) has been set in webpack.base.conf with an alias.
 3 import Vue from 'vue'
 4 // process.env.MOCK && require('@/mock')
 5 import 'element-ui/lib/theme-chalk/index.css'
 6 import App from './App'
 7 import router from './router'
 8 import ElementUI from 'element-ui'
 9 import axios from '@/api/http'
10 // import axios from 'axios'
11 import VueAxios from 'vue-axios'
12 import store from './store'
13
14
15
16 Vue.use(VueAxios,axios)
17 Vue.use(ElementUI)
18 Vue.config.productionTip = false
19
20 /* eslint-disable no-new */
21 new Vue({
22   el: '#app',
23   data(){
24     return{
25       Bus:new Vue({
26
27       })
28     }
29   },
30   router,
31   store,
32   components: { App },
33   template: '<App/>'
34 })
4. vuex的核心概念:store、state、getters、mutations、actions
4.1 store
每一个Vuex应用的核心就是store(仓库),store基本上就是一个容器,它包含着你的应用中大部分的状态 (state)。
const store = new Vuex.Store({
state, // 共同维护的一个状态,state里面可以是很多个全局状态
getters, // 获取数据并渲染
actions, // 数据的异步操作
mutations // 处理数据的唯一途径,state的改变或赋值只能在这里
})
 1 import Vue from 'vue'
 2 import Vuex from 'vuex'
 3 import state from './State'
 4 import getters from './Getters'
 5 import actions from './Actions'
 6 import mutations from './Mutations'
 7 Vue.use(Vuex)
 8 const store = new Vuex.Store({
 9   state,
10   getters,
11   actions,
12   mutations
13 })
14
15 export default store
4.2 state(保存数据的容器)
状态,即要全局读写的数据
const state = {
resturantName:'飞歌餐馆'
};
export default {
  resturantName: '天天餐馆'
}
4.3 getters(getXxx)
获取数据并渲染,const getters = {
resturantName: (state) => {
return state.resturantName;
}
};
注1:getters将state中定义的值暴露在this.$store.getters对象中,我们可以通过如下代码访问
this.$store.getters.resturantName
this.$store.getters.resturantName
注2:state状态存储是响应式的,从store实例中读取状态最简单的方法就是在计算属性中返回某个状态,如下:
computed: {
resturantName: function() {
return this.$store.getters.resturantName;
}
}
computed: {
resturantName: function() {
return this.$store.getters.resturantName;
}
}
export default {
  getResturantName: (state) => {
    return state.resturantName;
  }
}
4.4 mutations(setXxx)
处理数据的唯一途径,state的改变或赋值只能在这里 export default {
// type(事件类型): 其值为setResturantName
// payload:官方给它还取了一个高大上的名字:载荷,其实就是一个保存要传递参数的容器
setResturantName: (state, payload) => {
state.resturantName = payload.resturantName;
}
}
// type(事件类型): 其值为setResturantName
// payload:官方给它还取了一个高大上的名字:载荷,其实就是一个保存要传递参数的容器
setResturantName: (state, payload) => {
state.resturantName = payload.resturantName;
}
}
注1:mutations中方法的调用方式
不能直接调用this.$store.mutations.setResturantName('KFC'),必须使用如下方式调用:
this.$store.commit(type,payload);
// 1、把载荷和type分开提交
store.commit('setResturantName',{
resturantName:'KFC'
})
不能直接调用this.$store.mutations.setResturantName('KFC'),必须使用如下方式调用:
this.$store.commit(type,payload);
// 1、把载荷和type分开提交
store.commit('setResturantName',{
resturantName:'KFC'
})
// 2、载荷和type写到一起
store.commit({
type: 'setResturantName',
resturantName: 'KFC'
})
注2:一定要记住,Mutation 必须是同步函数。为什么呢?异步方法,我们不知道什么时候状态会发生改变,所以也就无法追踪了
如果我们需要异步操作,Mutations就不能满足我们需求了,这时候我们就需要Actions了
store.commit({
type: 'setResturantName',
resturantName: 'KFC'
})
注2:一定要记住,Mutation 必须是同步函数。为什么呢?异步方法,我们不知道什么时候状态会发生改变,所以也就无法追踪了
如果我们需要异步操作,Mutations就不能满足我们需求了,这时候我们就需要Actions了
export default {
  setResturantName: (state, payload) => {
    state.resturantName = payload.resturantName;
  }

}
4.5 actions
数据的异步(async)操作
 1 export default {
 2   setResturantNameByAsync: (context, payload) => {
 3     console.log('xxxx');
 4     setTimeout(() => {
 5       console.log('yyyy');
 6       console.log(payload)
 7       // state.resturantName = payload.resturantName;
 8       context.commit('setResturantName', payload); //Action提交的是mutation
 9     }, 6000)
10     console.log('zzzz');
11     //在这个里面是获取不到Vue实例的
12   },
13   doAjax: (context, payload) => {
14     let _this = payload._this;
15     let url = _this.axios.urls.SYSTEM_USER_DOLOGIN;
16     _this.axios.post(url, {}).then((response) => {
17       console.log(response);
18     }).catch(function(error) {
19       console.log(error);
20     });
21   },
22 }

 浙公网安备 33010602011771号