

ActiveMQ学习笔记(三):发布订阅模式
发布订阅模式
发布订阅模式与点对点模式主要区别为,点对点模式支持异步,并且只能有一个接收者,而发布订阅模式可以有很多订阅者,但是不支持异步
代码实现
发布者
package org.emample.jms;

import org.apache.activemq.ActiveMQConnectionFactory;

import javax.jms.*;

/**
 * @author: lxk
 * @date: 2021/8/1 10:23
 * @description: 发布订阅模式生产者
 * @modified By:
 */
public class producerTopic {
    // ActiveMQ的服务器tcp连接方式
    private static final String url = "tcp://127.0.0.1:61616";
    // 定义主题的名称
    private static final String topicName = "topic-test";

    public static void main(String[] args) throws JMSException {
        // 1.创建connectionFactory
        ConnectionFactory connectionFactory = new ActiveMQConnectionFactory(url);
        // 2.创建connection
        Connection connection = connectionFactory.createConnection();
        // 3.启动连接
        connection.start();
        // 4.创建session
        Session session = connection.createSession(false, Session.AUTO_ACKNOWLEDGE);
        // 5.创建destination
        Destination destination = session.createTopic(topicName);
        // 6.创建生产者
        MessageProducer producer = session.createProducer(destination);

        for (int i=0; i<100; i++){
            TextMessage textMessage = session.createTextMessage("发送文本" + i);
            producer.send(textMessage);
            if ((i+1)%10 == 0) {
                System.out.println("已发送" + (i+1)/10 + "组");
            }
        }

        connection.close();
    }
}
订阅者
package org.emample.jms;

import org.apache.activemq.ActiveMQConnectionFactory;

import javax.jms.*;

/**
 * @author: lxk
 * @date: 2021/8/1 10:23
 * @description: 发布订阅模式消费者
 * @modified By:
 */
public class consumerTopic {
    public static final String url = "tcp://127.0.0.1:61616";
    public static final String topicName = "topic-test";

    public static void main(String[] args) throws JMSException {

        // 1.创建connectionFactory
        ConnectionFactory connectionFactory = new ActiveMQConnectionFactory(url);
        // 2.创建connection
        Connection connection = connectionFactory.createConnection();
        // 3.启动连接
        connection.start();
        // 4.创建session
        Session session = connection.createSession(false, Session.AUTO_ACKNOWLEDGE);
        // 5.创建destination
        Destination destination = session.createTopic(topicName);
        // 6.创建消费者
        MessageConsumer consumer = session.createConsumer(destination);
        // 7.创建监听器
        consumer.setMessageListener(new MessageListener() {
            @Override
            public void onMessage(Message message) {

                TextMessage textMessage = (TextMessage) message;
                try {
                    System.out.println("收到消息" + textMessage.getText());
                } catch (JMSException e) {
                    e.printStackTrace();
                }
            }
        });

        // 8.关闭连接(监听器是异步的还没有监听到消息的时候,就关闭连接了)
        // connection.close();

    }
}
启动测试
先启动两个订阅者
然后启动发布者
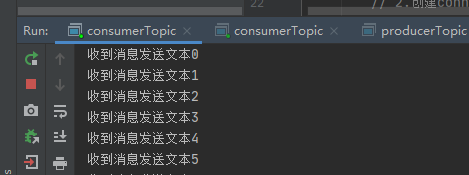
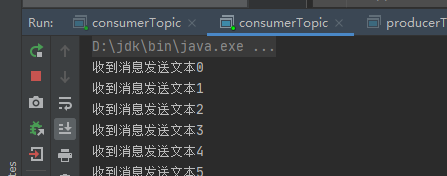
可以看到两个订阅者收到了相同的内容

 浙公网安备 33010602011771号