Cobbler自动化安装部署操作系统
备注:Cobbler是快速网络安装linux操作系统的服务,支持众多的Linux发行版:Red Hat、Fedora、CentOS、Debian、Ubuntu和SUSE,也可以支持网络安装windows。
配置网络
1、配置主服务器网络,设置UP状态网卡IP地址 ,需要连通外网。
vi /etc/sysconfig/network-scripts/ifcfg-ens33
TYPE=Ethernet
PROXY_METHOD=none
BROWSER_ONLY=no
BOOTPROTO=static
DEFROUTE=yes
IPV4_FAILURE_FATAL=no
IPV6INIT=yes
IPV6_AUTOCONF=yes
IPV6_DEFROUTE=yes
IPV6_FAILURE_FATAL=no
IPV6_ADDR_GEN_MODE=stable-privacy
NAME=ens33
UUID=8946f2b4-d969-4db0-9f67-c51576b3fd43
DEVICE=ens33
ONBOOT=yes
IPADDR=192.168.88.160
NETMASK=255.255.255.0
GATEWAY=192.168.88.1
关闭防火墙
1、SELinux默认是SELINUX=enforcing状态,永久有效需要修改vi /etc/sysconfig/selinux,然后reboot重启系统
vi /etc/sysconfig/selinux
# This file controls the state of SELinux on the system.
# SELINUX= can take one of these three values:
# enforcing - SELinux security policy is enforced.
# permissive - SELinux prints warnings instead of enforcing.
# disabled - No SELinux policy is loaded.
SELINUX=disabled
# SELINUXTYPE= can take one of three values:
# targeted - Targeted processes are protected,
# minimum - Modification of targeted policy. Only selected processes are protected.
# mls - Multi Level Security protection.
SELINUXTYPE=targeted
2、查看SELinux状态
[root@localhost ~]# getenforce
Disabled
3、查看系统防火墙
[root@localhost ~]# systemctl status firewalld.service
● firewalld.service - firewalld - dynamic firewall daemon
Loaded: loaded (/usr/lib/systemd/system/firewalld.service; disabled; vendor preset: enabled)
Active: active (running) since Sun 2019-12-29 16:47:30 CST; 2s ago
Docs: man:firewalld(1)
Main PID: 18456 (firewalld)
Tasks: 2
CGroup: /system.slice/firewalld.service
└─18456 /usr/bin/python2 -Es /usr/sbin/firewalld --nofork --nopid
Dec 29 16:47:30 localhost.localdomain systemd[1]: Starting firewalld - dynamic firewall daemon...
Dec 29 16:47:30 localhost.localdomain systemd[1]: Started firewalld - dynamic firewall daemon.
[root@localhost ~]#
4、关闭系统防火墙
[root@localhost ~]# systemctl stop firewalld.service
[root@localhost ~]# systemctl disable firewalld.service
[root@localhost ~]# systemctl status firewalld.service
● firewalld.service - firewalld - dynamic firewall daemon
Loaded: loaded (/usr/lib/systemd/system/firewalld.service; disabled; vendor preset: enabled)
Active: inactive (dead)
Docs: man:firewalld(1)
Dec 29 16:47:30 localhost.localdomain systemd[1]: Starting firewalld - dynamic firewall daemon...
Dec 29 16:47:30 localhost.localdomain systemd[1]: Started firewalld - dynamic firewall daemon.
Dec 29 16:50:18 localhost.localdomain systemd[1]: Stopping firewalld - dynamic firewall daemon...
Dec 29 16:50:18 localhost.localdomain systemd[1]: Stopped firewalld - dynamic firewall daemon.
[root@localhost ~]#
系统信息
备注:通过查看系统信息,根据系统版本安装对应的RPM安装包。
uname –r (显示操作系统的发行编号)
cat /etc/redhat-release (查看版本当前操作系统发行版信息)
[root@localhost ~]# uname -r
3.10.0-1062.9.1.el7.x86_64
[root@localhost ~]# cat /etc/redhat-release
CentOS Linux release 7.7.1908 (Core)
[root@localhost ~]#
安装RPM源
cobbler所在的源是epel源所以先安装RPM源,https://mirrors.aliyun.com/epel/(阿里云epel源)
[root@localhost ~]# rpm -ivh https://mirrors.aliyun.com/epel/epel-release-latest-7.noarch.rpm
Retrieving https://mirrors.aliyun.com/epel/epel-release-latest-7.noarch.rpm
warning: /var/tmp/rpm-tmp.Ee2uka: Header V3 RSA/SHA256 Signature, key ID 352c64e5: NOKEY
Preparing... ################################# [100%]
Updating / installing...
1:epel-release-7-12 ################################# [100%]
[root@localhost ~]#
安装服务
1、安装cobbler服务及相关的软件
[root@localhost ~]# yum install httpd dhcp cobbler xinetd tftp-server -y
2、启动相关服务并设置为开机启动
[root@localhost ~]# systemctl restart httpd
[root@localhost ~]# systemctl enable httpd
Created symlink from /etc/systemd/system/multi-user.target.wants/httpd.service to /usr/lib/systemd/system/htt
[root@localhost ~]# systemctl start cobblerd.service
[root@localhost ~]# systemctl enable cobblerd.service
Created symlink from /etc/systemd/system/multi-user.target.wants/cobblerd.service to /usr/lib/systemd/system/
3、查看cobbler监听到的端口
[root@localhost ~]# netstat -antp | grep 25151
tcp 0 0 127.0.0.1:25151 0.0.0.0:* LISTEN 32642/python2
[root@localhost ~]#
配置cobbler
1、使用cobbler check查看所需配置的内容
[root@localhost ~]# cobbler check
The following are potential configuration items that you may want to fix:
1 : The 'server' field in /etc/cobbler/settings must be set to something other than localhost, or kickstarting features will not work. This should be a resolvable hostname or IP for the boot server as reachable by all machines that will use it.
2 : For PXE to be functional, the 'next_server' field in /etc/cobbler/settings must be set to something other than 127.0.0.1, and should match the IP of the boot server on the PXE network.
3 : change 'disable' to 'no' in /etc/xinetd.d/tftp
4 : Some network boot-loaders are missing from /var/lib/cobbler/loaders, you may run 'cobbler get-loaders' to download them, or, if you only want to handle x86/x86_64 netbooting, you may ensure that you have installed a *recent* version of the syslinux package installed and can ignore this message entirely. Files in this directory, should you want to support all architectures, should include pxelinux.0, menu.c32, elilo.efi, and yaboot. The 'cobbler get-loaders' command is the easiest way to resolve these requirements.
5 : enable and start rsyncd.service with systemctl
6 : debmirror package is not installed, it will be required to manage debian deployments and repositories
7 : ksvalidator was not found, install pykickstart
8 : The default password used by the sample templates for newly installed machines (default_password_crypted in /etc/cobbler/settings) is still set to 'cobbler' and should be changed, try: "openssl passwd -1 -salt 'random-phrase-here' 'your-password-here'" to generate new one
9 : fencing tools were not found, and are required to use the (optional) power management features. install cman or fence-agents to use them
Restart cobblerd and then run 'cobbler sync' to apply changes.
[root@localhost ~]#
翻译:
以下是您可能需要修复的潜在配置项目:
1:必须将/ etc / cobbler / settings中的'server'字段设置为localhost以外的其他内容,否则kickstarting功能将不起作用。这应该是启动服务器的可解析主机名或IP,所有使用它的计算机都可以访问该主机名或IP。
2:要使PXE起作用,必须将/ etc / cobbler / settings中的'next_server'字段设置为127.0.0.1以外的其他值,并且该字段应与PXE网络上的引导服务器的IP地址匹配。
3:在/etc/xinetd.d/tftp中将"禁用"更改为"否"
4:/ var / lib / cobbler / loaders中缺少某些网络引导加载程序,您可以运行'cobbler get-loaders'下载它们,或者,如果您只想处理x86 / x86_64网络引导程序,则可以确保已经安装了最新版本的syslinux软件包,可以完全忽略此消息。如果要支持所有体系结构,此目录中的文件应包括pxelinux.0,menu.c32,elilo.efi和yaboot。 'cobbler get-loaders'命令是解决这些要求的最简单方法。
5:使用systemctl启用并启动rsyncd.service
6:未安装debmirror软件包,它将需要管理debian部署和存储库
7:未找到ksvalidator,安装pykickstart
8:样本模板为新安装的机器使用的默认密码(在/ etc / cobbler / settings中的default_password_crypted)仍然设置为'cobbler',应该更改,请尝试:" openssl passwd -1 -salt'random-phrase-在这里''您的密码在这里'"生成新的
9:未找到防护工具,需要使用防护工具才能使用(可选)电源管理功能。安装cman或fence-agents以使用它们
重新启动cobblerd,然后运行" cobbler sync"以应用更改。
2、在/etc/cobbler/settings文件中查找到以下几项并进行修改,修改完成保存退出。
方法一:
参考命令:sed -i "s/server: 127.0.0.1/server: 192.168.88.160/g" /etc/cobbler/settings
参考命令:sed -i "s/^next_server: 127.0.0.1/ next_server: 192.168.88.160/g" /etc/cobbler/settings
方法二:
server: 192.168.88.160 #cobbler的服务器地址(278行)
next_server: 192.168.88.160 #tftp服务器地址(390行)
manage_dhcp: 1 #dhcpg管理设置为1,由cobbler控制(242行)
备注:vi编辑器查找使用:先按「/」键,再输入您想寻找的字符,如果第一次找的关键字不是您想要的,可以一直按「n」会往后寻找到您要的关键字为止。
manage_dhcp: 1 通过cobbler来管理DHCP,此处也可以不修改单独配置DHCP服务
3、重启cobbler服务
[root@localhost ~]# systemctl restart cobblerd.service
[root@localhost ~]#
4、下载boot-loaders
备注:自动获取cobbler更新的软件包及配置文件
[root@localhost ~]# cobbler get-loaders
task started: 2019-12-30_065359_get_loaders
task started (id=Download Bootloader Content, time=Mon Dec 30 06:53:59 2019)
downloading https://cobbler.github.io/loaders/README to /var/lib/cobbler/loaders/README
downloading https://cobbler.github.io/loaders/COPYING.elilo to /var/lib/cobbler/loaders/COPYING.elilo
downloading https://cobbler.github.io/loaders/COPYING.yaboot to /var/lib/cobbler/loaders/COPYING.yaboot
downloading https://cobbler.github.io/loaders/COPYING.syslinux to /var/lib/cobbler/loaders/COPYING.syslinux
downloading https://cobbler.github.io/loaders/elilo-3.8-ia64.efi to /var/lib/cobbler/loaders/elilo-ia64.efi
downloading https://cobbler.github.io/loaders/yaboot-1.3.17 to /var/lib/cobbler/loaders/yaboot
downloading https://cobbler.github.io/loaders/pxelinux.0-3.86 to /var/lib/cobbler/loaders/pxelinux.0
downloading https://cobbler.github.io/loaders/menu.c32-3.86 to /var/lib/cobbler/loaders/menu.c32
downloading https://cobbler.github.io/loaders/grub-0.97-x86.efi to /var/lib/cobbler/loaders/grub-x86.efi
downloading https://cobbler.github.io/loaders/grub-0.97-x86_64.efi to /var/lib/cobbler/loaders/grub-x86_64.efi
*** TASK COMPLETE ***
[root@localhost ~]#
5、开启rsync服务并添加rsync到开机自启动
备注:开启rsyncd:需要在本机的不同目录之间同步对应的文件
[root@localhost ~]# systemctl restart rsyncd
[root@localhost ~]# systemctl enable rsyncd
Created symlink from /etc/systemd/system/multi-user.target.wants/rsyncd.service to /usr/lib/systemd/system/rsyncd.service.
[root@localhost ~]#
6、生成新的加密串,此处密码为部署系统的默认密码。
[root@localhost ~]# openssl passwd -1
Password:
Verifying - Password:
$1$/4qO6UBU$EC4HE86nnzwIqL5CbTrAS0
[root@localhost ~]#
7、复制生成的加密串,替换掉默认密码
[root@localhost ~]# vi /etc/cobbler/settings
[root@localhost ~]#
default_password_crypted: "$1$/4qO6UBU$EC4HE86nnzwIqL5CbTrAS0" #修改默认密码(101行)
开启tftp服务
备注:将 disable = yes 改为 disable = no
1、将开机不自启修改为开机自启。
[root@localhost ~]# vi /etc/xinetd.d/tftp
# default: off
# description: The tftp server serves files using the trivial file transfer \
# protocol. The tftp protocol is often used to boot diskless \
# workstations, download configuration files to network-aware printers, \
# and to start the installation process for some operating systems.
service tftp
{
socket_type = dgram
protocol = udp
wait = yes
user = root
server = /usr/sbin/in.tftpd
server_args = -s /var/lib/tftpboot
disable = no
per_source = 11
cps = 100 2
flags = IPv4
}
2、开启tftp服务并添加tftp到开机自启动
[root@localhost ~]# systemctl restart tftp
[root@localhost ~]# systemctl enable tftp
Created symlink from /etc/systemd/system/sockets.target.wants/tftp.socket to /usr/lib/systemd/system/tftp.socket.
[root@localhost ~]#
[root@localhost ~]# systemctl restart xinetd
[root@localhost ~]# systemctl enable xinetd
[root@localhost ~]#
配置DHCP
备注:
subnet 192.168.88.0 netmask 255.255.255.0 { #修改网
option routers 192.168.88.1; #指定网关
option domain-name-servers 114.114.114.114,8.8.8.8; #指定dns
option subnet-mask 255.255.255.0; #指定子网掩码
range dynamic-bootp 192.168.1.100 192.168.1.200; #指定地址池
1、修改修改cobbler的dhcp模板文件vi /etc/cobbler/dhcp.template
[root@localhost ~]# vi /etc/cobbler/dhcp.template
subnet 192.168.88.0 netmask 255.255.255.0 {
option routers 192.168.88.1;
option domain-name-servers 114.114.114.114;
option subnet-mask 255.255.255.0;
range dynamic-bootp 192.168.88.100 192.168.88.200;
default-lease-time 21600;
max-lease-time 43200;
next-server $next_server;
class "pxeclients" {
match if substring (option vendor-class-identifier, 0, 9) = "PXEClient";
if option pxe-system-type = 00:02 {
filename "ia64/elilo.efi";
} else if option pxe-system-type = 00:06 {
filename "grub/grub-x86.efi";
} else if option pxe-system-type = 00:07 {
filename "grub/grub-x86_64.efi";
} else if option pxe-system-type = 00:09 {
filename "grub/grub-x86_64.efi";
} else {
filename "pxelinux.0";
}
}
}
同步配置
1、重启cobbler服务并同步设置,一定要确认最后任务完成,*** TASK COMPLETE ***。
[root@localhost ~]# systemctl restart cobblerd.service
[root@localhost ~]# cobbler sync
task started: 2020-01-05_205450_sync
task started (id=Sync, time=Sun Jan 5 20:54:50 2020)
running pre-sync triggers
cleaning trees
removing: /var/www/cobbler/images/USM-x86_64
removing: /var/lib/tftpboot/pxelinux.cfg/default
removing: /var/lib/tftpboot/grub/images
removing: /var/lib/tftpboot/grub/grub-x86.efi
removing: /var/lib/tftpboot/grub/grub-x86_64.efi
removing: /var/lib/tftpboot/grub/efidefault
removing: /var/lib/tftpboot/images/USM-x86_64
removing: /var/lib/tftpboot/s390x/profile_list
copying bootloaders
trying hardlink /var/lib/cobbler/loaders/grub-x86.efi -> /var/lib/tftpboot/grub/grub-x86.efi
trying hardlink /var/lib/cobbler/loaders/grub-x86_64.efi -> /var/lib/tftpboot/grub/grub-x86_64.efi
copying distros to tftpboot
copying files for distro: USM-x86_64
trying hardlink /var/www/cobbler/ks_mirror/USM-x86_64/images/pxeboot/vmlinuz -> /var/lib/tftpboot/images/USM-x86_64/vmlinuz
trying hardlink /var/www/cobbler/ks_mirror/USM-x86_64/images/pxeboot/initrd.img -> /var/lib/tftpboot/images/USM-x86_64/initrd.img
copying images
generating PXE configuration files
generating PXE menu structure
copying files for distro: USM-x86_64
trying hardlink /var/www/cobbler/ks_mirror/USM-x86_64/images/pxeboot/vmlinuz -> /var/www/cobbler/images/USM-x86_64/vmlinuz
trying hardlink /var/www/cobbler/ks_mirror/USM-x86_64/images/pxeboot/initrd.img -> /var/www/cobbler/images/USM-x86_64/initrd.img
Writing template files for USM-x86_64
rendering DHCP files
generating /etc/dhcp/dhcpd.conf
rendering TFTPD files
generating /etc/xinetd.d/tftp
processing boot_files for distro: USM-x86_64
cleaning link caches
running post-sync triggers
running python triggers from /var/lib/cobbler/triggers/sync/post/*
running python trigger cobbler.modules.sync_post_restart_services
running: dhcpd -t -q
received on stdout:
received on stderr:
running: service dhcpd restart
received on stdout:
received on stderr: Redirecting to /bin/systemctl restart dhcpd.service
running shell triggers from /var/lib/cobbler/triggers/sync/post/*
running python triggers from /var/lib/cobbler/triggers/change/*
running python trigger cobbler.modules.manage_genders
running python trigger cobbler.modules.scm_track
running shell triggers from /var/lib/cobbler/triggers/change/*
*** TASK COMPLETE ***
[root@localhost ~]#
检查配置
1、使用cobbler check查看所需配置的内容
[root@localhost ~]# cobbler check
The following are potential configuration items that you may want to fix:
1 : debmirror package is not installed, it will be required to manage debian deployments and repositories
2 : ksvalidator was not found, install pykickstart
3 : fencing tools were not found, and are required to use the (optional) power management features. install cman or fence-agents to use them
Restart cobblerd and then run 'cobbler sync' to apply changes.
[root@localhost ~]#
翻译:
以下是您可能需要修复的潜在配置项目:
1:未安装debmirror软件包,它将需要管理debian部署和存储库
2:未找到ksvalidator,安装pykickstart
3:未找到防护工具,需要使用防护工具(可选)电源管理功能。 安装cman或fence-agents以使用它们
重新启动cobblerd,然后运行" cobbler sync"以应用更改。
2、安装debmirror包,并且修改配置文件vi /etc/debmirror.conf,告诉要安装哪种类型的操作系统。
[root@localhost ~]# yum install debmirror
Loaded plugins: fastestmirror, langpacks
Loading mirror speeds from cached hostfile
* base: mirrors.huaweicloud.com
* epel: hk.mirrors.thegigabit.com
* extras: ap.stykers.moe
* updates: ap.stykers.moe
Resolving Dependencies
--> Running transaction check
---> Package debmirror.noarch 0:2.30-1.el7 will be installed
--> Processing Dependency: patch for package: debmirror-2.30-1.el7.noarch
......安装过程省略......
perl-WWW-RobotRules.noarch 0:6.02-5.el7
perl-libwww-perl.noarch 0:6.05-2.el7
Complete!
[root@localhost ~]#
备注:将不属于的操作系统前面加上#号禁用,28行和30行的i386 32位操作系统禁用
[root@localhost ~]# vi /etc/debmirror.conf
参考命令:
sed -i 's/@dists="sid";/#@dists="sid";/' /etc/debmirror.conf
sed -i 's/@arches="i386";/#@arches="i386";/' /etc/debmirror.conf
#@dists="sid";
#@arches="i386";
3、安装pykickstart组件yum install pykickstart -y
[root@localhost ~]# yum install pykickstart -y
Loaded plugins: fastestmirror, langpacks
Loading mirror speeds from cached hostfile
* base: mirrors.huaweicloud.com
* epel: hk.mirrors.thegigabit.com
* extras: ap.stykers.moe
* updates: ap.stykers.moe
Resolving Dependencies
--> Running transaction check
---> Package pykickstart.noarch 0:1.99.66.21-1.el7 will be installed
--> Finished Dependency Resolution
Dependencies Resolved
================================================================================================
Package Arch Version Repository Si
================================================================================================
Installing:
pykickstart noarch 1.99.66.21-1.el7 base 368
Transaction Summary
================================================================================================
Install 1 Package
Total download size: 368 k
Installed size: 1.7 M
Downloading packages:
pykickstart-1.99.66.21-1.el7.noarch.rpm | 368 kB 00:00:00
Running transaction check
Running transaction test
Transaction test succeeded
Running transaction
Installing : pykickstart-1.99.66.21-1.el7.noarch 1
Verifying : pykickstart-1.99.66.21-1.el7.noarch 1
Installed:
pykickstart.noarch 0:1.99.66.21-1.el7
Complete!
[root@localhost ~]#
3、安装cman和fence-agents,yum install cman fence-agents。
[root@localhost ~]# yum install cman fence-agents
Loaded plugins: fastestmirror, langpacks
Loading mirror speeds from cached hostfile
* base: mirrors.huaweicloud.com
* epel: hk.mirrors.thegigabit.com
* extras: mirrors.huaweicloud.com
* updates: mirrors.huaweicloud.com
No package cman available.
Resolving Dependencies
--> Running transaction check
-24.el7 will be installed
64
--> Processing Dependency: libgnutls.so.28()(64bit) for package: gnutls-utils-3.3.29-9.el7_6.x86_64
......安装过程省略......
Complete!
[root@localhost ~]#
再次检查
[root@localhost ~]# cobbler check
No configuration problems found. All systems go.
[root@localhost ~]#
翻译:
显示No configuration problems found. All systems go.(没有找到配置问题,一切正常)
导入镜像
1、把对应光驱连接上服务器
2、挂载镜像
[root@localhost ~]# mount /dev/cdrom /mnt/
mount: /dev/sr0 is write-protected, mounting read-only
[root@localhost ~]#
3、导入镜像
备注:
将光盘内文件复制入cobbler,此步骤是将光盘的的文件复制至/var/www/cobbler/ks_mirror/目录下
命令格式:cobbler import --path=镜像路径--name=安装引导名 --arch=32位或64位
--path表示镜像所挂载的目录
--name表示为安装源定义的名字
--arch表示指定安装源是32位还是64位,目前支持的选项:x86,x86_64,ia64
导入新的系统文件时,数据文件较大,需等待几分钟。
[root@localhost ~]# cobbler import --path=/mnt --name=USM --arch=x86_64 --arch=x86_64
task started: 2019-12-30_100349_import
task started (id=Media import, time=Mon Dec 30 10:03:49 2019)
Found a candidate signature: breed=redhat, version=rhel6
Found a candidate signature: breed=redhat, version=rhel7
Found a matching signature: breed=redhat, version=rhel7
Adding distros from path /var/www/cobbler/ks_mirror/USM-x86_64:
creating new distro: USM-x86_64
trying symlink: /var/www/cobbler/ks_mirror/USM-x86_64 -> /var/www/cobbler/links/USM-x86_64
creating new profile: USM-x86_64
associating repos
checking for rsync repo(s)
checking for rhn repo(s)
checking for yum repo(s)
starting descent into /var/www/cobbler/ks_mirror/USM-x86_64 for USM-x86_64
processing repo at : /var/www/cobbler/ks_mirror/USM-x86_64
need to process repo/comps: /var/www/cobbler/ks_mirror/USM-x86_64
looking for /var/www/cobbler/ks_mirror/USM-x86_64/repodata/*comps*.xml
Keeping repodata as-is :/var/www/cobbler/ks_mirror/USM-x86_64/repodata
*** TASK COMPLETE ***
[root@localhost ~]#
WEB访问
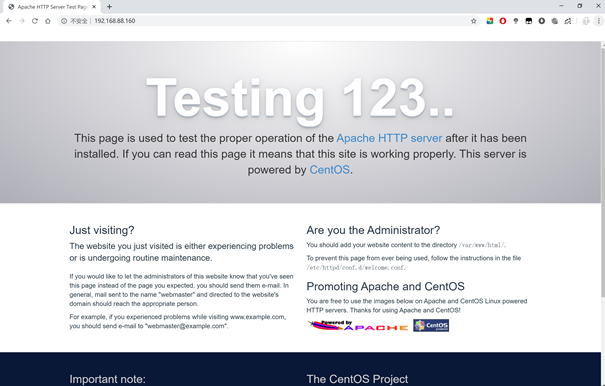
1、此时已经可以通过web页面访问服务器,http://192.168.88.160访问到它的Apache页面。
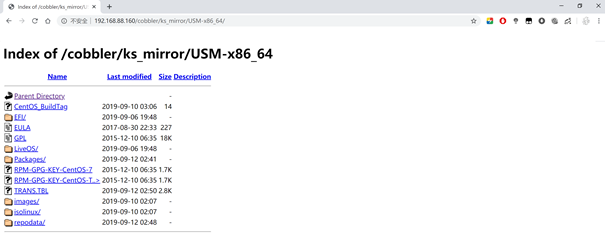
2、在服务器地址后面http://192.168.88.160/cobbler/ks_mirror/USM-x86_64进入后便可查看到导入成功的镜像。
备注:此处的地址为后面KS文件中的url=地址。
3、查看导入的系统镜像
[root@localhost ~]# cobbler distro list
USM-x86_64
[root@localhost ~]#
4、查看默认生成的KS文件
[root@localhost ~]# cobbler profile list
USM-x86_64
[root@localhost ~]#
5、删除默认生成的KS文件
警告:此默认生成的KS文件无法完成装机,需要删除编写新的KS文件。
备注:由于cobbler所自带的关联安装方法,并不能完成安装,所以我们需要将其从列表中删除
命令 cobbler profile remove --name= ,名称根据实际情况删除。
[root@localhost ~]# cobbler profile remove --name=USM-x86_64
[root@localhost ~]#
配置kickstarts
1、修改kickstarts配置文件,按自己所需更改文件内容。并将文件放到/var/lib/cobbler/kickstarts/目录。
2、进入目录cd /var/lib/cobbler/kickstarts/
[root@localhost ~]# cd /var/lib/cobbler/kickstarts/
[root@localhost kickstarts]# ls
default.ks legacy.ks sample_esx4.ks sample.ks USM.cfg
esxi4-ks.cfg pxerescue.ks sample_esxi4.ks sample_old.seed
esxi5-ks.cfg sample_autoyast.xml sample_esxi5.ks sample.seed
install_profiles sample_end.ks sample_esxi6.ks sample.seed.28
[root@localhost kickstarts]#
3、检查ks文件是否存在错误,命令cobbler validateks
[root@localhost kickstarts]# cobbler validateks
task started: 2019-12-31_082555_validateks
task started (id=Kickstart Validation, time=Tue Dec 31 08:25:55 2019)
*** all kickstarts seem to be ok ***
*** TASK COMPLETE ***
[root@localhost kickstarts]#
关联镜像KS
1、指定KS文件与镜像对应
备注:
cobbler profile add --name=指定安装时的列表选项名称
--distro=指定要关联的镜像名称(cobbler distro list命令查看导入的镜像)
--kickstart=/var/lib/cobbler/kickstarts/usm.cfg指定KS脚本文件所在路径
[root@localhost ~]# cobbler profile add --name=USM-x86_64 --distro=USM-x86_64 --kickstart=/var/lib/cobbler/kickstarts/USM.cfg
编辑关联
命令:--kopts='net.ifnames=0 biosdevname=0' #还原镜像网卡名为"eth0"
[root@localhost ~]# cobbler profile edit --name=USM-x86_64 --kickstart=/var/lib/cobbler/krts/USM.cfg
[root@localhost ~]# cobbler profile edit --name=USM-x86_64 --kopts='net.ifnames=0 biosdvname=0'
[root@localhost ~]#
查看重新生成的KS文件
[root@localhost ~]# cobbler profile list
USM-x86_64
[root@localhost ~]#
同步SYNC
命令:cobbler sync
[root@localhost ~]# cobbler sync
重启服务
[root@localhost ~]# systemctl restart xinetd.service
[root@localhost ~]# systemctl restart httpd.service
[root@localhost ~]# systemctl restart cobblerd.service
[root@localhost ~]#
客户端测试
1、给客户端插上电源,连接上网线,开机。
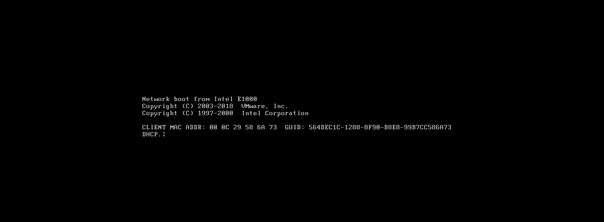
2、上下键选择要安装的系统,local为从本地磁盘启动
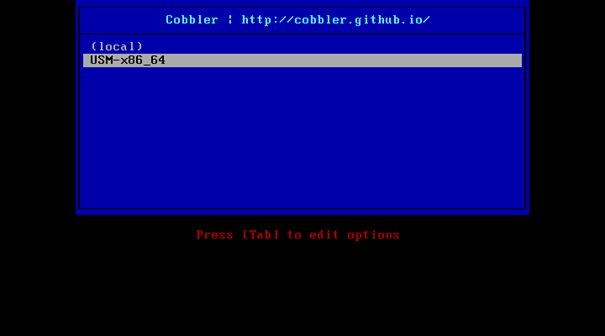
3、相当于定义了安装的具体要求
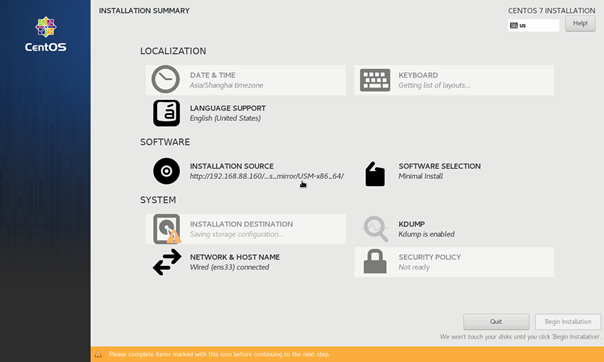
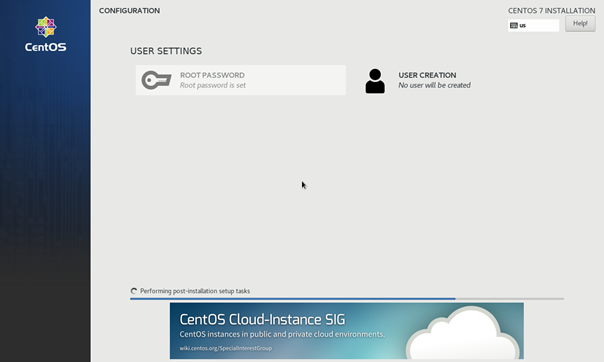
4、密码也是配置好自动完成的

cobbler_web
1、cobbler_web安装
[root@localhost ~]# yum -y install cobbler-web
2、同步配置并重启httpd、cobbler
[root@localhost ~]# cobbler sync
[root@localhost ~]# systemctl restart httpd
[root@localhost ~]# systemctl restart cobblerd
[root@localhost ~]#
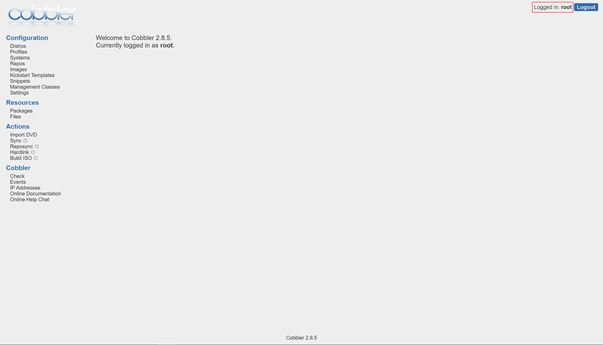
3、进入WEB页面,访问地址:https://IP/cobbler_web 即可。默认账号为cobbler,密码也为cobbler。web界面有很多功能,包括上传镜像、编辑kickstart、等等很多在命令行操作的都可以在web界面直接操作。
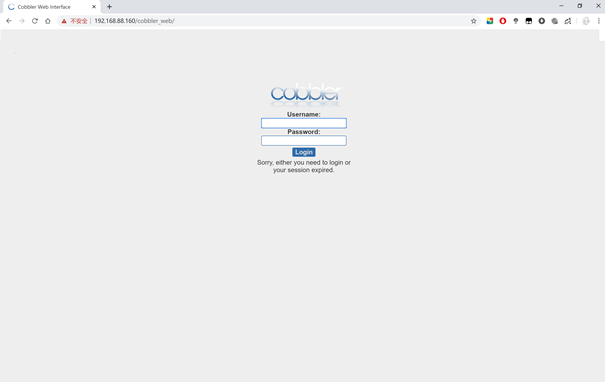
认证登录
1、使用cobbler默认的authn_configfile模块认证方式
cobbler默认的authn_configfile模块认证方式,可以直接使用htdigest命令添加cobbler用户和密码。
[root@localhost ~]# htdigest -c /etc/cobbler/users.digest Cobbler root
Adding password for root in realm Cobbler.
New password:
Re-type new password:
[root@localhost ~]#
然后重启cobbler服务,apache服务即可
[root@localhost ~]# systemctl restart httpd.service
[root@localhost ~]# systemctl restart cobblerd.service
[root@localhost ~]#
问题排查
同步失败
同步失败,提到dhcpd -t failed,检查DHCP配置是否错误。
[root@localhost ~]# cobbler sync
task started: 2019-12-30_084121_sync
task started (id=Sync, time=Mon Dec 30 08:41:21 2019)
running pre-sync triggers
cleaning trees
removing: /var/lib/tftpboot/pxelinux.cfg/default
removing: /var/lib/tftpboot/grub/images
removing: /var/lib/tftpboot/grub/grub-x86.efi
removing: /var/lib/tftpboot/grub/grub-x86_64.efi
removing: /var/lib/tftpboot/grub/efidefault
removing: /var/lib/tftpboot/s390x/profile_list
copying bootloaders
trying hardlink /var/lib/cobbler/loaders/grub-x86.efi -> /var/lib/tftpboot/grub/grub-x86.efi
trying hardlink /var/lib/cobbler/loaders/grub-x86_64.efi -> /var/lib/tftpboot/grub/grub-x86_64.efi
copying distros to tftpboot
copying images
generating PXE configuration files
generating PXE menu structure
rendering DHCP files
generating /etc/dhcp/dhcpd.conf
rendering TFTPD files
generating /etc/xinetd.d/tftp
cleaning link caches
running post-sync triggers
running python triggers from /var/lib/cobbler/triggers/sync/post/*
running python trigger cobbler.modules.sync_post_restart_services
running: dhcpd -t -q
received on stdout:
received on stderr:
dhcpd -t failed
Exception occured: <class 'cobbler.cexceptions.CX'>
Exception value: 'cobbler trigger failed: cobbler.modules.sync_post_restart_services'
Exception Info:
File "/usr/lib/python2.7/site-packages/cobbler/remote.py", line 82, in run
rc = self._run(self)
File "/usr/lib/python2.7/site-packages/cobbler/remote.py", line 181, in runner
return self.remote.api.sync(self.options.get("verbose",False),logger=self.logger)
File "/usr/lib/python2.7/site-packages/cobbler/api.py", line 763, in sync
return sync.run()
File "/usr/lib/python2.7/site-packages/cobbler/action_sync.py", line 144, in run
utils.run_triggers(self.api, None, "/var/lib/cobbler/triggers/sync/post/*", logger=self.logger)
File "/usr/lib/python2.7/site-packages/cobbler/utils.py", line 928, in run_triggers
raise CX("cobbler trigger failed: %s" % m.__name__)
!!! TASK FAILED !!!
[root@localhost ~]#

 浙公网安备 33010602011771号