7、flask电子邮件
1、安装Flask-Mail
pip install flask-mail
2、hello.py 配置Flask-Mail使用qq邮箱
from flask_mail import Mail,Message

app.config['MAIL_SERVER'] = 'smtp.qq.com'
app.config['MAIL_PORT'] = 465
app.config['MAIL_USE_TLS'] = False
app.config['MAIL_USE_SSL'] = True
app.config['MAIL_USERNAME'] = '*******@qq.com'
app.config['MAIL_PASSWORD'] = '********'
mail = Mail(app)
3、保存电子邮件服务器用户名和密码两个环境变量要在环境中定义
windows下
(venv) $ set MAIL_USERNAME=<Gmail username>
(venv) $ set MAIL_PASSWORD=<Gmail password>

4、在python shell中发送电子邮件

收到的邮件显示如下:
5、在程序中集成发送电子邮件功能
hello.py 电子邮件支持的部分如下:
app.config['FLASKY_MAIL_SUBJECT_PREFIX'] = '[Flasky]'
app.config['FLASKY_MAIL_SENDER'] = '*******@qq.com'
app.config['FLASKY_ADMIN'] = '*******@qq.com'

def send_mail(to, subject, template, **kwargs):
    msg = Message(app.config['FLASKY_MAIL_SUBJECT_PREFIX'] + subject, sender=app.config['FLASKY_MAIL_SENDER'], recipients=[to])
    msg.body = render_template(template + '.txt', **kwargs)
    msg.html = render_template(template + '.html', **kwargs)
    mail.send(msg)
send_email 函数的参数分别为收件人地址、主题、渲染邮件正文的模板和关键字参数列表。指定模板时不能包含扩展名,这样才能使用两个模板分别渲染纯文本正文和富文本正文。调用者将关键字参数传给 render_template() 函数,以便在模板中使用,进而生成电子邮件正文。
hello.py 中index函数的修改,加入发送邮件的逻辑
@app.route('/', methods=['GET', 'POST'])
def index():
    form = NameForm()
    if form.validate_on_submit():
        user = User.query.filter_by(username=form.name.data).first()
        if user is None:
            user = User(username=form.name.data)
            db.session.add(user)
            session['known'] = False
            if app.config['FLASKY_ADMIN']:
                send_mail(app.config['FLASKY_ADMIN'], 'New User', 'mail/new_user', user=user)
        else:
            session['known'] = True
        session['name'] = form.name.data
        form.name.data = ''
        return redirect(url_for('index'))
    return render_template('index.html', form = form, name = session.get('name'), known = session.get('known', False))
6、templates下新增msg.body部分的new_user.txt文件,和msg.html部分的new_user.html文件,示例如下:


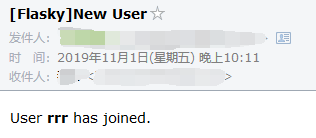
7、发送邮件被定义为函数后,需要添加环境变量FLASK_ADMIN
linux下 : (venv) $ export FLASKY_ADMIN=<your-email-address>
windows下: (venv) $ set FLASKY_ADMIN=<Gmail username>
设置好后,每次在表单填写新名字后,管理员都会收到一封电子邮件,邮件如下:
8、异步发送邮件
测试过程中,在mail.send()函数发送邮件时,页面停滞了几秒。为避免处理请求过程中,不必要的延迟,我们可以把发送电子邮件的函数移到后台线程中
修改hello.py
from threading import Thread

def send_async_email(app, msg):
    with app.app_context():
        mail.send(msg)

def send_mail(to, subject, template, **kwargs):
    msg = Message(app.config['FLASKY_MAIL_SUBJECT_PREFIX'] + subject, sender=app.config['FLASKY_MAIL_SENDER'], recipients=[to])
    msg.body = render_template(template + '.txt', **kwargs)
    msg.html = render_template(template + '.html', **kwargs)
    thr = Thread(target=send_async_email, args=[app, msg])
    thr.start()
    return thr
很多 Flask 扩展都假设已经存在激活的程序上下文和请求上下文。 Flask-Mail 中的 send() 函数使用 current_app,因此必须激活程序上下文。不过,在不同线程中执行 mail.send() 函数时,程序上下文要使用 app.app_context() 人工创建

 浙公网安备 33010602011771号