python: matplotlib.pyplot 制作动图
jupyter notebook很好用,写文字和公式用markdown,作图用python,都在一个文件里,需要的时候就把这个笔记转成pdf,非常轻松。但是我以前一直用gnuplot,没怎么用过python作图,所以有心情的时候就玩一玩。最好玩的是动图,所以今天试着做了一个利萨如图形。在网上找了模板:https://blog.csdn.net/ouening/article/details/84175396 ,把每个语句弄清楚了,然后做了一点修改。
matplotlib.animation.FuncAnimation是核心,这个函数调用画布、初始桢画图函数、后续每一帧画图函数,生成动图。
代码如下:
%matplotlib qt5
# 改变渲染方式,自动弹出动图,显示在jupyter notebook之外。
import numpy as np
import matplotlib.pyplot as plt
from matplotlib.animation import FuncAnimation
fig, ax = plt.subplots() # 创建画布,并且在画布上创建一个图片对象 ax
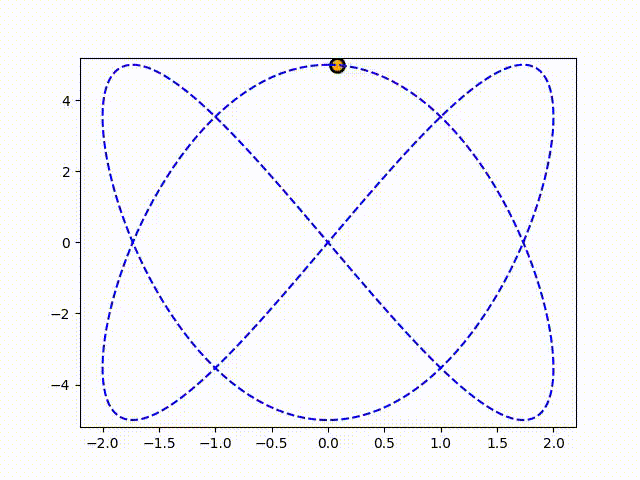
t = np.linspace(0, 2np.pi, 300) # 参数list
xdata, ydata = 2np.sin(2t), 5np.cos(3*t) # x坐标list, y坐标list
ball, = plt.plot([], [], linestyle='None',marker='o',
markersize=10,markeredgecolor='k',
color='orange',markeredgewidth=2) # 定义一个图:只有一个点,这个点circle画
ln, = plt.plot([], [], linestyle = '--', color = 'blue')
#定义一条曲线,即利萨如曲线
def init():
ax.set_xlim(-2.2, 2.2) #定义 x, y 轴坐标范围
ax.set_ylim(-5.2, 5.2)
return ln, #没有理解为什么需要加个逗号
def update(frame): # frame 是 frames = np.arange(1,300) 中的元素值
ln.set_data(xdata, ydata) #每桢都画上整条利萨如曲线
ball.set_data([xdata[frame]], [ydata[frame]]) #每桢只画1个小球
return ln, ball,
ani = FuncAnimation(fig, update, frames=np.arange(1,300),
init_func=init, blit=True)
#在画布 fig 上,调用 init_func, 然后一次调用 update( frames[] )
plt.show()
ani.save("利萨如.mp4",fps=60) # 储存文件,fps: frame per sec
效果如下:
总结:大概所有动图的思路都是一样的,控制一个序列,让电脑自动生成每一帧,然后串起来完事。FuncAnimation打包这些操作。所以只需要了解这个函数,其他动图就是相似地进行操作了。


 浙公网安备 33010602011771号