Flutter之毛玻璃效果的实现
用Flutter实现毛玻璃效果的代码如下:
import 'dart:ui';
import 'package:flutter/material.dart';

class FrostedGlassDemo extends StatelessWidget {
  @override
  Widget build(BuildContext context) {
    return Scaffold(
      body: Stack(
        children: [
          ConstrainedBox(
            constraints: BoxConstraints.expand(),
            child: Image.network('https://gimg2.baidu.com/image_search/src=http%3A%2F%2Fhuafans.dbankcloud.com%2Fpic%2F2017%2F01%2F25%2F195116eebdd5aa2fdaebff832280a391_IMG_20170125_153017.jpg%3Fmode%3Ddownload&refer=http%3A%2F%2Fhuafans.dbankcloud.com&app=2002&size=f9999,10000&q=a80&n=0&g=0n&fmt=jpeg?sec=1620875132&t=ea50802522897aad43419379eea3267a'),
          ),
          Center(
            child: ClipRect(
              child: BackdropFilter(
                filter: ImageFilter.blur(sigmaX: 3.0,sigmaY: 3.0),
                child: Opacity(
                  opacity: 0.5,
                  child: Container(
                    width: 500.0,
                    height: 800.0,
                    decoration: BoxDecoration(
                      color: Colors.grey.shade200
                    ),
                    child: Center(
                      child:Text(
                        'Cat',
                        style: Theme.of(context).textTheme.display3
                      )
                    ),
                  ),
                ),
              ),
            ),
          )
        ],
      ),
    );
  }
}
其中,要点为:
1.用Stack组件包含图片和毛玻璃两个组件。
2.图片组件外层加了约束盒子组件,从而增加约束,实现全屏扩展图片。
3.使用剪切矩形组件包含毛玻璃组件,并居中。
4.使用背景过滤器和透明组件实现毛玻璃的具体效果。
5.在容器组件中设置毛玻璃的宽高,并使用盒子装饰器组件修饰容器,设置颜色,也可以不使用盒子装饰器直接设置颜色。
如:
child: Container(
  width: 500.0,
  height: 800.0,
  color: Colors.grey.shade200,
  child: Center(
    child:Text(
      'Cat',
      style: Theme.of(context).textTheme.display3
    )
  ),
),
6.文字组件应居中,否则会在页面的左上角。
7.使用
Theme.of(context).textTheme.display3
设置字体的样式,也可以使用TextStyle组件进行设置。
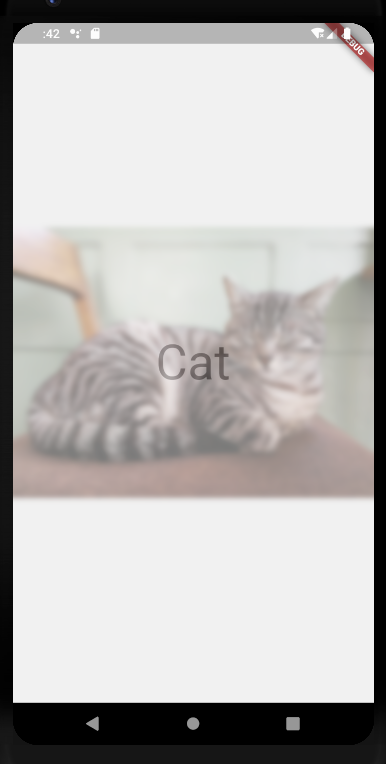
毛玻璃效果如下:

 浙公网安备 33010602011771号