
一、Nginx软件目录结构说明
[root@web1 tools]# tree /application/nginx
/application/nginx
├── client_body_temp
├── conf #Nginx的所有配置文件目录
│ ├── fastcgi.conf # fastcgi相关参数的配置文件
│ ├── fastcgi.conf.default #fastcgi.conf的原始备份文件
│ ├── fastcgi_params #fastcgi的参数文件
│ ├── fastcgi_params.default #fastcgi的参数文件备份
│ ├── koi-utf
│ ├── koi-win
│ ├── mime.types #媒体类型文件
│ ├── mime.types.default #mime.types的文件备份
│ ├── nginx.conf #nginx默认的主配置文件
│ ├── nginx.conf.default #nginx.conf默认的主配置文件备份
│ ├── scgi_params #scgi相关参数文件
│ ├── scgi_params.default #scgi相关参数文件备份
│ ├── uwsgi_params #uwsgi相关参数文件,配置Python环境可能会用到
│ ├── uwsgi_params.default #uwsgi相关参数文件备份
│ └── win-utf
├── fastcgi_temp #fastcgi临时数据目录
├── html #编译安装Nginx的默认站点目录,类似于Apache的默认站点htdocs目录
│ ├── 50x.html #错误页面优雅代替显示文件,例如:出现502错误时会调用此页面
│ └── index.html #默认的首页文件
├── logs #默认的日志路径,包括错误日志及访问日志
│ ├── access.log #默认访问日志文件
│ ├── error.log #错误日志文件
│ └── nginx.pid #Nginx的pid文件,Nginx进程启动后,会把所有的进程ID号写到此文件
├── proxy_temp #临时目录
├── sbin #Nginx的命令目录
│ └── nginx #Nginx的启动命令
├── scgi_temp #临时目录
└── uwsgi_temp #临时目录
二、Nginx的主配置文件nginx.conf
Nginx的主配置文件是一个纯文本类型的文件,位于Nginx安装目录下的conf目录,整个配置文件是以区块的形式组织的。
[root@web1 conf]# egrep -v "^$|#" /application/nginx/conf/nginx.conf|cat -n #去掉注释与空格后的nginx.conf文件
1 worker_processes 1; #worker进程的数量
2 events { #事件区块开始
3 worker_connections 1024; #每个worker进程支持的最大连接数
4 } #事件区块结束
5 http { #HTTP区块开始
6 include mime.types; #Nginx支持的媒体类型库文件包含
7 default_type application/octet-stream; #默认的媒体类型
8 sendfile on; #开启高效传输模式
9 keepalive_timeout 65; #连接超时
10 server { #第一个server区块开始,表示一个独立的虚拟主机站点
11 listen 80; #提供服务的端口,默认80
12 server_name localhost; #提供服务的域名主机名
13 location / { #第一个location区块开始
14 root html; #站点的根目录,相对于Nginx安装目录
15 index index.html index.htm; #默认的首页文件,多个用空格分开
16 }
17 error_page 500 502 503 504 /50x.html; #出现对应的http状态码,使用50x.html 回应客户
18 location = /50x.html { #location区块开始,访问50x.html
19 root html; #指定对应的站点目录
20 } #location区块结束
21 } #server区块结束
22 } #http区块结束
三、Nginx虚拟主机配置实战
虚拟主机类型可以分为基于域名的虚拟主机、基于端口的虚拟主机、基于IP的虚拟主机
首先配置基于域名的虚拟主机
[root@web1 conf]# diff nginx.conf.default nginx.conf #比较两个文件的异同,发现两个文件完全一样
[root@web1 conf]# egrep -v "^$|#" nginx.conf.default >nginx.conf #去掉注释与空格后的nginx.conf文件
[root@web1 conf]# vim nginx.conf
worker_processes 1;
events {
worker_connections 1024;
}
http {
include mime.types;
default_type application/octet-stream;
sendfile on;
keepalive_timeout 65;
server {
listen 80;
server_name www.etiantian.org;
location / {
root html/www; #在默认的文件中修改的
index index.html index.htm;
}
}
}
[root@web1 conf]# mkdir ../html/www -p #表示在上级目录html 下创建www目录
[root@web1 conf]# cd ..
[root@web1 nginx]# ls
client_body_temp conf fastcgi_temp html logs proxy_temp sbin scgi_temp uwsgi_temp
[root@web1 nginx]# cd html
[root@web1 html]# ls
50x.html index.html www
[root@web1 html]# echo "http://www.etiantian.org" > www/index.html
[root@web1 html]# cat www/index.html
http://www.etiantian.org
[root@web1 html]# nginx -t #检查Nginx是否有语法错误
nginx: the configuration file /application/nginx-1.16.0//conf/nginx.conf syntax is ok
nginx: configuration file /application/nginx-1.16.0//conf/nginx.conf test is successful
[root@web1 html]# nginx -s reload
[root@web1 html]# netstat -lntup|grep nginx #检查重新加载后的Nginx的端口号是否正常
tcp 0 0 0.0.0.0:80 0.0.0.0:* LISTEN 8037/nginx: master #正常
[root@web1 conf]# echo "192.168.23.110 www.etiantian.org" >>/etc/hosts
[root@web1 conf]# tail -1 /etc/hosts
192.168.23.110 www.etiantian.org
[root@web1 www]# ping www.etiantian.org #表示域名解析成功
PING www.etiantian.org (192.168.23.110) 56(84) bytes of data.
64 bytes from www.etiantian.org (192.168.23.110): icmp_seq=1 ttl=64 time=0.096 ms #表示解析成功
----------------------------------------------------------------------------------------------------------
[root@web1 conf]# curl www.etiantian.org #访问测试成功
http://www.etiantian.org
配置多个基于域名的虚拟主机
[root@web1 conf]# cat -n nginx.conf
1 worker_processes 1;
2 events {
3 worker_connections 1024;
4 }
5 http {
6 include mime.types;
7 default_type application/octet-stream;
8 sendfile on;
9 keepalive_timeout 65;
10 server {
11 listen 80;
12 server_name www.etiantian.org;
13 location / {
14 root html/www;
15 index index.html index.htm;
16
17 }
18 }
19 server {
20 listen 80;
21 server_name bbs.etiantian.org;
22 location / {
23 root html/bbs;
24 index index.html index.htm;
25 }
26 }
27 server {
28 listen 80;
29 server_name blog.etiantian.org;
30 location / {
31 root html/blog;
32 index index.html index.htm;
33 }
34 }
35 }
创建虚拟主机站点对应的目录和文件
[root@web1 conf]# mkdir ../html/bbs ../html/blog -p
[root@web1 conf]# echo "http://bbs.etiantian.org" >../html/bbs/index.html
[root@web1 conf]# echo "http://blog.etiantian.org" >../html/blog/index.html
[root@web1 conf]# cat ../html/bbs/index.html
http://bbs.etiantian.org
[root@web1 conf]# cat ../html/blog/index.html
http://blog.etiantian.org
[root@web1 conf]# tree ../html/ #所有的.. 表示上一级目录
../html/
├── 50x.html
├── bbs
│ └── index.html
├── blog
│ └── index.html
├── index.html
└── www
└── index.html
3 directories, 5 files
[root@web1 conf]# vim /etc/hosts
[root@web1 conf]# cat /etc/hosts
127.0.0.1 localhost localhost.localdomain localhost4 localhost4.localdomain4
::1 localhost localhost.localdomain localhost6 localhost6.localdomain6
192.168.23.110 www.etiantian.org bbs.etiantian.org blog.etiantian.org
[root@web1 conf]# curl bbs.etiantian.org
http://bbs.etiantian.org
[root@web1 conf]# curl blog.etiantian.org
http://blog.etiantian.org
在浏览器中输入http://bbs.etiantian.org,访问网页
在浏览器中输入http://blog.etiantian.org,访问网页
到这里,多个基于域名的虚拟主机配置完成
基于端口的虚拟主机配置实战
首先修改配置文件
[root@web1 conf]# vim nginx.conf
[root@web1 conf]# cat -n nginx.conf
1 worker_processes 1;
2 events {
3 worker_connections 1024;
4 }
5 http {
6 include mime.types;
7 default_type application/octet-stream;
8 sendfile on;
9 keepalive_timeout 65;
10 server {
11 listen 80;
12 server_name www.etiantian.org;
13 location / {
14 root html/www;
15 index index.html index.htm;
16 }
17 }
18 server {
19 listen 81;
20 #由基于域名的80改为基于端口的81
21 server_name bbs.etiantian.org;
22 location / {
23 root html/bbs;
24 index index.html index.htm;
25 }
26 }
27 server {
28 listen 82;
29 #由基于域名的80改为基于端口的82
30 server_name blog.etiantian.org;
31 location / {
32 root html/blog;
33 index index.html index.htm;
34 }
35 }
36 }
[root@web1 conf]# nginx -t #检查是否有语法错误
nginx: the configuration file /application/nginx-1.16.0//conf/nginx.conf syntax is ok
nginx: configuration file /application/nginx-1.16.0//conf/nginx.conf test is successful
[root@web1 conf]# nginx -s reload
[root@web1 conf]# netstat -lntup|grep nginx #检查使用的端口
tcp 0 0 0.0.0.0:80 0.0.0.0:* LISTEN 2863/nginx: master
tcp 0 0 0.0.0.0:81 0.0.0.0:* LISTEN 2863/nginx: master
tcp 0 0 0.0.0.0:82 0.0.0.0:* LISTEN 2863/nginx: master
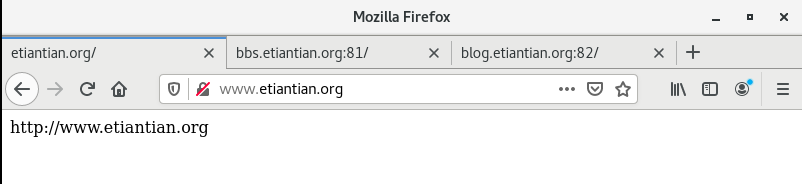
[root@web1 conf]# curl http://www.etiantian.org:80 #测试网页
http://www.etiantian.org
[root@web1 conf]# curl http://bbs.etiantian.org:81
http://bbs.etiantian.org
[root@web1 conf]# curl http://blog.etiantian.org:82
http://blog.etiantian.org
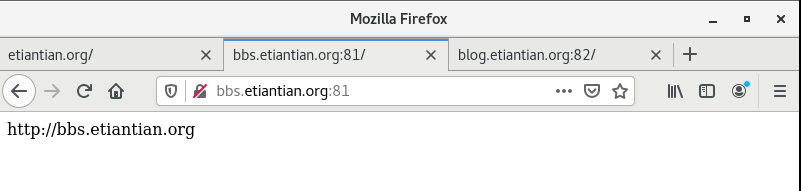
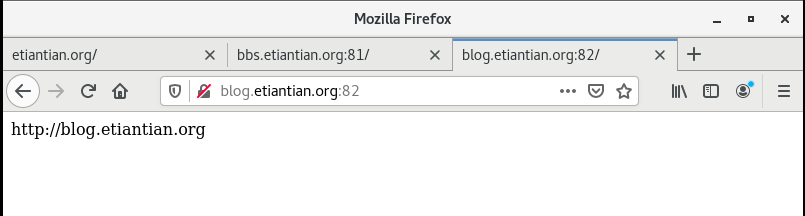
在浏览器中分别输入http://www.etiantian.org:80、http://bbs.etiantian.org:81、http://blog.etiantian.org:82网址,访问网页
基于ip的虚拟主机配置
在基于ip的虚拟主机的配置过程中,首先要在网卡中增加多个ip地址
[root@web1 ~]# ip addr add 192.168.23.111/24 dev ens33 label ens33:111
[root@web1 ~]# ip addr add 192.168.23.112/24 dev ens33 label ens33:112
[root@web1 ~]# ip add|grep ens33 #检查网卡上的ip地址,发现我们增加的ip都在
2: ens33: <BROADCAST,MULTICAST,UP,LOWER_UP> mtu 1500 qdisc pfifo_fast state UP group default qlen 1000
inet 192.168.23.110/24 brd 192.168.23.255 scope global ens33
inet 192.168.23.111/24 scope global secondary ens33:111
inet 192.168.23.112/24 scope global secondary ens33:112
[root@web1 ~]# ping 192.168.23.111 #使用ping命令检查网络
PING 192.168.23.111 (192.168.23.111) 56(84) bytes of data.
64 bytes from 192.168.23.111: icmp_seq=1 ttl=64 time=0.119 ms
64 bytes from 192.168.23.111: icmp_seq=2 ttl=64 time=0.087 ms
^C
--- 192.168.23.111 ping statistics ---
2 packets transmitted, 2 received, 0% packet loss, time 1000ms
rtt min/avg/max/mdev = 0.087/0.103/0.119/0.016 ms
[root@web1 ~]# ping 192.168.23.112
PING 192.168.23.112 (192.168.23.112) 56(84) bytes of data.
64 bytes from 192.168.23.112: icmp_seq=1 ttl=64 time=0.078 ms
64 bytes from 192.168.23.112: icmp_seq=2 ttl=64 time=0.067 ms
^C
--- 192.168.23.112 ping statistics ---
2 packets transmitted, 2 received, 0% packet loss, time 1001ms
rtt min/avg/max/mdev = 0.067/0.072/0.078/0.010 ms
增加虚拟主机配置
[root@web1 conf]# vim nginx.conf
[root@web1 conf]# cat -n nginx.conf
1 worker_processes 1;
2 events {
3 worker_connections 1024;
4 }
5 http {
6 include mime.types;
7 default_type application/octet-stream;
8 sendfile on;
9 keepalive_timeout 65;
10 server {
11 listen 192.168.23.110:80;
12 server_name www.etiantian.org;
13 location / {
14 root html/www;
15 index index.html index.htm;
16 }
17 }
18 server {
19 listen 192.168.23.111:80;
20
21 server_name bbs.etiantian.org;
22 location / {
23 root html/bbs;
24 index index.html index.htm;
25 }
26 }
27 server {
28 listen 192.168.23.112:80;
29
30 server_name blog.etiantian.org;
31 location / {
32 root html/blog;
33 index index.html index.htm;
34 }
35 }
36 }
重新加载Nginx服务使得修改的配置文件生效
[root@web1 conf]# nginx -t #检查语法错误
nginx: the configuration file /application/nginx-1.16.0//conf/nginx.conf syntax is ok
nginx: configuration file /application/nginx-1.16.0//conf/nginx.conf test is successful
[root@web1 conf]# nginx -s reload #平滑重启
[root@web1 conf]# netstat -lntup|grep nginx #检查端口,发现我们修改的ip地址不在,需要重启Nginx服务
tcp 0 0 0.0.0.0:80 0.0.0.0:* LISTEN 2863/nginx: master
tcp 0 0 0.0.0.0:81 0.0.0.0:* LISTEN 2863/nginx: master
tcp 0 0 0.0.0.0:82 0.0.0.0:* LISTEN 2863/nginx: master
[root@web1 conf]# nginx -s stop #关掉Nginx
[root@web1 conf]# nginx #重启Nginx
[root@web1 conf]# netstat -lntup|grep nginx #重新检查端口,发现现在合适了
tcp 0 0 192.168.23.110:80 0.0.0.0:* LISTEN 8933/nginx: master
tcp 0 0 192.168.23.111:80 0.0.0.0:* LISTEN 8933/nginx: master
tcp 0 0 192.168.23.112:80 0.0.0.0:* LISTEN 8933/nginx: master
访问网页
[root@web1 conf]# curl 192.168.23.110
http://www.etiantian.org
[root@web1 conf]# curl 192.168.23.111
http://bbs.etiantian.org
[root@web1 conf]# curl 192.168.23.112
http://blog.etiantian.org
到这里,基于域名的虚拟主机、基于端口的虚拟主机、基于IP的虚拟主机就都配置完成了。对Nginx软件的深入介绍也就告一段落。 (*╯3╰)(*^▽^*)(#^.^#)

 浙公网安备 33010602011771号