

官网教程:https://www.elastic.co/cn/webinars/getting-started-elasticsearch
0.手动集群部署:https://www.cnblogs.com/michael-xiang/p/13715692.html
分别进入es-7.15.1-node-1、es-7.15.1-node-2 和 es-7.15.1-node-3 的文件夹,config/elasticsearch.yml 设置如下


# es-7.3.0-node-1
cluster.name: search-7.3.2
node.name: node-1
node.master: true
node.data: false
node.ingest: false
network.host: 0.0.0.0
http.port: 9200
transport.port: 9300
discovery.seed_hosts: ["127.0.0.1:9300","127.0.0.1:9301","127.0.0.1:9302"]
cluster.initial_master_nodes: ["node-1"]

# es-7.3.0-node-2
cluster.name: search-7.3.2
node.name: node-2
node.master: true
node.data: true
node.ingest: false
network.host: 0.0.0.0
http.port: 9201
transport.port: 9301
discovery.seed_hosts: ["127.0.0.1:9300","127.0.0.1:9301","127.0.0.1:9302"]

# es-7.3.0-node-3
cluster.name: search-7.3.2
node.name: node-3
node.master: true
node.data: true
node.ingest: false
network.host: 0.0.0.0
http.port: 9202
transport.port: 9302
discovery.seed_hosts: ["127.0.0.1:9300","127.0.0.1:9301","127.0.0.1:9302"]
1.elasticSearch docker 部署(官网):https://www.elastic.co/guide/en/elasticsearch/reference/current/docker.html
#(单一结节点集群)To start a single-node Elasticsearch cluster for development or testing, specify
       sudo docker run -itd  --restart=always  --name=es_sigle --net=host -p 9200:9200 -p 9300:9300 \
         --ulimit nofile=102400:102400 \
         -e "http.cors.enabled=true" \
         -e 'http.cors.allow-origin="*"' \
         -e "discovery.type=single-node" \
         -e node.name=es01  \
         -e bootstrap.memory_lock=true \
         --ulimit memlock = -1:-1  \
         -e "ES_JAVA_OPTS=-Xms512m -Xmx512m" \
         -v /opt/docker/elasticsearch/data:/usr/share/elasticsearch/data  \
         -v /opt/docker/elasticsearch/logs:/usr/share/elasticsearch/logs \
      -v /opt/docker/elasticsearch/plugins:/usr/share/elasticsearch/plugins:rw \
         docker.elastic.co/elasticsearch/elasticsearch:7.15.1
多个节点集群():
#需要修改 host,或者直接指定IP
docker run   -itd  --restart=always --net=host -p 9200:9200 -p 9300:9300  \
      --ulimit nofile=102400:102400  \
      -e node.name=es01   \
      -e cluster.name=es-docker-cluster  \
      -e discovery.seed_hosts=es02,es03   \
      -e cluster.initial_master_nodes=es01,es02,es03  \
      -e bootstrap.memory_lock=true \
    --ulimit memlock = -1:-1  \
      -e "ES_JAVA_OPTS=-Xms8g -Xmx8g"  \
      -v /opt/docker/elasticsearch/data:/usr/share/elasticsearch/data:rw  \
      -v /opt/docker/elasticsearch/logs:/usr/share/elasticsearch/logs:rw  \
      -v /opt/docker/elasticsearch/plugins:/usr/share/elasticsearch/plugins:rw \
       docker.elastic.co/elasticsearch/elasticsearch:7.15.1
指定ip
 sudo docker run   -itd  --restart=always  -p 9200:9200 -p 9300:9300  --net=host  \
      --ulimit nofile=102400:102400  \
      -e node.name=es01   \
      -e cluster.name=es-docker-cluster  \
      -e discovery.seed_hosts=["192.168.18.131","192.168.18.132"]   \
      -e cluster.initial_master_nodes=["es01"] \
       -e bootstrap.memory_lock=true  \
       --ulimit memlock=-1:-1 \
      -e "ES_JAVA_OPTS=-Xms512m -Xmx512m"  \
      -v /opt/docker/elasticsearch/data:/usr/share/elasticsearch/data \
      -v /opt/docker/elasticsearch/logs:/usr/share/elasticsearch/logs \
      -v /opt/docker/elasticsearch/plugins:/usr/share/elasticsearch/plugins:rw \
       docker.elastic.co/elasticsearch/elasticsearch:7.15.1
说明:
--ulimit memlock=-1:-1 # 禁止内存交换
--ulimit nofile=102400:102400 #修改句柄数
-e discovery.seed_hosts 如果想单一结点,此配置不要即可,master_node 填写自己的ip
2.elasticsearch head 部署:
方式1
Running with docker (https://github.com/mobz/elasticsearch-head)
> for ElasticSearch 7.X :建议直接使用谷歌的插件,最新版本为0.1.5: https://chrome.google.com/webstore/detail/elasticsearch-head/ffmkiejjmecolpfloofpjologoblkegm/
如果打不开google ,点击这下载:https://github.com/Lshan523/chrome-plugs/blob/main/ElasticSearch_Head7x.zip
- for Elasticsearch 5.x:
docker run -p 9100:9100 mobz/elasticsearch-head:5 - for Elasticsearch 2.x:
docker run -p 9100:9100 mobz/elasticsearch-head:2 - for Elasticsearch 1.x:
docker run -p 9100:9100 mobz/elasticsearch-head:1 - for fans of alpine there is
mobz/elasticsearch-head:5-alpine
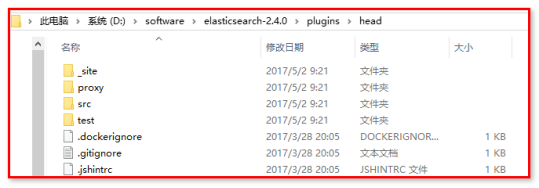
【方案二】:下载解压
1、插件下载地址
https://github.com/mobz/elasticsearch-head
2、安装方法:
将下载下的zip文件,解压缩到plugins/head目录下
目录路径如下:elasticsearch-2.4.0/plugins/head/
3、启动es bin/elasticsearch
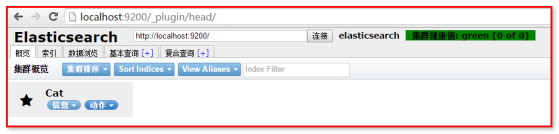
4、访问集群
浏览器地址栏输入http://localhost:9200/_plugin/head/
5、显示结果如下图

 浙公网安备 33010602011771号