【Android】与服务器实现JSON数据通信
一、前言
作为一名移动端开发人员,具备一定的服务端开发能力也是非常必要的,本篇博客讲述如何在Android和服务器之间实现JSON数据通信交互,博客内容基于另外一篇博客:【Web】Eclipse + Maven + Struts搭建服务器。
二、服务器端改造
在博客【Web】Eclipse + Maven + Struts搭建服务器中,我们实现了服务器的搭建,现在要做的事情就是让它返回的数据是一个JSON格式的,这样在获得请求的时候,我们才可以得到JSON数据,其配置改变如下。
首先我们新建一个com.android.display.bean包,新建一个User类,如下:


 1 package conm.android.sdisplay.bean;
 2
 3 public class User {
 4     String id;
 5     String name;
 6     String password;
 7     String say;
 8     public String getId() {
 9         return id;
10     }
11     public void setId(String id) {
12         this.id = id;
13     }
14     public String getName() {
15         return name;
16     }
17     public void setName(String name) {
18         this.name = name;
19     }
20     public String getPassword() {
21         return password;
22     }
23     public void setPassword(String password) {
24         this.password = password;
25     }
26     public String getSay() {
27         return say;
28     }
29     public void setSay(String say) {
30         this.say = say;
31     }
32 }
修改HelloAction代码如下:
 1 package com.android.displaymain;
 2
 3 import java.util.HashMap;
 4 import java.util.Map;
 5
 6 import com.opensymphony.xwork2.ActionSupport;
 7
 8 import conm.android.sdisplay.bean.User;
 9
10 public class HelloAction extends ActionSupport{
11     //将会被Struts2序列化为JSON字符串的对象
12     private Map<String, Object> dataMap;
13
14     @Override
15     public String execute() throws Exception {
16         // dataMap中的数据将会被Struts2转换成JSON字符串,所以这里要先清空其中的数据
17         dataMap = new HashMap<String, Object>();
18         User user = new User();
19         user.setId("123");
20         user.setName("Android");
21         user.setPassword("abcdefg");
22         user.setSay("Hello world !");
23         dataMap.put("user", user);
24         // 放入一个是否操作成功的标识
25         dataMap.put("success", true);
26         // 返回结果
27         return SUCCESS;
28     }
29
30     public Map<String, Object> getDataMap() {
31         return dataMap;
32     }
33
34     public void setDataMap(Map<String, Object> dataMap) {
35         this.dataMap = dataMap;
36     }
37 }
我们的目标是将dataMap以JSON格式返回。现在Action已经完成了,但是还需要配置一下,修改struts.xml文件如下:
 1 <?xml version="1.0" encoding="UTF-8" ?>
 2 <!DOCTYPE struts PUBLIC
 3     "-//Apache Software Foundation//DTD Struts Configuration 2.3//EN"
 4     "http://struts.apache.org/dtds/struts-2.3.dtd">
 5
 6 <struts>
 7 <package name="com.android.server" namespace="/" extends="json-default" >
 8     <default-action-ref name="index"/>
 9
10     <action name="index">
11        <result>/index.jsp</result>      <!-- index.htm为项目根目录的默认页面 -->
12     </action>
13
14     <action name="HelloAction" class="com.android.displaymain.HelloAction" method="execute">
15         <result type="json"> <!-- 这里指定将被Struts2序列化的属性,该属性在action中必须有对应的getter方法 -->
16              <param name="root">dataMap</param>
17         </result>
18     </action>
19 </package>
20 </struts>
注意两处改动,一是package的extends属性,二是HelloAction的结果返回类型,已经变为json,并且我们声明了一个叫做root的param,其值就是我们要JSON化的属性,至于为什么要声明,待会儿可以测试一下。
修改完之后,我们因为使用JSON,需要Struts做一定的工作,我们就需要引入新的jar包,将pom文件改为:
 1 <project xmlns="http://maven.apache.org/POM/4.0.0" xmlns:xsi="http://www.w3.org/2001/XMLSchema-instance"
 2   xsi:schemaLocation="http://maven.apache.org/POM/4.0.0 http://maven.apache.org/maven-v4_0_0.xsd">
 3   <modelVersion>4.0.0</modelVersion>
 4   <groupId>com.android.network</groupId>
 5   <artifactId>network_server</artifactId>
 6   <packaging>war</packaging>
 7   <version>0.0.1-SNAPSHOT</version>
 8   <name>network_server Maven Webapp</name>
 9   <url>http://maven.apache.org</url>
10   <dependencies>
11     <dependency>
12       <groupId>junit</groupId>
13       <artifactId>junit</artifactId>
14       <version>3.8.1</version>
15       <scope>test</scope>
16     </dependency>
17     <dependency>
18             <groupId>org.apache.struts</groupId>
19             <artifactId>struts2-core</artifactId>
20             <version>2.3.16</version>
21         </dependency>
22         <dependency>
23             <groupId>org.apache.commons</groupId>
24             <artifactId>commons-io</artifactId>
25             <version>1.3.2</version>
26         </dependency>
27         <dependency>
28             <groupId>org.apache.struts</groupId>
29             <artifactId>struts2-json-plugin</artifactId>
30             <version>2.3.4</version>
31         </dependency>
32         <dependency>
33             <groupId>commons-lang</groupId>
34             <artifactId>commons-lang</artifactId>
35             <version>2.3</version>
36         </dependency>
37   </dependencies>
38   <build>
39     <finalName>network_server</finalName>
40   </build>
41 </project>
这里增添了两个jar包,最重要的一个是struts2-json-plugin。
配置完成,我们再运行一下工程,运行起来以后,我们在浏览器(注:非IE,否则会要求你下载文件)中输入网址:http://localhost:8080/display/HelloAction就可以看到浏览器返回的数据:
{"success":true,"user":{"id":"123","name":"Android","password":"abcdefg","say":"Hello world !"}}
很明显,服务器端已经正确返回我们需要的JSON数据了!读者可以去掉struts.xml配置中的关于root的配置,看看结果就明白这段配置的含义了。接下来就看Android端的了。
三、Android客户端构建
Android实现的目标是:向服务器发送请求,并且携带参数,展示返回的JSON数据。Android环境的搭建就不赘述啦~直接进入正题。
发起请求的Activity如下:
 1 package com.example.androidjson;
 2
 3 import java.io.IOException;
 4
 5 import org.apache.http.HttpResponse;
 6 import org.apache.http.HttpStatus;
 7 import org.apache.http.client.ClientProtocolException;
 8 import org.apache.http.client.HttpClient;
 9 import org.apache.http.client.methods.HttpPost;
10 import org.apache.http.impl.client.DefaultHttpClient;
11 import org.apache.http.util.EntityUtils;
12
13 import android.app.Activity;
14 import android.os.Bundle;
15 import android.os.Handler;
16 import android.os.Message;
17 import android.view.View;
18 import android.view.View.OnClickListener;
19 import android.widget.Button;
20 import android.widget.TextView;
21
22 public class MainActivity extends Activity {
23     TextView textView;
24     Button dataButton;
25     Handler mainHandler;
26
27     @Override
28     protected void onCreate(Bundle savedInstanceState) {
29         super.onCreate(savedInstanceState);
30         setContentView(R.layout.activity_main);
31
32         textView = (TextView)findViewById(R.id.textView);
33         dataButton = (Button)findViewById(R.id.dataButton);
34
35         mainHandler = new Handler(){
36
37             @Override
38             public void handleMessage(Message msg) {
39                 // TODO Auto-generated method stub
40                 textView.setText(msg.obj.toString());
41             }
42         };
43
44         dataButton.setOnClickListener(new OnClickListener(){
45             @Override
46             public void onClick(View v) {
47                 // TODO Auto-generated method stub
48                 Thread thread = new Thread(){
49                     @Override
50                     public void run() {
51                         // TODO Auto-generated method stub
52                         sendData();
53                     }
54                 };
55
56                 thread.start();
57             }
58         });
59     }
60
61     private void sendData(){
62         HttpClient httpClient = new DefaultHttpClient();
63         HttpPost httpPost = new HttpPost("http://192.168.0.102:8080/display/HelloAction");
64         try {
65             HttpResponse httpResponse = httpClient.execute(httpPost);
66             if (httpResponse.getStatusLine().getStatusCode() == HttpStatus.SC_OK) {
67                   // 取得返回的数据
68                   Message msg = mainHandler.obtainMessage(0, EntityUtils.toString(httpResponse.getEntity()));
69                   mainHandler.sendMessage(msg);
70             }
71         } catch (ClientProtocolException e) {
72             // TODO Auto-generated catch block
73             e.printStackTrace();
74         } catch (IOException e) {
75             // TODO Auto-generated catch block
76             e.printStackTrace();
77         }
78     }
79 }
按下按钮后返回结果如下:
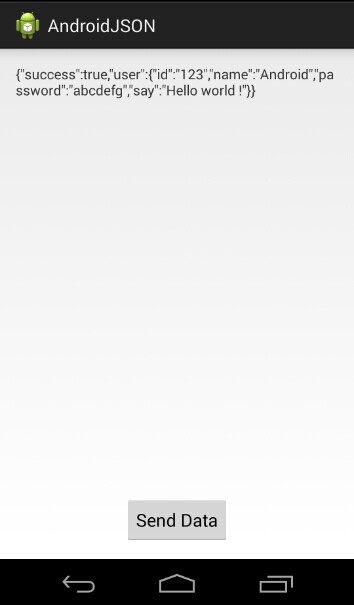
到这里,基本功能已经完成,我们可以发起请求,获取到正确的JSON格式数据了。接下来就是解析JSON数据格式了~
修改一下服务器端的HelloAction代码如下:
 1 package com.android.displaymain;
 2
 3 import java.util.HashMap;
 4 import java.util.Map;
 5
 6 import com.opensymphony.xwork2.ActionSupport;
 7
 8 import conm.android.sdisplay.bean.User;
 9
10 public class HelloAction extends ActionSupport{
11     //将会被Struts2序列化为JSON字符串的对象
12     private Map<String, Object> dataMap;
13
14     private String name;
15
16     @Override
17     public String execute() throws Exception {
18         // dataMap中的数据将会被Struts2转换成JSON字符串,所以这里要先清空其中的数据
19         dataMap = new HashMap<String, Object>();
20         User user = new User();
21         user.setId("123");
22         user.setName(name);
23         user.setPassword("abcdefg");
24         user.setSay("Hello world !");
25         dataMap.put("user", user);
26         // 放入一个是否操作成功的标识
27         dataMap.put("success", true);
28         // 返回结果
29         return SUCCESS;
30     }
31
32     public Map<String, Object> getDataMap() {
33         return dataMap;
34     }
35
36     public void setDataMap(Map<String, Object> dataMap) {
37         this.dataMap = dataMap;
38     }
39
40     public String getName() {
41         return name;
42     }
43
44     public void setName(String name) {
45         this.name = name;
46     }
47 }
这里要求我们传入一个参数name,并且设置到返回值中去。现在,我们的目标是通过JSON向服务器端发送带参数请求,并正确解析返回的数据。修改Activity代码如下:
  1 package com.example.androidjson;
  2
  3 import java.io.IOException;
  4 import java.util.ArrayList;
  5
  6 import org.apache.http.HttpEntity;
  7 import org.apache.http.HttpResponse;
  8 import org.apache.http.HttpStatus;
  9 import org.apache.http.NameValuePair;
 10 import org.apache.http.client.ClientProtocolException;
 11 import org.apache.http.client.HttpClient;
 12 import org.apache.http.client.entity.UrlEncodedFormEntity;
 13 import org.apache.http.client.methods.HttpPost;
 14 import org.apache.http.impl.client.DefaultHttpClient;
 15 import org.apache.http.message.BasicNameValuePair;
 16 import org.apache.http.protocol.HTTP;
 17 import org.apache.http.util.EntityUtils;
 18 import org.json.JSONException;
 19 import org.json.JSONObject;
 20
 21 import android.app.Activity;
 22 import android.os.Bundle;
 23 import android.os.Handler;
 24 import android.os.Message;
 25 import android.view.View;
 26 import android.view.View.OnClickListener;
 27 import android.widget.Button;
 28 import android.widget.TextView;
 29
 30 public class MainActivity extends Activity {
 31     TextView textView;
 32     Button dataButton;
 33     Handler mainHandler;
 34
 35     @Override
 36     protected void onCreate(Bundle savedInstanceState) {
 37         super.onCreate(savedInstanceState);
 38         setContentView(R.layout.activity_main);
 39
 40         textView = (TextView)findViewById(R.id.textView);
 41         dataButton = (Button)findViewById(R.id.dataButton);
 42
 43         mainHandler = new Handler(){
 44
 45             @Override
 46             public void handleMessage(Message msg) {
 47                 // TODO Auto-generated method stub
 48                 parseJSON(msg.obj.toString());
 49             }
 50         };
 51
 52         dataButton.setOnClickListener(new OnClickListener(){
 53             @Override
 54             public void onClick(View v) {
 55                 // TODO Auto-generated method stub
 56                 Thread thread = new Thread(){
 57                     @Override
 58                     public void run() {
 59                         // TODO Auto-generated method stub
 60                         sendData();
 61                     }
 62                 };
 63
 64                 thread.start();
 65             }
 66         });
 67     }
 68
 69     private void parseJSON(String result){
 70         JSONObject jsonObj;
 71         try {
 72             jsonObj = new JSONObject(result);
 73             boolean resResult = jsonObj.getBoolean("success");
 74             JSONObject userObj = jsonObj.getJSONObject("user");
 75             String id = userObj.getString("id");
 76             String name = userObj.getString("name");
 77             String say = userObj.getString("say");
 78             textView.setText("ID: "+ id + "\n姓名: " + name + "\n性别: " + say);
 79         } catch (JSONException e) {
 80             // TODO Auto-generated catch block
 81             e.printStackTrace();
 82         }
 83     }
 84
 85     private void sendData(){
 86         HttpClient httpClient = new DefaultHttpClient();
 87         HttpPost httpPost = new HttpPost("http://192.168.0.102:8080/display/HelloAction");
 88         try {
 89             ArrayList<NameValuePair> list = new ArrayList<NameValuePair>();
 90             list.add(new BasicNameValuePair("name", "大脚印"));
 91             HttpEntity en = new UrlEncodedFormEntity(list, HTTP.UTF_8);
 92             httpPost.setEntity(en);
 93             HttpResponse httpResponse = httpClient.execute(httpPost);
 94             if (httpResponse.getStatusLine().getStatusCode() == HttpStatus.SC_OK) {
 95                   // 取得返回的数据
 96                   Message msg = mainHandler.obtainMessage(0, EntityUtils.toString(httpResponse.getEntity()));
 97                   mainHandler.sendMessage(msg);
 98             }
 99         } catch (ClientProtocolException e) {
100             // TODO Auto-generated catch block
101             e.printStackTrace();
102         } catch (IOException e) {
103             // TODO Auto-generated catch block
104             e.printStackTrace();
105         }
106     }
107 }
点击Send Data 按钮:

至此,我们已经可以完成从数据库返回JSON格式的数据,并且正确解析数据~
五、总结
突发奇想,想要自己走一遍Android客户端到服务器之间的数据传递流程,所以花了点时间研究了一下~
使用JSON传递数据非常简单,尤其是当服务器使用Struts2时可以使用插件支持该功能,更是非常方便~

 浙公网安备 33010602011771号