
一 .linux上安装 python git redis nginx
一 Linux平台上 python git redis nginx 源码包安装
 下载依赖库

 yum -y  install gcc  gcc-c++  autoconf  automake
 yum -y install  zlib zlib-devel  openssl  openssl-devel  pcre pcre-devel
 yum -y install gcc automake autoconf libtool make
1. Python安装图解
https://www.cnblogs.com/Jimc/p/10218387.html
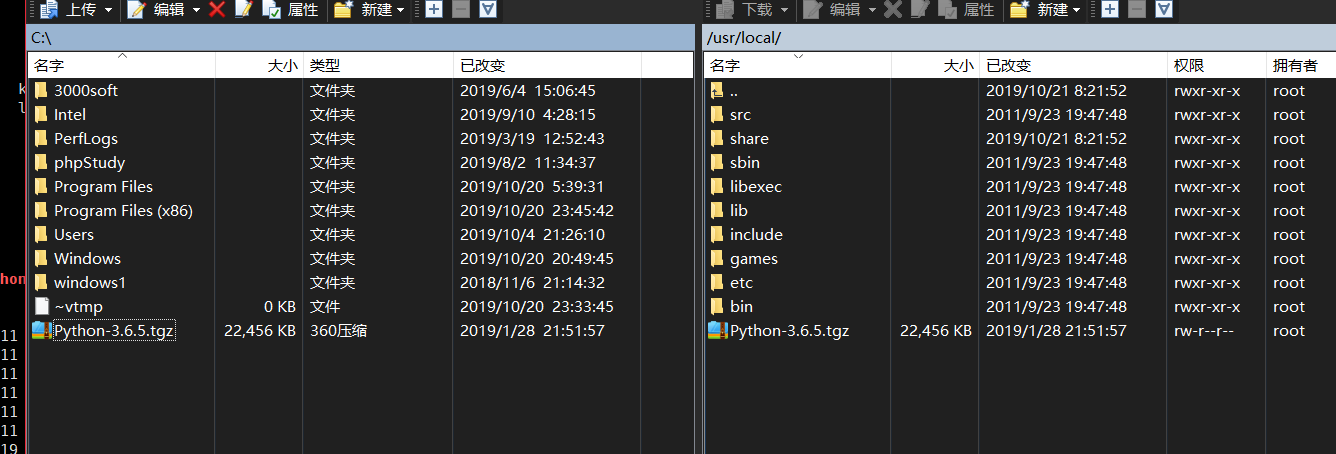
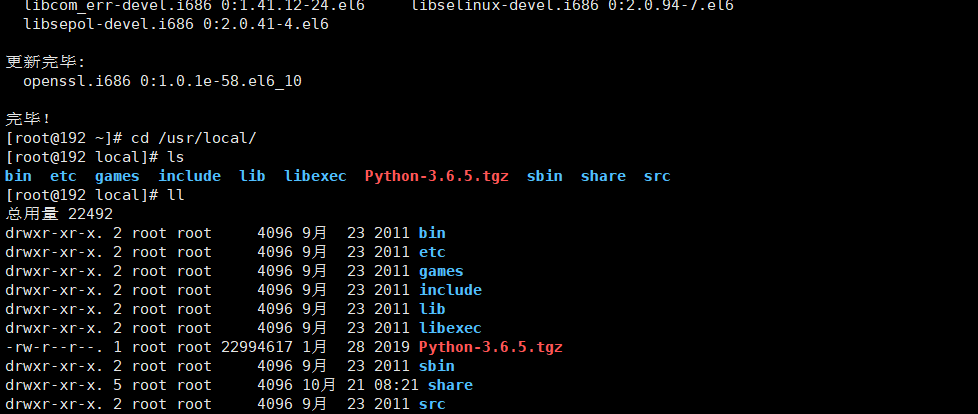
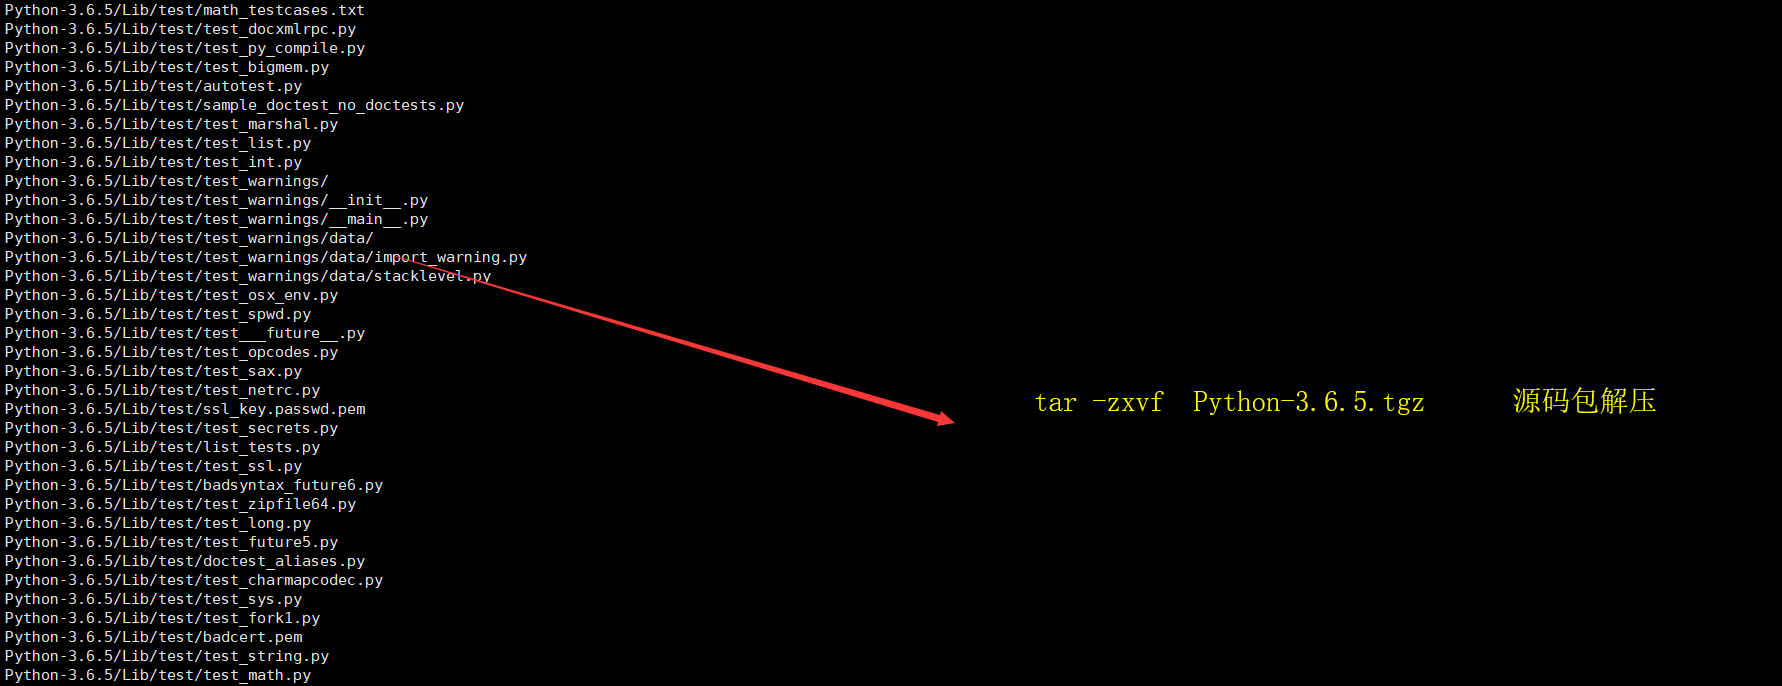
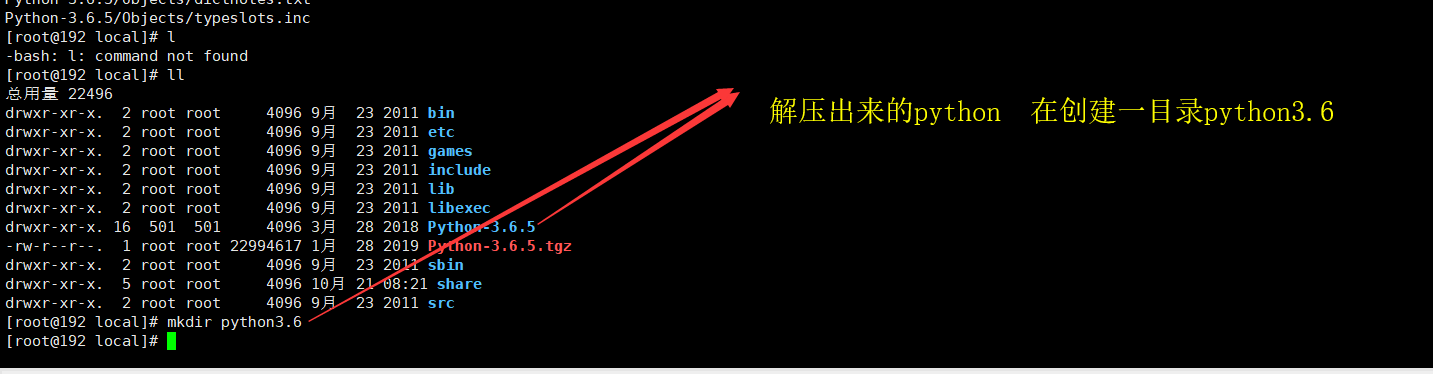
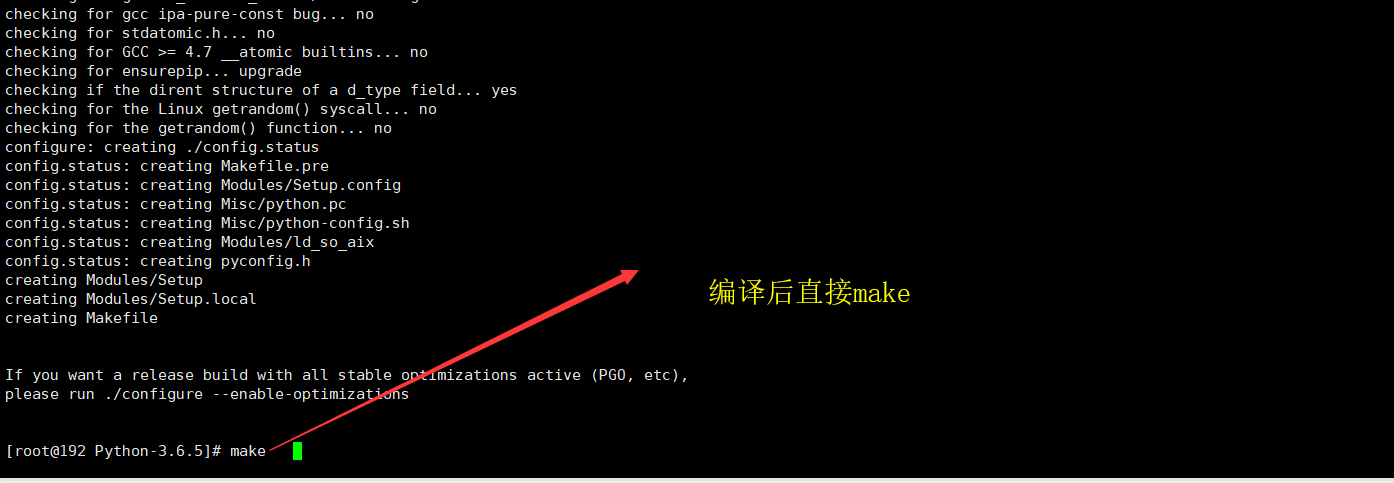
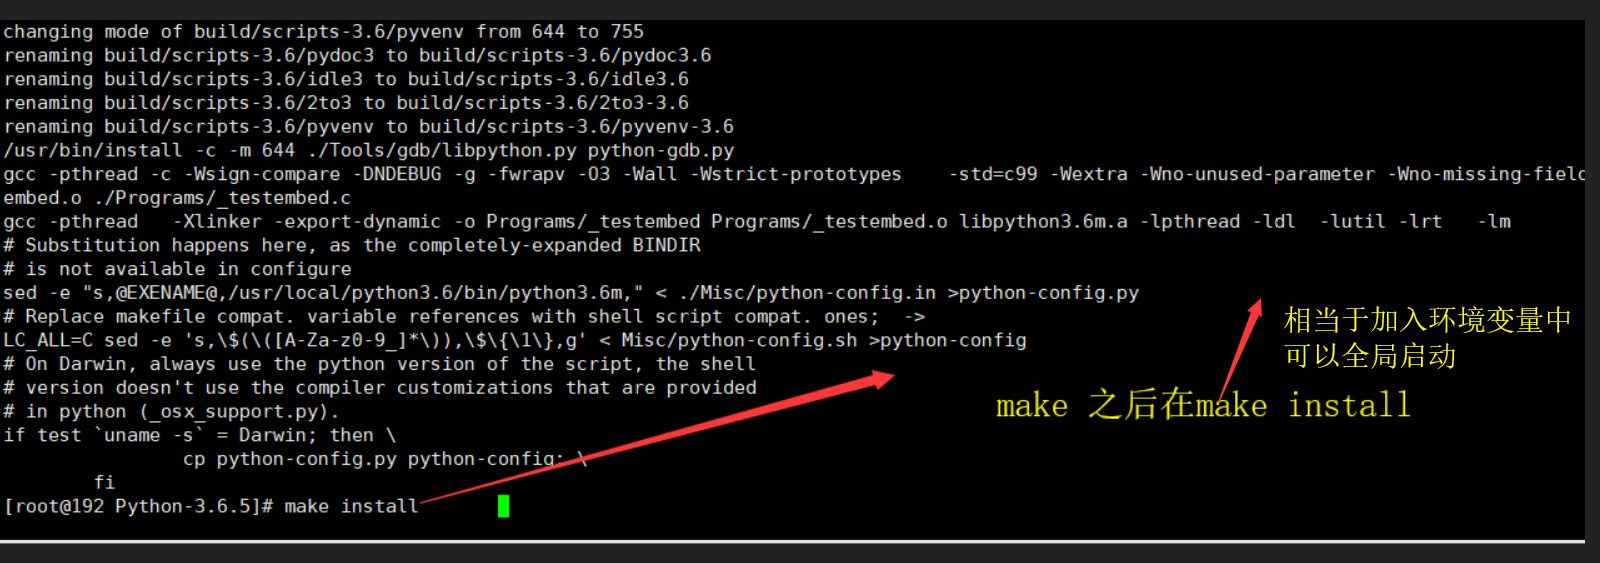
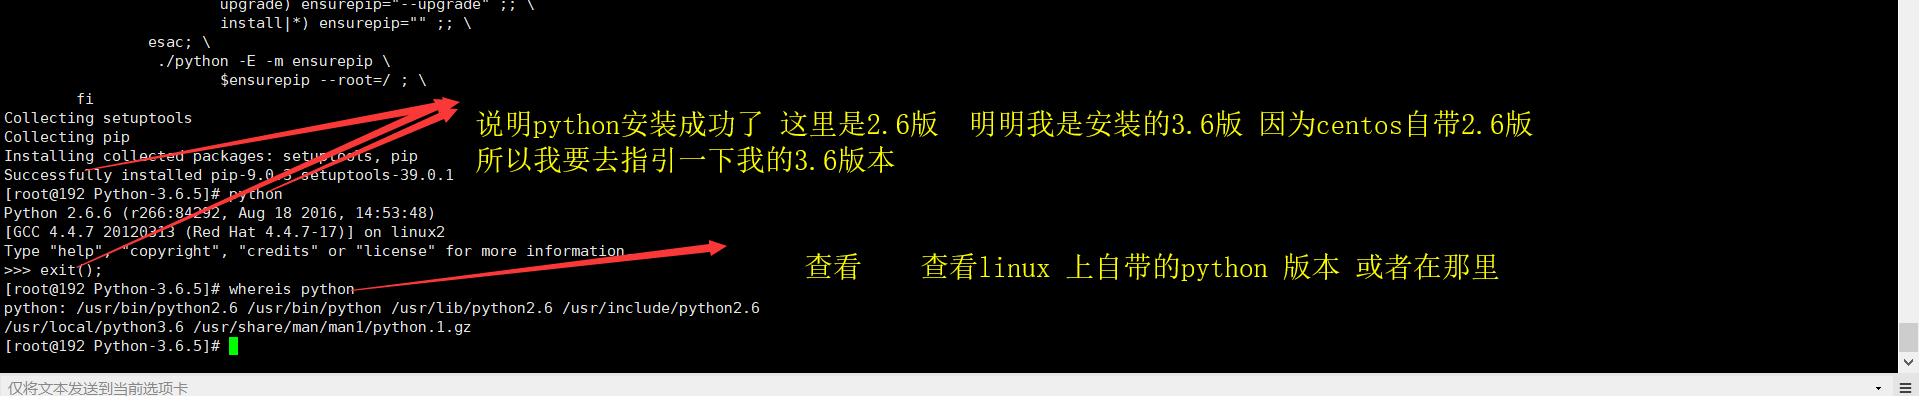
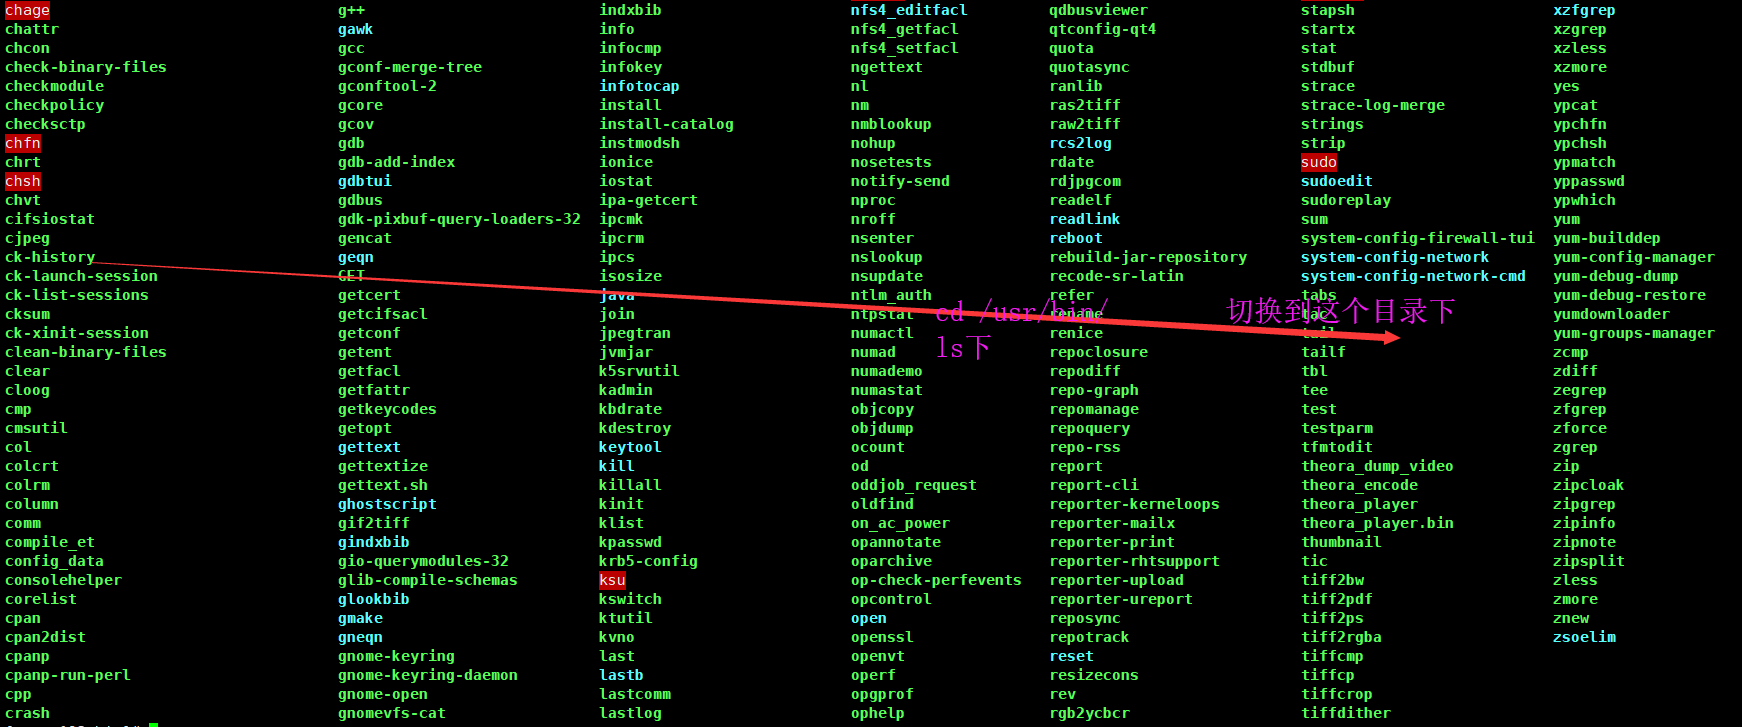
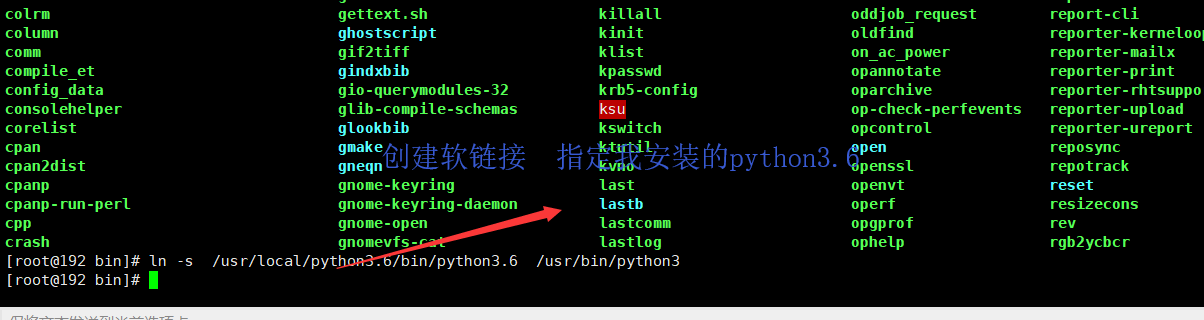
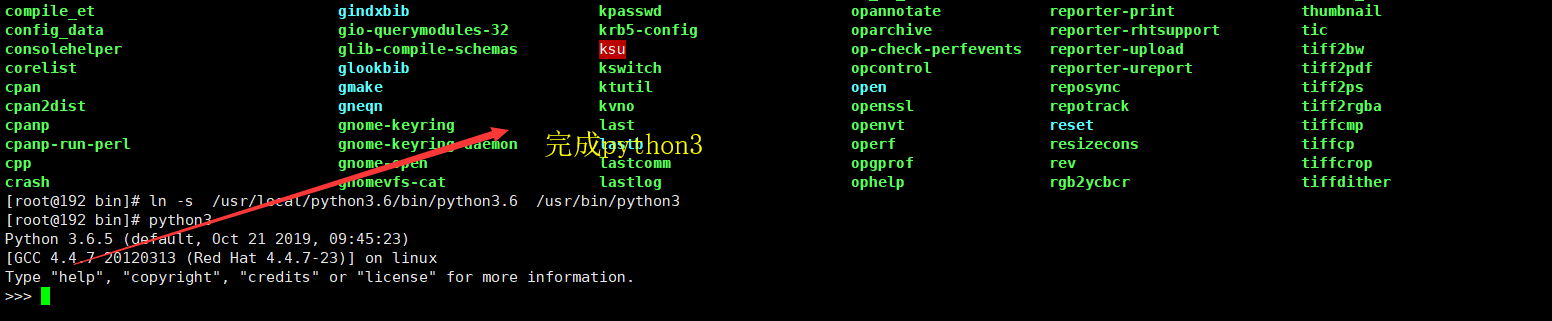
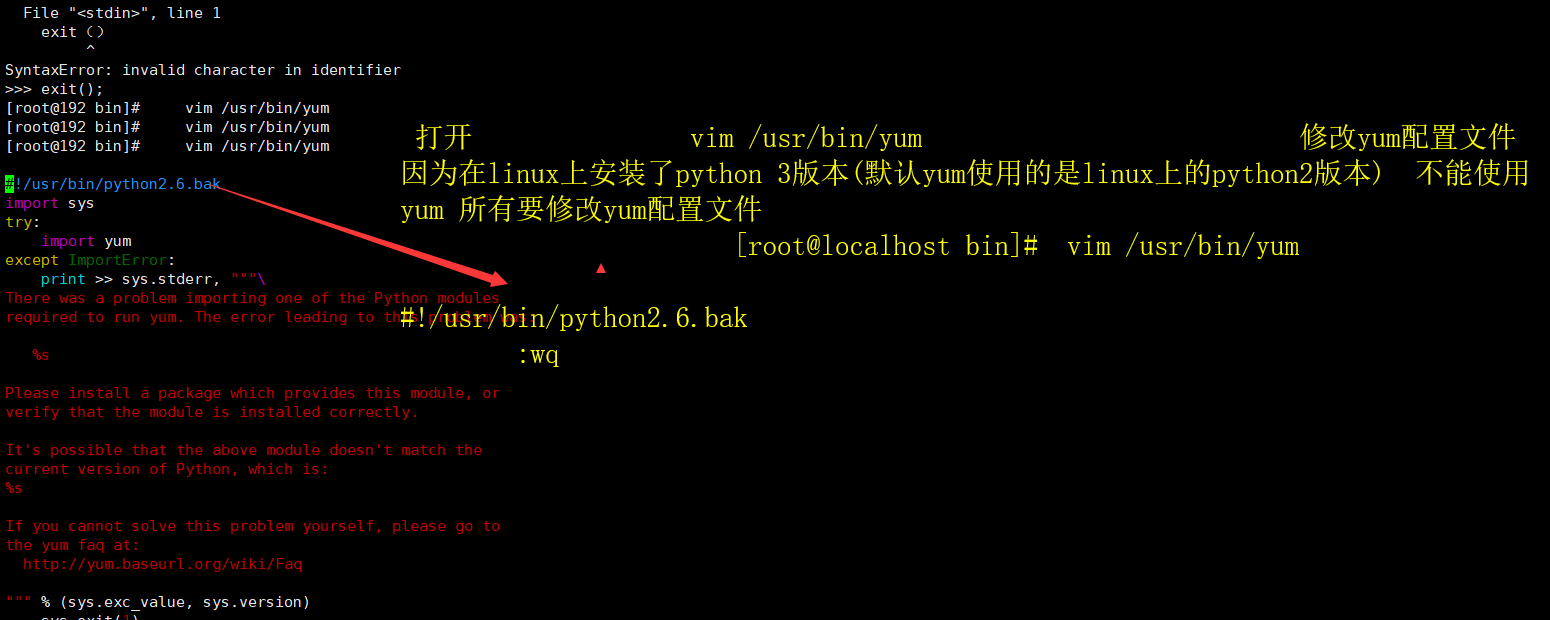
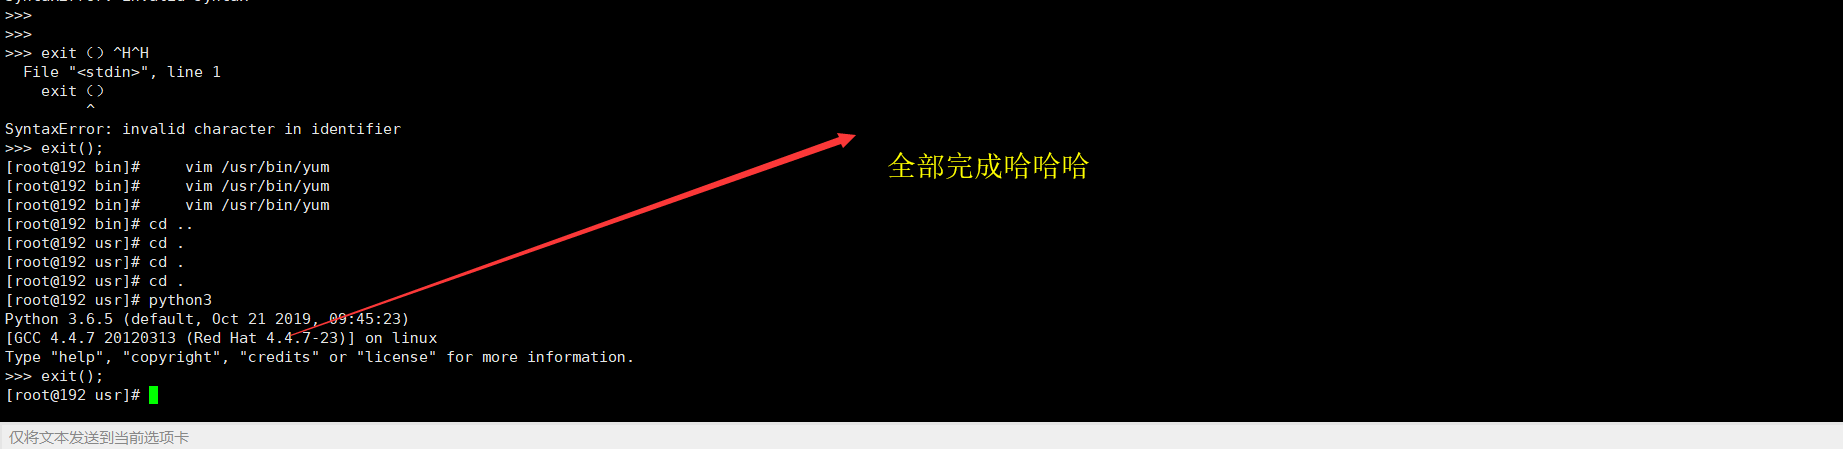
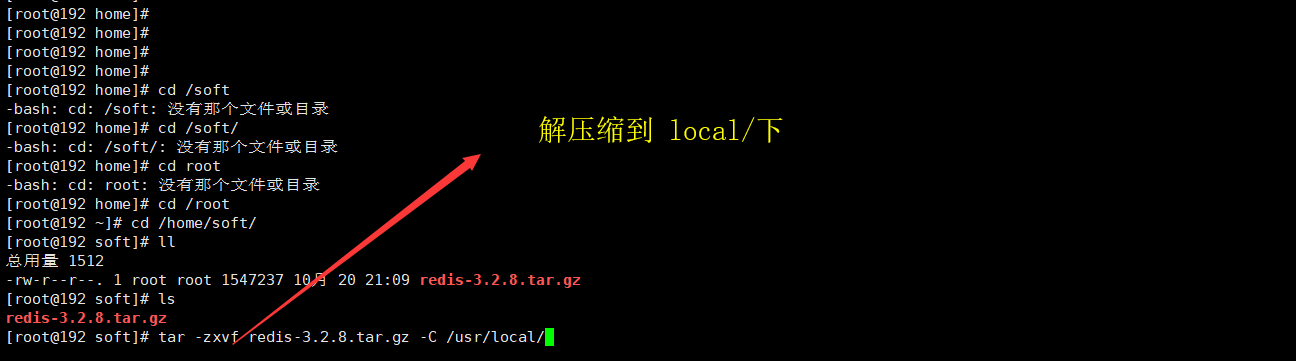
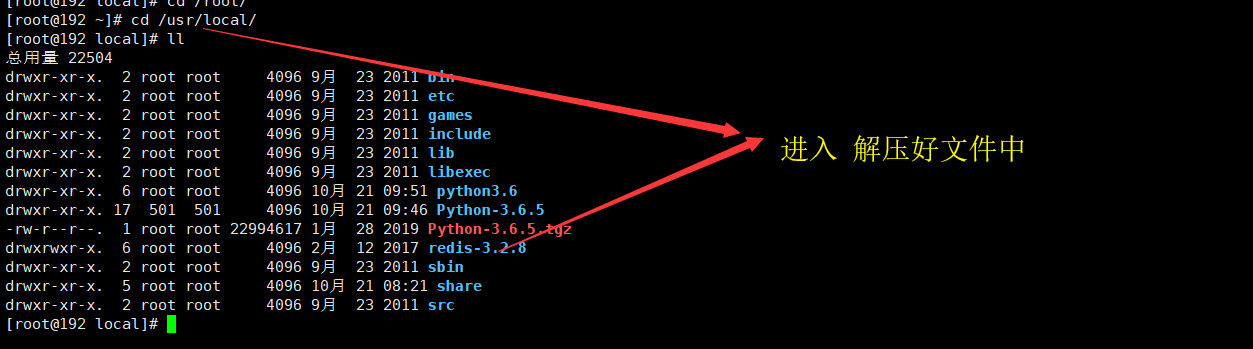
tar -zxvf  Python-3.6.5.tgz                                                                        第三步解压python包
mkdir python3.6                                                                                       第四步创建文件夹python3.6
cd  Python-3.6.5                                                                                              第五步进入到python源码包
[root@localhost Python-3.6.5]# ./configure --prefix=/usr/local/python3.6    第六步
make                                     第七步

make install                           第八步
whereis python   查看linux 上的python 版本 或者在那里                     第九步
cd /usr/bin/        切换到这个目录下                                                   第十步
mv python python2.6.bak     重命名linux中的python 备份                 第十一步
ln -s  /usr/local/python3.6/bin/python3.6  /usr/bin/python3           第十二步 创建软链接

 打开               vim /usr/bin/yum                          修改yum配置文件 因为在linux上安装了python 3版本(默认yum使用的是linux上的python2版本)  不能使用yum 所有要修改yum配置文件
                       [root@localhost bin]#  vim /usr/bin/yum

#!/usr/bin/python2.6.bak
        :wq


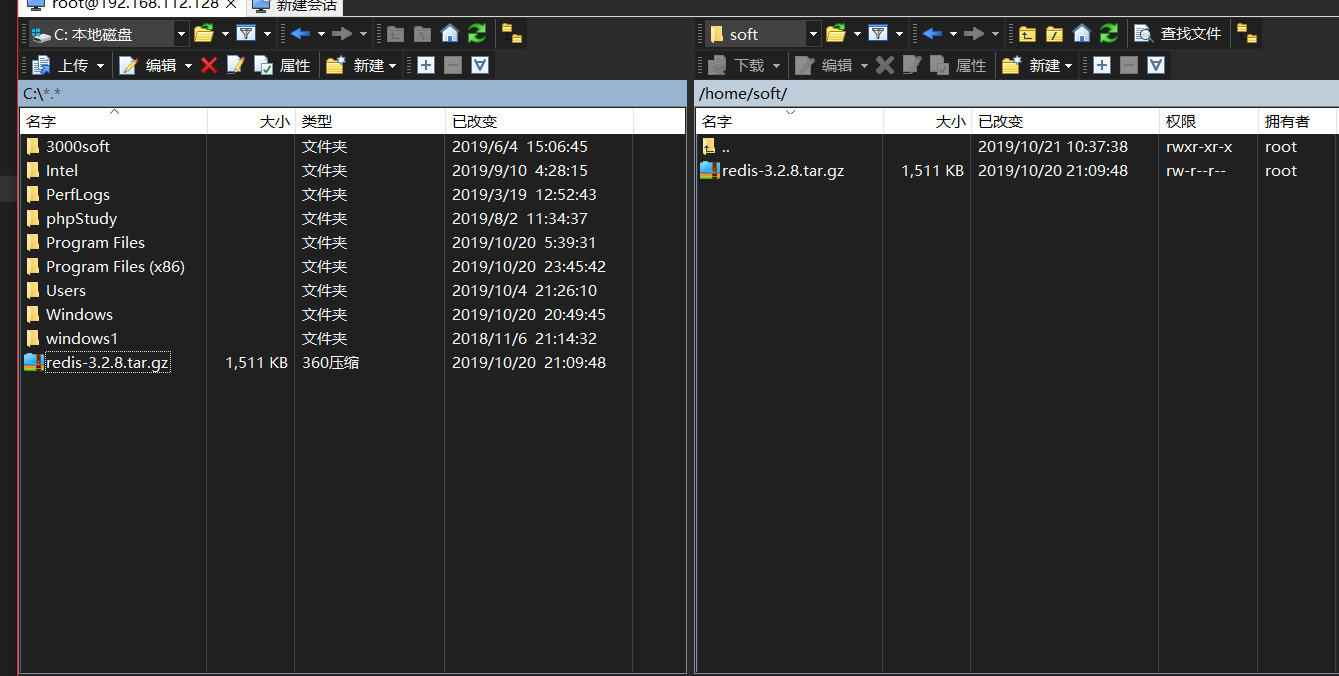
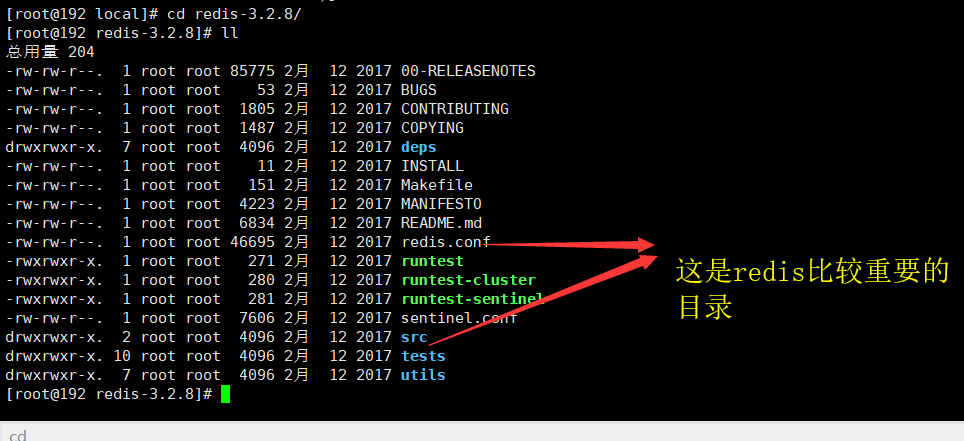
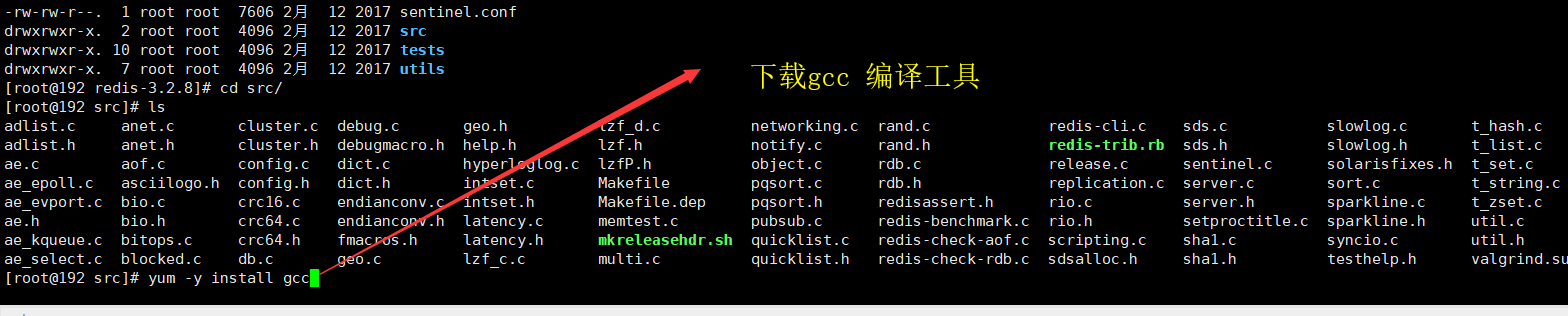
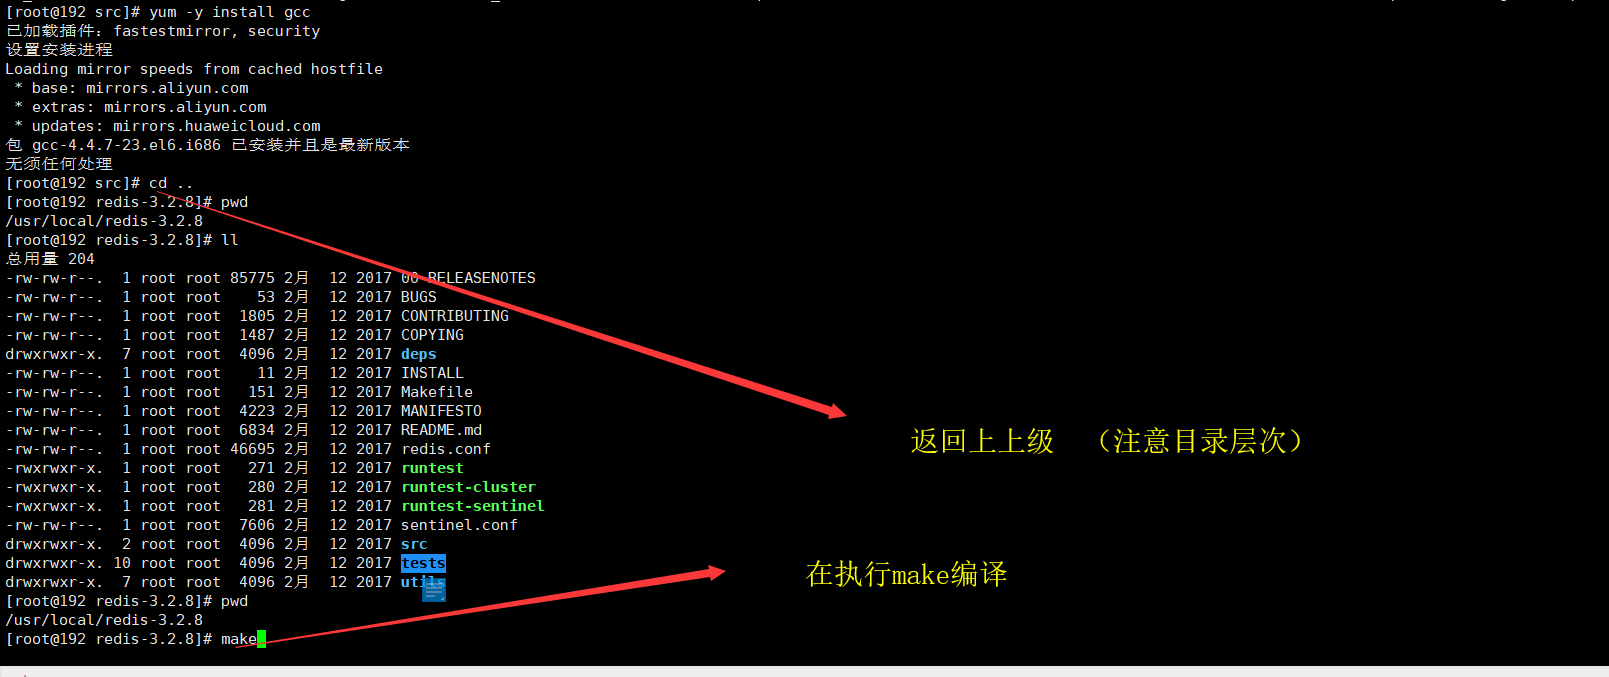
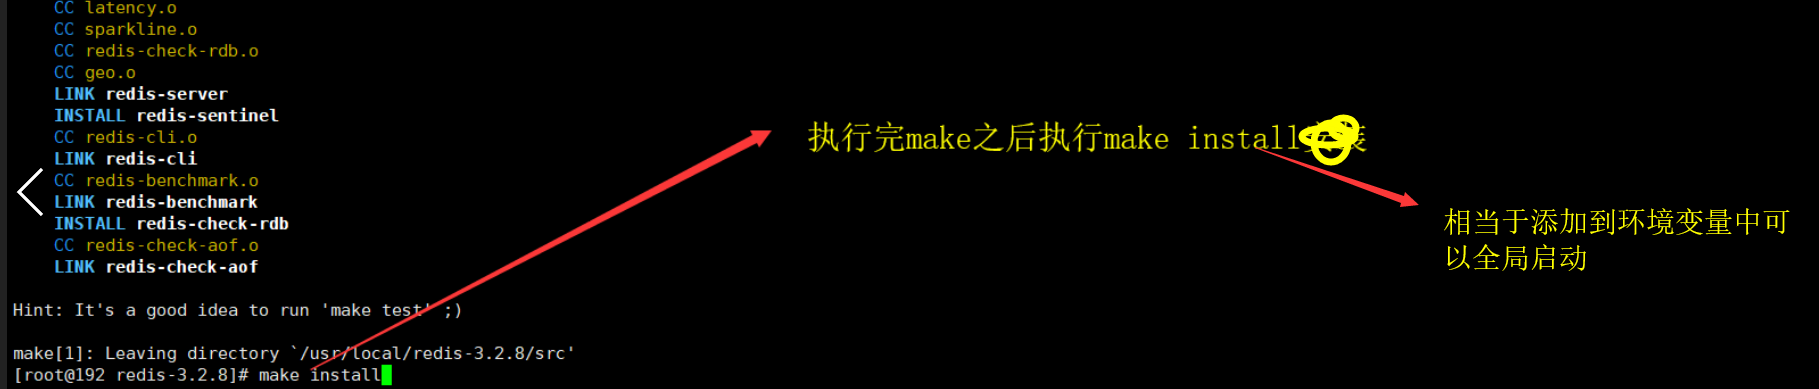
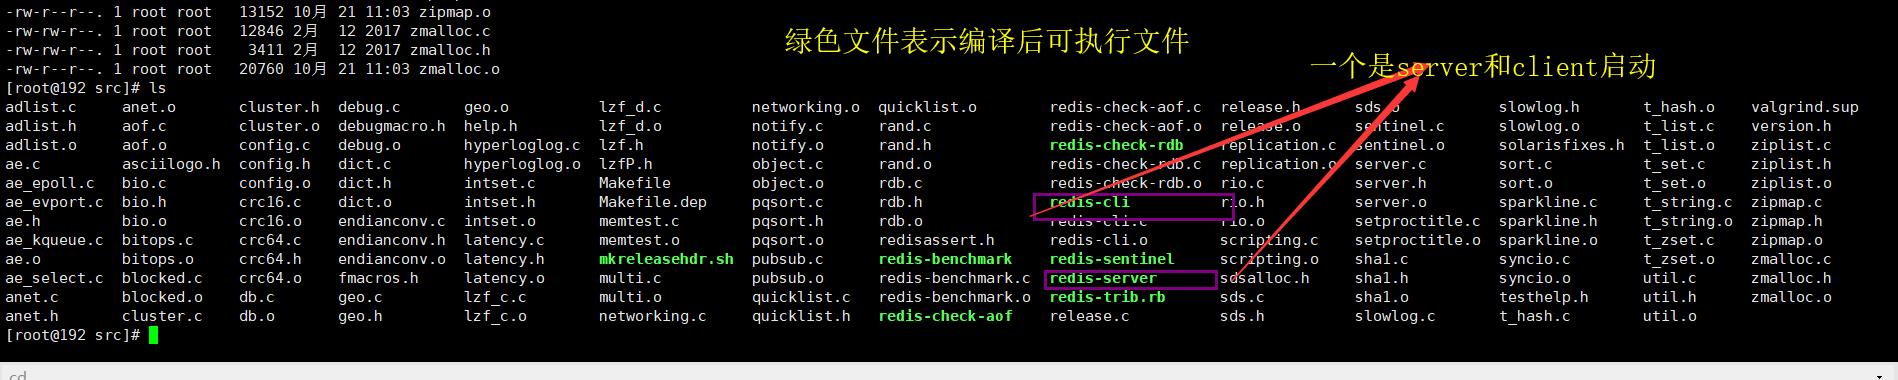
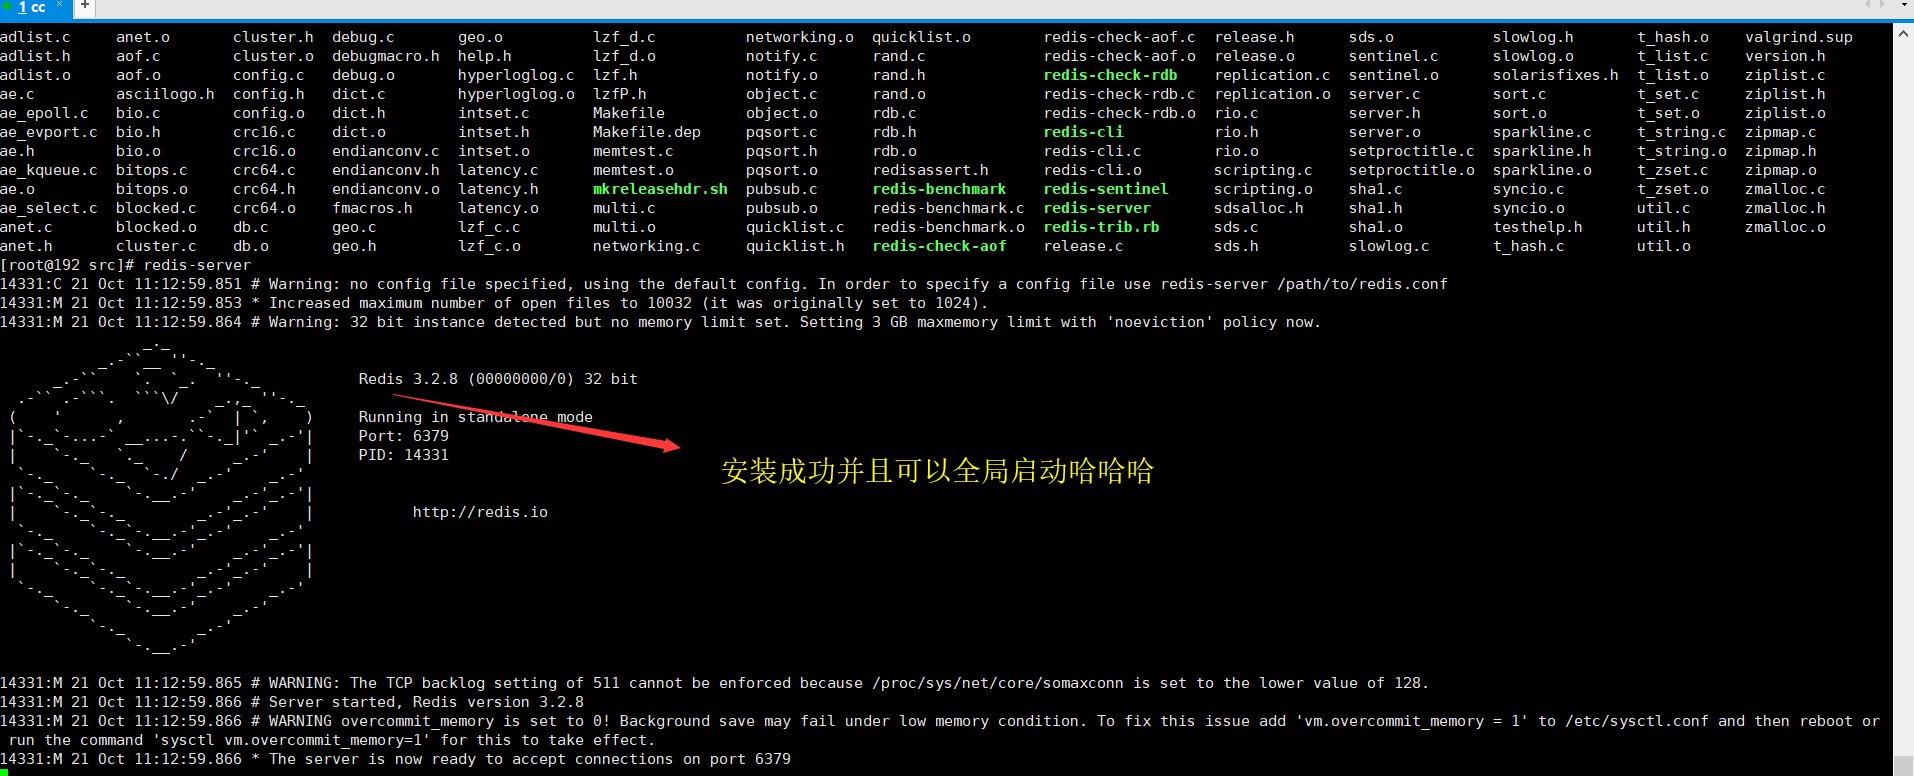
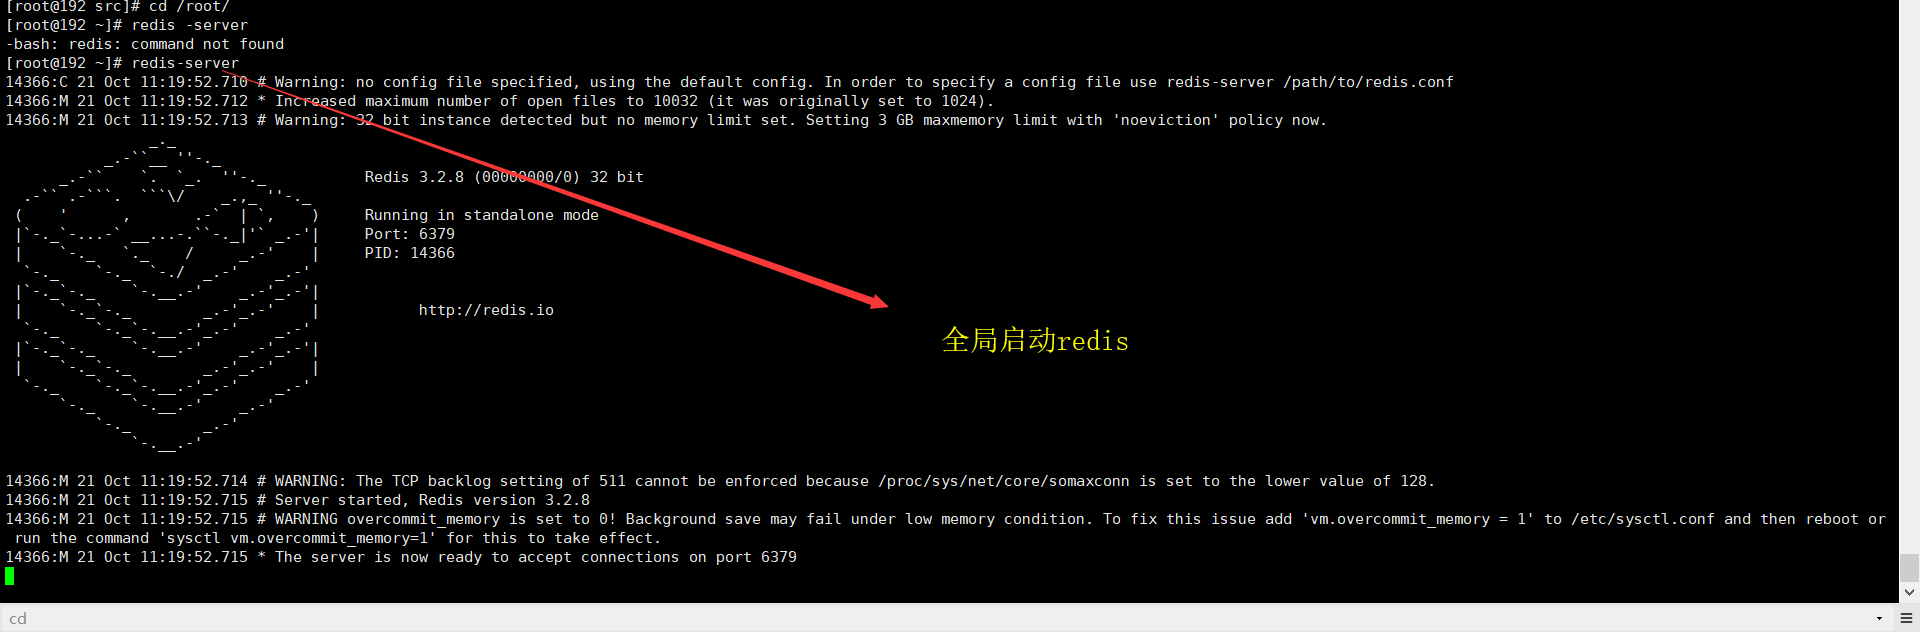
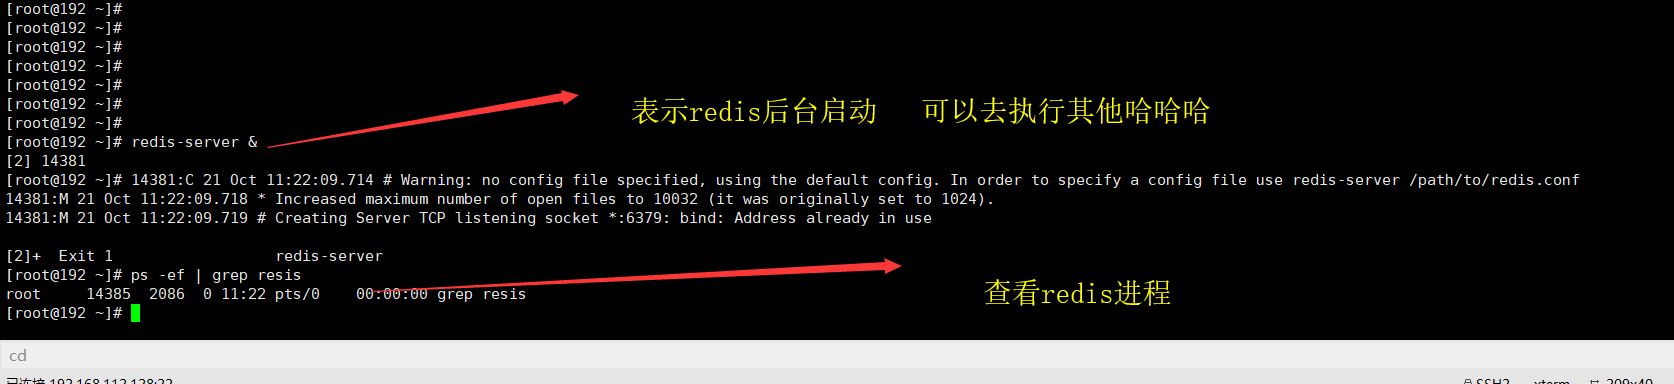
2. redis安装图解
https://www.cnblogs.com/teamemory/p/9482475.html


3 . git安装图解
https://www.cnblogs.com/qiutianyou/p/9501498.html
https://www.cnblogs.com/lhbryant/p/6928894.html
https://www.cnblogs.com/wulixia/p/11016684.html
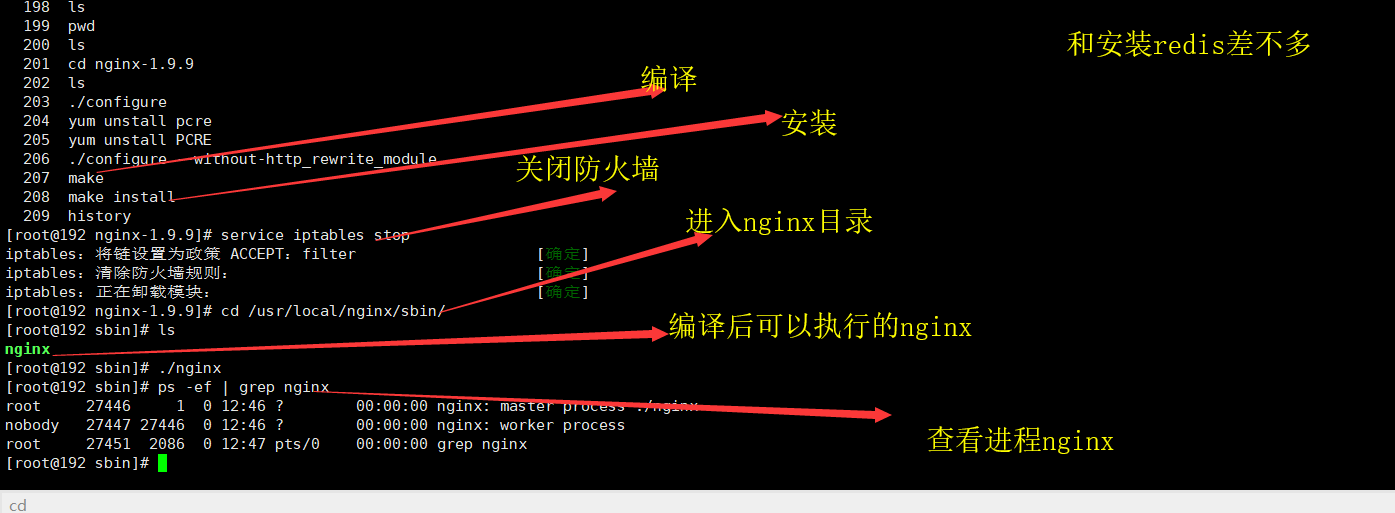
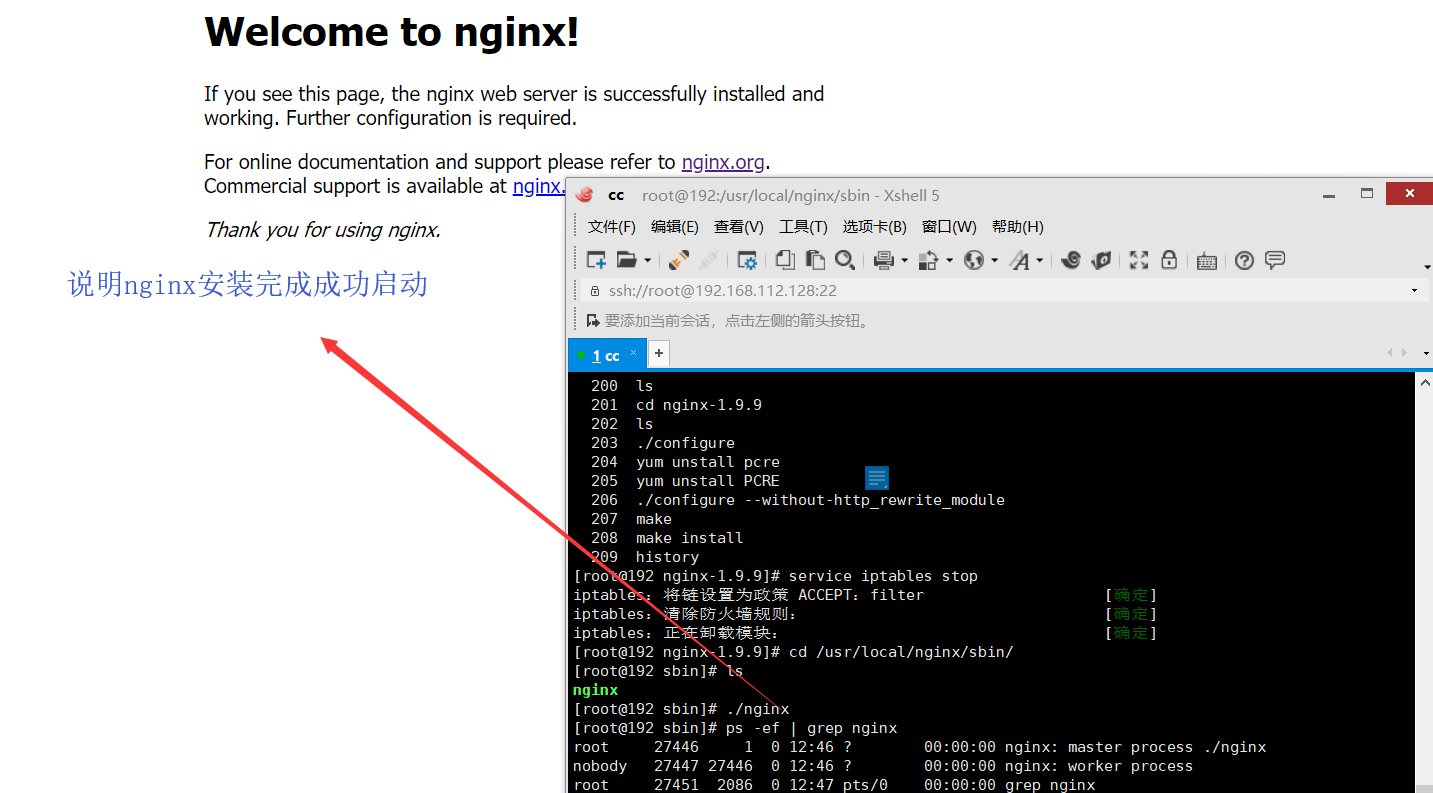
4 . nginx安装图解
5.nginx配置文件
nginx 默认配置文件
1. 结构
 在 nginx 的配置文件中,大概分为几个区域:events {}、http {}、和没有被 {}包裹的区域。而 http {} 中还有 server {},以及 server {} 中的 location {}。结构如下:
...
worker_processes  1;

events {
    worker_connections  1024;
}

http {
    ...

    server {
        ...

        location {
            ...
        }
    }

    server {
        ...
    }
}
没有被 {} 包裹的部分为全局配置,如 worker_processes 1; 设置工作进程(子进程)数为 1

events {} 为 nginx 连接配置的模块,如 worker_connections 1024; 设置每一个子进程最大允许连接 1024 个连接

http {} 为 nginx http 核心配置模块

server {} 为虚拟主机配置模块,包括监听端口、监听域名等

location {} URI 匹配
# sudo  kill   19855      杀掉进程命名 (后面进程号)
# ./nginx -V /v    查看版本信息


配置文件

#user  nobody;      # user 指定运行 nginx 的用户和组(第一个参数为用户第二个为组,这里只有用户)
worker_processes  1;   # 指定工作进程数(一般设置为CPU核数)

#error_log  logs/error.log;   # 指定错误日志为 logs/ 目录下的 error.log 文件
#error_log  logs/error.log  notice;   # 指定错误日志,并指定写入格式为 notice
#error_log  logs/error.log  info;    # 指定错误日志,并指定写入格式为 info

#pid        logs/nginx.pid;  # 指定 pid 文件(存放主进程 pid 号)

# nginx 连接配置模块
events {
    worker_connections  1024;  # 指定每个工作进程最大连接数为 1024
}

# http 配置模块
http {
    include       mime.types;  # 通过 include 加载 mime.types 文件,里面的 types {} 模块将文件扩展名映射到响应的 MIME 类型
    default_type  application/octet-stream;  # 定义响应的默认 MIME 类型

   # 写入格式 main 的内容格式如下
    #log_format  main  '$remote_addr - $remote_user [$time_local] "$request" '
    #                  '$status $body_bytes_sent "$http_referer" '
    #                  '"$http_user_agent" "$http_x_forwarded_for"';

    #access_log  logs/access.log  main;

    sendfile        on;    # 指定访问日志和写入格式为 main
    #tcp_nopush     on;   # 启用或者禁用 sendfile()
    #keepalive_timeout  0;      # 0 值禁用保持活动的客户端连接
    keepalive_timeout  65;       # 65 s 超时

    #gzip  on;     # 启用或者禁用 gzip


# 虚拟主机配置模块
    server {
        listen       80;     # 监听 80 端口
        server_name  localhost;    # 监听域名为 localhost
        # 将指定的 charset 添加到 “Content-Type” 响应头字段。如果此charset与source_charset指令中指定的charset不同,则执行转换。
        #charset koi8-r;
        #charset koi8-r;

        #access_log  logs/host.access.log  main;     # 指定该虚拟主机的访问日志


# 将特定的文件或目录重新定位,如 php 文件,image 目录等
        location / {
            root   html;    # 设置请求的根目录
            index  index.html index.htm;    # 定义索引,按顺序匹配
        }

        #error_page  404              /404.html;   # 定义显示 404 错误的 uri

        # redirect server error pages to the static page /50x.html
        #
        error_page   500 502 503 504  /50x.html;
        location = /50x.html {       # location 精准匹配 '/50x.html'
            root   html;
        }

        # proxy the PHP scripts to Apache listening on 127.0.0.1:80     # 正则表达式匹配 php 文件
        #
        #location ~ \.php$ {
        #    proxy_pass   http://127.0.0.1; # 设置代理服务器的协议和地址,以及应该映射位置的可选URI。作为协议,可以指定“http”或“https”。该地址可以指定为一个域名或IP地址,以及一个可选端口
        #}

        # pass the PHP scripts to FastCGI server listening on 127.0.0.1:9000
        #
        #location ~ \.php$ {
        #    root           html;
        #    fastcgi_pass   127.0.0.1:9000;  # 设置 FastCGI 服务器的地址。地址可以指定为一个域名或 IP 地址,以及一个端口
        #    fastcgi_index  index.php;     # 设置将在以斜杠结尾的URI之后追加的文件名,
        #    fastcgi_param  SCRIPT_FILENAME  /scripts$fastcgi_script_name;    # 设置一个应该传递给FastCGI服务器的参数。
# 加载 conf/fastcgi_params 文件
        #    include        fastcgi_params;
        #}

        # deny access to .htaccess files, if Apache's document root
        # concurs with nginx's one
        #
        #location ~ /\.ht {
        #    deny  all;
        #}
    }


    # another virtual host using mix of IP-, name-, and port-based configuration
    #
    #server {
    #    listen       8000;
    #    listen       somename:8080;
    #    server_name  somename  alias  another.alias;

    #    location / {
    #        root   html;
    #        index  index.html index.htm;
    #    }
    #}


   # HTTPS server
   # ssl 配置,要启用 ssl 模块需要在编译 nginx 时加上 --with-http_ssl_module 参数
    #server {
    #    listen       443 ssl;
    #    server_name  localhost;

    #    ssl_certificate      cert.pem;
    #    ssl_certificate_key  cert.key;

    #    ssl_session_cache    shared:SSL:1m;
    #    ssl_session_timeout  5m;

    #    ssl_ciphers  HIGH:!aNULL:!MD5;
    #    ssl_prefer_server_ciphers  on;

    #    location / {
    #        root   html;
    #        index  index.html index.htm;
    #    }
    #}

}

 浙公网安备 33010602011771号