
mmseg学习笔记(二):前馈推理
一、要素分析
要完成图像语义分割的前馈推理demo,需要具备以下几个要素:
-
- 运行环境。此项我们已经备好。
-
- 输入图片。此项容易获得。
-
- 神经网络模型。
- 3.1 神经网络模型的配置文件。我们借用官方提供的配置文件。
- 3.2 神经网络模型的存档点(checkpoint)。我们借用官方提供的存档点文件。
-
- 一小段代码。
实际上还可以用视频作为输入,不过本篇笔记一切从简,便暂不采用。
二、实现步骤
因为代码主要来自官方,所以实现步骤写在原理分析前面。
2.1 运行环境
环境配置详见[[mmseg学习笔记(一):安装]]。
值得注意的是,本文是安装了mmseg的pip包之后,再把源码摘抄出来用的,需要用哪个文件就去源码里面复制出来。
2.2 输入图片
也不是随便到网上找一张图就行。为了和神经网络模型相适应,我们需要找符合场景的图片。比如后文神经网络模型存档点文件是基于CityScapes数据集训练的,于是我们大概也应该用一张街景图。
或者直接从数据集里面抽一张出来。
2.3 神经网络模型
2.3.1 配置文件
直接从源码中复制../configs/pspnet/pspnet_r50-d8_512x1024_40k_cityscapes.py。
2.3.2 存档点
下载https://download.openmmlab.com/mmsegmentation/v0.5/pspnet/pspnet_r50-d8_512x1024_40k_cityscapes/pspnet_r50-d8_512x1024_40k_cityscapes_20200605_003338-2966598c.pth到checkpoint路径。
url来自官网doc。
mkdir ./checkpoints
wget https://download.openmmlab.com/mmsegmentation/v0.5/pspnet/pspnet_r50-d8_512x1024_40k_cityscapes/pspnet_r50-d8_512x1024_40k_cityscapes_20200605_003338-2966598c.pth -P ./checkpoints
2.4 一小段代码
创建demo.py。
在进行了上述准备工作之后,工作目录结构如下:
.
|-checkpoints
| \-pspnet_r50-d8_512x1024_40k_cityscapes_20200605_003338-2966598c.pth
|-configs
| \-pspnet
|   \-pspnet_r50-d8_512x1024_40k_cityscapes.py
|-demo.png
\-demo.py
在demo.py中书写:
from mmseg.apis import init_segmentor, inference_segmentor, show_result_pyplot
from mmseg.core.evaluation import get_palette

config_file = './configs/pspnet/pspnet_r50-d8_512x1024_40k_cityscapes.py'

checkpoint_file = './checkpoints/pspnet_r50-d8_512x1024_40k_cityscapes_20200605_003338-2966598c.pth'

# build the model from a config file and a checkpoint file
model = init_segmentor(config_file, checkpoint_file, device='cuda:0')

img = 'demo.png'
result = inference_segmentor(model, img)

# show the results
show_result_pyplot(model, img, result, get_palette('cityscapes'))
代码摘抄自源码中提供的jupyter notebook文件。
2.5 运行
运行之。
(mmseg) PS > python demo.py
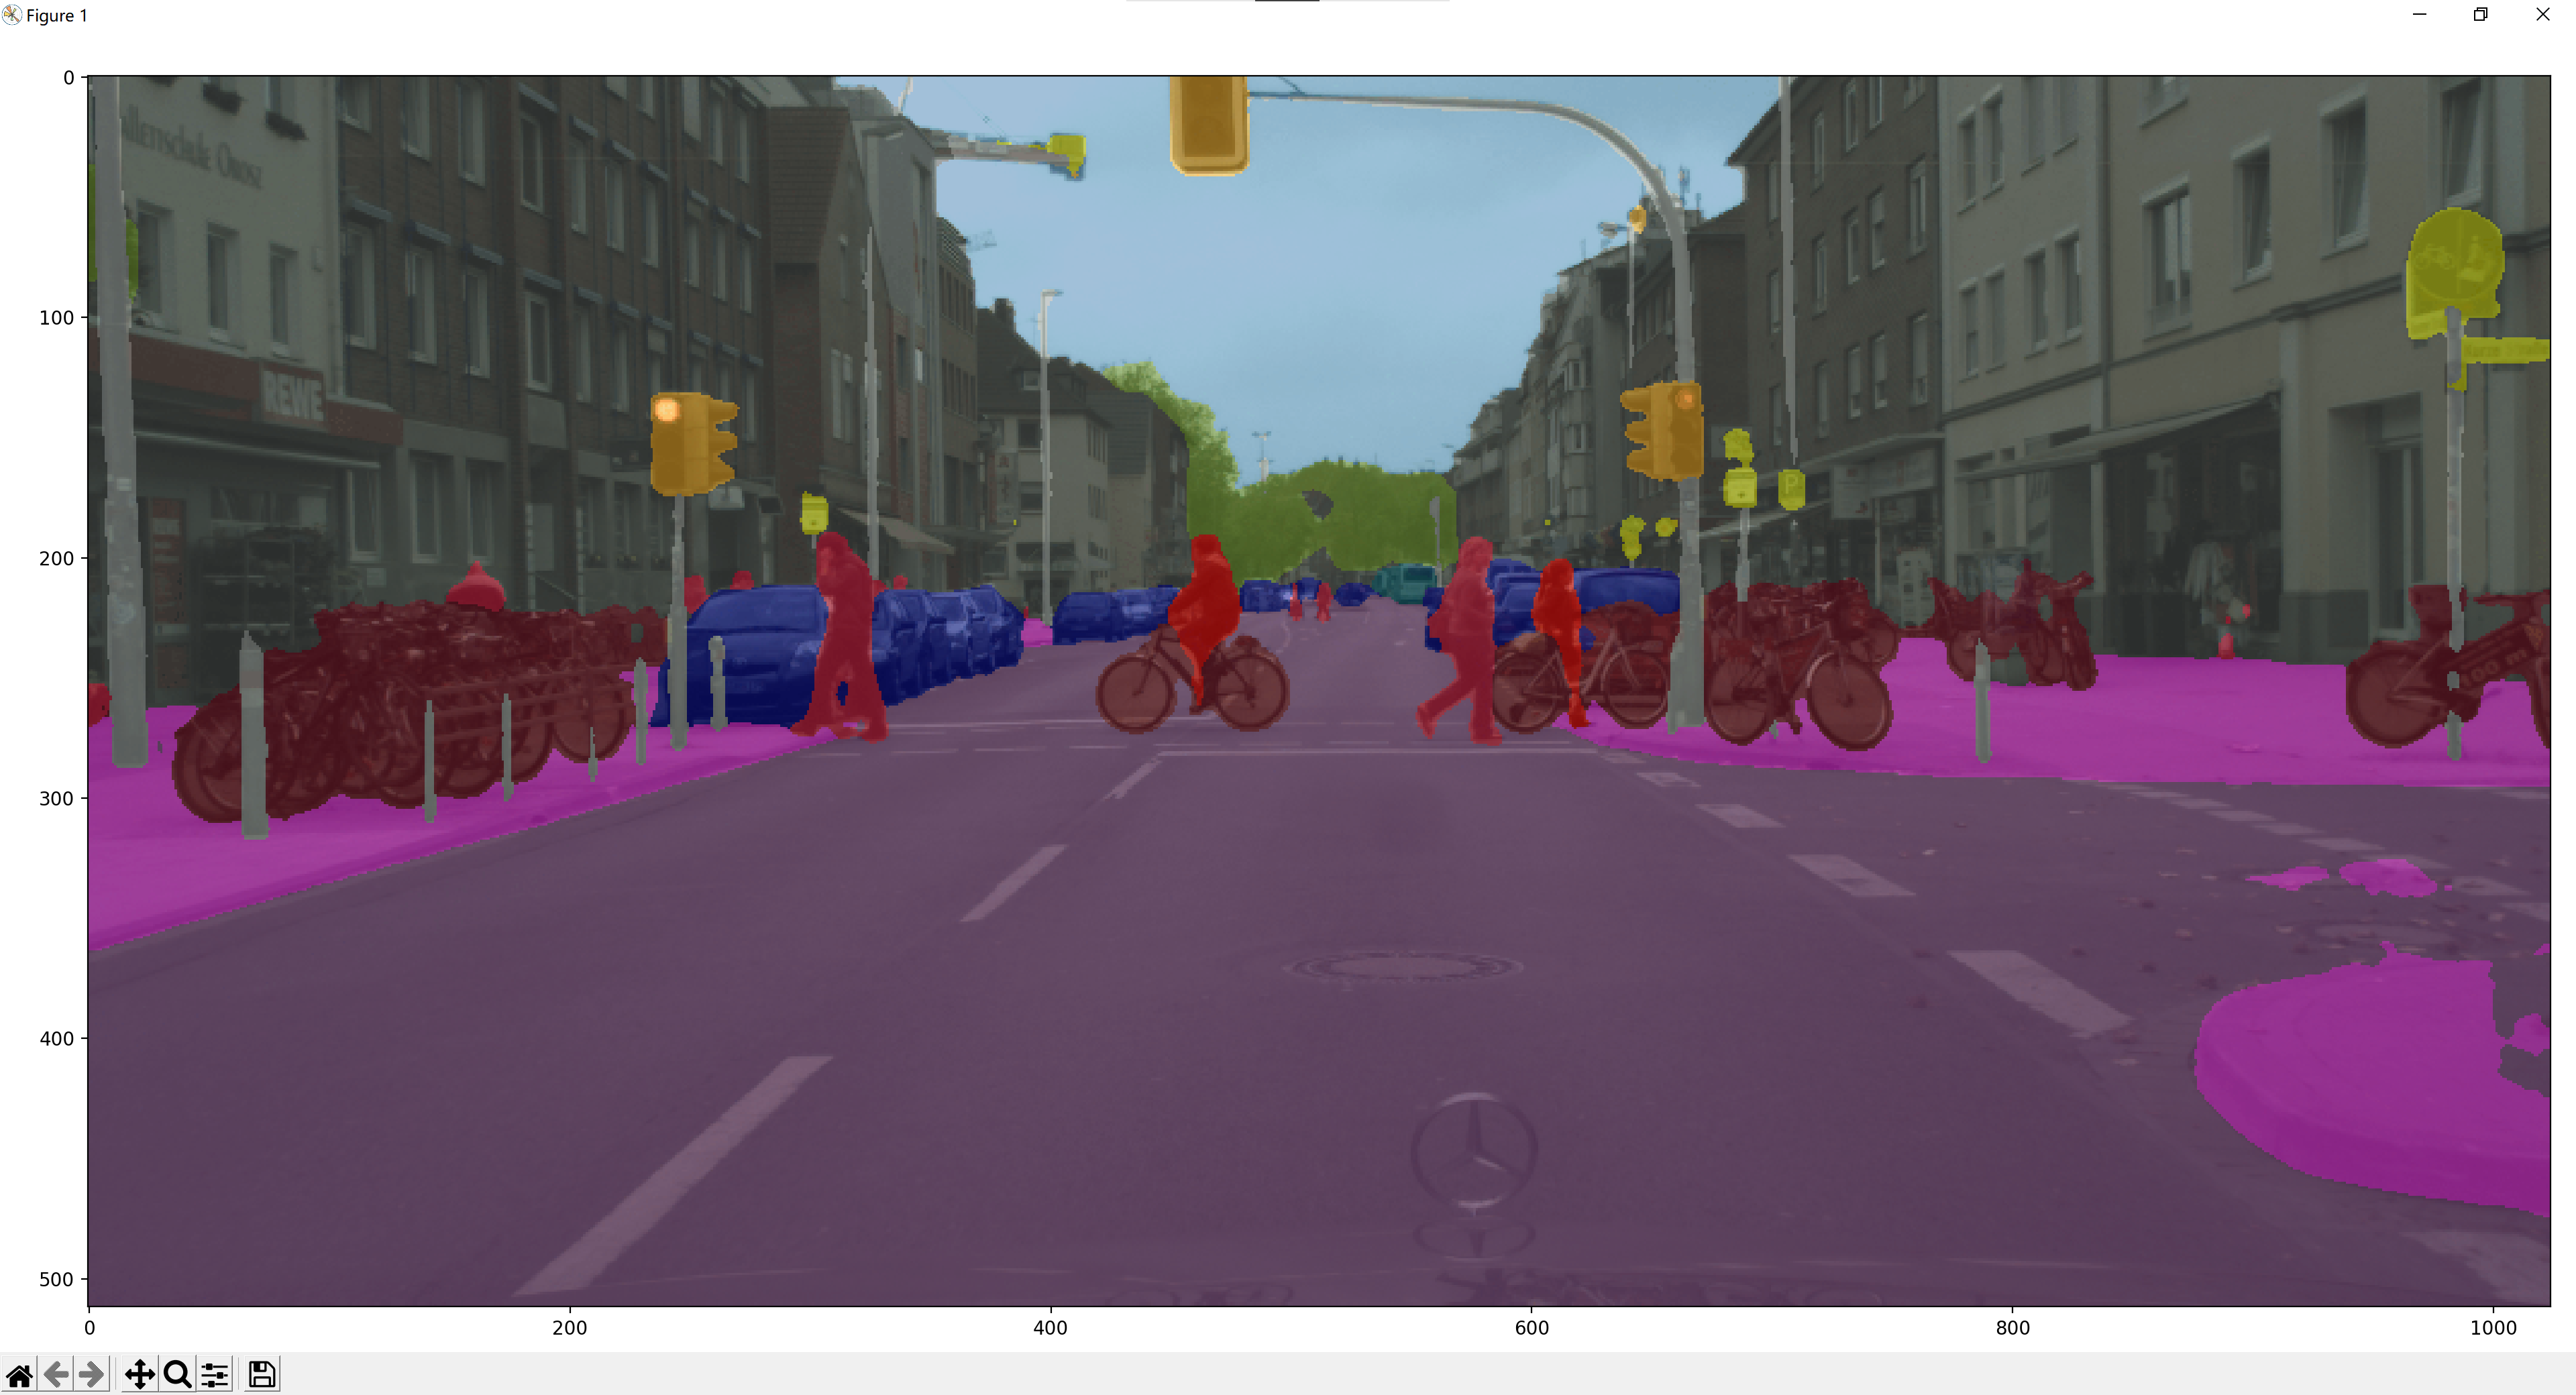
得到结果。
期间可能会报Warning,不必管他。要解决Warning的问题,之后再单独折腾。
三、原理分析
笔者功力尚浅,无法有效分析。

 浙公网安备 33010602011771号