json & pickle(* * * *) & shelve模块(* * *) & xml模块(* *)
之前我们学习过用eval内置方法可以将一个字符串转成python对象,不过,eval方法是有局限性的,对于普通的数据类型,json.loads和eval都能用,但遇到特殊类型的时候,eval就不管用了,所以eval的重点还是通常用来执行一个字符串表达式,并返回表达式的值。
import json
x="[null,true,false,1]"
print(eval(x))
print(json.loads(x))
什么是序列化?
我们把对象(变量)从内存中变成可存储或传输的过程称之为序列化,在Python中叫pickling,在其他语言中也被称之为serialization,marshalling,flattening等等,都是一个意思。
序列化之后,就可以把序列化后的内容写入磁盘,或者通过网络传输到别的机器上。
反过来,把变量内容从序列化的对象重新读到内存里称之为反序列化,即unpickling。
json(* * * *)
如果我们要在不同的编程语言之间传递对象,就必须把对象序列化为标准格式,比如XML,但更好的方法是序列化为JSON,因为JSON表示出来就是一个字符串,可以被所有语言读取,也可以方便地存储到磁盘或者通过网络传输。JSON不仅是标准格式,并且比XML更快,而且可以直接在Web页面中读取,非常方便。
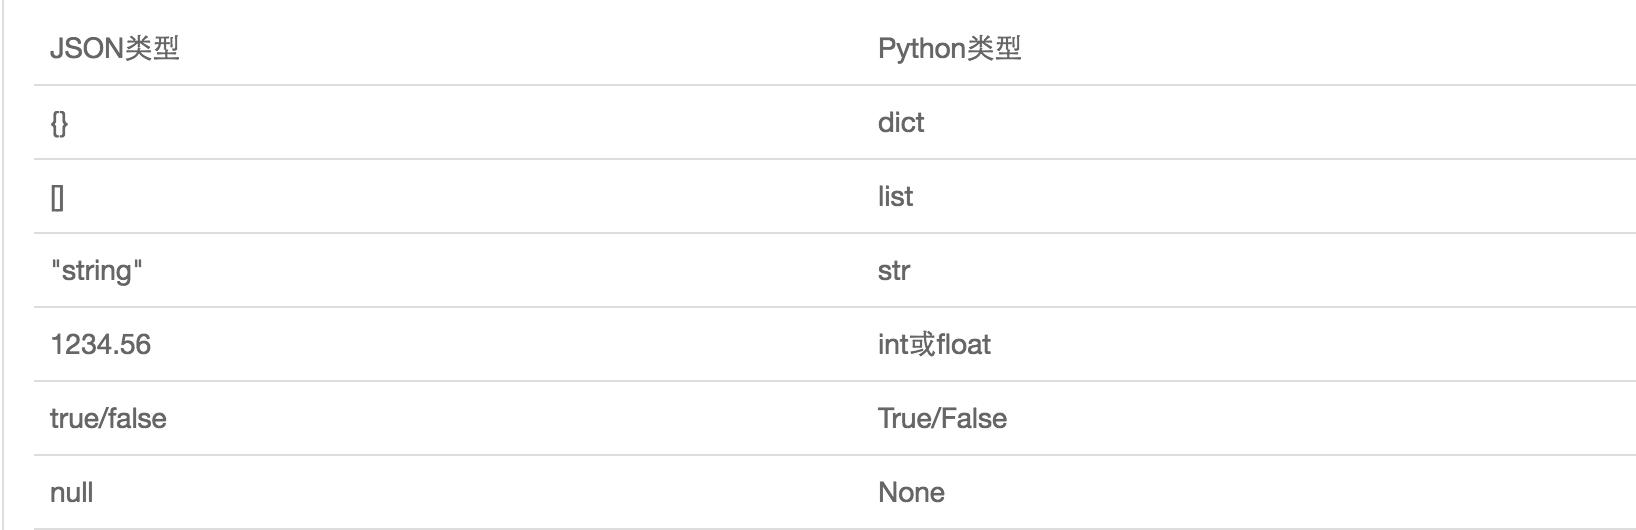
JSON表示的对象就是标准的JavaScript语言的对象,JSON和Python内置的数据类型对应如下:
#----------------------------序列化
import json

dic={'name':'alvin','age':23,'sex':'male'}
print(type(dic))#<class 'dict'>

j=json.dumps(dic)
print(type(j))#<class 'str'>


f=open('序列化对象','w')
f.write(j)  #-------------------等价于json.dump(dic,f)
f.close()
#-----------------------------反序列化<br>
import json
f=open('序列化对象')
data=json.loads(f.read())#  等价于data=json.load(f)


import json
#dct="{'1':111}"#json 不认单引号
#dct=str({"1":111})#报错,因为生成的数据还是单引号:{'one': 1}

dct='{"1":"111"}'
print(json.loads(dct))

#conclusion:
#        无论数据是怎样创建的,只要满足json格式,就可以json.loads出来,不一定非要dumps的数据才能loads

注意点
pickle(* * * * )
##----------------------------序列化
import pickle

dic={'name':'alvin','age':23,'sex':'male'}

print(type(dic))#<class 'dict'>

j=pickle.dumps(dic)
print(type(j))#<class 'bytes'>


f=open('序列化对象_pickle','wb')#注意是w是写入str,wb是写入bytes,j是'bytes'
f.write(j)  #-------------------等价于pickle.dump(dic,f)

f.close()
#-------------------------反序列化
import pickle
f=open('序列化对象_pickle','rb')

data=pickle.loads(f.read())#  等价于data=pickle.load(f)


print(data['age'])
Pickle的问题和所有其他编程语言特有的序列化问题一样,就是它只能用于Python,并且可能不同版本的Python彼此都不兼容,因此,只能用Pickle保存那些不重要的数据,不能成功地反序列化也没关系。
shelve模块(* * *)
shelve模块比pickle模块简单,只有一个open函数,返回类似字典的对象,可读可写;key必须为字符串,而值可以是python所支持的数据类型
import shelve

f = shelve.open(r'shelve.txt')

# f['stu1_info']={'name':'alex','age':'18'}
# f['stu2_info']={'name':'alvin','age':'20'}
# f['school_info']={'website':'oldboyedu.com','city':'beijing'}
# f.close()

print(f.get('stu_info')['age'])
xml模块(* *)
xml是实现不同语言或程序之间进行数据交换的协议,跟json差不多,但json使用起来更简单,不过,古时候,在json还没诞生的黑暗年代,大家只能选择用xml呀,至今很多传统公司如金融行业的很多系统的接口还主要是xml。
xml的格式如下,就是通过<>节点来区别数据结构的:
<?xml version="1.0"?>
<data>
    <country name="Liechtenstein">
        <rank updated="yes">2</rank>
        <year>2008</year>
        <gdppc>141100</gdppc>
        <neighbor name="Austria" direction="E"/>
        <neighbor name="Switzerland" direction="W"/>
    </country>
    <country name="Singapore">
        <rank updated="yes">5</rank>
        <year>2011</year>
        <gdppc>59900</gdppc>
        <neighbor name="Malaysia" direction="N"/>
    </country>
    <country name="Panama">
        <rank updated="yes">69</rank>
        <year>2011</year>
        <gdppc>13600</gdppc>
        <neighbor name="Costa Rica" direction="W"/>
        <neighbor name="Colombia" direction="E"/>
    </country>
</data>

xml数据
xml协议在各个语言里的都 是支持的,在python中可以用以下模块操作xml:
import xml.etree.ElementTree as ET

tree = ET.parse("xmltest.xml")
root = tree.getroot()
print(root.tag)

#遍历xml文档
for child in root:
    print(child.tag, child.attrib)
    for i in child:
        print(i.tag,i.text)

#只遍历year 节点
for node in root.iter('year'):
    print(node.tag,node.text)
#---------------------------------------

import xml.etree.ElementTree as ET

tree = ET.parse("xmltest.xml")
root = tree.getroot()

#修改
for node in root.iter('year'):
    new_year = int(node.text) + 1
    node.text = str(new_year)
    node.set("updated","yes")

tree.write("xmltest.xml")


#删除node
for country in root.findall('country'):
   rank = int(country.find('rank').text)
   if rank > 50:
     root.remove(country)

tree.write('output.xml')
自己创建xml文档:
import xml.etree.ElementTree as ET


new_xml = ET.Element("namelist")
name = ET.SubElement(new_xml,"name",attrib={"enrolled":"yes"})
age = ET.SubElement(name,"age",attrib={"checked":"no"})
sex = ET.SubElement(name,"sex")
sex.text = '33'
name2 = ET.SubElement(new_xml,"name",attrib={"enrolled":"no"})
age = ET.SubElement(name2,"age")
age.text = '19'

et = ET.ElementTree(new_xml) #生成文档对象
et.write("test.xml", encoding="utf-8",xml_declaration=True)

ET.dump(new_xml) #打印生成的格式

创建xml文档
转自:https://www.cnblogs.com/yuanchenqi/articles/5732581.html
-------------------------------------------
个性签名:独学而无友,则孤陋而寡闻。做一个灵魂有趣的人!
如果觉得这篇文章对你有小小的帮助的话,记得在右下角点个“推荐”哦,博主在此感谢!

 浙公网安备 33010602011771号