搭建公网私有docker镜像仓库解决群辉docker注册表无法访问
tags: docker 镜像 群辉
前言
1、开始接触nas也有快2年了,也搭建了几台nas,对于docker的需求很大,最开始的接触docker功能是在docker注册表中取搜索下载docker镜像,然后看着网上的教程一步一步图形化启动,突然某一天打开docker注册表发现提示查询注册表失败已经无法正常搭建docker了,但是这个时候还没有完全无法使用,还可以使用docker命令的方式进行拉去启动。
2、最近突然国内各大docker镜像站纷纷关闭服务,目前docker官方镜像地址无法正常访问,导致docker无法正常拉去镜像,对于nas用户无疑是晴天霹雳,
基于上面的背景打算自己搭建一个私有的镜像仓库用来管理日常需要的docker镜像,还要实现在群辉中图形化下载安装功能
环境准备
- 注册一个私有域名(并托管到cloudflare)如果不会可以私聊博主
- 购买一台私有的云服务器(腾讯、阿里、天翼)说明:如果内网使用也可以不需要这个
- 服务器安装(ubuntu系统)博主经常用的服务器操作系统
原理说明
通过cloudflare的worker用来代理访问到 --> https://registry.hub.docker.com --> 将我们需要的功能镜像下载到服务器 --> 再将这个镜像上传(推送)到本地私有的docker镜像 --> 将私有的仓库的地址配置到 docker注册表中 --> 就可以在nas图形化中使用这个镜像
使用docker搭建本地私有化docker镜像仓库
所使用到的镜像仓库
- nginx (配置https)
- registry (官方的镜像仓库)
- joxit/docker-registry-ui (使用网页的形式管理镜像)
搭建方式
docker-compose
搭建过程
1、将ubuntu的镜像地址设置为国内
# 备份原始文件
sudo mv /etc/apt/sources.list /etc/apt/sources.list.bak

# 新建配置文件
sudo vim /etc/apt/sources.list

# 输入下面内容
deb https://mirrors.ustc.edu.cn/ubuntu/ bionic main restricted universe multiverse
deb-src https://mirrors.ustc.edu.cn/ubuntu/ bionic main restricted universe multiverse
deb https://mirrors.ustc.edu.cn/ubuntu/ bionic-updates main restricted universe multiverse
deb-src https://mirrors.ustc.edu.cn/ubuntu/ bionic-updates main restricted universe multiverse
deb https://mirrors.ustc.edu.cn/ubuntu/ bionic-backports main restricted universe multiverse
deb-src https://mirrors.ustc.edu.cn/ubuntu/ bionic-backports main restricted universe multiverse
deb https://mirrors.ustc.edu.cn/ubuntu/ bionic-security main restricted universe multiverse
deb-src https://mirrors.ustc.edu.cn/ubuntu/ bionic-security main restricted universe multiverse
deb https://mirrors.ustc.edu.cn/ubuntu/ bionic-proposed main restricted universe multiverse
deb-src https://mirrors.ustc.edu.cn/ubuntu/ bionic-proposed main restricted universe multiverse

# 保存
切换到英文输入法 按键盘上的 : 输入wq 按回车(可参考下面图片)

2、安装docker和docker-compose环境
# 更新apt源
sudo apt update
# 安装docker环境
sudo apt install docker -y
# 安装docker-compose环境
sudo apt install docker-compose -y
# 测试环境安装情况
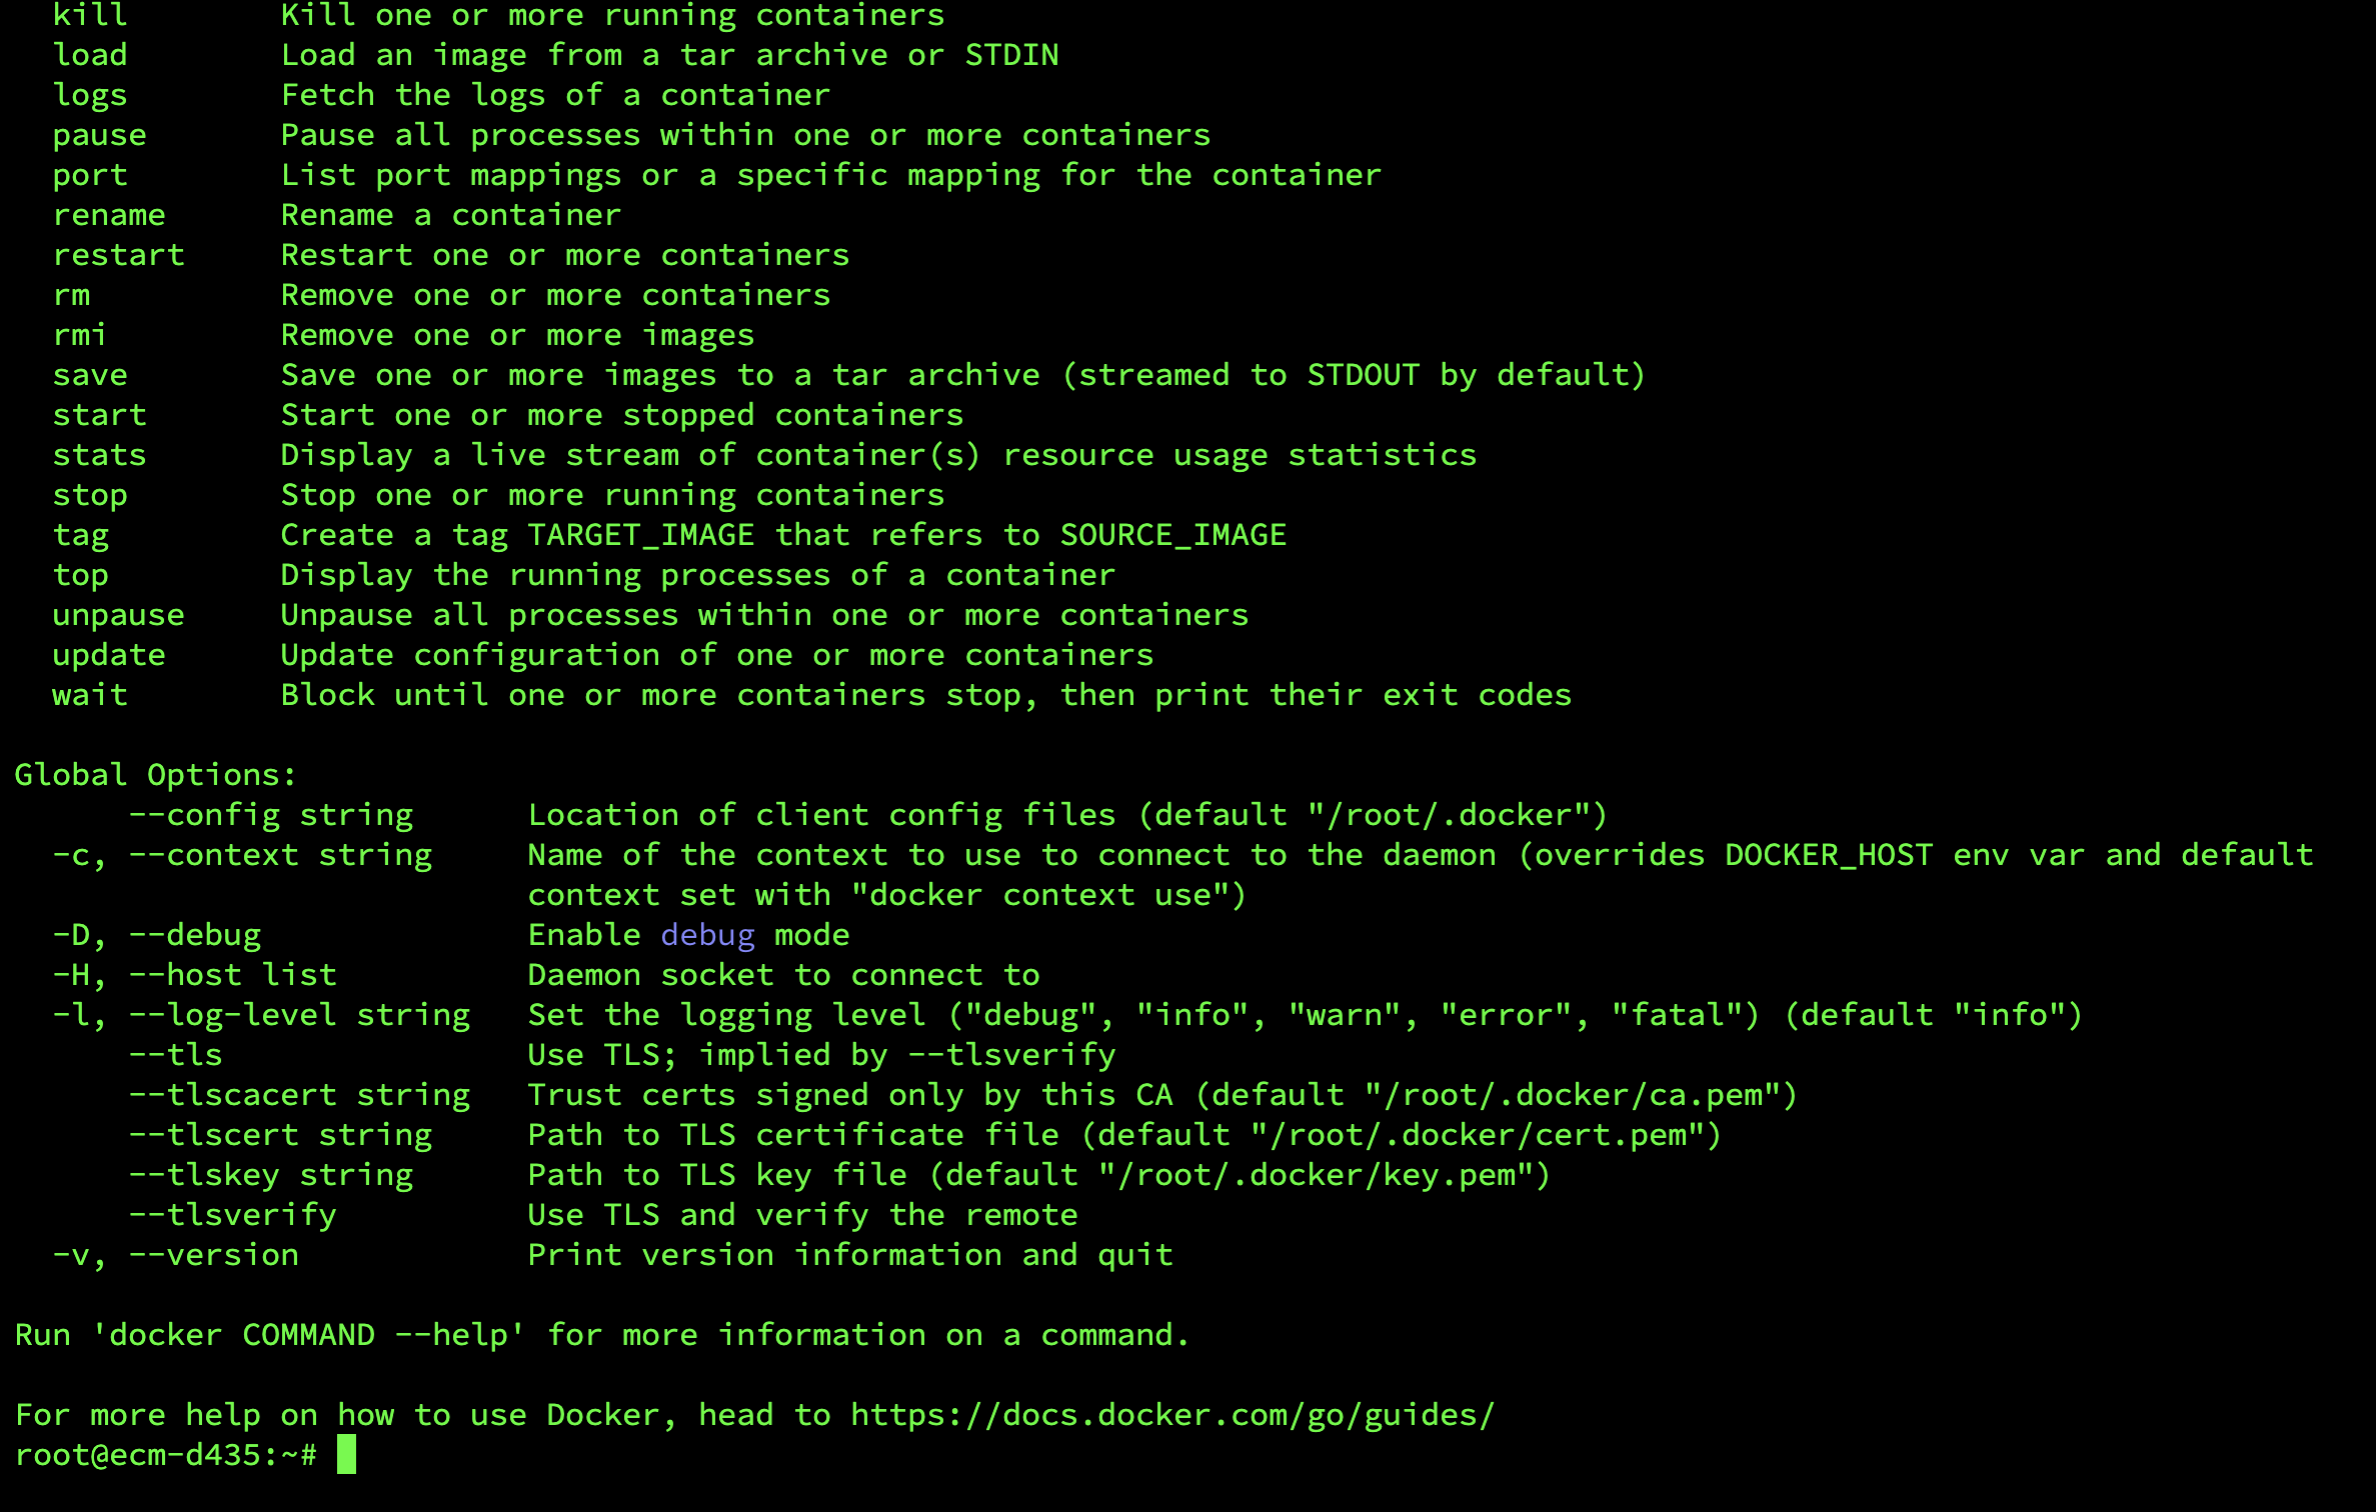
sudo dokcer
sudo docker-compose
# 出现下面的界面代表安装成功

3、配置docker镜像源地址
# 备份文件(如果有配置文件)
sudo mv /etc/docker/daemon.json /etc/docker/daemon.json.bak

# 修改镜像源地址
sudo vim /etc/docker/daemon.json

#输入
{
    "registry-mirrors": ["https://docker.loee.cc/"],
}


# 重启docker镜像
sudo systemctl daemon-reload
sudo systemctl restart docker
4、使用docker-compose的方式安装docker私有仓库
特别说明
把域名证书上传到/app/docker_registry/certs这里 格式为xxx.pem和xxx.key,记住这个名字后面配置nginx要使用
# 创建仓库存放的文件夹
mkdir -p /app/docker_registry/registry-data
mkdir -p /app/docker_registry/nginx
mkdir -p /app/docker_registry/certs
# 进入文件夹
cd /app/docker_registry

# 设置文件夹权限
sudo chmod -R 755 /app/docker_registry

# 编辑配置文件
vim /app/docker_registry/docker-compose.yml

# 输入下面配置
docker-compose.yml
version: '3.0'
services:
  registry:
    image: registry
    volumes:
      - ./registry-data:/var/lib/registry
    ports:
      - 5000:5000
  ui:
    image: joxit/docker-registry-ui:1.5-static
    environment:
      - REGISTRY_TITLE=XXX私有仓库
      - REGISTRY_URL=http://registry:5000
      - DELETE_IMAGES=true
      - CATALOG_ELEMENTS_LIMIT=1000
    depends_on:
      - registry
  nginx:
    image: nginx:latest
    ports:
      - "443:443"
    volumes:
      - ./nginx/nginx.conf:/etc/nginx/nginx.conf
      - ./nginx/default.conf:/etc/nginx/conf.d/default.conf
      - ./certs:/etc/nginx/certs
    depends_on:
      - registry
      - ui
volumes:
  registry-data:
# 设置nginx配置
vim /app/docker_registry/nginx/nginx.conf

# 输入下面配置
nginx.conf
# 全局配置
user  nginx; # 运行用户
worker_processes  1; # 工作进程数,可以设置为与CPU核心数相等
# 错误日志和PID文件位置
error_log  /var/log/nginx/error.log warn;
pid        /var/run/nginx.pid;
events {
    worker_connections  1024; # 每个工作进程的最大连接数
}
http {
    default_type  application/octet-stream; # 默认文件类型
    # 日志格式
    log_format  main  '$remote_addr - $remote_user [$time_local] "$request" '
                      '$status $body_bytes_sent "$http_referer" '
                      '"$http_user_agent" "$http_x_forwarded_for"';
    access_log  /var/log/nginx/access.log  main; # 访问日志
    sendfile        on; # 允许发送文件
    #tcp_nopush     on; # 防止网络阻塞
    keepalive_timeout  65; # 长连接超时时间
    # 包含其他的配置文件
    include /etc/nginx/conf.d/*.conf;
    include /etc/nginx/sites-enabled/*;
}
# 打开nginx默认配置文件
vim /root/docker-registry-ui/nginx/defalut.conf

# 输入下面配置
这里需要
1.把xxx.pem和xxx.key替换为自己的证书名字
2.server_name 自己的域名 配置为自己的域名
其他配置不需要变动
default.conf
server {
    listen 443 ssl; #侦听443端口,用于SSL
    server_name 自己的域名;
    ssl_certificate /etc/nginx/certs/xxx.pem;
    ssl_certificate_key /etc/nginx/certs/xxx.key;
    ssl_session_timeout 5m;
    ssl_protocols TLSv1 TLSv1.1 TLSv1.2;
    ssl_ciphers ECDHE-RSA-AES128-GCM-SHA256:HIGH:!aNULL:!MD5:!RC4:!DHE;
    ssl_prefer_server_ciphers on;
    access_log /etc/nginx/access_nginx.log;
    error_log /etc/nginx/error_nginx.log;
    client_max_body_size 5M;
    location /registry {
      proxy_set_header Host $http_host;
      proxy_set_header X-Real-IP $remote_addr;
      proxy_set_header REMOTE-HOST $remote_addr;
      proxy_set_header X-Forwarded-For $proxy_add_x_forwarded_for;
      proxy_pass http://registry:5000/;
    }
    error_page   500 502 503 504  /50x.html;
    location / {
      proxy_set_header Host $http_host;
      proxy_set_header X-Real-IP $remote_addr;
      proxy_set_header REMOTE-HOST $remote_addr;
      proxy_set_header X-Forwarded-For $proxy_add_x_forwarded_for;
      proxy_pass http://ui:80/;
    }
    location = /50x.html {
        root   /app;
    }
}
# 启动docker-compose
cd /app/docker_registry
sudo docker-compose up -d

# 查看启动情况(启动成功,看下图)
sudo docker ps

5.测试镜像仓库服务
curl 127.0.0.1:5000/v2/_catalog

#会输出下面内容,因为本地仓库还没有任何镜像
{"repositories":[]}
6.拉去镜像并上传到本地仓库
# 从公共镜像库下载nginx镜像到本地
docker pull nginx
# 编写自动脚本用来把本地的镜像上传到本地仓库
vim /app/docker_registry/push.sh
#输入下面配置
push.sh
#!/bin/bash

# 检查参数
if [ "$1" != "-i" ]; then
    echo "Usage: $0 -i <image[:tag]>"
    exit 1
fi

# 获取镜像名和标签,如果没有提供标签则默认使用 latest
IMAGE=$2
if [[ $IMAGE != *":"* ]]; then
    IMAGE="$IMAGE:latest"
fi

# 定义目标仓库地址
TARGET_REPO="127.0.0.1:5000"

# 打标签并推送镜像
docker tag $IMAGE $TARGET_REPO/$IMAGE
docker push $TARGET_REPO/$IMAGE

# 打印成功消息
echo "Successfully tagged and pushed $IMAGE to $TARGET_REPO"
#给脚本增加执行权限
sudo chmod +x /app/docker_registry/push.sh

# 执行脚本将nginx推送到本地仓库
/app/docker_registry/push.sh -i nginx

# 会自动把镜像推送到本地,结果如下
The push refers to repository [127.0.0.1:5000/nginx]
61a7fb4dabcd: Layer already exists
bcc6856722b7: Layer already exists
188d128a188c: Layer already exists
7d52a4114c36: Layer already exists
3137f8f0c641: Layer already exists
84619992a45b: Layer already exists
ceb365432eec: Layer already exists
latest: digest: sha256:678226242061e7dd8c007c32a060b7695318f4571096cbeff81f84e50787f581 size: 1778
Successfully tagged and pushed nginx:latest to 127.0.0.1:5000

# 查看是否成功
curl 127.0.0.1:5000/v2/_catalog

# 返回 代表成功了
{"repositories":["nginx"]}
7.互联网上面查看服务,输入自己的域名,例如:https://xxx.docker.com
可以看到如下内容
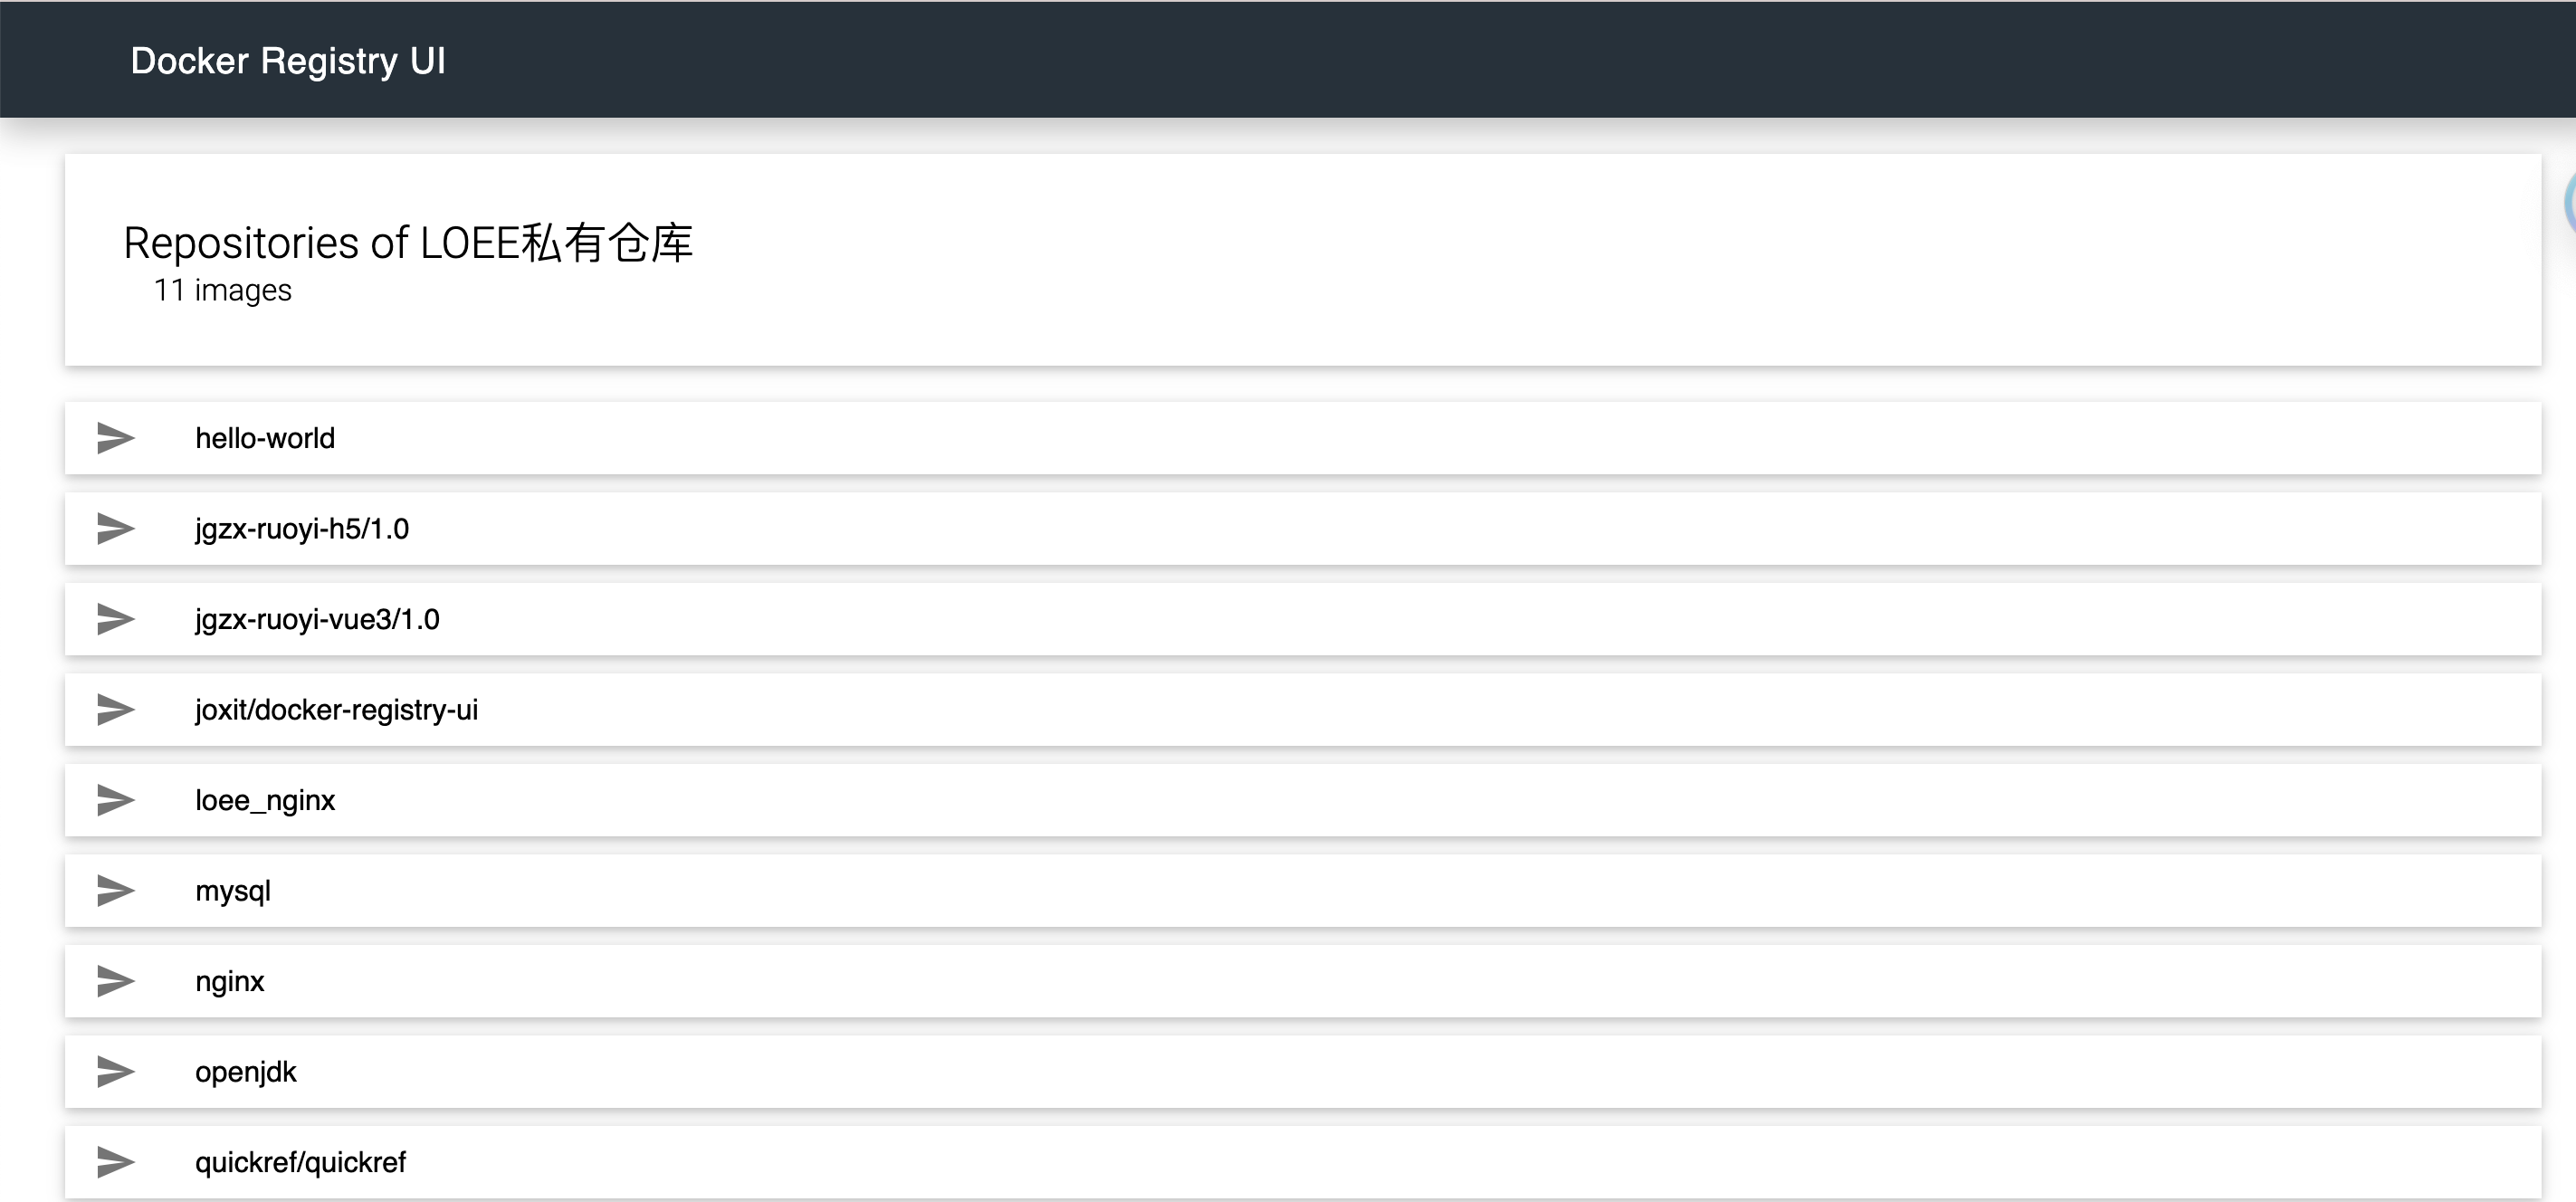

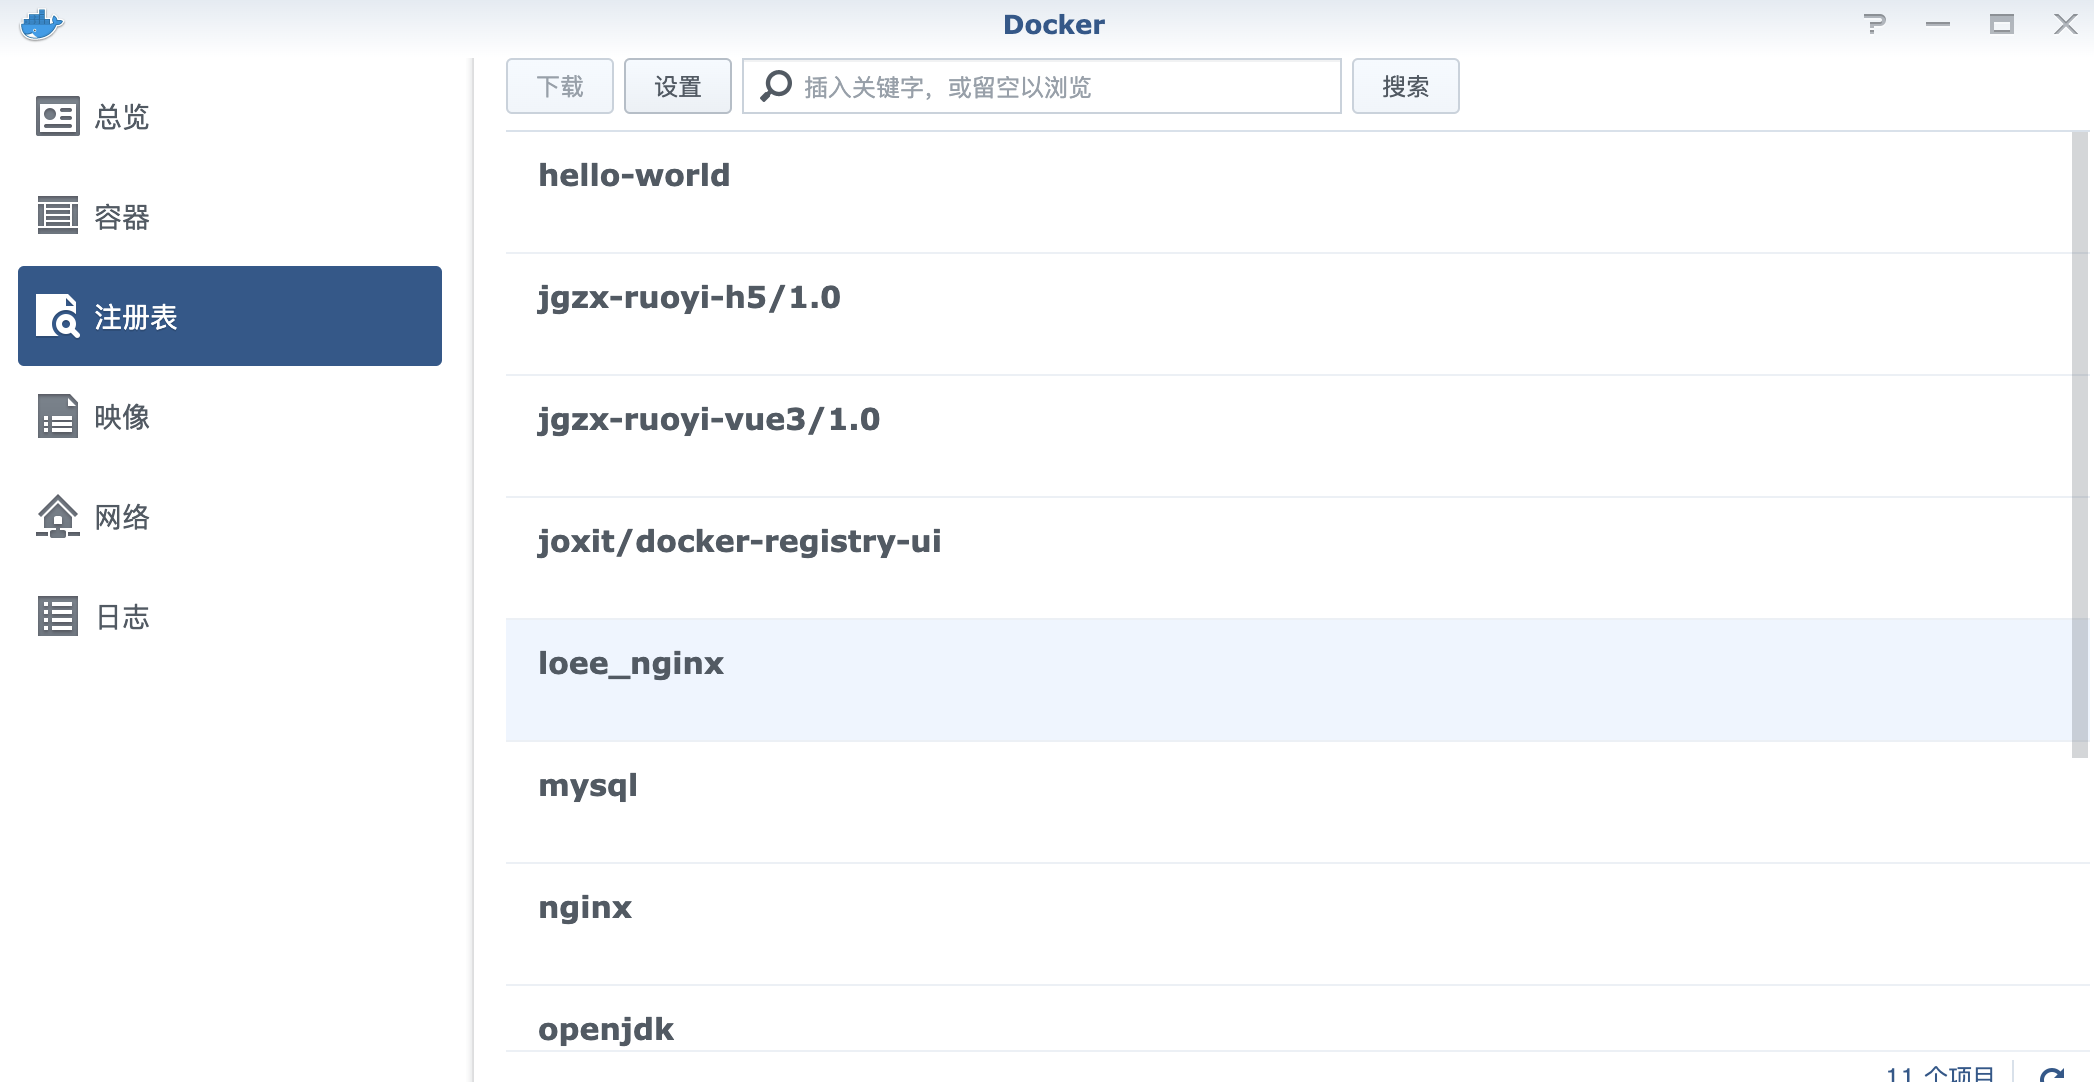
8.配置nas注册表


成功显示
联系我微信(注明来意):LOEE945
结尾附上 cloudflare 的worker配置(具体操作网上有相关教程)
worker.js
// _worker.js

// Docker镜像仓库主机地址
let hub_host = 'registry-1.docker.io'
// Docker认证服务器地址
const auth_url = 'https://auth.docker.io'
// 自定义的工作服务器地址
let workers_url = 'https://你的域名'

// 根据主机名选择对应的上游地址
function routeByHosts(host) {
		// 定义路由表
	const routes = {
		// 生产环境
		"quay": "quay.io",
		"gcr": "gcr.io",
		"k8s-gcr": "k8s.gcr.io",
		"k8s": "registry.k8s.io",
		"ghcr": "ghcr.io",
		"cloudsmith": "docker.cloudsmith.io",

		// 测试环境
		"test": "registry-1.docker.io",
	};

	if (host in routes) return [ routes[host], false ];
	else return [ hub_host, true ];
}

/** @type {RequestInit} */
const PREFLIGHT_INIT = {
	// 预检请求配置
	headers: new Headers({
		'access-control-allow-origin': '*', // 允许所有来源
		'access-control-allow-methods': 'GET,POST,PUT,PATCH,TRACE,DELETE,HEAD,OPTIONS', // 允许的HTTP方法
		'access-control-max-age': '1728000', // 预检请求的缓存时间
	}),
}

/**
 * 构造响应
 * @param {any} body 响应体
 * @param {number} status 响应状态码
 * @param {Object<string, string>} headers 响应头
 */
function makeRes(body, status = 200, headers = {}) {
	headers['access-control-allow-origin'] = '*' // 允许所有来源
	return new Response(body, { status, headers }) // 返回新构造的响应
}

/**
 * 构造新的URL对象
 * @param {string} urlStr URL字符串
 */
function newUrl(urlStr) {
	try {
		return new URL(urlStr) // 尝试构造新的URL对象
	} catch (err) {
		return null // 构造失败返回null
	}
}

function isUUID(uuid) {
	// 定义一个正则表达式来匹配 UUID 格式
	const uuidRegex = /^[0-9a-f]{8}-[0-9a-f]{4}-[4][0-9a-f]{3}-[89ab][0-9a-f]{3}-[0-9a-f]{12}$/i;

	// 使用正则表达式测试 UUID 字符串
	return uuidRegex.test(uuid);
}

async function nginx() {
	const text = `
	<!DOCTYPE html>
	<html>
	<head>
	<title>Welcome to nginx!</title>
	<style>
		body {
			width: 35em;
			margin: 0 auto;
			font-family: Tahoma, Verdana, Arial, sans-serif;
		}
	</style>
	</head>
	<body>
	<h1>Welcome to nginx!</h1>
	<p>If you see this page, the nginx web server is successfully installed and
	working. Further configuration is required.</p>

	<p>For online documentation and support please refer to
	<a href="http://nginx.org/">nginx.org</a>.<br/>
	Commercial support is available at
	<a href="http://nginx.com/">nginx.com</a>.</p>

	<p><em>Thank you for using nginx.</em></p>
	</body>
	</html>
	`
	return text ;
}

export default {
	async fetch(request, env, ctx) {
		const getReqHeader = (key) => request.headers.get(key); // 获取请求头

		let url = new URL(request.url); // 解析请求URL
		workers_url = `https://${url.hostname}`;
		const pathname = url.pathname;
		const hostname = url.searchParams.get('hubhost') || url.hostname;
		const hostTop = hostname.split('.')[0];// 获取主机名的第一部分
		const checkHost = routeByHosts(hostTop);
		hub_host = checkHost[0]; // 获取上游地址
		const fakePage = checkHost[1];
		console.log(`域名头部: ${hostTop}\n反代地址: ${hub_host}\n伪装首页: ${fakePage}`);
		const isUuid = isUUID(pathname.split('/')[1].split('/')[0]);

		const conditions = [
			isUuid,
			pathname.includes('/_'),
			pathname.includes('/r'),
			pathname.includes('/v2/user'),
			pathname.includes('/v2/orgs'),
			pathname.includes('/v2/_catalog'),
			pathname.includes('/v2/categories'),
			pathname.includes('/v2/feature-flags'),
			pathname.includes('search'),
			pathname.includes('source'),
			pathname === '/',
			pathname === '/favicon.ico',
			pathname === '/auth/profile',
		];

		if (conditions.some(condition => condition) && (fakePage === true || hostTop == 'docker')) {
			if (env.URL302){
				return Response.redirect(env.URL302, 302);
			} else if (env.URL){
				if (env.URL.toLowerCase() == 'nginx'){
					//首页改成一个nginx伪装页
					return new Response(await nginx(), {
						headers: {
							'Content-Type': 'text/html; charset=UTF-8',
						},
					});
				} else return fetch(new Request(env.URL, request));
			}

			const newUrl = new URL("https://registry.hub.docker.com" + pathname + url.search);

			// 复制原始请求的标头
			const headers = new Headers(request.headers);

			// 确保 Host 头部被替换为 hub.docker.com
			headers.set('Host', 'registry.hub.docker.com');

			const newRequest = new Request(newUrl, {
					method: request.method,
					headers: headers,
					body: request.method !== 'GET' && request.method !== 'HEAD' ? await request.blob() : null,
					redirect: 'follow'
			});

			return fetch(newRequest);
		}

		// 修改包含 %2F 和 %3A 的请求
		if (!/%2F/.test(url.search) && /%3A/.test(url.toString())) {
			let modifiedUrl = url.toString().replace(/%3A(?=.*?&)/, '%3Alibrary%2F');
			url = new URL(modifiedUrl);
			console.log(`handle_url: ${url}`)
		}

		// 处理token请求
		if (url.pathname.includes('/token')) {
			let token_parameter = {
				headers: {
					'Host': 'auth.docker.io',
					'User-Agent': getReqHeader("User-Agent"),
					'Accept': getReqHeader("Accept"),
					'Accept-Language': getReqHeader("Accept-Language"),
					'Accept-Encoding': getReqHeader("Accept-Encoding"),
					'Connection': 'keep-alive',
					'Cache-Control': 'max-age=0'
				}
			};
			let token_url = auth_url + url.pathname + url.search
			return fetch(new Request(token_url, request), token_parameter)
		}

		// 修改 /v2/ 请求路径
		if (/^\/v2\/[^/]+\/[^/]+\/[^/]+$/.test(url.pathname) && !/^\/v2\/library/.test(url.pathname)) {
			url.pathname = url.pathname.replace(/\/v2\//, '/v2/library/');
			console.log(`modified_url: ${url.pathname}`)
		}

		// 更改请求的主机名
		url.hostname = hub_host;

		// 构造请求参数
		let parameter = {
			headers: {
				'Host': hub_host,
				'User-Agent': getReqHeader("User-Agent"),
				'Accept': getReqHeader("Accept"),
				'Accept-Language': getReqHeader("Accept-Language"),
				'Accept-Encoding': getReqHeader("Accept-Encoding"),
				'Connection': 'keep-alive',
				'Cache-Control': 'max-age=0'
			},
			cacheTtl: 3600 // 缓存时间
		};

		// 添加Authorization头
		if (request.headers.has("Authorization")) {
			parameter.headers.Authorization = getReqHeader("Authorization");
		}

		// 发起请求并处理响应
		let original_response = await fetch(new Request(url, request), parameter)
		let original_response_clone = original_response.clone();
		let original_text = original_response_clone.body;
		let response_headers = original_response.headers;
		let new_response_headers = new Headers(response_headers);
		let status = original_response.status;

		// 修改 Www-Authenticate 头
		if (new_response_headers.get("Www-Authenticate")) {
			let auth = new_response_headers.get("Www-Authenticate");
			let re = new RegExp(auth_url, 'g');
			new_response_headers.set("Www-Authenticate", response_headers.get("Www-Authenticate").replace(re, workers_url));
		}

		// 处理重定向
		if (new_response_headers.get("Location")) {
			return httpHandler(request, new_response_headers.get("Location"))
		}

		// 返回修改后的响应
		let response = new Response(original_text, {
			status,
			headers: new_response_headers
		})
		return response;
	}
};

/**
 * 处理HTTP请求
 * @param {Request} req 请求对象
 * @param {string} pathname 请求路径
 */
function httpHandler(req, pathname) {
	const reqHdrRaw = req.headers

	// 处理预检请求
	if (req.method === 'OPTIONS' &&
		reqHdrRaw.has('access-control-request-headers')
	) {
		return new Response(null, PREFLIGHT_INIT)
	}

	let rawLen = ''

	const reqHdrNew = new Headers(reqHdrRaw)

	const refer = reqHdrNew.get('referer')

	let urlStr = pathname

	const urlObj = newUrl(urlStr)

	/** @type {RequestInit} */
	const reqInit = {
		method: req.method,
		headers: reqHdrNew,
		redirect: 'follow',
		body: req.body
	}
	return proxy(urlObj, reqInit, rawLen)
}

/**
 * 代理请求
 * @param {URL} urlObj URL对象
 * @param {RequestInit} reqInit 请求初始化对象
 * @param {string} rawLen 原始长度
 */
async function proxy(urlObj, reqInit, rawLen) {
	const res = await fetch(urlObj.href, reqInit)
	const resHdrOld = res.headers
	const resHdrNew = new Headers(resHdrOld)

	// 验证长度
	if (rawLen) {
		const newLen = resHdrOld.get('content-length') || ''
		const badLen = (rawLen !== newLen)

		if (badLen) {
			return makeRes(res.body, 400, {
				'--error': `bad len: ${newLen}, except: ${rawLen}`,
				'access-control-expose-headers': '--error',
			})
		}
	}
	const status = res.status
	resHdrNew.set('access-control-expose-headers', '*')
	resHdrNew.set('access-control-allow-origin', '*')
	resHdrNew.set('Cache-Control', 'max-age=1500')

	// 删除不必要的头
	resHdrNew.delete('content-security-policy')
	resHdrNew.delete('content-security-policy-report-only')
	resHdrNew.delete('clear-site-data')

	return new Response(res.body, {
		status,
		headers: resHdrNew
	})
}

 浙公网安备 33010602011771号