2026 1 24 (mysql的一些知识)
1:
sql语句对大小写不敏感;
以分号结束 ;
2:
--单行注释:
'#' 单行注释:(可以后面不加空格,但推荐加上)
/* 多行注释 */
3 : DDL 数据库的定义
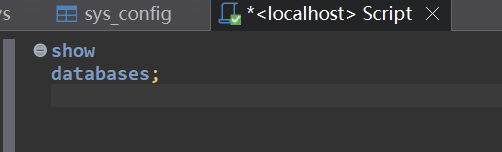
show databases;
use 数据库的名称
create database 数据库的名称 [charset utf8]
drop database 数据库的名称
select database(); 查看当前数据库
4: 表
show tables;
use helloworld ;
drop table student(表名称);
create table 表名称(
列名称 列类型,
列名称 列类型
);
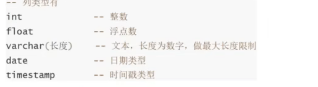
int flaoat varchar() date timestamp
:5: 数据的插入,删除,更新
insert into 表名称(列1,......)values(值1,值2,.....),()
delete from 表名称[where 条件判断]
update 表名称 set 列=值 【where 条件判断】
字符串要用‘’ 括起来
点击查看代码
USE helloworld;
delete from wcnm where name=3;
delete from wcnm;
insert into wcnm values(2,'woman');
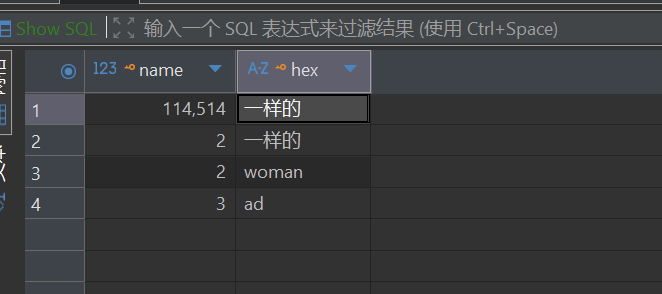
update wcnm set name=114514 where name=1;
update wcnm set hex='一样的';
6:数据的查询:
select 字段列表 | * from 表 [where ]
点击查看代码
select name,hex from wcnm;
select * from wcnm;
select * from wcnm where name=114514;
7: GROUP BY
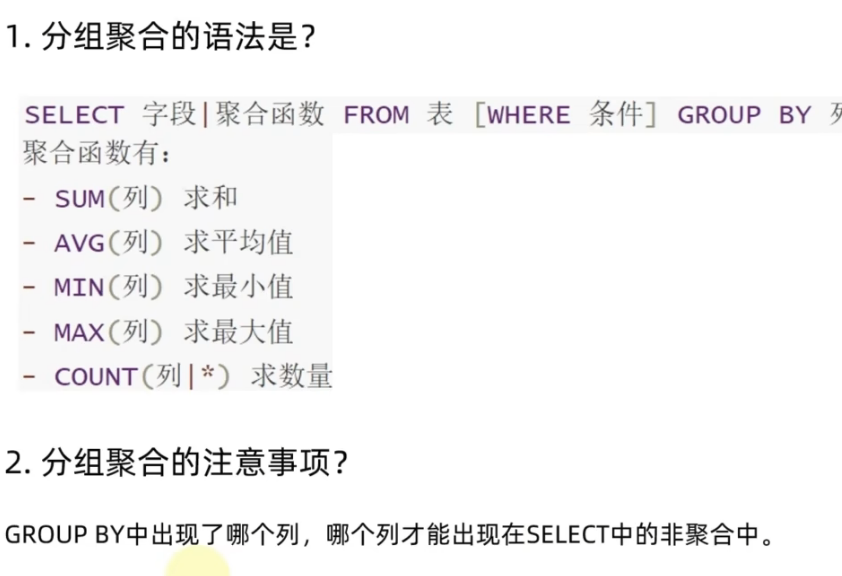
select hex,sum(name),avg(name),min(name),max(name),count(hex),count(*) from wcnm group by hex;
注意: group by 将表中数据按照指定列的值进行分组,把具有相同值的行归为一组
有去重的效果

8:结果的排序
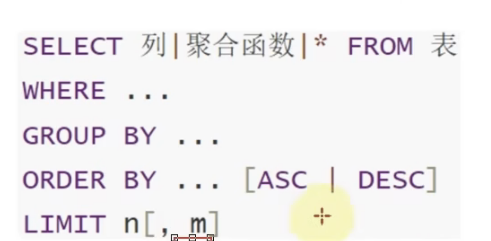
limit : 限制几条的数据
SELECT → FROM → WHERE → GROUP BY → HAVING → ORDER BY → LIMIT
点击查看代码
select * from wcnm where name=2 order by hex asc;  # 默让是asc升序
# order by 排序       desc  降序   esc 升序
select * from wcnm where name=2 limit 1;# 限制几条的数据
select * from wcnm where name=2 limit 10,5; #跳过前面的10跳来展示后面的5条
use helloworld;
select namen,cout(*) from wcnm where name>50 group by name  order by name limit 20;
9: 联合sql和py
查询
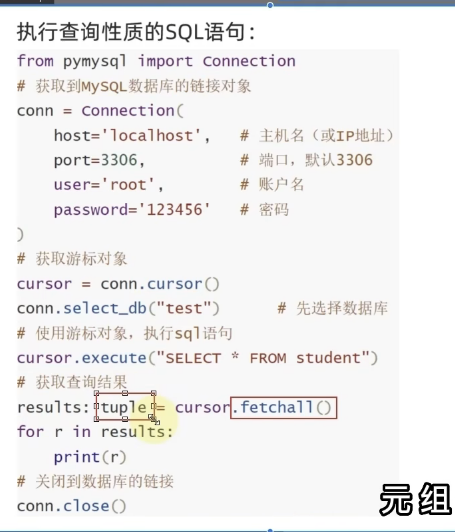
# 从 pymysql 库中导入 Connection 类(这个类是创建数据库连接的核心模板)
from pymysql import Connection

# 构建 SQL 连接:通过 Connection 类创建实例 conn(即数据库连接对象)
conn = Connection(
    host='localhost',  # 数据库服务器的主机名/IP,localhost 代表本机
    port=3306,         # MySQL 服务的端口号,默认是 3306
    user='root',       # 连接数据库的用户名(root 是 MySQL 超级管理员账户)
    password='123456'  # 连接数据库的密码(需替换为你自己的 MySQL 密码)
)

# 获取并打印 MySQL 服务器的版本信息(用于验证连接是否成功,返回如 8.0.32 这类版本号)
print(conn.get_server_info())

# ------------------------------ 执行 SQL 语句的核心逻辑 ------------------------------
# 1. 获取游标对象:游标(cursor)是执行 SQL 语句的“工具”,所有 SQL 都通过游标执行
cursor = conn.cursor()

# 2. 选择要操作的数据库:指定后续 SQL 语句执行的目标数据库为 "helloworld"
#    相当于在 MySQL 客户端执行 "USE helloworld;"
conn.select_db("helloworld")

# 【可选】执行非查询类 SQL(增/删/改/建表等),此处注释掉了建表语句
# cursor.execute("create table text_plmysql(id int);")

print("------------------------------")

# 3. 执行查询类 SQL 语句:执行 "select * from wcnm",查询 wcnm 表的所有数据
#    execute 方法接收 SQL 字符串作为参数,负责把 SQL 发送给数据库执行
cursor.execute(" select * from wcnm")

# 4. 获取查询结果:fetchall() 会获取游标执行查询后返回的所有数据,返回格式是 元组嵌套元组
#    比如 ((1, '王磊'), (2, '李娜'), ...),每一个内层元组对应表中的一行数据
results = cursor.fetchall()

# 5. 打印查询结果:输出 wcnm 表的所有数据
print(results)

# 6. 关闭数据库连接:释放数据库的连接资源(必须执行,否则会占用连接池)
#    关闭后 conn 和 cursor 都无法再使用
conn.close()
插入
```plaintext
from pymysql import Connection

# 构建 SQL 连接:通过 Connection 类创建实例 conn(即数据库连接对象)
conn = Connection(
    host='localhost',  # 数据库服务器的主机名/IP,localhost 代表本机
    port=3306,         # MySQL 服务的端口号,默认是 3306
    user='root',       # 连接数据库的用户名(root 是 MySQL 超级管理员账户)
    password='123456', # 连接数据库的密码(需替换为你自己的 MySQL 密码)
    autocommit=True    # 可以不加     默认是commit自己提交
)

# 获取并打印 MySQL 服务器的版本信息(用于验证连接是否成功,返回如 8.0.45 这类版本号)
print(conn.get_server_info())

# ------------------------------ 执行 SQL 语句的核心逻辑 ------------------------------
# 1. 获取游标对象:游标(cursor)是执行 SQL 语句的“工具”,所有 SQL 都通过游标执行
cursor = conn.cursor()

# 2. 选择要操作的数据库:指定后续 SQL 语句执行的目标数据库为 "helloworld"
#    相当于在 MySQL 客户端执行 "USE helloworld;"
conn.select_db("helloworld")
#执行命令
#cursor.execute("insert into wcnm values(101,'老牛')")

cursor.execute("select * from wcnm")
print(cursor.fetchall())
#手动提交
conn.commit()
#关闭
conn.close()
</details>

 浙公网安备 33010602011771号