

springboot之assembly的文件配置
一、在使用springboot框架的时候,存在一个问题。就是我们配置yaml文件,需要单独提出来做参数修改。当然这个是可以通过spring.profiles.active的方式来配置dev,prod等环境的激活。但是我们如果存在环境不确定,或者需要启动脚本,启动项目的时候,这样通过jar的方式后续会处理很多工作。所以前期的集成工作还是很有必要的。
二、这里有一个简单的例子,用于参数配置方式
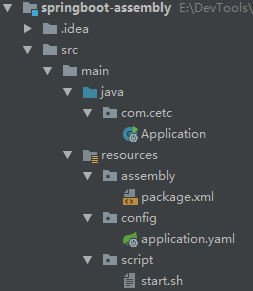
1)目录结构
2)需要的依赖包(pom.xml)
  <parent>
        <groupId>org.springframework.boot</groupId>
        <artifactId>spring-boot-starter-parent</artifactId>
        <version>2.0.0.RELEASE</version>
    </parent>

    <dependencies>
        <dependency>
            <groupId>org.springframework.boot</groupId>
            <artifactId>spring-boot-starter-web</artifactId>
        </dependency>
    </dependencies>
3)maven的构建过程
   <build>
        <finalName>assembly</finalName>
        <plugins>
            <plugin>
                <groupId>org.springframework.boot</groupId>
                <artifactId>spring-boot-maven-plugin</artifactId>
                <configuration>
                    <includeSystemScope>true</includeSystemScope>
                </configuration>
            </plugin>
            <plugin>
                <!--主要使用的是maven提供的assembly插件完成-->
                <artifactId>maven-assembly-plugin</artifactId>
                <executions>
                    <execution>
                        <configuration>
                            <appendAssemblyId>false</appendAssemblyId>
                            <!--具体的配置文件-->
                            <descriptors>${project.basedir}/src/main/resources/assembly/package.xml</descriptors>
                        </configuration>
                        <id>make-assembly</id>
                        <!--绑定到maven操作类型上-->
                        <phase>package</phase>
                        <!--运行一次-->
                        <goals>
                            <goal>single</goal>
                        </goals>
                    </execution>
                </executions>
            </plugin>
        </plugins>
    </build>
4)集成过程(package.xml)
<?xml version='1.0' encoding='UTF-8'?>
<assembly xmlns="http://maven.apache.org/ASSEMBLY/2.0.0"
          xmlns:xsi="http://www.w3.org/2001/XMLSchema-instance"
          xsi:schemaLocation="http://maven.apache.org/ASSEMBLY/2.0.0 http://maven.apache.org/xsd/assembly-2.0.0.xsd">
    <!--打包名称,唯一标识-->
    <id>${project.build.finalName}</id>
    <!--打包格式,可以手动修改-->
    <formats>
        <format>tar.gz</format>
    </formats>
    <!--文件设置-->
    <fileSets>
        <fileSet>
            <!--目标目录,会处理目录里面的所有文件-->
            <directory>${project.basedir}/src/main/resources/config</directory>
            <!--相对于打包后的目录-->
            <outputDirectory>config</outputDirectory>
            <!--文件过滤-->
            <includes>
                <include>*.*</include>
            </includes>
        </fileSet>
        <fileSet>
            <directory>${project.basedir}/src/main/resources/script</directory>
            <outputDirectory>/</outputDirectory>
            <includes>
                <include>*.*</include>
            </includes>
            <!--文件权限-->
            <fileMode>0755</fileMode>
            <!--如果是脚本,一定要改为unix.如果是在windows上面编码,会出现dos编写问题-->
            <lineEnding>unix</lineEnding>
        </fileSet>
    </fileSets>
    <files>
        <!--包含打包后的jar文件,可以不加入<outputDirectory/>,默认打包的目录-->
        <file>
            <source>${project.build.directory}/${project.build.finalName}.jar</source>
        </file>
        <!--这种方式也可以进行文件处理,但是针对单文件-->
       <!-- <file>
            <source>${project.basedir}/src/main/resources/script/start.sh</source>
            <fileMode>0755</fileMode>
            <lineEnding>unix</lineEnding>
        </file>-->
    </files>
</assembly>
备注:具体的参数的意义可以参考官网:http://maven.apache.org/plugins/maven-assembly-plugin/assembly.html
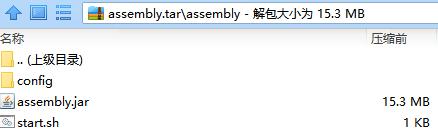
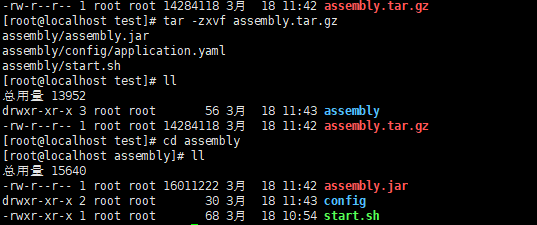
5)通过maven的package打包

三、源码:https://github.com/lilin409546297/springboot-assembly

 浙公网安备 33010602011771号