

基于SpringBoot整合SpringCloud微服务框架--Config(Config Server及Config Client)
一、整合步骤
前面写过几篇有关springcloud其它微服务组件的整合,有兴趣的博友可以参考一下,
基于SpringBoot整合SpringCloud微服务框架--Eureka注册中心及Feign远程调用/Ribbon负载均衡;
基于SpringBoot整合SpringCloud微服务框架--Eureka注册中心及Feign远程调用/Ribbon负载均衡及Hystrix熔断器;
基于SpringBoot整合SpringCloud微服务框架--Eureka注册中心及Feign远程调用/Ribbon负载均衡及Hystrix熔断器及zuul网关;
1、创建Config Server配置中心
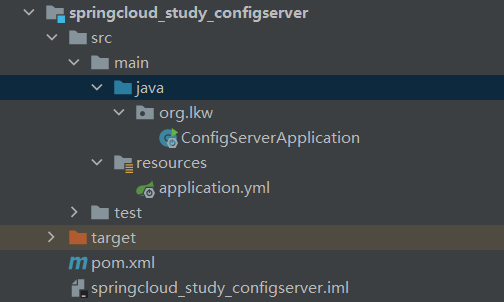
(1)子模块springcloud_study_configserver目录结构
(2)步骤
 1 //配置中心Config Server创建及配置
 2 1、创建存储配置文件的代码仓库config-server-test
 3 (1)在该仓库的master分支下创建配置目录TestConfigInfo
 4 (2)在TestConfigInfo下创建配置文件client-test-dev.properties
 5 (3)在client-test-dev.properties文件添加键值对,比如testKey:12345abc
 6 2、基于maven构建子模块springcloud_study_configserver
 7 3、在pom.xml添加相关依赖
 8     <parent>
 9         <artifactId>springcloud_study</artifactId>
10         <groupId>org.lkw</groupId>
11         <version>1.0-SNAPSHOT</version>
12     </parent>
13     <modelVersion>4.0.0</modelVersion>
14
15     <artifactId>springcloud_study_configserver</artifactId>
16
17     <dependencies>
18         <!-- 引入配置中心config server框架依赖 -->
19         <dependency>
20             <groupId>org.springframework.cloud</groupId>
21             <artifactId>spring-cloud-config-server</artifactId>
22         </dependency>
23         <dependency>
24             <groupId>org.springframework.cloud</groupId>
25             <artifactId>spring-cloud-starter-netflix-eureka-client</artifactId>
26         </dependency>
27     </dependencies>
28 4、在application.yml进行服务配置
29 # 服务调用者即消费者配置
30 server:
31   port: 8768
32 spring:
33   application:
34     # 该服务的名字:配置中心
35     name: config-server
36   cloud:
37     # 配置中心config-server配置
38     config:
39       server:
40         git:
41           uri: https://gitee.com/xx_xxx/config-server-test.git     # 这里写你自己的git仓库地址
42           search-paths: TestConfigInfo   # 这里写你的仓库项目下的配置目录
43         default-label: master   # 仓库分支
44 eureka:
45   client:
46     serviceUrl:
47       # eureka服务的地址
48       defaultZone: http://localhost:8761/eureka/
49 5、创建配置中心启动类
50 /*
51 *@author lkw
52 * 配置中心服务器启动类
53  */
54 @SpringBootApplication
55 @EnableEurekaClient
56 @EnableConfigServer
57 public class ConfigServerApplication {
58
59     public static void main(String[] args){
60         SpringApplication.run(ConfigServerApplication.class,args);
61     }
62 }
63 6、启动项目,在浏览器访问ip:端口/client-test-dev.properties,观察是否能查看到该文件的配置内容
2、创建Config Client读取配置客户端
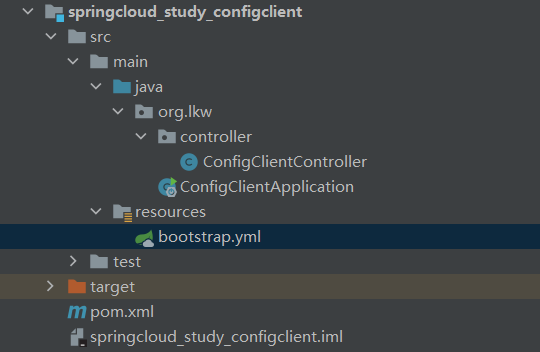
(1)子模块springcloud_study_configclient目录结构
(2)步骤
 1 //Config Client子模块的创建及配置
 2 1、基于maven创建子模块springcloud_study_configclient
 3 2、在pom.xml添加相关依赖
 4     <parent>
 5         <artifactId>springcloud_study</artifactId>
 6         <groupId>org.lkw</groupId>
 7         <version>1.0-SNAPSHOT</version>
 8     </parent>
 9     <modelVersion>4.0.0</modelVersion>
10
11     <artifactId>springcloud_study_configclient</artifactId>
12
13     <dependencies>
14         <!-- 引入配置中心config client框架依赖 -->
15         <dependency>
16             <groupId>org.springframework.cloud</groupId>
17             <artifactId>spring-cloud-starter-config</artifactId>
18         </dependency>
19         <dependency>
20             <groupId>org.springframework.cloud</groupId>
21             <artifactId>spring-cloud-starter-netflix-eureka-client</artifactId>
22         </dependency>
23         <dependency>
24             <groupId>org.springframework.boot</groupId>
25             <artifactId>spring-boot-starter-web</artifactId>
26         </dependency>
27     </dependencies>
28 3、在bootstrap.yml进行服务配置(在main/resources目录下手动创建)
29 # 服务调用者即消费者配置
30 server:
31   port: 8769
32 spring:
33   application:
34     # 该服务的名字:配置中心客户端(注意:这里的应用名要和仓库里的配置文件名里的应用名要一致!!!)
35     name: client-test
36   cloud:
37     # 配置中心config-server配置
38     config:
39       uri: http://localhost:8768/   # config server地址
40       label: master    # 仓库分支
41       profile: dev   # 环境
42 eureka:
43   client:
44     serviceUrl:
45       # eureka服务的地址
46       defaultZone: http://localhost:8761/eureka/
47 4、添加项目启动类
48 /**
49  * @autor lkw
50  * config client启动类
51  */
52 @SpringBootApplication
53 @EnableEurekaClient
54 public class ConfigClientApplication {
55
56     public static void main(String[] args){
57         SpringApplication.run(ConfigClientApplication.class,args);
58     }
59 }
60 5、创建测试控制器
61 /**
62  * @autor lkw
63  * 模拟客户端获取配置中心configserver里(即git仓库里)的配置值
64  */
65 @RestController
66 public class ConfigClientController {
67
68     //获取配置中心里的键为testkey对应的value值然后注入到此变量
69     @Value("${testKey}")
70     private String testKey;
71
72     @RequestMapping(value = "/getTestKey")
73     public String getTestKey(){
74         return testKey;
75     }
76 }
77 6、启动项目,在浏览器中访问ip:端口/getTestKey,观察页面显示,是否能拿到配置中心对应的key值
二、FAQ(问题集锦)
1、启动config client时,出现“org.springframework.beans.factory.BeanCreationException: Error creating bean with name 'configClientController': Injection of autowired dependencies failed; nested exception is java.lang.IllegalArgumentException: Could not resolve placeholder 'testKey' in value "${testKey}"”?
解决方法: 把原来的应用名config-client改为client-test,和仓库里的client-test-dev.properties一致(仓库的配置文件命名是有格式要求的!!!)
一共支持以下几种方式:
/{application}/{profile}[/{label}]
/{application}-{profile}.yml
/{label}/{application}-{profile}.yml
/{application}-{profile}.properties
/{label}/{application}-{profile}.properties
spring:
  application:
    # 该服务的名字:配置中心客户端(注意:这里的应用名要和仓库里的配置文件名里的应用名要一致!!!)
    name: client-test
三、成果
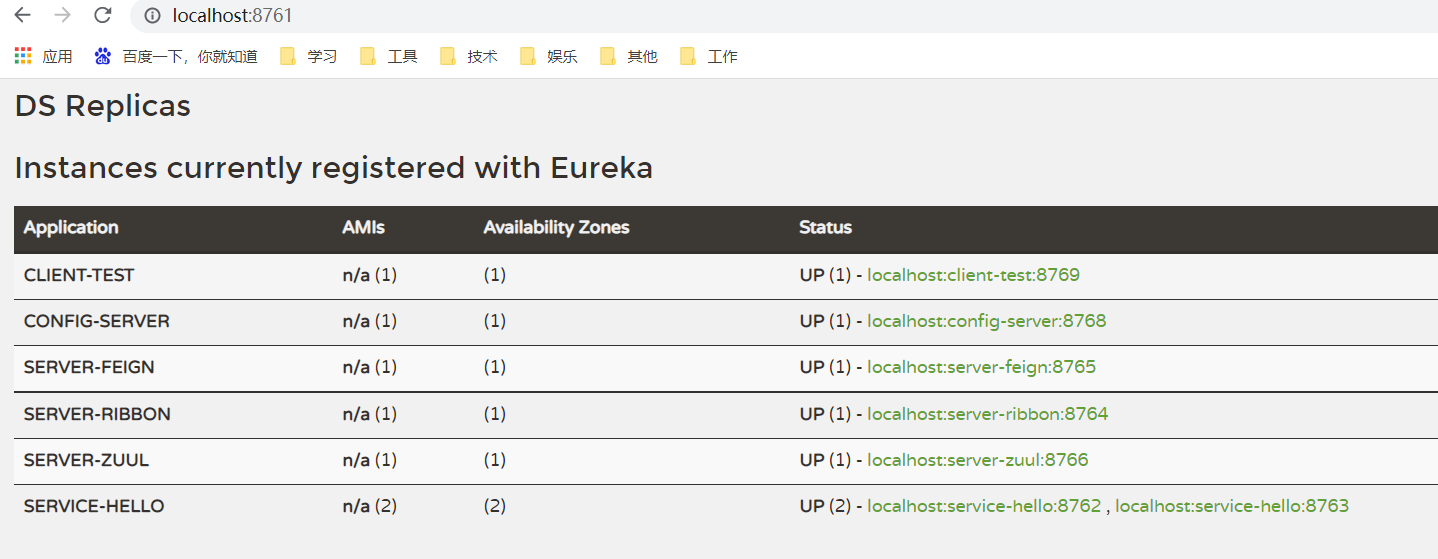
1、启动服务后,在Eureka注册中心查看服务
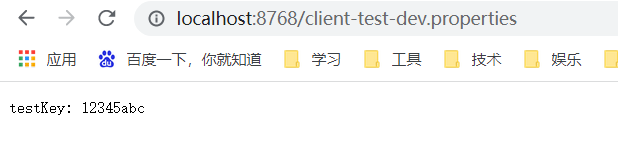
2、启动Config Server后,直接访问配置文件成功
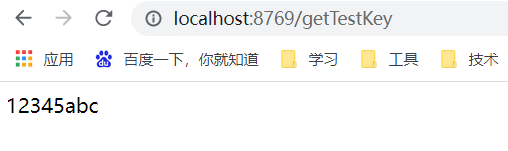
3、启动Config Client后,访问对应key,成功获取配置中心里对应的key值,恭喜恭喜!!!

 浙公网安备 33010602011771号